In a 1911 newspaper article discussing journalism and publicity, and quoting the newspaper editor Tess Flanders, the following expression appeared:
Use a picture. It's worth a thousand words.
A similar phrase also appeared in a 1913 newspaper advertisement for the Piqua Auto Supply House:
One look is worth a thousand words.
I'm not going to go deep into history matters. This introduction was just to make it a bit fun, and show how the phrases give us an indication of the importance of pictures and how they really can embed a lot of information within them. I'm sure most of us realize that, especially when we notice how a picture can stick in our minds more than just pure text.
It is thus no doubt that pictures play an important part in our communications—not just general pictures, but also specialized photos like medical images (e.g. MRI, Ultrasound, etc.).
We can obtain photos through different acquisition devices. For instance, melanoma (skin cancer) images are retrieved using a dermatoscope. We take photos of ourselves or friends using a digital camera or a smartphone. Sometimes, however, we notice some issues in our pictures, like blurring for instance, which may be due to the acquisition device used.
But, what to do in this case? You were sent some medical images to analyze, and you don't have the choice of retaking such images. Even if you retook an image, the resolution you see will not change, nor any other issues you face. Image processing comes into play in such situations.
I liked how the term image processing was defined in Oxford Dictionaries:
The analysis and manipulation of a digitized image, especially in order to improve its quality.
"Digitized image" here refers to the fact that the image is considered digital, that is it is processed by a computer.
Getting the computer in this game means using a programming language. In this tutorial I will show you how we can use the Python programming language to perform image processing tasks on an image.
scikit-image
The library we are going to use in order to carry out our image processing tasks is scikit-image. According to the paper scikit-image: image processing in Python:
scikit-image is an image processing library that implements algorithms and utilities for use in research, education and industry applications. It is released under the liberal Modified BSD open source license, provides a well-documented API in the Python programming language, and is developed by an active, international team of collaborators.
The first thing we need to do is install scikit-image. Instructions for installing the library can be found on the download page, and in this tutorial I will show you how to install the library on a Mac OS X machine, as this is what I'm currently using in writing this tutorial.
As scikit-image is an external library, the first thing we have to do is install that library. For that, I will be using pip, which is (based on Wikipedia):
A package management system used to install and manage software packages written in Python. Many packages can be found in the Python Package Index (PyPI).
You can follow the steps mentioned in the Python Packaging User Guide for installing pip, but if you have Python 2.7.9 and higher, or Python 3.4 and higher, you already have pip!
scikit-image now can be simply installed by typing the following command (in Mac OS X's Terminal):
pip install -U scikit-image
We now have the library installed and ready for some image processing fun!
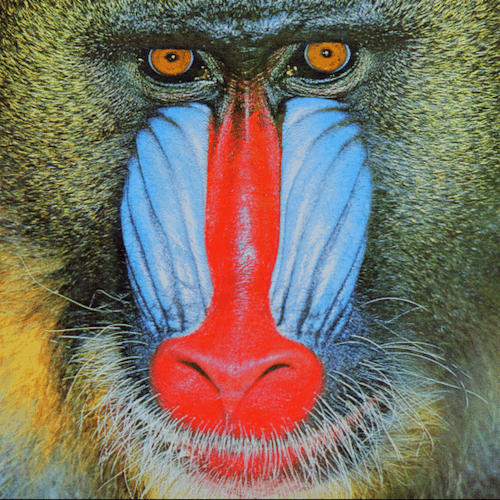
The test image we will be using in this tutorial is baboon.png. Go ahead and download it, or simply use the image of your choice. The image looks as follows:
Dimensions of an Image
Sometimes we need to know the dimensions of an image (more on that in the filtering section). In order to check the dimensions of our image, we can use the guess_spatial_dimensions() method, as follows:
from skimage import io, color
img = io.imread('baboon.png')
dimensions = color.guess_spatial_dimensions(img)
print dimensions
The output of the above script is 3, meaning that we have an image consisting of three spatial dimensions.
Color to Grayscale
From the above section, we have noticed that our image is a 3D array image (in RGBA format with the shape (.., .., 4)). How did I know it is in RGBA format? You can simply do the following:
import skimage.io as io
from skimage.color import rgb2gray
img = io.imread('baboon.png')
print img.shape
In this case, you would get this output: (512, 512, 4).
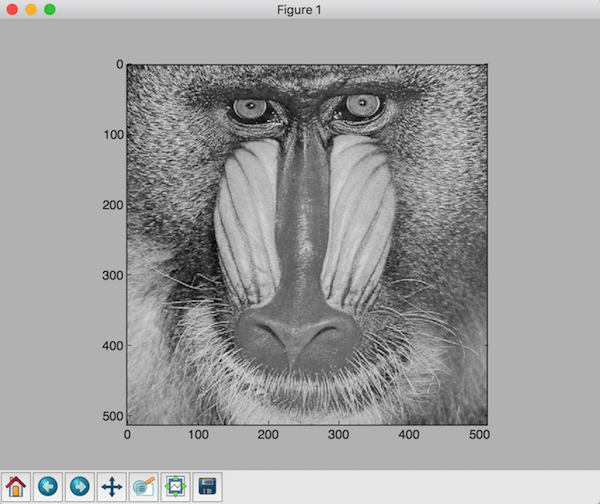
In this section, we would like to convert the original colored baboon.png image into a grayscale 2D image (black and white). This can be simply done using the following script:
import skimage.io as io
from skimage.color import rgb2gray
img = io.imread('baboon.png')
img_grayscale = rgb2gray(img)
Let's go ahead and save the new image (grayscale) to a file. This can be done using the imsave() function, as follows (notice that the new image is in the file baboon-gs.png):
io.imsave('baboon-gs.png',img_grayscale)
To check the dimensions of the image, we can use the script in the previous section, in which case you would get 2 returned. Or you can use img_grayscale.shape, which results into 512x512. So, we now have a 2D image.
In order to show the new grayscale image, add the following to the end of the script:
show_grayscale = io.imshow(img_grayscale)
io.show()
The result looks like this:
Applying a Filter to an Image
In image processing, filtering is performed to make some enhancements in the image. In general, filtering encompasses the following operations: edge enhancement, sharpening, and smoothing.
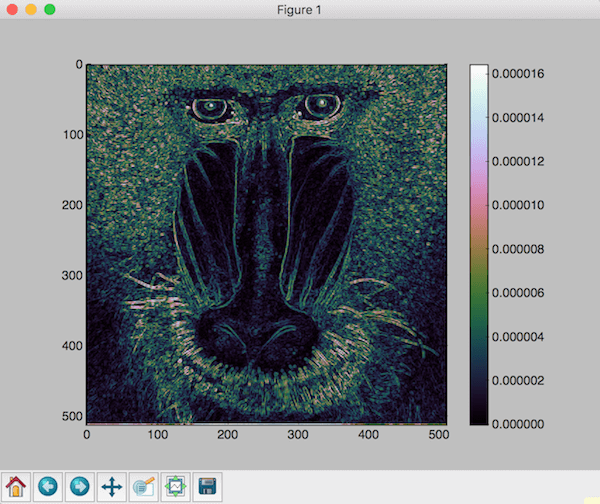
In this section, I'm going to show you how we can apply the Sobel filter on our image, and see what the output looks like after performing such an operation. I'm going to use the example shown on the front page of the scikit-image website, but applied on our image.
The script for applying the Sobel filter on our image looks as follows:
from skimage import data, io, filters
img = io.imread('baboon.png')
edges = filters.sobel(img)
io.imshow(edges)
io.show()
If you run the script, did you notice any issues? Yes, we couldn't apply the operation since the image has to be a 2D image. So, instead of using baboon.png, we need to use our 2D image, baboon-gs.png. The output of this operation looks as follows:
Conclusion
There are many image processing operations, and the scikit-image Python library provides us with many interesting operations we can perform on our images. You can see more image processing operations using this library on the scikit-image website.

Comments