cURL is a commonly used command-line tool for making HTTP requests. In this tutorial, we'll have a look at HTTPie, a command-line tool for making HTTP requests in a human-friendly way. HTTPie uses commands with simple and natural syntax and displays the output in a presentable manner.
From the official docs:
HTTPie (pronounced aitch-tee-tee-pie) is a command line HTTP client. Its goal is to make CLI interaction with web services as human-friendly as possible. It provides a simplehttpcommand that allows for sending arbitrary HTTP requests using a simple and natural syntax, and displays colorized output. HTTPie can be used for testing, debugging, and generally interacting with HTTP servers.
Getting Started
In order to get started with HTTPie on an Ubuntu machine, you need to install the package using apt-get.
sudo apt-get install httpie
Once it's installed, you should have HTTPie on your system. Try to make a GET request to any website using HTTPie:
http www.tutsplus.com
The above query gives the following response:
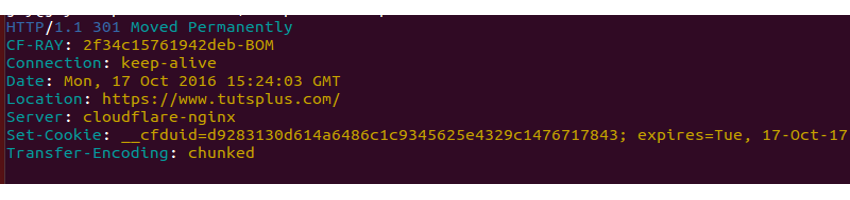
That looks as if HTTPie is installed and working on your system. If you look closely, the colored output of the above command shows that the URL has been moved permanently to https://tutsplus.com. Hence, to do a GET request query on tutsplus, modify the query:
http https://tutsplus.com
The above query would return the HTML output of the GET request on the URL https://tutsplus.com.
As seen from the above query, the only information HTTPie needs to perform a request is the URL.
Performing Basic Requests Using HTTPie
Before diving deep into HTTPie commands, we'll have a look at how to perform the basic requests using HTTPie. We'll be making use of json-server to have a dummy server up and running for making requests. To get started with json-server, install the server using npm.
npm install -g json-server
Create a file called index.js which will create some random data for our dummy server.
// index.js
module.exports = function() {
  var data = { users: [] }
  // Create 5 users
  for (var i = 0; i < 5; i++) {
    data.users.push({ id: i, name: 'user' + i })
  }
  return data
}
Run the json server using the index.js file.
json-server index.js
Now the server should be up and running at http://localhost:3000/.
GET Request Using HTTPie
By default if a URL is given to HTTPie, it assumes the request type to be GET and performs accordingly. Here is an example of a GET request:
http http://localhost:3000/users
The above request displays the following output:
HTTP/1.1 200 OK
Access-Control-Allow-Credentials: true
Cache-Control: no-cache
Connection: keep-alive
Content-Length: 212
Content-Type: application/json; charset=utf-8
Date: Tue, 18 Oct 2016 03:40:15 GMT
ETag: W/"d4-4+4+bS4GA0+D/tDXlF8voQ"
Expires: -1
Pragma: no-cache
Vary: Origin, Accept-Encoding
X-Content-Type-Options: nosniff
X-Powered-By: Express

[
    {
        "id": 0,
        "name": "user0"
    },
    {
        "id": 1,
        "name": "user1"
    },
    {
        "id": 2,
        "name": "user2"
    },
    {
        "id": 3,
        "name": "user3"
    },
    {
        "id": 4,
        "name": "user4"
    }
]
POST Request Using HTTPie
To perform a POST request using HTTPie, we need to add the POST keyword along with the data to be posted to the URL. Here is an example:
http POST http://localhost:3000/users id=007 name=RoyAgasthyan
The command would display the following output on the terminal screen:
HTTP/1.1 201 Created
Access-Control-Allow-Credentials: true
Cache-Control: no-cache
Connection: keep-alive
Content-Length: 43
Content-Type: application/json; charset=utf-8
Date: Tue, 18 Oct 2016 03:46:22 GMT
ETag: W/"2b-mpj//lkYJiGiWBB42OLoKA"
Expires: -1
Pragma: no-cache
Vary: Origin, X-HTTP-Method-Override, Accept-Encoding
X-Content-Type-Options: nosniff
X-Powered-By: Express

{
    "id": "007",
    "name": "RoyAgasthyan"
}
Try doing a GET request using HTTPie, and you should see the newly posted data in the response.
Submitting Forms Using HTTPie
Submitting a form is another request that is commonly performed by a user. With HTTPie, it becomes quite a bit easier to submit a form over a URL by specifying the form option as shown:
http --form POST www.yourformposturl.com name='Roy'
When the above command is executed, the Content-Type is automatically set to application/x-www-form-urlencoded; charset=utf-8, hence you don't need to set it explicitly.
Handling HTTP Redirect
As you may have noticed in our earlier example, by default HTTPie does not handle HTTP redirects. When we tried to do a GET request on www.tutsplus.com, it showed a message stating the URL had been moved. If you want HTTPie to handle redirects, you need to add an option called follow to the request command.
http --follow www.tutsplus.com
The above HTTPie query would handle HTTP redirects, if any.
Download Files Using HTTPie
HTTPie provides a feature to download files from a server, similar to the wget command. In order to download the file, you need to specify a download option along with the URL.
http --download http://www.tutorialspoint.com/python/python_tutorial.pdf
The above command would display a response as shown below:
HTTP/1.1 200 OK
Accept-Ranges: bytes
Access-Control-Allow-Headers: X-Requested-With
Access-Control-Allow-Origin: *
Content-Length: 3945951
Content-Type: application/pdf
Date: Tue, 18 Oct 2016 04:01:43 GMT
Etag: "3c35df-52fe21b892a6f"
Last-Modified: Thu, 07 Apr 2016 09:57:34 GMT
Server: ECS (pnq/AF9A)
X-Cache: HIT

Downloading 3.76 MB to "python_tutorial.pdf-1"
 |  28.03 %    1.05 MB   63.85 kB/s  0:00:43 ETA
Handling Authentication
Accessing a web service URL would require some or other kind of authentication. HTTPie supports most of the commonly used authentication mechanisms. By default, HTTPie supports basic authentication, so you only need to pass in the username and password to the request with the -a option.
http -a username:password www.mywebservice.com
To use a digest authentication, you'll need to pass in the authentication mechanism name using the -A option.
http -A digest -a username:password www.myservice.com
Customizing the Response Display
When we make a request to a URL, all the data along with the header information is displayed in the terminal. HTTPie provides an option to customize the output response. You can print the individual header and body information by specifying the --header and --body option along with the request.
http https://www.tutsplus.com --header
The above command would print the header information as shown:
HTTP/1.1 301 Moved Permanently
CF-RAY: 2f6669f88fc43548-LHR
Connection: keep-alive
Date: Sun, 23 Oct 2016 16:02:32 GMT
Location: https://tutsplus.com/
Server: cloudflare-nginx
Set-Cookie: __cfduid=dfea480f2567e7c463e66999adfdc73d71477238552; expires=Mon, 23-Oct-17 16:02:32 GMT; path=/; domain=.tutsplus.com; HttpOnly
Transfer-Encoding: chunked
Now, if you try the HTTP request along with the --body option, it should only print the body portion.
http www.google.com --body
The above command would print the following output:
<HTML>
<HEAD>
<meta http-equiv="content-type" content="text/html;charset=utf-8">
<TITLE>302 Moved</TITLE>
</HEAD>
<BODY>
<H1>302 Moved</H1>
The document has moved
<A HREF="http://www.google.co.in/?gfe_rd=cr&ei=OBwQWPO7Juyq8wf13bzYBw">here</A>.
</BODY>
</HTML>
Maintaining Sessions
While using HTTPie, each request is independent of other requests. We can keep sessions in case we want to persist the session for other HTTP requests. In order to maintain a session, all we need to do is create a named session as shown:
http --session=roy -a roy:mypass www.myservice.com
The above command would create a session called roy which can be used for other requests by using the session name. Here is an example which uses the session roy:
http --session=roy www.myservice.com
Auto Complete Using HTTP Prompt
It might be difficult to remember all commands related to HTTPie. The http-prompt toolkit provides an auto complete feature which can be used along with HTTPie. To get started with http-prompt, install it using pip:
sudo pip install http-prompt
To start a session, invoke http-prompt with the server URL which we'll be querying. Restart the json-server that we installed and invoke the http-prompt as shown:
http-prompt http://localhost:3000/users
Type in a few letters of HTTP and the auto complete should show up.
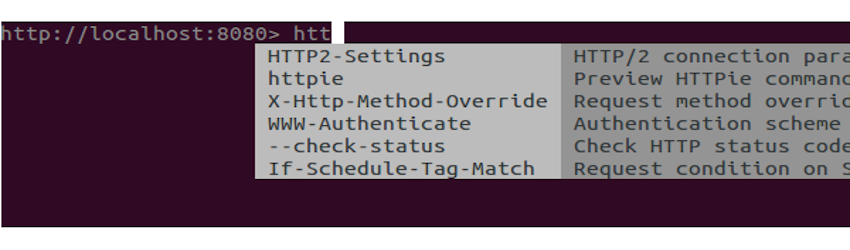
Type in httpie and it should display the URL we are querying.
http http://localhost:3000/users
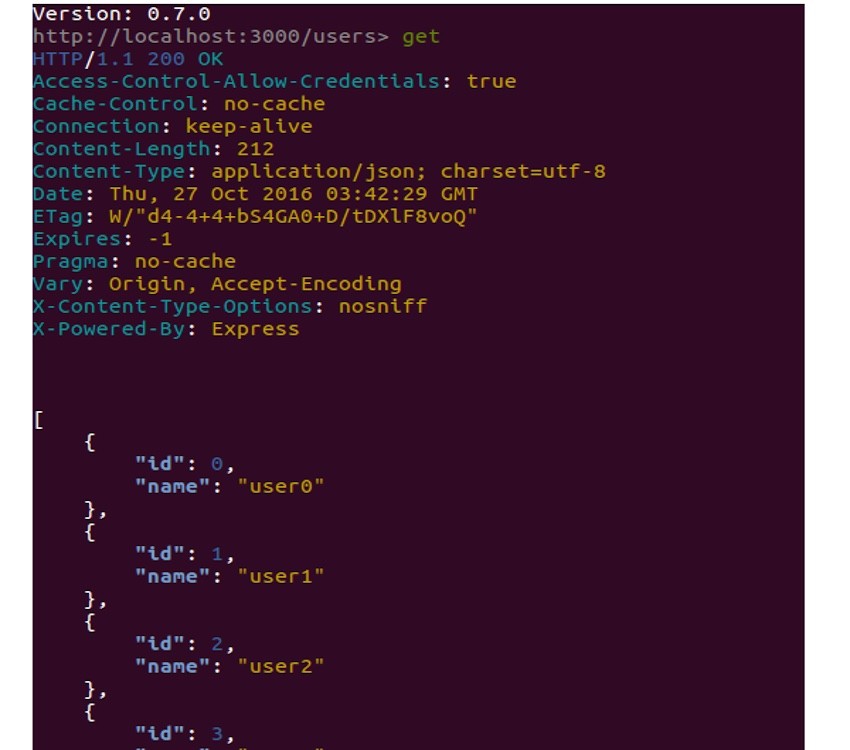
All the HTTPie request commands should be working in the http-prompt. Try typing in GET and it should pop up in the auto complete. On entering the GET command, the following response should be displayed.
Wrapping It Up
In this tutorial, we saw how to get started with HTTPie, a more human-friendly cURL alternative. We saw how to do the basic request operations like GET and POST using HTTPie and some other features. For in-depth information on using HTTPie, do have a look at the official documentation. Also check out the official documentation for http-prompt. Do let us know your thoughts in the comments below.

Comments