If you're asking, "What's Yii?" check out my earlier tutorial: Introduction to the Yii Framework, which reviews the benefits of Yii and includes an overview of what's new in Yii 2.0, released October 12, 2014.
In Programming with Yii2: Getting Started, we set up Yii2 locally, built a Hello World application, set up a remote server and used GitHub to deploy our code. In part two, we learned about Yii's implementation of its Model View Controller architecture and how to build web pages and forms that collect and validate data. In this tutorial, we'll use Yii's database and active record capabilities to automate code generation for a basic web application.
For these examples, we'll continue to imagine we're building a framework for posting simple status updates, e.g. our own mini-Twitter.
1. Creating Your Database
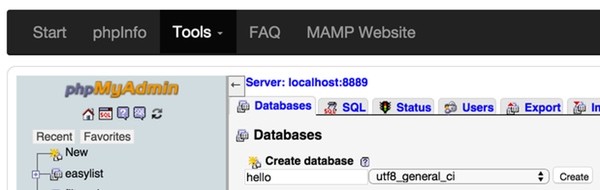
First, we need to create a database in our development environment. I do this through MAMP's PHPMyAdmin web user interface. Navigate to PHPMyAdmin, e.g. http://localhost:8888/MAMP/index.php?page=phpmyadmin, choose the Databases tab and create a database called hello:
You can also use the MySQL command line interface.
Now, we'll provide database credentials to Yii's database configuration file. Open /hello/config/db.php and provide your MySQL database credentials. Mine look like this:
<?php

return [
    'class' => 'yii\db\Connection',
    'dsn' => 'mysql:host=localhost;dbname=hello',
    'username' => 'root',
    'password' => 'password',
    'charset' => 'utf8',
];
Now, we'll create our first database migration. A migration provides a programmatic way to create and update database schemas. It's especially helpful if you're running on multiple servers or in different environments. It eliminates the difficulty of importing SQL scripts.
For our coding examples, you can use the Git repository from the last tutorial to follow along, or you can download the completed repository here.
Create the Migration
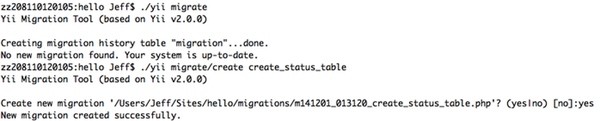
Our first migration will create the Status table. Open Terminal and enter the following:
cd ~/Sites/hello
./yii migrate/create create_status_table
It should look like this, when you're done:
When you open \hello\migrations, you'll see a file named similar to m141201_013120_create_status_table.php. It should look like this when opened:
<?php

use yii\db\Schema;
use yii\db\Migration;

class m141201_013120_create_status_table extends Migration
{
    public function up()
    {

    }

    public function down()
    {
        echo "m141201_013120_create_status_table cannot be reverted.\n";

        return false;
    }
}
This is the default migration code that Yii provides. Next, we'll update it to provide the fields we need.
Building the Status Table
Our Status table will store message text and specify whether a post is private or public. Each row will also have an id, create and update time fields.
Update your migration code to ours:
public function up()
    {
          $tableOptions = null;
          if ($this->db->driverName === 'mysql') {
              $tableOptions = 'CHARACTER SET utf8 COLLATE utf8_unicode_ci ENGINE=InnoDB';
          }

          $this->createTable('{{%status}}', [
              'id' => Schema::TYPE_PK,
              'message' => Schema::TYPE_TEXT.' NOT NULL DEFAULT ""',
              'permissions' => Schema::TYPE_SMALLINT . ' NOT NULL DEFAULT 0',
              'created_at' => Schema::TYPE_INTEGER . ' NOT NULL',
              'updated_at' => Schema::TYPE_INTEGER . ' NOT NULL',
          ], $tableOptions);
      }


    public function down()
    {
      $this->dropTable('{{%status}}');
    }
Notice how we've added definitions for the fields we need such as message, permissions, created_at, and updated_at.
Run the Migration
To tell Yii to create the table, we need to run the migration. It's easy. From Terminal again, we run ./yii migrate/up:
$ ./yii migrate/up
Yii Migration Tool (based on Yii v2.0.0)

Total 1 new migration to be applied:
    m141201_013120_create_status_table

Apply the above migration? (yes|no) [no]:yes
*** applying m141201_013120_create_status_table
    > create table {{%status}} ... done (time: 0.032s)
*** applied m141201_013120_create_status_table (time: 0.038s)


Migrated up successfully.
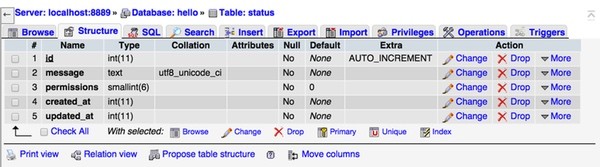
If you browse the table using PHPMyAdmin, you should see something like this:
Now that we've created the database table, we can begin to use Gii, Yii's powerful scaffolding generator, to automate all of the model view controller code.
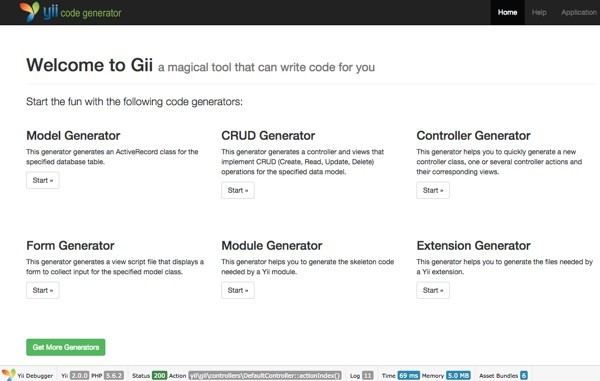
2. Using Gii: The Yii Code Generator
Gii is Yii's scaffolding code generator. It uses its knowledge of your database schema to generate well-written, default model view controller code for your application. Gii can turn a database schema into a basic working web application in minutes. It's incredibly powerful. Let me show you how it works.
Building the Model
With Gii, we start by building a model based on each database table we've created. For our example, we'll use the Status table.
To begin using Gii, navigate to your web application and add /gii, e.g. http://localhost:8888/hello/web/gii. You'll see something like this:
Click on Model Generator, and enter status in the Table Name field:

When you click Preview, it will show you which files it will build. Since we already have a Status.php model file from the last tutorial, click Overwrite. Then, click Generate.

The results will look like this:

Open the /hello/models/Status.php file and you'll see the basic validation rules and form attributes which Yii has built for us:
<?php

namespace app\models;

use Yii;

/**
 * This is the model class for table "status".
 *
 * @property integer $id
 * @property string $message
 * @property integer $permissions
 * @property integer $created_at
 * @property integer $updated_at
 */
class Status extends \yii\db\ActiveRecord
{
    /**
     * @inheritdoc
     */
    public static function tableName()
    {
        return 'status';
    }

    /**
     * @inheritdoc
     */
    public function rules()
    {
        return [
            [['message', 'created_at', 'updated_at'], 'required'],
            [['message'], 'string'],
            [['permissions', 'created_at', 'updated_at'], 'integer']
        ];
    }

    /**
     * @inheritdoc
     */
    public function attributeLabels()
    {
        return [
            'id' => 'ID',
            'message' => 'Message',
            'permissions' => 'Permissions',
            'created_at' => 'Created At',
            'updated_at' => 'Updated At',
        ];
    }
}
Building the Web Interface
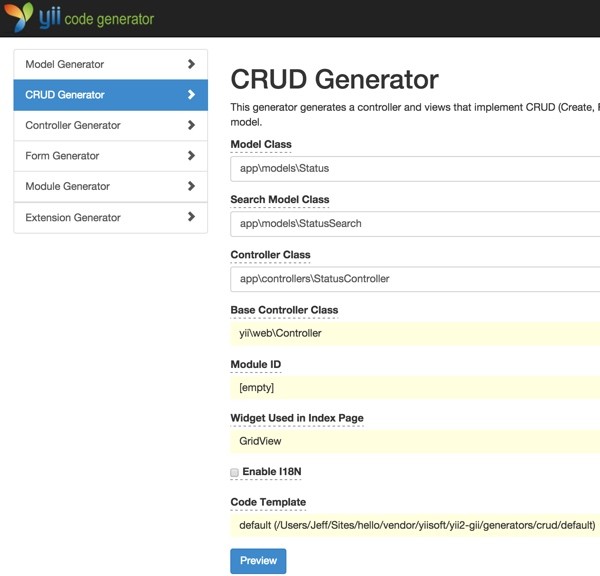
Now, it's time to use Gii to build the controller and views for the Status table. Return to the Gii home page and click CRUD Generator, e.g. http://localhost:8888/hello/web/gii/crud:
For Model Class, enter app\models\Status (these entries are case sensitive). For Search Model Class, enter app\models\StatusSearch. For Controller Class, enter app\controllers\StatusController. It should look like this:
Click Preview. You'll see the following—be sure to click Overwrite again since we have older files from the last tutorial which need to be updated:
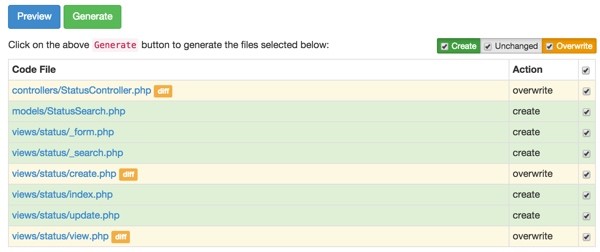
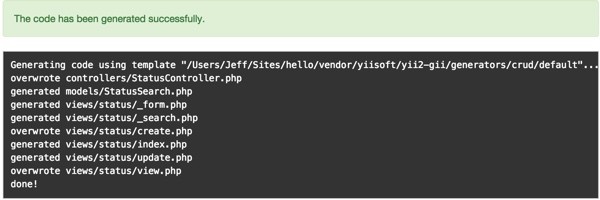
When you click Generate, you'll see all of the controller and view files generated:
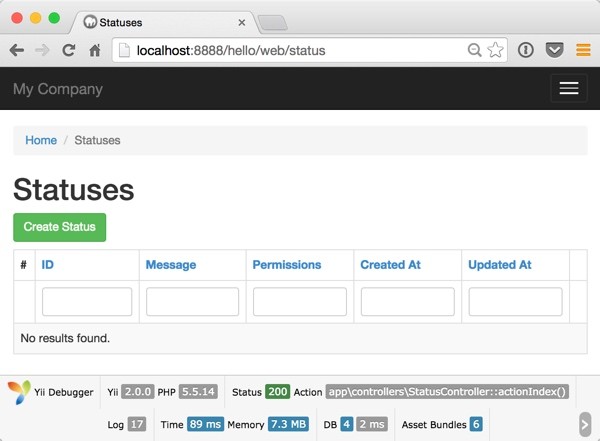
The Default CRUD Pages
Navigate your browser to http://localhost:8888/hello/web/status, and you'll see the generated CRUD index page. Since there aren't any rows in the database yet, it'll appear empty.

Now, click on Create Status and you'll see the default Create Status Form which Gii created:
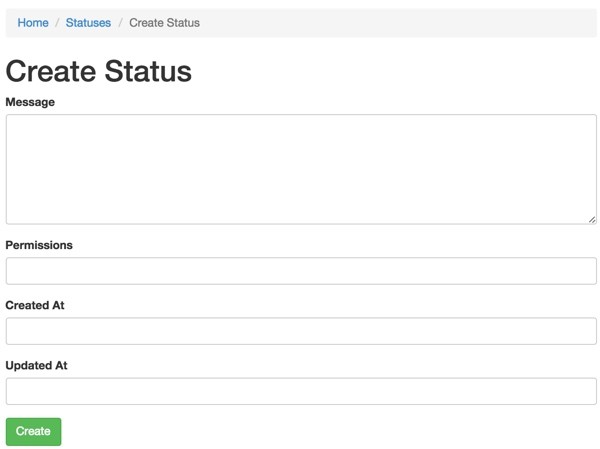
It's pretty amazing how quickly Gii creates working code for us. Next, we'll customize the scaffolding code to make this work for us.
3. Customizing Our Code
Customizing the Form View
Let's clean up the form. In /hello/views/Status/_form.php, remove the created and updated fields:
    <?= $form->field($model, 'created_at')->textInput() ?>
    <?= $form->field($model, 'updated_at')->textInput() ?>
Replace the permissions field with the drop-down list code we created in part two of this series:
<?=
    $form->field($model, 'permissions')->dropDownList($model->getPermissions(),
             ['prompt'=>'- Choose Your Permissions -']) ?>
We need to put the getPermissions function back in the model as well. Edit /hello/models/Status.php. Put back the constant definitions and permissions functions:
      const PERMISSIONS_PRIVATE = 10;
      const PERMISSIONS_PUBLIC = 20;
...

public function getPermissions() {
      return array (self::PERMISSIONS_PRIVATE=>'Private',self::PERMISSIONS_PUBLIC=>'Public');
    }

    public function getPermissionsLabel($permissions) {
      if ($permissions==self::PERMISSIONS_PUBLIC) {
        return 'Public';
      } else {
        return 'Private';
      }
    }
Your new Status form should look like this:

We need to adjust the controller a bit to make the form save properly.
Customizing the Controller
In /hello/controllers/StatusController.php, replace the actionCreate method with this code:
public function actionCreate()
    {
        $model = new Status();

        if ($model->load(Yii::$app->request->post())) {
          $model->created_at = time();
          $model->updated_at = time();
           if ($model->save()) {
             return $this->redirect(['view', 'id' => $model->id]);
           }
        }
        return $this->render('create', [
            'model' => $model,
        ]);
    }
When the form is posted, we manually set the created_at and updated_at fields, then we save the data in the database.
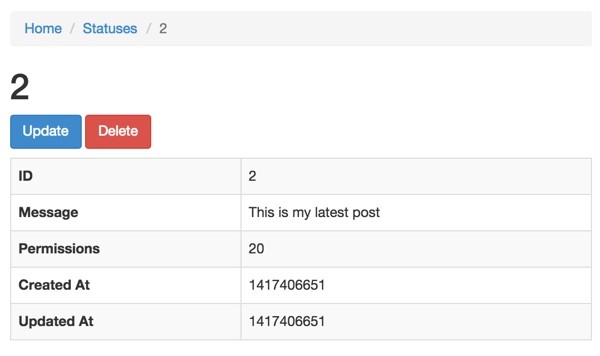
When you save your first status update, you'll see the following view page:
Adjusting the Layout
Let's readjust the navbar so that it doesn't drop down for Status but jumps directly to the Status index page. Edit /hello/views/layouts/main.php and replace the Nav::widget code with this:
echo Nav::widget([
                'options' => ['class' => 'navbar-nav navbar-right'],
                'items' => [
                    ['label' => 'Home', 'url' => ['/site/index']],
                    ['label' => 'Status', 'url' => ['/status/index']],
                    ['label' => 'About', 'url' => ['/site/about']],
                    ['label' => 'Contact', 'url' => ['/site/contact']],
                    Yii::$app->user->isGuest ?
                        ['label' => 'Login', 'url' => ['/site/login']] :
                        ['label' => 'Logout (' . Yii::$app->user->identity->username . ')',
                            'url' => ['/site/logout'],
                            'linkOptions' => ['data-method' => 'post']],
                ],
            ]);
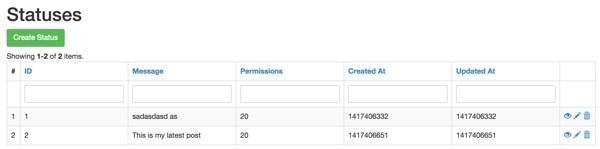
The Grid View
When you return to the Status index view, you can see the Yii2 Grid filled with data:
The code which generates this page is in /hello/views/status/index.php:
<?php

use yii\helpers\Html;
use yii\grid\GridView;

/* @var $this yii\web\View */
/* @var $searchModel app\models\StatusSearch */
/* @var $dataProvider yii\data\ActiveDataProvider */

$this->title = 'Statuses';
$this->params['breadcrumbs'][] = $this->title;
?>
<div class="status-index">

    <h1><?= Html::encode($this->title) ?></h1>
    <?php // echo $this->render('_search', ['model' => $searchModel]); ?>

    <p>
        <?= Html::a('Create Status', ['create'], ['class' => 'btn btn-success']) ?>
    </p>

    <?= GridView::widget([
        'dataProvider' => $dataProvider,
        'filterModel' => $searchModel,
        'columns' => [
            ['class' => 'yii\grid\SerialColumn'],

            'id',
            'message:ntext',
            'permissions',
            'created_at',
            'updated_at',

            ['class' => 'yii\grid\ActionColumn'],
        ],
    ]); ?>

</div>
If you try out the column sorting and view, update and delete icons, you'll see that Gii has built out all the functionality for these features as well.
So in just a few minutes, we created a schema for our database, and generated a model and all of the web application code needed for a basic application. I hope you've found Yii's code generation capabilities as impressive as I have.
What's Next?
Next up, I'll show you how to integrate user registration and login capabilities into our application so we can set up join relations between status posts and specific users.
If you'd like to know when the next Yii2 tutorial arrives, follow me @reifman on Twitter or check my Tuts+ instructor page. My instructor page will include all the articles from this series as soon as they are published.

Comments