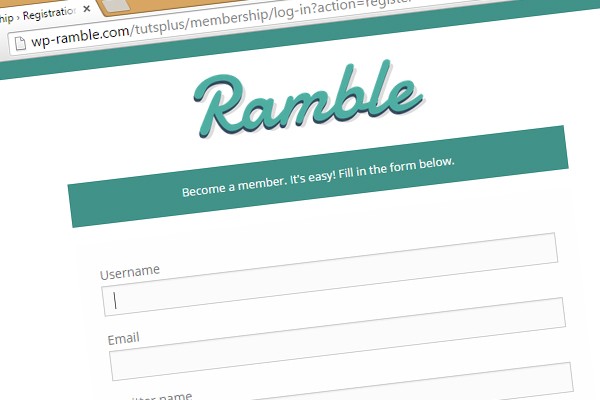
In the first part of this series, we covered customizing the registration and login forms. Today we’ll be covering how to add custom fields to the registration form. We’ll be adding a text input for a Twitter handle and a checkbox where users will need to agree to terms before registering. The work required can be divided into three parts:
- Adding the fields themselves
- Validation on the fields
- Processing the data
We will also very briefly discuss the best ways to style your outgoing emails. This means users will receive nice branded emails when they register.
Quickly before we start, make sure Anyone can register is ticked in your WordPress settings (Settings > General).

There’s Lots to Do; Let’s Get Started
One of the greatest things about WordPress is the way it supplies you with actions and filters. These allow us to hook onto events or filter content, which gives us the opportunity to extend WordPress gracefully.
So using the register_form action, let’s hook into the registration form and add our fields. Copy the following function to our admin.php that we created in part one of this series.
<?php

function tutsplus_register_form_edit() {
    $twitter_name = ( ! empty( $_POST['twitter_name'] ) ) ? trim( $_POST['twitter_name'] ) : ''; ?>
    <p>
        <label for="twitter_name">
        	<?php _e( 'Twitter name', 'sage' ) ?><br />
        	<input type="text" name="twitter_name" id="twitter_name" class="input" value="<?php echo esc_attr( wp_unslash( $twitter_name ) ); ?>" size="25" />
        </label>
    </p>

	<?php $terms = ( ! empty( $_POST['terms'] ) ) ? $_POST['terms'] : ''; ?>
    <p>
        <label for="terms">
        	<input type="checkbox" name="terms" id="terms" class="input" value="agreed" <?php checked( $_POST['terms'], 'agreed', true ); ?> />
        	<?php _e( 'I have read the terms and conditions', 'sage' ) ?>
        </label>
    </p>
    <?php
}
add_action( 'register_form', 'tutsplus_register_form_edit' );
Basically we are injecting some new fields into our registration form. The markup used is mimicking that of the native fields. We also want to retain the values if the page is reloaded, so we will check if they exist in the $_POST super global. You might be wondering why our Twitter label is wrapped in a function: <?php _e( 'Twitter name', 'tutsplus' ) ?>.
The _e function allows translation to occur—you can read more about it in the WordPress Codex.
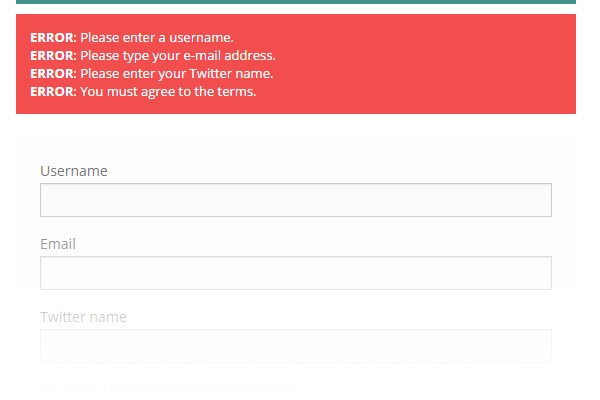
This is great, but how about some validation? As it stands, users can put whatever they want in there or just leave it blank. Let’s make our fields required and make sure the text field only takes in regular characters to prevent malicious attacks. This time we will be using a WordPress filter: registration_errors.
<?php

function tutsplus_validate_registration( $errors, $sanitized_user_login, $user_email ) {
    if ( empty( $_POST['twitter_name'] ) || !empty( $_POST['twitter_name'] ) && trim( $_POST['twitter_name'] ) == '' ) {
		$errors->add( 'twitter_name_error', __( '<strong>ERROR</strong>: Please enter your Twitter name.', 'sage' ) );
	}
	if ( preg_match('/[^a-z_\-0-9]/i', $_POST['twitter_name']) ) {
		$errors->add( 'twitter_name_error', __( '<strong>ERROR</strong>: Please use letters, numbers, spaces and underscores only.', 'sage' ) );
	}
	if ( empty( $_POST['terms'] ) ) {
		$errors->add( 'terms_error', __( '<strong>ERROR</strong>: You must agree to the terms.', 'sage' ) );
	}
	return $errors;
}
add_filter( 'registration_errors', 'tutsplus_validate_registration', 10, 3 );
The above filter is passed three parameters:
- The errors that have been processed
- The user's email
- The user's sanitized user name
The function is triggered after the form is submitted but before the data hits the database. In our case we are checking if the fields are empty and if there are any bizarre characters in our Twitter name input. If any of these are true we pass an error message to the $error object that is returned.
Note: if you are getting an empty error box, don't worry. The security plugin we installed in part one has a default setting that hides the messages. Under the WordPress Tweaks section, uncheck the option Disable login error messages.
Now the final piece of our puzzle: processing the data so it’s saved in our database against that user. Again we will be using a WordPress defined action (user_register) to hook into this process. It takes one parameter, the user_id—that way it knows who to save the data against. Assuming the $_POST superglobal contains our data, we can save it using update_user_meta.
<?php

/**
 * Process the additional fields.
 *
 * @param user_id
 */
function tutsplus_process_registration( $user_id ) {
    if ( ! empty( $_POST['twitter_name'] ) ) {
		update_user_meta( $user_id, 'twitter_name', trim( $_POST['twitter_name'] ) );
	}
	if ( ! empty( $_POST['terms'] ) ) {
		update_user_meta( $user_id, 'terms', trim( $_POST['terms'] ) );
	}
}
add_action( 'user_register', 'tutsplus_process_registration' );
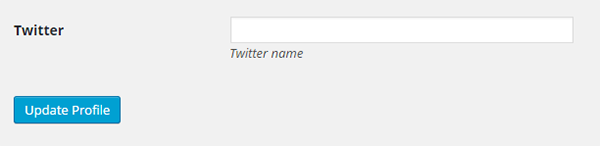
Custom Fields in the Admin
Right now we have collected the users' data - including our custom fields - but we can not edit those values in the WordPress admin. Let's hook that up. In our admin.php add the following function:
<?php
/** Display in the wp backend
 * http://codex.wordpress.org/Plugin_API/Action_Reference/show_user_profile
 *
 * Show custom user profile fields
 * @param  obj $user The WP user object.
 * @return void
 */
function tutsplus_custom_user_profile_fields( $user ) {
?>
<table class="form-table">
    <tr>
		<th>
			<label for="twitter_name"><?php __e( 'Twitter name','sage' ); ?></label>
		</th>
		<td>
			<input type="text" name="twitter_name" id="twitter_name" value="<?php echo esc_attr( get_the_author_meta( 'twitter_name', $user->ID ) ); ?>" class="regular-text" />
		</td>
	</tr>
</table>
<?php
}
// Hooks near the bottom of profile page (if current user)
add_action('show_user_profile', 'tutsplus_custom_user_profile_fields');
// Hooks near the bottom of the profile page (if not current user)
add_action('edit_user_profile', 'tutsplus_custom_user_profile_fields');
Using some WordPress actions we are easily able to add custom fields.
Now to process the custom user meta.
<?php
/** Update the custom meta
 * https://codex.wordpress.org/Plugin_API/Action_Reference/personal_options_update
 * https://codex.wordpress.org/Plugin_API/Action_Reference/edit_user_profile_update
 *
 * Show custom user profile fields
 * @param  int user_id.
 */
function tutsplus_update_extra_profile_fields( $user_id ) {

   if ( current_user_can( 'edit_user', $user_id ) )

      update_user_meta( $user_id, 'twitter_name', $_POST['twitter_name'] );
}
// Hook is used to save custom fields that have been added to the WordPress profile page (if current user)
add_action( 'personal_options_update', 'tutsplus_update_extra_profile_fields' );

// Hook is used to save custom fields that have been added to the WordPress profile page (if not current user)
add_action( 'edit_user_profile_update', 'tutsplus_update_extra_profile_fields' );
Redirect on Login
Finally we want to redirect our users to a specific page when they are logged in. The default sends them to the WordPress back end. Forget that. Let's send them to a "my account" page. So firstly you'll need to create this page in the back end. Don't worry about content for now, because we'll get into that in the next part of the series.
Now that we have our page, paste the code below into ____.php and give it a test drive. Assuming your "my account" page has the slug my-account it should work. Yet again we have used a WordPress filter to achieve this sorcery.
In a nutshell, the code checks for a user, and if they are an admin user they are directed to the default place, else they are redirect to the my-account page. All this is triggered when the user logs in using the filter login_redirect.
<?php

/**
 * Redirect user after successful login.
 *
 * @param string $redirect_to URL to redirect to.
 * @param string $request URL the user is coming from.
 * @param object $user Logged user's data.
 * @return string
 */
function tutsplus_redirect_on_login( $redirect_to, $request, $user ) {
    //is there a user to check?
	global $user;
	if ( isset( $user->roles ) && is_array( $user->roles ) ) {
		//check for admins
		if ( in_array( 'administrator', $user->roles ) ) {
			// redirect them to the default place
			return $redirect_to;
		} else {
			return home_url('profile');
		}
	} else {
		return $redirect_to;
	}
}
add_filter( 'login_redirect', 'tutsplus_redirect_on_login', 10, 3 );
A Quick Note on Outgoing Emails
When users register on your site they will be receiving confirmation emails. Also if a user forgets their password they have the ability to retrieve it over email. So it's important we give these emails some love and attention if we want our membership site to be all that.
Now there are a few ways to do this. For all the purists out there you can use WordPress filters to change the email content type and style your emails—see the WordPress Codex. Alternatively there's a host of plugins out there designed for this purpose.
Personally I like to use MailChimp's Mandrill to send emails out of my WordPress sites. It's not too tricky to set up and it's full of features, one of which is being able to apply templates/styles to your outgoing emails.
What’s Next?
In the next and final part of the series we will be making a basic account section whereby the logged-in users will be able to edit their details. We also want administrators to be able to edit these details from the WP admin area, so we will be adding some custom fields in there too.
If you have any suggestions or questions please leave a comment. I'll do my best to reply in a timely fashion.
Things to Note
Please note: if you are downloading the code from the GitHub repository it includes all the files to get your theme up and running. The idea is that you can grab the repo and just run the necessary Gulp and Bower commands and you'll be away! If you just want the files that contain code specific to this series the files are listed below.
- All the files in the admin directory
- lib/admin.php
- lib/membership.php
- template-user-profile.php
- templates/header.php

Comments