Introduction
Xcode is the main IDE (Integrated Development Environment) used by thousands and thousands of developers every day. It is an awesome tool, but sometimes you want to customize some of its features and behaviors to better fit your workflow.
Until Xcode 7, it was possible to inject code into Xcode at runtime to create plugins. Plugins could be submitted and distributed through a great app called Alcatraz. This is no longer possible in Xcode 8.
Xcode 8 validates each library and bundle to prevent malicious code from running without your permission. When Xcode starts, previously installed plugins with Alcatraz are not loaded anymore. Not everything is lost though, Apple also announced at WWDC the possibility to develop Xcode source editor extensions so that everyone can extend existing source editing features. Let's take a look about what we can achieve with such extensions.
1. Getting Started
Xcode 8 source editor extensions are a first step in the right direction. If you have been working with Xcode for a while, you may have found yourself in a situation where you wished that a specific task could be automated within Xcode. Source editor extensions allow third party applications to modify a source file, which is exactly what you need to speed up your workflow.
At this moment, extensions can only interact with the source code. This means that not every plugin available through Alcatraz can be replaced by a source editor extension. But who knows what the future brings.
It is important to understand that each extension must be contained in a macOS app. You could, for example, add preferences and explanations about what the extension does in the macOS app and distribute it through the Mac App Store. Also note that each extension runs in a separate process. If the extension crashes, it won't crash Xcode. Instead, it will display a message that the extension was not able to finish its work.
Furthermore, extensions don't have a user interface and they can only modify the code directly when the user invokes your command. They can't, for example, run in the background.
I recommend watching the WWDC 2016 session about source editor extensions. Not only does it explain how to get started developing Xcode source editor extensions, it also shows tips and shortcuts to speed up your development.
2. Overview
In this tutorial, we are going to develop an extension that cleans up the closure syntax in Swift. Xcode autocompletes a closure syntax with the parentheses, but they can be omitted for brevity. This is a task that can be easily be automated by wrapping it into a source editor extension.
The shorter explanation of what we are going to develop is an extension that transforms any closure to the simpler and cleaner syntax. Take a look at the example below.
// Before
session.dataTask(with: url) { (data, response, error) in

}

// After
session.dataTask(with: url) { data, response, error in

}
3. Project Setup
It goes without saying that this tutorial requires Xcode 8. You can download it from Apple's developer website. It runs on both OS X 10.11 and macOS 10.12.
Create a new OS X project of type Cocoa Application and give it the name CleanClosureSyntax. Make sure that you have set the language of the project to Swift. We will use the new Swift 3 syntax in this tutorial.
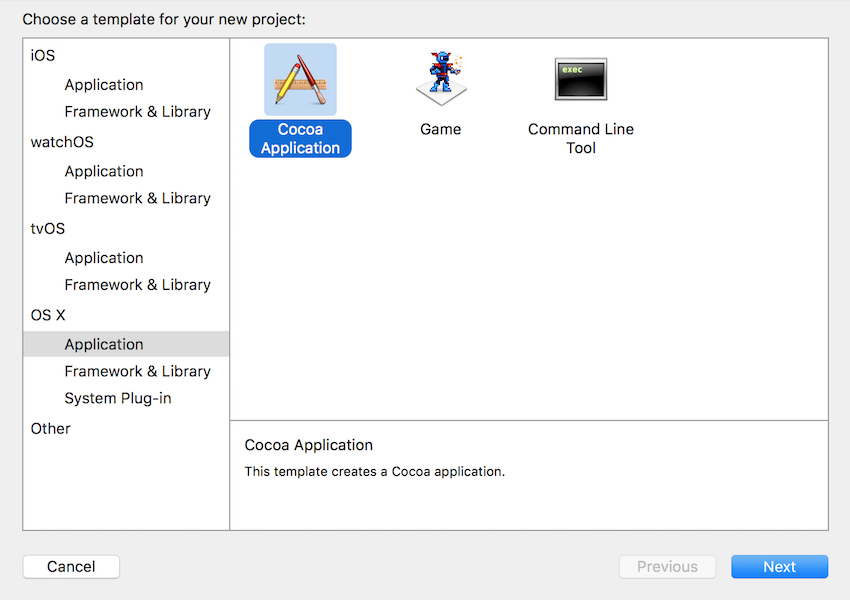
We will leave the macOS app empty for now and we can focus on creating the Xcode source editor extension. From the File menu, choose New > Target.... In the left sidebar, choose OS X and select Xcode Source Editor Extension from the list.
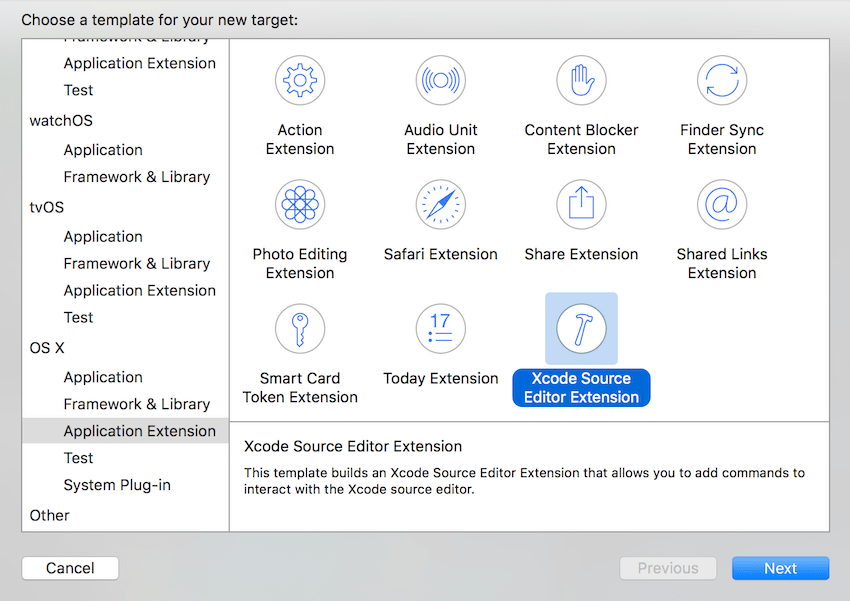
Click Next and set Product Name to Cleaner. A new target will be created for you. Click Activate if Xcode asks you if the newly created Scheme should be activated.
4. Project Structure
Let's first analyze what Xcode just created for us. Expand the Cleaner folder to see its contents.
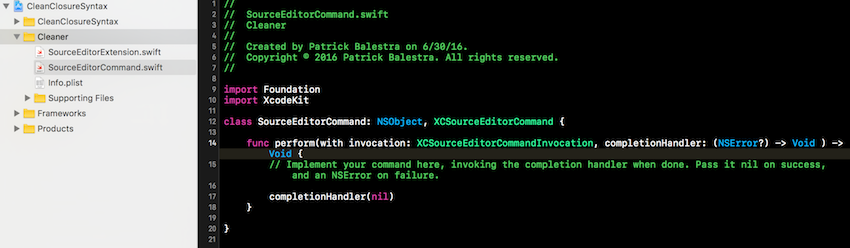
We won't modify SourceEditorExtension.swift in this tutorial, but it can be used to further customize your extension. The extensionDidFinishLaunching() method is called as soon as the extension is launched so that you can perform any initialization if needed. The commandDefinitions property getter can be used if you want to dynamically show or hide certain commands.
SourceEditorCommand.swift is the hear of the extension. This file is where you will implement the logic for the extension. The perform(with:completionHandler:) method is called when the user launches your extension. The XCSourceEditorCommandInvocation object contains a buffer property, which is used to access the source code in the currently selected file. The completion handler should be called with value nil if everything went well, otherwise pass it an NSError instance.
5. Implementing the Extension
Now that the project contains all the required targets, we are ready to start writing the extension. To recap, we want to remove the parentheses from any closure in a Swift file. This can be done in three steps:
- find the lines that contain a closure
- remove the two parentheses from that particular line
- substitute back the modified line
Let's get started.
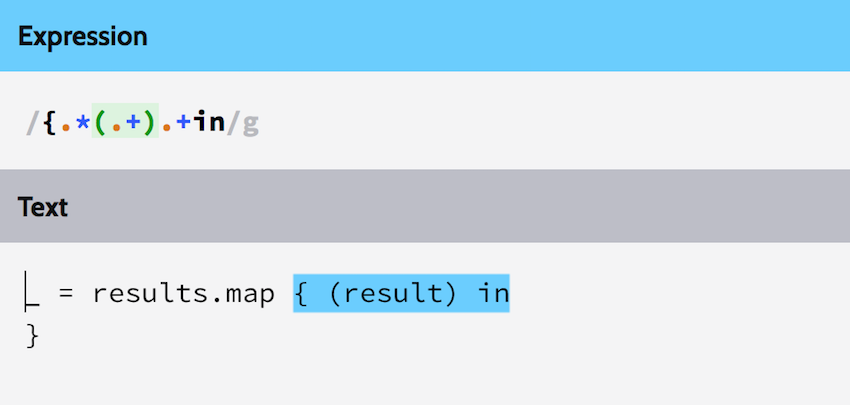
We can use a regex (regular expression) to parse each line of code and see if it contains a closure. You can refer to Akiel's tutorial about Swift and regular expressions if you want to learn more about regular expressions. You can use RegExr to test your regular expressions. Take a look at the following screenshot to see how I tested my regex.
Open SourceEditorCommand.swift and modify the perform(with:completionHandler:) method to look like this:
func perform(with invocation: XCSourceEditorCommandInvocation, completionHandler: (NSError?) -> Void ) -> Void {
    var updatedLineIndexes = [Int]()

    // 1. Find lines that contain a closure syntax
    for lineIndex in 0 ..< invocation.buffer.lines.count {
        let line = invocation.buffer.lines[lineIndex] as! NSString
        do {
            let regex = try RegularExpression(pattern: "\\{.*\\(.+\\).+in", options: .caseInsensitive)
            let range = NSRange(0 ..< line.length)
            let results = regex.matches(in: line as String, options: .reportProgress, range: range)
            // 2. When a closure is found, clean up its syntax
            _ = results.map { result in
                let cleanLine = line.remove(characters: ["(", ")"], in: result.range)
                updatedLineIndexes.append(lineIndex)
                invocation.buffer.lines[lineIndex] = cleanLine
            }
        } catch {
            completionHandler(error as NSError)
        }
    }

    // 3. If at least a line was changed, create an array of changes and pass it to the buffer selections
    if !updatedLineIndexes.isEmpty {
        let updatedSelections: [XCSourceTextRange] = updatedLineIndexes.map { lineIndex in
            let lineSelection = XCSourceTextRange()
            lineSelection.start = XCSourceTextPosition(line: lineIndex, column: 0)
            lineSelection.end = XCSourceTextPosition(line: lineIndex, column: 0)
            return lineSelection
        }
        invocation.buffer.selections.setArray(updatedSelections)
    }
    completionHandler(nil)
}
Find Lines With Closure Syntax
We first create and array of Int values that will contain the line indexes of the modified lines. This is because we don't want to substitute all the lines. We want to replace only the lines that we modify.
We enumerate over all the lines of the invocation.buffer object and we try to find a match for the RegularExpression object. If I remove the escaping characters from the regex, it looks like the following:
{.*(.+).+in
This regex matches when a string has the following characteristics:
- It has a curly open bracket (
{), which is followed by 0 or more characters, except a new line character (\n). - An open parenthesis (
() must be found again, followed by 0 or more characters. This part should contain the parameters of the closure. - We then need to find a closing parenthesis (
)), followed by 0 or more characters, which are the optional return types. - Finally, the
inkeyword should be found.
If the RegularExpression object fails to find a match (for example, if the regex is not valid), we call the completionHandler with the error as a parameter. If a string that matches all these conditions is found on a line, we have correctly localized a closure.
Clean Up Syntax
When a match is found, we call a utility method on NSString that removes the parentheses. We also need to pass in the range of the match to avoid removing some other parentheses outside of the closure.
Update Lines
The last part of code checks that at least a line was changed. If this is true, we call setArray() to substitute back the new lines and the correct indexes. The completion handler is called with the value nil so that Xcode knows that everything went well.
We still have to implement the remove(characters:range:) method on NSString. Let's add this extension at the top of file.
extension NSString {
    // Remove the given characters in the range
    func remove(characters: [Character], in range: NSRange) -> NSString {
        var cleanString = self
        for char in characters {
            cleanString = cleanString.replacingOccurrences(of: String(char), with: "", options: .caseInsensitiveSearch, range: range)
        }
        return cleanString
    }
}
This method calls replacingOccurrences(of:with:range:) on NSString for each character that we want to remove.
6. Testing
Xcode 8 comes with a great solution to test extensions. First of all, if you are running OS X 10.11 El Capitan, open Terminal, execute the following command, and restart your Mac.
sudo /usr/libexec/xpccachectl
After doing this, build and run your extension by selecting the appropriate scheme. When it asks which app to run, search for Xcode and make sure to select the beta version of Xcode 8. A new Xcode version will be launched with the application icon grayed out so that you can recognize in which instance of Xcode you are testing the extension.
In the new Xcode instance, create a new project or open an existing one, and go to Editor > Clean Closure > Source Editor Command. Make sure to have at least one closure in the currently focused Swift file to see the result. As you can see in the following animation, our extension works.

Source Editor Command is the default name for a command. You can modify it in the Info.plist file of the extension. Open it and change the string to Clean Syntax.
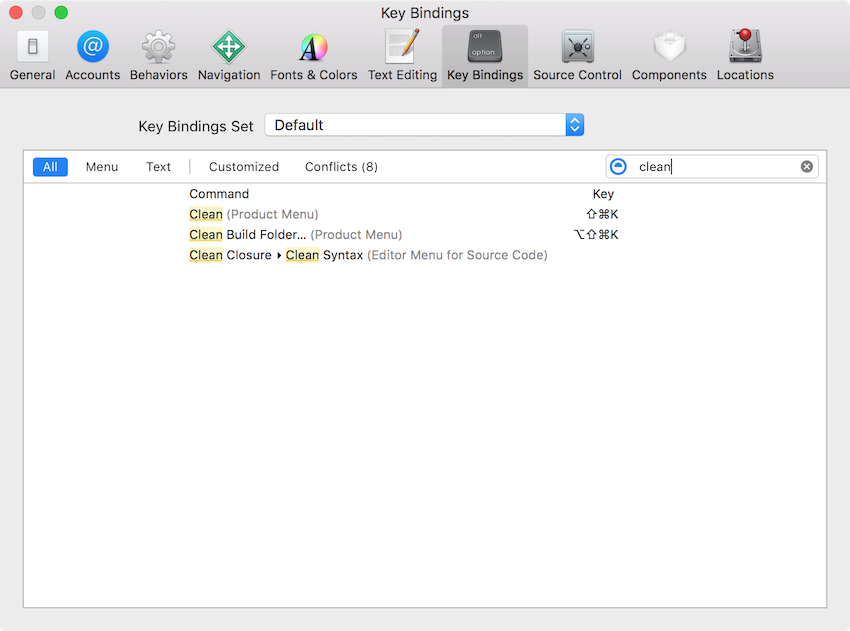
We can also assign a shortcut to automatically invoke the Clean Syntax command. Open Xcode's Preferences and select the Key Bindings tab. Search for Clean Syntax and the command will appear. Click to the right of it and press the shortcut you would like to use, for example, Command-Alt-Shift-+. You can now go back to the source file and press that shortcut to invoke it directly.
7. Tips and Tricks
Xcode 8 and source editor extensions are still in beta at the time of writing. The following tips can help you debug some issues you may be running into.
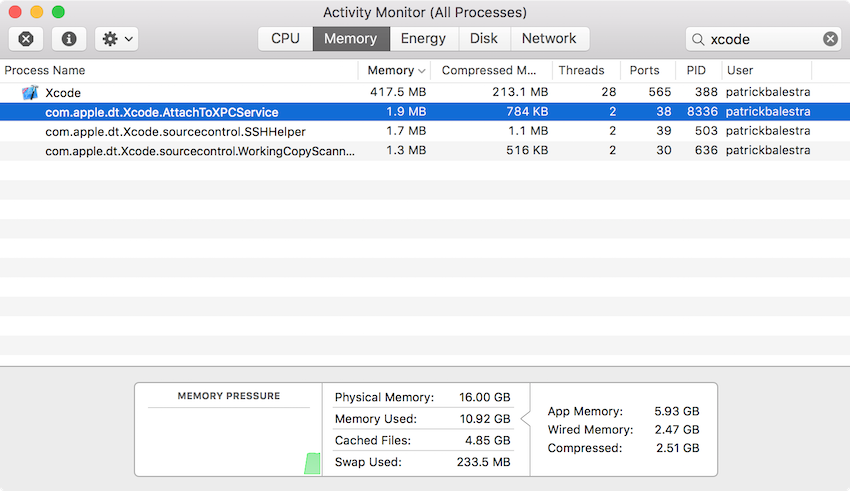
If your extension is not selectable in the Xcode testing instance, kill the com.apple.dt.Xcode.AttachToXPCService process and run the extension again.
Only substitute back the lines that you modify in the buffer. This makes the extension run faster and it will have less chances to be killed by Xcode. The latter can happen if Xcode believes a command of your extension is taking too long.
If you want to show multiple commands, assign to each command a different identifier and use the commandIdentifier property on the XCSourceEditorCommandInvocation object to recognize which one the user triggered.
Conclusion
Creating Xcode source editor extension is really easy. If you can improve your workflow and speed up your development by creating a source editor extension, then go ahead and make it happen. Apple introduced a new way for developers to share signed plugins through the Mac App Store so that you can release your work and watch other developers benefit from it.
You can find the source code of the example of this tutorial on GitHub.

Comments