Last time, you set up a local server (XAMPP), a web server (GitHub Page), and a database server (Parse.com). You also bootstrapped the HTML of a blog page and embedded basic Parse.js code to link to the database. In this session, I will teach you how to create, retrieve and render your first object.
If you can bear using Parse.com as your admin panel, you can easily create portfolios, blogs, landing pages, etc. for yourself after learning this session.
The Concept of a Class and an Instance
Before we dive into the code base and make it happen, let me make sure you're familiar with classes and instances. Again, feel free to skip this part if you are familiar with those concepts.
According to Wikipedia:
A class is “an extensible program-code-template for creating objects, providing initial values for state (member variables) and implementations of behavior (member functions, methods);” and "when an object is created by a constructor of the class, the resulting object is called an instance of the class."
If those definitions are too abstract for you, let's put them in the context of a blog.
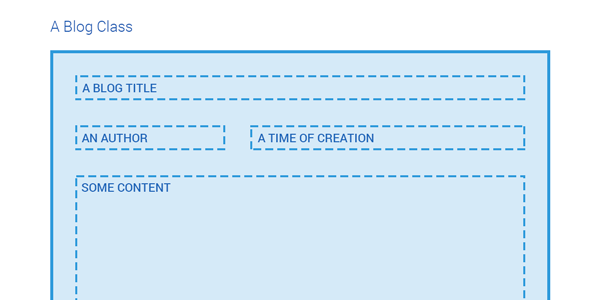
A Blog Class
Think about the common components of all the blogs. They probably each have a title, an author, a page of content, a time that they are created, etc. Those shared attributes will make a common template for all the blogs we have, thus the Blog class:
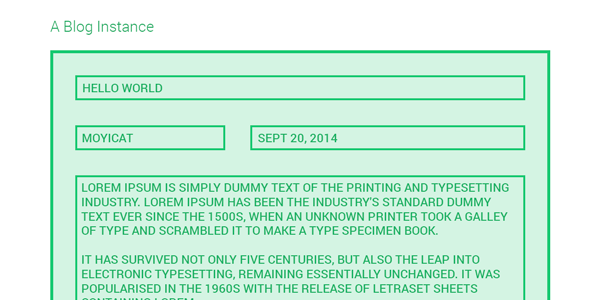
A Blog Instance
And when we have the Blog class, each specific blog that fits this template would be an instance of the Blog class:
To help identify when we are referring to the Blog class and when we are referring to a specific blog, we always capitalize the first letter of a class. So "Blog" for the blog class and "blog" for a blog instance. This rule applies to both this tutorial article and to the JavaScript code you will be writing.
Also, you will notice that on Parse.com, you would see the word "object" a lot. In this context, we will be utilizing the rule of capitalization and use the word "object" for instance and "Object" for class. You will soon get used to that.
A Blog Table
Because a class defines all the attributes its instances have, it's easy to store all the instances of a given class in one table: each attribute would be a column, and each instance would be a row:
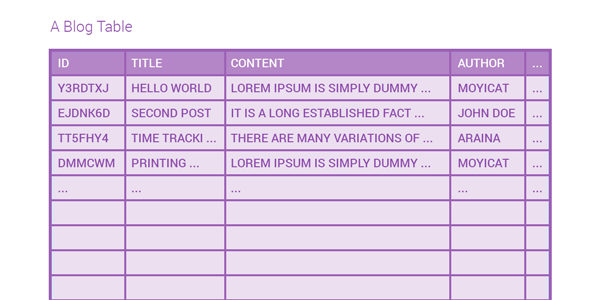
And this is exactly how you are going to store data on Parse.com
Create Blog Class
Now let's go ahead and create it on Parse.com.
Step 1: Add a Blog Class
First, go to your dashboard on Parse.com, find your project and go to "Core" - "Data" (previously Data Browser). Then, click "Add Class."
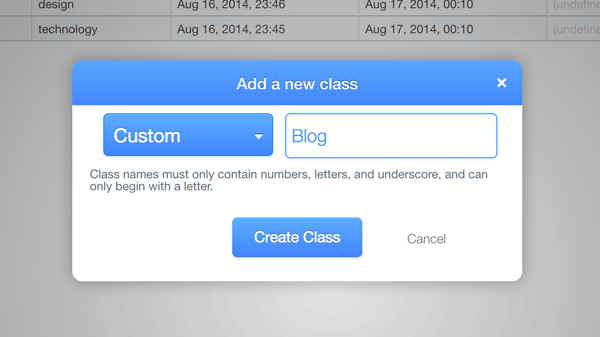
As you can see in the screenshot, you need to create a custom class for your blogs. Let's name it Blog. You always want your class names to be crystal clear and say what they store.
And as you can see, you now have an empty custom class on Parse.com:
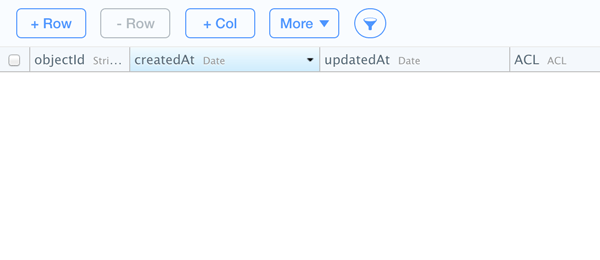
Every custom class would have four system attributes:
-
objectId- a unique identifier automatically generated by Parse when a new object is created. That way, the program always know which object you are referring to. (As you can see, here object just mean instance.) -
createdAt- a timestamp automatically generated by Parse when you first create an object. -
updatedAt- a timestamp automatically generated and updated by Parse every time you update that object. -
ACL- an object-level access control List that defines who can read from and write to that object. If undefined, it defaults to the class-level access control. We will discuss it in future sessions. You can just leave it empty for now.
Step 2: Add Columns to the Blog Class
Next, let's move on and create columns for the attributes that defines a blog. To keep it as simple as possible, let's just do two of them: title and content.
Click on the "+ Col" button to create a new column. Set the type to "String" and name it title.

Repeat the same process and create a content column, also set the type to "String".
Step 3: Add Some Blogs
Time to add some blogs! Click on the "+ Row" button and double click on the title and content cells to add some content:
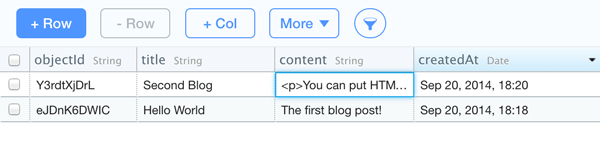
Notice that you can also put HTML syntax in the content column. In fact, all string columns can correctly store HTML syntax. However, remember not to over use it. In this case, the title column probably should not contain HTML syntax.
As I mentioned before, because Parse.com let you manipulate your database like this, you can totally use it as your admin panel if you don't want to write your own. And once you learn how to render that data on your website, you can easily create a dynamic blog or portfolio of your own. Moving on to the next part, I will show you how to do that.
Retrieve Blog Data
Go back to your blog.js file. It's time to take out the test code and get those blog data from the Parse.com to your website!
First, extend a JavaScript class from the Blog class on Parse.com:
var Blog = Parse.Object.extend("Blog");
Thinking about a blog homepage, you probably want to get a list of blogs at once. That list of objects of the same class is called a collection by Parse. Let's also define that:
var Blogs = Parse.Collection.extend({
    model: Blog
});
Notice that both Blog and Blogs are classes. They are the abstract templates for blogs and collations of blogs. You can have different, specific blogs, and collections of blogs. Those are their instances.
So now, in order to have a real collection of all the blogs you added on Parse.com, you need to create a new instance of Blogs collection (notice that the first letter should not be capitalized here):
var blogs = new Blogs();
If we don't specify anything and just fetch that new collection with data, it will get all the rows in the Blog table by default.
Let's fetch and log it into the console:
blogs.fetch({
	success: function(blogs) {
		console.log(blogs);
	},
	error: function(blogs, error) {
		console.log(error);
	}
});
Load the website on your local server again, and check your console in your developer tools, you should be able to see this:
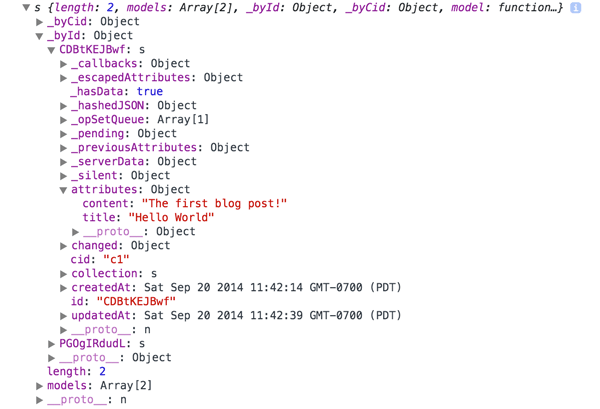
Now you have the data!
Display Data on the Page
Before we display the blog data on the page, we need to prepare an HTML template for that.
Step 1: Clean Up HTML
Clean up everything within .blog-main and replace that with a simple container:
<div class="col-sm-8 blog-main">
	<div class="main-container"></div>
</div>
Then, if you take a look at the original blog template, you will find the HTML structure of one single post can be simplified like this:
<div class="blog-post">
    <h2 class="blog-post-title"><a href="#">A title</a></h2>
	<p class="blog-post-meta">At time by an author</p>
	<div>Some content</div>
</div>
All we want is to replace those placeholder text with the data of each blog we have on Parse.com.
Step 2: Prepare Blog Template
To do that, we first need to change the HTML to a template, which takes a data object and change it a string of HTML.
We want the template to take an array of blogs:
[{
    title: 'Hello World',
	content: 'The first blog post!'
}, {
	title: 'Second Blog',
	content: '<p>You can put HTML in content, too.</p>'
}, ...]
And render it as HTML like this:
<div class="blog-post">
    <h2 class="blog-post-title"><a href="#">Hello World</a></h2>
	<p class="blog-post-meta">At time by an author</p>
	<div>The first blog post!</div>
</div>
<div class="blog-post">
	<h2 class="blog-post-title"><a href="#">Second Blog</a></h2>
	<p class="blog-post-meta">At time by an author</p>
	<div><p>You can put HTML in content, too.</p></div>
</div>
I will show you how to use handlebars.js to do that in this tutorial, but you can also use underscore.js, mustache, or other templates you prefer.
In order to use handlebars.js, let's first add it to the index.html under parse.js:
<!-- Handlebars.js -->
<script src="//cdnjs.cloudflare.com/ajax/libs/handlebars.js/2.0.0/handlebars.min.js"></script>
Then, let's take the cleaned up HTML of a single blog post and put it in a special <script> tag for handlebars just above the <script> tags for JavaScript files. Let's also give it the id of #blogs-tpl. This way, handlebars would know that it's a template, and you would have a way to refer to it:
<script id="blogs-tpl" type="text/x-handlebars-template">
    <div class="blog-post">
		<h2 class="blog-post-title"><a href="#">A title</a></h2>
		<p class="blog-post-meta">At time by an author</p>
		<div>Some content</div>
	</div>
</script>
Next, to let handlebars know that where to put the title and content value, you need to change "A title" to {{title}} and "Some content" to {{{content}}}. Handlebars.js identifies the content within "double-stash" {{}} as variables.
<script id="blogs-tpl" type="text/x-handlebars-template">
    <div class="blog-post">
		<h2 class="blog-post-title"><a href="#">{{title}}</a></h2>
		<p class="blog-post-meta">At time by an author</p>
		<div>{{{content}}}</div>
	</div>
</script>
Notice that for content, we use {{{}}} instead of just {{}}. That's because handlebars.js HTML-escapes values by default. Using "triple-stash" {{{}}} keeps all the HTML syntax in the content.
The final change you need to make to the #blogs-tpl is to wrap the blog template within {{#each blog}} {{/each}}, so it takes in an array of objects and render them one by one:
<script id="blogs-tpl" type="text/x-handlebars-template">
    {{#each blog}}
	<div class="blog-post">
		<h2 class="blog-post-title"><a href="#">{{title}}</a></h2>
		<p class="blog-post-meta">At time by an author</p>
		<div>{{{content}}}</div>
	</div>
	{{/each}}
</script>
Step 3: Render Blogs
Now that we have a template, let's go back to blog.js and render those blogs on the page.
To do that, you will be creating a view for the blog collection. The concept of a view is from the MVC (model–view–controller) architectural pattern, and Parse follows that pattern. I will not dive into MVC here. Just know that a view instance for a blog collection generates HTML for it and handles all its events. And a View class is the abstract template for that instance.
It can be confusing for now, but it would be clearer as we write the code. Let's write a BlogsView class:
var BlogsView =  Parse.View.extend({
    template: Handlebars.compile($('#blogs-tpl').html()),
	render: function(){
		var collection = { blog: this.collection.toJSON() };
		this.$el.html(this.template(collection));
	}
});
Like how we extended Blog class from Parse.Object and Blogs class from Parse.Collection, you can simply extend a new View class from Parse.View so it has all the predefined values and functions from Parse.
Here, the template variable get the template we prepared before. Then, the render() function get the data in this.collection, convert it to JSON format, render it with the handlebars template, and assign it to this.$el.
Next, let's change the success callback of blogs.fetch() to create a new instance of BlogsView, render that new instance, and put it in the $('.main-container') on the page.
success: function(blogs) {
    var blogsView = new BlogsView({ collection: blogs });
	blogsView.render();
	$('.main-container').html(blogsView.el);
}
Notice when you create a new instance of BlogsView, you pass in blogs, the blogs data you get from Parse server, that value becomes this.collection for the render() function. And when you put the HTML in $('.main-container'), you use the value of blogsView.el, which was the content of this.$el, created by the render() function. (Here blogsView.$el = $(blogsView.el)) That's how the View class and view instance works.
Now let's refresh the page: http://localhost/blog/
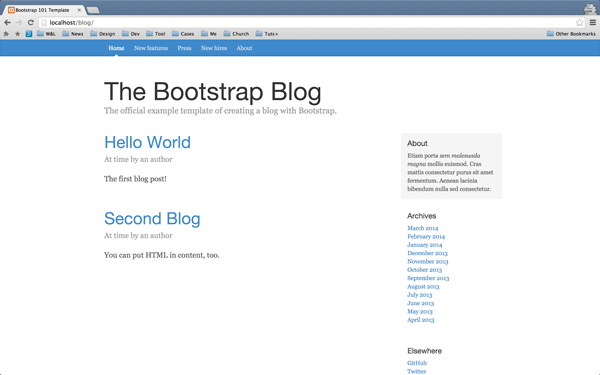
And it's working! Now you can just push it to your GitHub Page and have a working dynamic content site! If you take some time to change the blog template and modify the code a little bit, you can easily create portfolios and other content websites.
Conclusion
Today, you've created your first class on Parse.com. You also learned how to add content in that class on Parse.com and how to render it on your website. There could be quite a few new concepts for you, but I'm sure you will get familiar with those very soon.
In the next session, we will start building the admin page for the blog system. You will create your second class - the User class. You will also learn how to handle user login, and create two new views: login view and welcome view. So stay tuned, lots of good skills are coming your way.
I think you guys could have lots of fun with what you've learned in this session. Let me know if this tutorial helped you create anything. And as always, check the source file if you got stuck and leave a comment if you meet any difficulties following along.

Comments