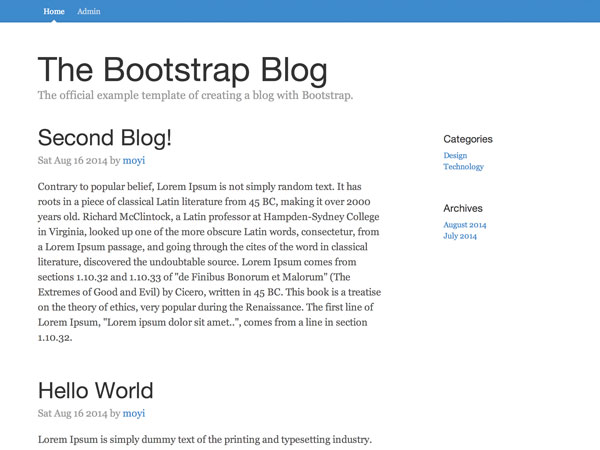
In the last session, you learned how to add data on Parse.com and render it on your website. You got familiar with the concept of objects, collections, and views, and created your first class. From this session and moving forward, you will be creating the admin panel of the blog system.
And it all starts with creating a User class and enabling login.
1. User Class
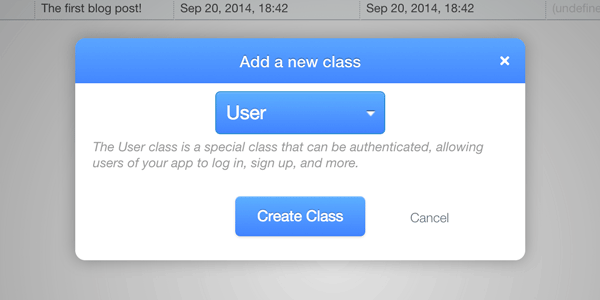
Step 1: Add a User Class
Parse.com made it extremely easy to add a new User class. Just click "Add Class" and choose "User" to create it.
Add a new row for yourself:

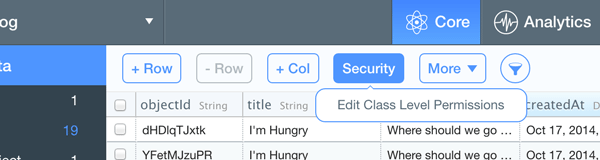
Step 2: Add Class-Level Access Controls
Now that you have a user, we can make the application more secure by setting some class-level access permissions.
Go to your table for blog posts and click on "Security":
Change the "Add Fields" permission from public to only yourself:
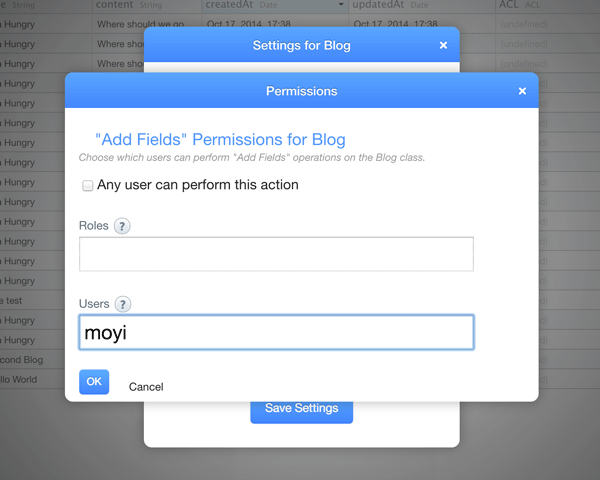
This will prevent others from adding new fields to the table.
Similarly, go to the User table and limit the "Add Fields" permission to yourself too.
You can set the rest of the class-level permissions according to your needs, but we will leave it for now.
2. Prepare an Admin Page
Step 1: Clean Up the Navigation
First things first, let's clean up the navigation bar of the HTML template a little bit to make room for the new admin page. Change the <nav> element to have only two links: Home and Admin:
<nav class="blog-nav">
    <a class="blog-nav-item active" href="index.html">Home</a>
    <a class="blog-nav-item" href="admin.html">Admin</a>
</nav>
Step 2: Prepare admin.html and Its CSS
Then, duplicate index.html and rename it admin.html, and duplicate blog.js and rename it admin.js. (For those who are familiar with the concept of a router and hate duplicated code, please bear with me for a while. I promise you will eventually learn how to use a router and clean stuff up!)
In admin.html, apply the .active class to the correct tab:
<nav class="blog-nav">
    <a class="blog-nav-item" href="index.html">Home</a>
    <a class="blog-nav-item active" href="admin.html">Admin</a>
</nav>
And link to admin.js instead of blog.js:
<script src="js/admin.js"></script>
Make sure everything's still working well, and we can now move on to quickly throw together some HTML for a login page.
Same old trick, go to http://getbootstrap.com/examples/signin, and copy the HTML of .form-signin into .main-container.
<div class="main-container">
	<form class="form-signin" role="form">
		<h2 class="form-signin-heading">Please sign in</h2>
		<input type="email" class="form-control" placeholder="Email address" required="" autofocus="">
		<input type="password" class="form-control" placeholder="Password" required="">
		<div class="checkbox">
			<label>
				<input type="checkbox" value="remember-me"> Remember me
			</label>
		</div>
		<button class="btn btn-lg btn-primary btn-block" type="submit">Sign in</button>
	</form>
</div>
Get the style in signin.css, and copy it into our blog.css, except for the style of body:
.form-signin {
    max-width: 330px;
	padding: 15px;
	margin: 0 auto;
}
.form-signin .form-signin-heading,
.form-signin .checkbox {
	margin-bottom: 10px;
}
.form-signin .checkbox {
	font-weight: normal;
}
.form-signin .form-control {
	position: relative;
	height: auto;
	-webkit-box-sizing: border-box;
	-moz-box-sizing: border-box;
	box-sizing: border-box;
	padding: 10px;
	font-size: 16px;
}
.form-signin .form-control:focus {
	z-index: 2;
}
.form-signin input[type="email"] {
	margin-bottom: -1px;
	border-bottom-right-radius: 0;
	border-bottom-left-radius: 0;
}
.form-signin input[type="password"] {
	margin-bottom: 10px;
	border-top-left-radius: 0;
	border-top-right-radius: 0;
}
Step 3: Clean Up admin.js
Finally, get rid of everything in admin.js below Parse.initialize():
$(function() {

    Parse.$ = jQuery;

    // Replace this line with the one on your Quickstart Guide Page
    Parse.initialize("HC87tn6aA7c3sYx9X0vwwLVXeqHDRMYYmrUBK5zv", "3piNGGnRMhvWo8u9pKD9TDc1MJlWhlvK78Vr3fHo");

});
Now refresh the page:
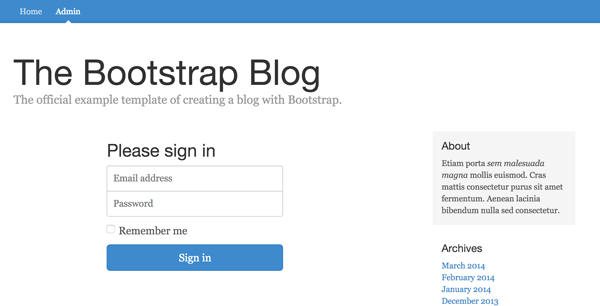
Looking good!
Step 4: Tweaking the Login Form
Some final tweaks to the page: we will be using username to log in, so change the email field to a text field, and add the name attribute to both input fields:
<input type="text" name="username" class="form-control" placeholder="Username" required="" autofocus="">
<input type="password" name="password" class="form-control" placeholder="Password" required="">
Change the CSS selector from email to text accordingly:
.form-signin input[type="text"] {
    margin-bottom: -1px;
    border-bottom-right-radius: 0;
    border-bottom-left-radius: 0;
}
And get rid of the "Remember me" checkbox, because we are not planning to get into that in this tutorial.
3. Enable Login
Now we are finally ready to enable login. Let's write a bare-bones JavaScript function to log users in when they click on Submit in admin.js:
$('.form-signin').on('submit', function(e) {

    // Prevent Default Submit Event
    e.preventDefault();

    // Get data from the form and put them into variables
    var data = $(this).serializeArray(),
        username = data[0].value,
        password = data[1].value;

    // Call Parse Login function with those variables
    Parse.User.logIn(username, password, {
        // If the username and password matches
        success: function(user) {
            alert('Welcome!');
        },
        // If there is an error
        error: function(user, error) {
            console.log(error);
        }
    });

});
Let's give it a try...
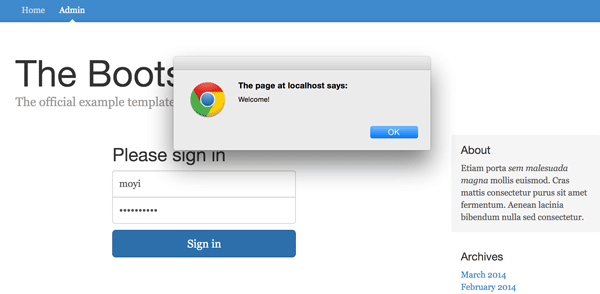
As simple as that: you are now logged in!
4. Login View and Welcome View
After you've logged in, you certainly don't want to just see an alert message and stay on the login page. We need to make a welcome screen for the logged-in users.
To do that gracefully, we will make both a login and welcome page in Views and serve them with Parse.js.
Step 1: Make Templates
Just as we did with the blog templates, let's take out everything in .main-container and make templates for the login page and the welcome page:
<script id="login-tpl" type="text/x-handlebars-template">
    <form class="form-signin" role="form">
        <h2 class="form-signin-heading">Please sign in</h2>
        <input type="text" name="username" class="form-control" placeholder="Username" required="" autofocus="">
        <input type="password" name="password" class="form-control" placeholder="Password" required="">
        <button class="btn btn-lg btn-primary btn-block" type="submit">Sign in</button>
    </form>
</script>

<script id="welcome-tpl" type="text/x-handlebars-template">
    <h2>Welcome, {{username}}!</h2>
</script>
We can keep the welcome view very simple for now. It will just take the user object and display the username.
Step 2: Define Views
Let's define those views in admin.js. Notice that because LoginView doesn't need to render any object, the render function just puts the template HTML to the DOM.
var LoginView = Parse.View.extend({
    	template: Handlebars.compile($('#login-tpl').html()),
		render: function(){
			this.$el.html(this.template());
		}
	}),
	WelcomeView = Parse.View.extend({
		template: Handlebars.compile($('#welcome-tpl').html()),
		render: function(){
			var attributes = this.model.toJSON();
			this.$el.html(this.template(attributes));
		}
	});
Step 3: Add Login Event to the View
Remember the simple Login function we have? Now you can make that an event under LoginView:
var LoginView = Parse.View.extend({
    template: Handlebars.compile($('#login-tpl').html()),
    events: {
        'submit .form-signin': 'login'
    },
    login: function(e) {

        // Prevent Default Submit Event
        e.preventDefault();

        // Get data from the form and put them into variables
        var data = $(e.target).serializeArray(),
            username = data[0].value,
            password = data[1].value;

        // Call Parse Login function with those variables
        Parse.User.logIn(username, password, {
            // If the username and password matches
            success: function(user) {
                alert('Welcome!');
            },
            // If there is an error
            error: function(user, error) {
                console.log(error);
            }
        });
    },
        render: function(){
        this.$el.html(this.template());
    }
})
Notice that we changed $(this).serializeArray() to $(e.target).serializeArray(). That's because in this context, this will point to LoginView.
Step 4: Render Login View on the Page
Before we move on to render the welcome view, let's first render a login view on the actual page and see if it works:
var loginView = new LoginView();
loginView.render();
$('.main-container').html(loginView.el);
Run it again, and it works just like before.
Step 5: Render Welcome View in the Success Callback
Now, let's change the success callback function of login() to render a welcome view using the returned user object.
success: function(user) {
    var welcomeView = new WelcomeView({ model: user });
    welcomeView.render();
    $('.main-container').html(welcomeView.el);
}
Test again:
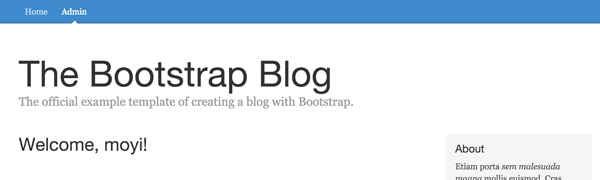
And yay, it surely works!
Conclusion
In this session, you've created your second Class: the User Class. You've also created two important views: LoginView and WelcomeView. You also enabled user login on your website, and now you can send a personal welcome message to your users.
This is just the starting point of building a blog admin panel. Stay tuned, and in the next tutorial we will create a new view and enable the "Add a new blog" function.

Comments