
In our last session, we built a view for managing existing blog posts, and we went through the idea of a router. Now, it's time to build out the editing function.
1. Create and Render EditBlogView
To build an edit function, let's first make an EditBlogView. Again, this should be very easy for you now. We've walked a long way together.
Step 1: HTML Template
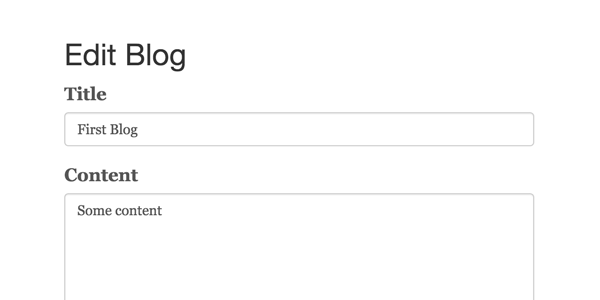
This part is very similar to the AddBlogView template. The only real difference is that because we are editing a blog, we need to pass in the existing title and content.
<script type="text/template" id="edit-tpl">
    <h2>Edit Blog</h2>
    <form class="form-edit" role="form">
      <div class="form-group">
        <label for="title">Title</label>
        <input name="title" type="text" class="form-control" id="title" value="{{title}}"></input>
      </div>
      <div class="form-group">
        <label for="content">Content</label>
        <textarea name="content" class="form-control" rows="20">{{{content}}}</textarea>
      </div>
      <button class="btn btn-lg btn-primary btn-block" type="submit">Submit</button>
    </form>
</script>
Step 2: EditBlogView
And then the EditBlogView. Again, this is very similar to AddBlogView. For the purpose of this tutorial, we are focusing on how to make it work first. In the next session, we will do all the cleaning up work, and remove duplicated code. Bear with me for now.
EditBlogView = Parse.View.extend({
    template: Handlebars.compile($('#edit-tpl').html()),
	events: {
		'submit .form-edit': 'submit'
	},
	submit: function(e) {
		e.preventDefault();
		// We will write the submit function later
	},
	render: function(){
		var attributes = this.model.toJSON();
		this.$el.html(this.template(attributes));
	}
})
This time, we are not going to first check and make sure this part of the code works—ideally you've done this enough times that you should feel comfortable moving on. Always check the previous sessions or leave me a comment if you feel stuck.
2. Link to the /edit Page With Router
Now, let's make sure /edit/ will link to and render the correct edit view.
Step 1: /edit/:id
Last time, we already did part of the preparation. We have the URL pattern for the /edit page in BlogRouter.routes:
routes: {
    'admin': 'admin',
	'login': 'login',
	'add': 'add',
	'edit/:url': 'edit'
}
As you can see, the URL pattern is already pointing to the BlogRouter.edit() function, in which we have a little placeholder function that takes in the url parameter input:
edit: function(url) {}
This means that if you visit http://localhost/your-directory/edit/what-ever-you-put-here, the BlogRouter.edit() function will be triggered, and the variable url within that function will get the value of what-ever-you-put-here.
So now, what's the easiest thing to put after /edit that can help us find the exact blog post that we want to edit? It should be id, right? Let's change the code a little bit so it's clear that we will be putting id there.
routes: {
    'admin': 'admin',
	'login': 'login',
	'add': 'add',
	'edit/:id': 'edit'
},

...

edit: function(id) {}
Step 2: Get a Blog by Its Id
Now that we've got the id from the URL, we need to find that specific blog with this id. The way to do that in Parse.js is using a query:
edit: function(id) {

	// First, you need to define a new query and tell it which table should it go for
	var query = new Parse.Query(Blog);

	// If you are looking for object by their id,
	// just pass the id as the first parameter in .get() function
	query.get(id, {
		success: function(blog) {
			// If the blog was retrieved successfully.
		},
		error: function(blog, error) {
			// If the blog was not retrieved successfully.
		}
	});
}
If you want to know more about Parse queries, check their documentation.
Step 3: Render editBlogView
Let's continue to finish the success and error functions in the query callback.
For the success function, we want to render an editBlogView using that blog post as the model:
success: function(blog) {
    var editBlogView = new EditBlogView({ model: blog });
	editBlogView.render();
	$('.main-container').html(editBlogView.el);
}
And for the error function, let's just log the error as usual:
error: function(blog, error) {
	console.log(error);
}
Step 4: Link to /edit Page
Moving on, let's update the edit links in #blogs-admin-tpl so they actually link to /edit pages. Let's also give it a unique class because we will be referring to it:
<a class="app-link app-edit" href="edit/{{objectId}}">Edit</a> |
And to make sure the router gets the URL change (because it's not static yet), let's write our own link function to replace the default one in BlogAdminView.
First, add an event for clicking .app-edit. That's why we needed a class before!
events: {
	'click .app-edit': 'edit'
}
Then within the edit() function, prevent the default action, get the href value, and use blogRouter.navigate() to trigger it.
edit: function(e){
    e.preventDefault();
	var href = $(e.target).attr('href');
	blogRouter.navigate(href, { trigger: true });
}
Now we can test it out:
The testing could be a little hard at this point because the router is not fully set up yet. Just go to http://localhost/your-directory/admin.html as a starting point every time you refresh. We will take care of this in the next session.
3. Submit Blog Edit
We are so close to getting this page functioning. We just need to make the EditBlogView.submit() function work.
Step 1: Blog.update()
Just as we created the Blog.create() function for adding a new blog, we now need to create a Blog.update() function to save our edits.
update: function(title, content) {
this.set({
'title': title,
'content': content
}).save(null, {
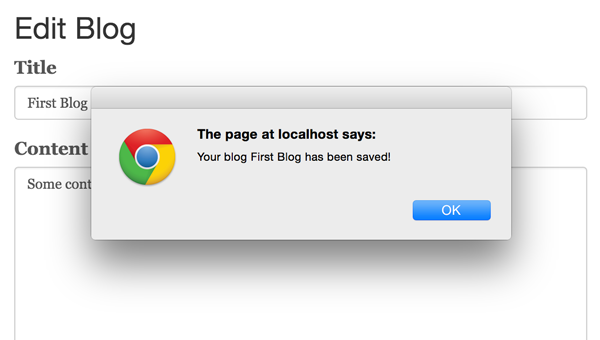
success: function(blog) {
alert('Your blog ' + blog.get('title') + ' has been saved!');
},
error: function(blog, error) {
console.log(blog);
console.log(error);
}
});
}
As you can see, it's very similar to the .create() function, but instead of creating and saving a new blog, you set the value on the current object first, and then save it.
Step 2: EditBlogView.submit()
Now let's get the data from the form in EditBlogView and call the .submit() function on the model (which refers to the current blog post rendered in the edit view). Again, very similar to the one in AddBlogView:
submit: function(e) {
    e.preventDefault();
	var data = $(e.target).serializeArray();
	this.model.update(data[0].value, $('textarea').val());
}
Give it a try, and it should be working!
If you've followed the tutorial to this point, well done indeed.
4. Bonus: Readable URL
If you don't like to see the id in the url, and want to have it be like /edit/your-blog-title/, you can do it pretty easily, too.
Just add a new field url to your blog posts, and add it in the .create() function:
'url': title.toLowerCase()
            .replace(/[^\w ]+/g,'')
	        .replace(/ +/g,'-')
And in BlogRouter.edit(), query blog posts by their url value:
query.equalTo("url", url).find().then(function(blogs) {
    // This query will return all the qualifying blogs in an array
	// So just get the first one
	// If you want to learn more, check out Parse.js's doc
	var blog = blogs[0];
	...
});
I won't be giving all the code here, because I think you can piece it together now!
Conclusion
Now everything should be coming together for you. You've made a ton of progress so far. In this session, we created the whole editing feature for the blog: from preparing the page, to setting up the router, and then to updating the database.
Next time, we will do a big cleanup in our codebase. Now we have a lot of overlapping code here and there, because we just want to make sure we can build the functions to work. Next time, you will merge index.html and admin.html, .create() and .update(), AddBlogView and EditBlogView. You will also learn to build a solid application structure with Parse.js.
What else? We will also revisit the router, so the URLs can be static (which means you can bookmark it, refresh the page, or send it to your friend). Lots of good stuff to come, so stay tuned!

Comments