Have you ever gotten excited by the idea of a web project, but found it miserable to make it run and work on a server? With Parse.js, everyone who understand the basics of HTML, CSS, and JavaScript can create dynamic websites and working web apps with ease.
In this tutorial, I will take you through the entire process of creating a blogging system with Parse.js from scratch. You will utilize all the bootstrapping tools, and really practice the idea of rapid prototyping, refactoring, and MVC framework. By the end of this series, you should be able to create any CMS site by yourself.
Though trying to be as detailed as possible, this tutorial does assume basic knowledge about HTML, CSS, JavaScript / jQuery, and GitHub. If you are not familiar with the aforementioned tools, there are lots of great tutorials here on Tuts+ that you can check out.
Setup the Development Environment
Let's get started by setting up our development environment. You will need a local testing server, a web server, a data server, and version control in place. As mentioned before, this tutorial requires no previous knowledge about the backend. I will take you through step by step. Feel free to skip this part if you already have those in place.
Step 1: Install XAMPP
After trying several different solutions, XAMPP is still the easiest way to setup a local test server I found. Therefore, I will use XAMPP as the local testing server in this tutorial.
If you haven't already, start by downloading XAMPP here. Choose the one that suits your system and install it.
I use Mac here so I will use that as the example from now on. If you use other operating system, the process should be pretty similar.
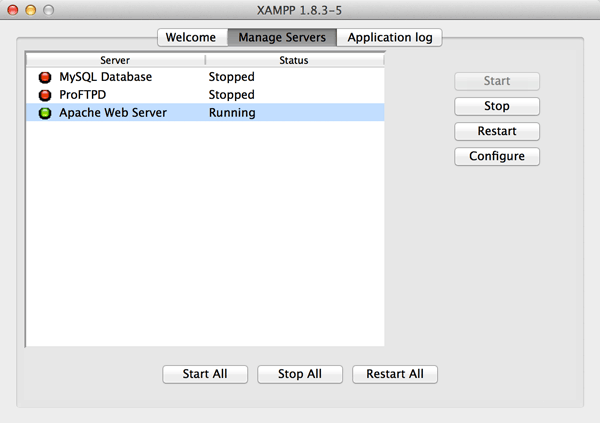
After you install it, Launch XAMPP, and start "Apache Web Server".
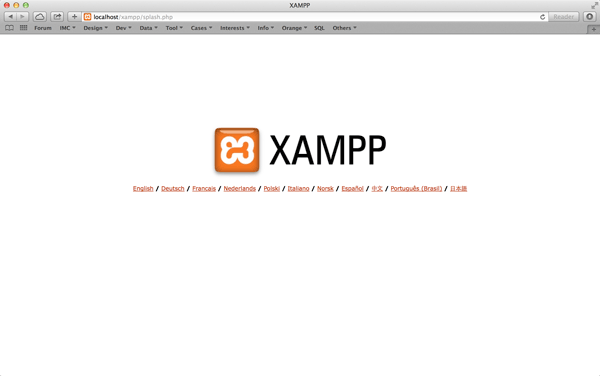
Now if you visit http://localhost/ in your browser, you should see this default XAMPP page. That means it's up and running!
Step 2: Create a New GitHub Page
Moving on, let's create a new git repo at GitHub. I call it blog just so it's short and clear to me. To make it work as a web sever, we need to set it as a GitHub Page.
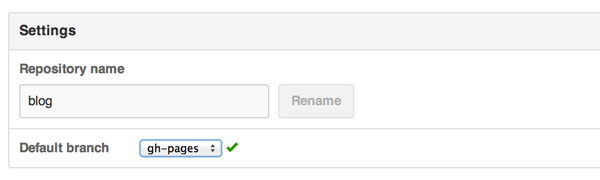
First, add a new branch, gh-pages.
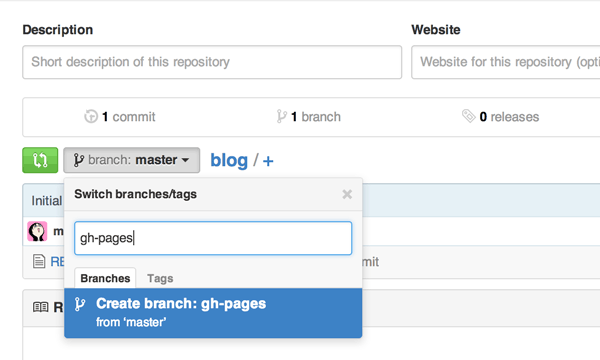
Then go to settings, set gh-pages as the default branch.
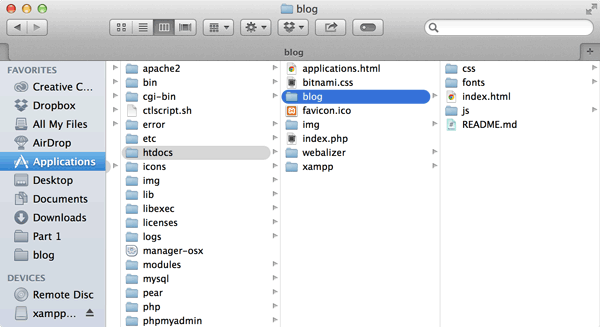
Great. Now let's get into the command lines, and clone that branch on GitHub into XAMPP's htdocs folder.
$ cd /Applications/XAMPP/xamppfiles/htdocs
$ git clone https://your-git-HTTPS-clone-URL-here
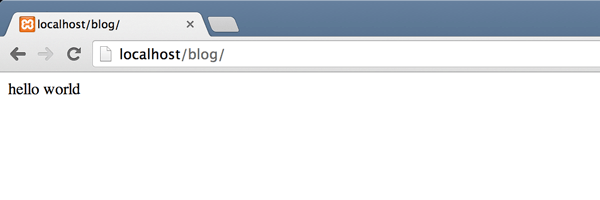
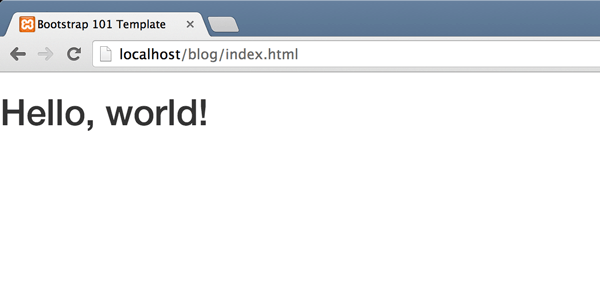
Navigate into the Git repo folder you just cloned, create a simple index.html file, and just write Hello World in it.
$ cd blog
$ echo 'hello world' > index.html
Check your localhost and make sure it's working.
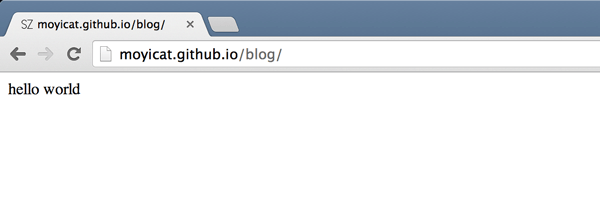
Great. Then let's push it to GitHub.
$ git add index.html
$ git commit -am "Add index.html"
$ git push
Go to http://yourusername.github.io/reponame, give it a few minutes, and you will see your index.html is now live :)
Step 3: Get Your Account on Parse.com
It's very easy to host static content on GitHub Page, but when it comes to the backend, things can get tricky with GitHub Page. Luckily, we now have Parse.js. We can use Parse.com as our data server and communicate with it JavaScript. In that way, we only need to host HTML, CSS, and JavaScript files on GitHub.
Go ahead and register at Parse.com if you haven't done so.
Now, you have your data server in the cloud.
Bootstrap Static HTML Template
Now let's prepare a static version of the blog system we are going to make. To show you how fast you can bootstrap through this, I will just utilize the example blog template from Bootstrap. Again, if you are already pretty familiar with Bootstrap or you have a static website designed already, feel free to do it your way. If you are new to Bootstrap, follow along.
Step 1: Download Bootstrap
First, download Bootstrap (currently we are using version 3.2.0 here), unzip it, and put its content in your XAMPP/xamppfiles/htdocs/blog folder.
Step 2: Start With Bootstrap's Basic Template
Then, edit index.html to have the basic template of Bootstrap. It provides a basic HTML structure with links to bootstrap.min.css, bootstrap.min.js, and jquery.min.js. Starting with a template like this will save you a lot of time.
<!DOCTYPE html>
<html lang="en">
  <head>
    <meta charset="utf-8">
    <meta http-equiv="X-UA-Compatible" content="IE=edge">
    <meta name="viewport" content="width=device-width, initial-scale=1">
    <title>Bootstrap 101 Template</title>

    <!-- Bootstrap -->
    <link href="css/bootstrap.min.css" rel="stylesheet">

    <!-- HTML5 Shim and Respond.js IE8 support of HTML5 elements and media queries -->
    <!-- WARNING: Respond.js doesn't work if you view the page via file:// -->
    <!--[if lt IE 9]>
      <script src="https://oss.maxcdn.com/html5shiv/3.7.2/html5shiv.min.js"></script>
      <script src="https://oss.maxcdn.com/respond/1.4.2/respond.min.js"></script>
    <![endif]-->
  </head>
  <body>
    <h1>Hello, world!</h1>

    <!-- jQuery (necessary for Bootstrap's JavaScript plugins) -->
    <script src="https://ajax.googleapis.com/ajax/libs/jquery/1.11.1/jquery.min.js"></script>
    <!-- Include all compiled plugins (below), or include individual files as needed -->
    <script src="js/bootstrap.min.js"></script>
  </body>
</html>
Refresh and make sure it's working.
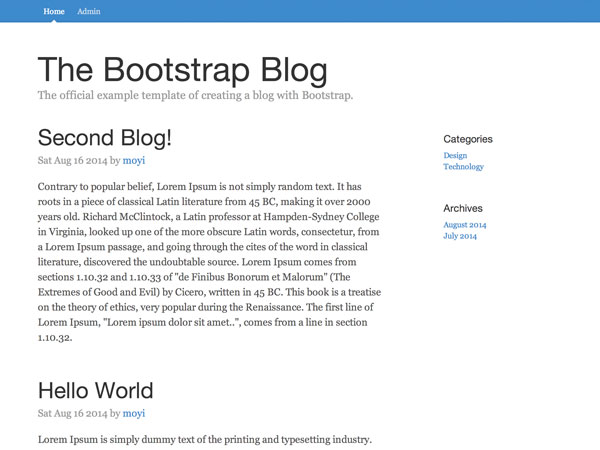
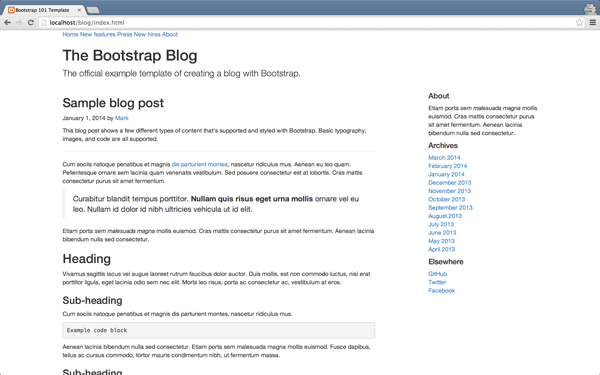
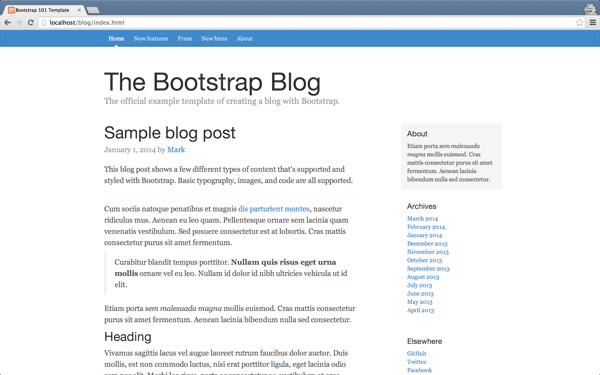
Step 3: Copy the Example Blog Template Over
Now, move on an open the example blog from Bootstrap: http://getbootstrap.com/examples/blog/
On the webpage, right click and choose "View Source". We want to copy all the content in <body> over to our index.html and replace the <h1>Hello, world!</h1> in the basic template.
Don't copy the <script> tags since we already have all the Javascript files we need.
You should now have this page:
Step 4: Copy the Example Blog Style and Add It in index.html
Notice the styles are not right yet. That's because we need blog.css, the blog specific stylesheet built on top of bootstrap basic styles.
Go ahead and find it from the source code: http://getbootstrap.com/examples/blog/blog.css
Copy that file, and put in your blog/css folder.
Link it in index.html below bootstrap.min.css:
<!-- Bootstrap -->
<link href="css/bootstrap.min.css" rel="stylesheet">
<link href="css/blog.css" rel="stylesheet">
And now the styles should be right, and we have our static template ready.
Setup and Connect to the Parse Database
To make our static blog dynamic, we need to first setup it's own database on Parse.com.
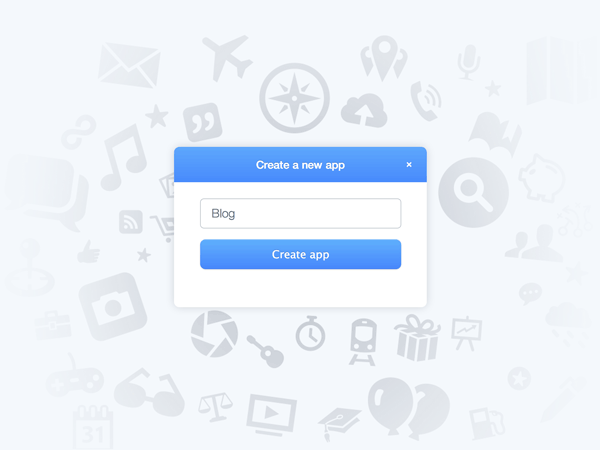
Step 1: Create a New App
Go to Parse.com dashboard, and click "Create New App".
Let's call it Blog for now.
Once it's created, go to "Quickstart Guide - Data - Web - Existing project"
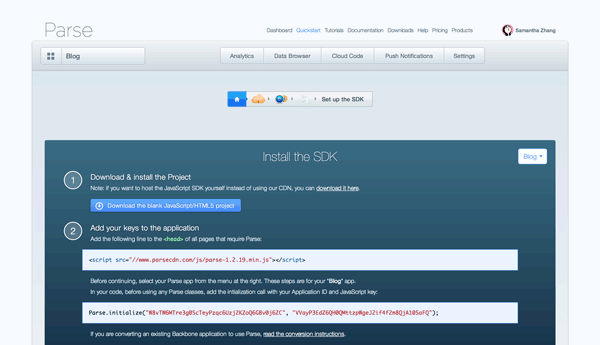
Step 2: Add Parse.js in index.html
Following the Quickstart Guide, add Parse.js to your index.html first. But instead of putting it in <head>, you can put it just below jQuery:
<!-- jQuery (necessary for Bootstrap's JavaScript plugins) -->
<script src="https://ajax.googleapis.com/ajax/libs/jquery/1.11.1/jquery.min.js"></script>
<!-- Parse.js -->
<script src="//www.parsecdn.com/js/parse-1.2.19.min.js"></script>
Step 3: Test Parse SDK
Moving on, create a blog.js under your blog/js folder with your Application ID and JavaScript key, and some test code. They all can be found in your Quickstart Guide:
$(function() {

    Parse.$ = jQuery;

	// Replace this line with the one on your Quickstart Guide Page
	Parse.initialize("W8vTW6MTre3g0ScTeyPzqc6Uzj2KZoQ6GBv0j6ZC", "VVayP3EdZ6QH0QMttzpWgeJ2if4f2m8QjA10SaFQ");

	var TestObject = Parse.Object.extend("TestObject");
	var testObject = new TestObject();
	testObject.save({foo: "bar"}).then(function(object) {
	  alert("yay! it worked");
	});

});
Save it, and link this JavaScript file in your index.html, below bootstrap.min.js.
<!-- Include all compiled plugins (below), or include individual files as needed -->
<script src="js/bootstrap.min.js"></script>
<script src="js/blog.js"></script>
Now, refresh index.html on your localhost again, and you should be able to see this alert message:
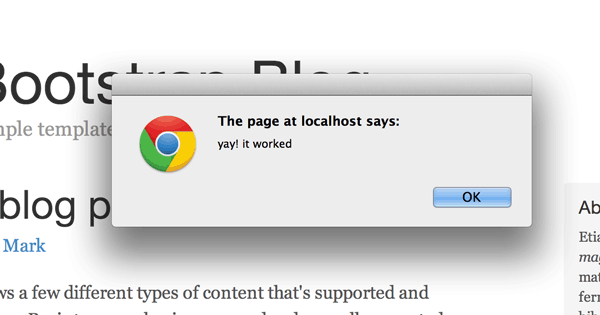
That means now you are connected to your Blog database in the cloud :)
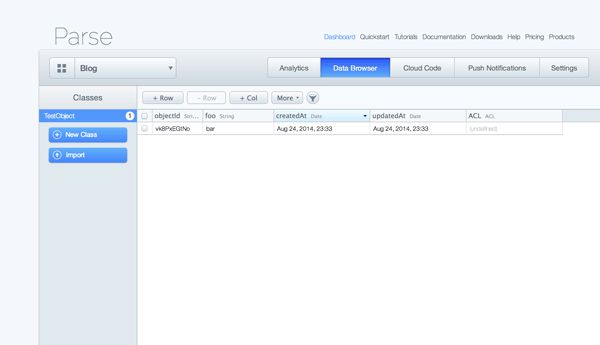
If you check your "Data Browser" on Parse.com now, you will see the TestObject you just created.
Conclusion
Today, we have set up all the servers we need: XAMPP as our local testing server, GitHub Pages as our web server, and Parse.com as our data server. We also have a basic blog template in place, and it's now connected to the database.
In the next session, I will teach you how to add blog posts from Parse's data browser, retrieve it with JavaScript, and render it on the front end.
Check the source file if you got stuck. And please leave a comment if you meet any difficulties following along.

Comments