Sparks is a new package-management system for CodeIgniter that extends the core with support for gem-like sparks.
This tutorial interweaves an entry-level overview of the architecture and usage of the sparks system with the creation of dovecote—a simple spark for managing RSS data.
Introduction
Packages are blocks of recyclable code that can make developers’ lives a whole lot easier.
CodeIgniter’s developers have long salivated over package managers like gems and npm, systems that empower their respective communities with tools and a central repository for developing, recycling, and sharing useful application components with each other. Now, the wait is over. Thanks to a new system—sparks—CodeIgniter developers can finally rejoice, as a growing package management system is finally their own.
Overview
If you haven’t worked with them before, just think of packages as blocks of recyclable code that can make developers’ lives a whole lot easier. Maybe you need an interface to an storage bucket in Amazon’s cloud? Skip the late nights pouring over S3 documentation and just grab the spark.
For its part, the sparks system consists of three parts:
- A central repository (getsparks.org) for storing and sharing sparks
- A utility for managing the sparks installed in a given CodeIgniter app
- The sparks themselves
For the purposes of this tutorial, we’ll introduce the first two but focus on spark development and some basic considerations in developing a spark. Sound good? Let’s see how it’s done.
Step 1: Installing Sparks
It’s official: sparks is slated for integration into CodeIgniter’s core, possibly as soon as the upcoming 2.1 release. But since it isn’t part of a default installation—yet—you’ll need to set the system up manually.
If you’re on OSX or Linux, or if you have PHP’s command-line interface installed on Windows, installation is as simple as installing a clean copy of CodeIgniter and issuing the following in the installation directory:
$ php -r "$(curl -fsSL http://getsparks.org/go-sparks)"
If all went well, you should see something like this:
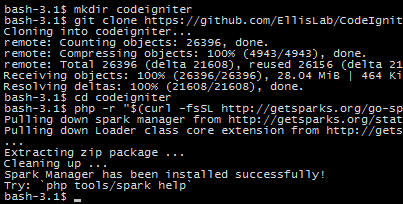
If for some reason that didn’t work, or if you’re on Windows and haven’t added PHP to your command path, you can also install sparks manually. It’s a little more work, but the result is the same:
- Adding a directory named
sparksin the root of your codeigniter directory - Adding a custom Loader Class to
application/core/MY_Loader.php - (optional) Downloading and extracting the sparks command line utility into your codeigniter directory
Your CodeIgniter installation should now be patched to support sparks.
Step 2: Getting Started
In medieval Europe, every manor house included a small outbuilding for pigeons to nest called a dovecote. Since we’ll be building a spark that involves both tweeting and feed, the name is appropriate enough. But it also meets the only requirement on naming: to be included in the repository at GetSparks.org,
GetSparks project names must be unique
Outlining the Spark
Before we can code, we’ll need to layout a project. In the sparks directory in the root of your CodeIgniter installation (create it, if it doesn’t exist), add a new folder to hold the spark:
/sparks/dovecote
Convention dictates that sparks are organized by version, so we’ll need a subfolder to hold the first draft. 0.0.1 is a good place to start.
/sparks/dovecote/0.0.1
This folder is where all the action will take place. When the rest of the tutorial refers to our "spark directory", this is it.
The spark.info File
Things are looking pretty bare so far, but we’re ready to start filling them out. The first piece in the spark--and the only file technically required by the spark utility—is spark.info. Create a new file called spark.info in your spark directory, and add the following:
name: dovecote
version: 0.0.1
compatibility: 2.0.2
dependencies:
   Atomizer: 0.0.1
tags: ["twitter","api","social"]
These fields represent all the information the spark utility needs manage the version and dependencies of all the sparks in this CodeIgniter installation. The utility will look for five things, but only the first three are required:
-
name-- the unique spark id -
version-- current version -
compatibility-- minimum CodeIgniter version -
dependencies-- (optional) other sparks required by this spark -
tags-- (optional) tags that describe this spark
Even if you aren’t planning to use the spark utility yourself, it’s still polite to include a spark.info file with any spark you plan on distributing. One of the real advantages to managing sparks this way, rather than pasting them directly into the sparks directory, is that the spark manager can use the compatibility, dependency, and version information in each spark to ensure nice play with the current CodeIgniter installation—and each other. There’s another benefit, too, as we will see in a moment: sparks installed outside of the manager utility must have their dependencies installed manually.
Organizing the Spark
With the info file written, it’s time to give the spark some structure. Create four new folders in the spark directory:
- config
- helpers
- libraries
- views
If you’ve worked with CodeIgniter before, these are probably familiar names. CodeIgniter’s loader class treats sparks as packages, meaning that the contents of these directories are checked for any application components that can’t be found in the /application directory. For now, this applies to five types of resources:
- configs
- helpers
- libraries
- models
- views
Step 3: Writing the Spark
Before we begin coding, take a moment to ensure that your spark directory contains all the necessary pieces.

Everything in order? Let’s proceed.
Create a file in the newly-created config directory and name it dovecote.php. We’ll store a few basic options here to tell the spark where it can find RSS data:
<?php /** config/dovecote.php **/

// Username to retrieve tweets from:
$config[ 'twitter' ]    = 'getsparks';

// API endpoint to query for tweets:
$config[ 'twitterURL' ] = 'http://twitter.com/statuses/user_timeline/%s.rss';

// Feed carrying RSS data:
$config[ 'feedURL' ]    = 'http://feeds.bbci.co.uk/news/rss.xml';

?>
Not much to it—we’ve defined a twitter username (@getsparks) to grab tweets from, provided an API endpoint for Twitter's Timeline API, and added an additional URL to search for RSS stories.
Now the spark knows where data can be found, it’s time to go retrieve some feeds. To do this, we’ll need to create a library—call it dovecote.php—and save it in the libraries directory:
<?php /** libraries/dovecote.php **/
class dovecote {
protected $ci, $timeline;
public function __construct() {
$this->ci = &get_instance();
}
public function retrieve() {
// build twitter request URL
$twitterURL = sprintf( $this->option( 'twitterURL' ), $this->option( 'twitter' ) );
// get RSS Data
$tweets = $this->ci->atomizer->loadURL( $twitterURL );
$feed = $this->ci->atomizer->loadURL( $this->option( 'feedURL' ) );
// set channel information for new feed
$info = array(
'title' => 'Convolved feed'
);
// mix the two feeds together
$this->timeline = $feed->convolve( $tweets, $info );
return $this->timeline;
}
public function publish() {
header('content-type: application/rss+xml');
echo $this->timeline->save();
}
// retrieve an option ($key) from config files
protected function option( $key ) {
return $this->ci->config->item( $key );
}
}
?>
This library provides helper functions to retrieve options from our config file and publish an RSS feed, but the critical piece is retrieve(). This function grabs RSS data from the providers described in dovecote’s configuration file in several steps:
- First, the address of the Twitter RSS feed is generated. Config outlined a username (
twitter) and an endpoint (twitterURL); now, the two are combined usingsprintf. - Next, the RSS data in each feed are retrieved using the
loadURLfunction theatomizerlibrary. This function returns an "AtomizerFeed" object that provides some useful functions for manipulating RSS data. - Finally,
AtomizerFeed’sconvolveoperation is used to combine the two feeds’ items into a single feed, which is returned.
At this point, we’re almost ready to fire up dovecote in a live application. We just need to check to make sure that our application includes all of dovecote’s dependencies and that the spark itself will load correctly.
Step 4: Dependencies
When we wrote spark.info, recall the line where we described dovecote’s dependencies:
Dependencies:
   Atomizer: 0.0.1
This means that dovecote relies on another spark—Atomizer—to function. Once sparks are committed to the getsparks.org repository, the manager utility will download dependencies automatically. While we remain in local development, however, we’ll need to do this ourselves.
If you’re using the sparks manager, you can install Atomizer by navigating to your CodeIgniter directory and invoking the manager’s install function:
php tools/spark install -v0.0.2 atomizer
Note: If you’re on Windows, you will need to invoke php tools\spark install -v0.0.2 atomizer instead.
If you aren’t using the manager, or if the installation didn’t complete successfully, you can download Atomizer from Github and extract it into your application’s sparks directory next to the folder containing dovecote.
Step 5: Autoloading
Before dovecote will be available to other parts of the application, we’ll need to make sure that it will load correctly. Return to the config folder in your spark directory and paste the following into a new file called autoload.php.
<?php /** config/autoload.php **/

// load default configuration
$autoload['config'] = array( 'dovecote' );

// load dependency
$autoload['sparks'] = array( 'atomizer/0.0.2' );

// load library
$autoload['libraries'] = array( 'dovecote' );
?>
Whenever CodeIgniter loads a spark, it will attempt to load all the resources listed in autoload.php as well. This allows sparks authors to define the resources that users should have immediate access to whenever they load the spark. Because the dovecote library is specified here, for instance, we will have immediate access to the retrieve function as soon as the spark is loaded.
It’s worth mentioning that the resources described in autoload.php need not reside in the spark directory. As long as they’re located somewhere in CodeIgniter’s search path, the application should be able to find them. Notice atomizer is being loaded in the example above; it wouldn’t do much good to list a spark’s dependencies but be unable to load them!
Save the autoload file, and let’s load it all up. In the welcome controller in your main application (/application/controllers/welcome.php), add the following:
public function dovecote() {
    $this->load->spark( 'dovecote/0.0.1' );
    $this->dovecote->retrieve();
    $this->dovecote->publish();
}
Let’s walk through that:
- We ask CodeIgniter to load dovecote, knowing that all the resources requested in
config/autoload.phpwill be loaded as well - dovecote’s
retrievefunction is used to get copies of the RSS feeds described inconfig/dovecote.php - The combined timeline produced by
retrieveis served up as an RSS feed using dovecote’spublishfunction
See it in Action
Browse to welcome/dovecote in your browser, and you should be greeted with an RSS feed chronicling the tweets and articles that dovecote has collected.
Step 6: Building on the Spark
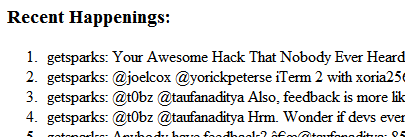
Let’s make dovecote a little more useful. First, we’ll create a basic view template to show the title of each article in our timeline:
<?php /** views/dovecote_timeline.php */ ?>

<h3>Recent Happenings:</h3>
<ol>
<?php foreach ($items as $item): ?>
    <li><?php echo $item->title; ?></li>
<?php endforeach; ?>
</ol>
Next, we’ll make the view accessible by providing a helper function that other parts of the application can use to render the timeline in HTML.
<?php /** helpers/dovecote_helper.php */
function dovecote_timeline() {
$ci = &get_instance();
$feed = $ci->dovecote->retrieve();
$data = array(
'items' => $feed->items()
);
$ci->load->view( 'dovecote_timeline', $data );
}
?>
The dovecote_timeline function and its eponymous view can now be used to render the timeline anywhere in our application. But in keeping with CodeIgniter’s only-what-you-need philosophy, we won’t make it automatically available via autoload.php. Instead, we’ll need to load the helper manually whenever it is needed. Return to your application’s welcome controller, and update the dovecote function to generate an HTML version of the feed:
public function dovecote() {
    $this->load->spark( 'dovecote/0.0.1' );
    $this->load->helper( 'dovecote' );

    $this->dovecote->retrieve();

    // call the helper function
    echo dovecote_timeline();
}
Refresh your browser, and you should now see a list of all the items in dovecote’s timeline.
Wrapping Up
Congratulations! You’re now the owner of a very simple spark, but there’s plenty more that can be done. Before sending dovecote out for action, you may consider writing additional functions. The details are up to you, but some useful features might include:
- caching of API responses
- views for beautifying the data retrieved
- data persistence to save older timeline items (check the feed license, first!)
This tutorial offers the barest outlines of what can be done with sparks and introduces the advantages that sparks can provide in minimizing repetition and speeding up development.
Working on a spark of your own? Having issues getting started out? Share a little more in the comments below and thank you so much for reading!

Comments