Introduction
In this tutorial, I will be showing you how to easily implement push notifications in your iOS app using a cloud-based, third-party back-end service. We will start by looking at the required steps for any iOS app to implement push notifications and then use back4app (based on the Parse platform) as our back-end service.
This tutorial requires that you are running at least Xcode 8 with the iOS 10 SDK. This is because we will be using the new UserNotifications framework to handle receiving notifications in the app. If you want to learn more about this framework, you can check out my tutorial covering it here:
You will also need a physical iOS device to run your app. This is because the iOS simulator does not support push notifications.
1. iOS App Setup
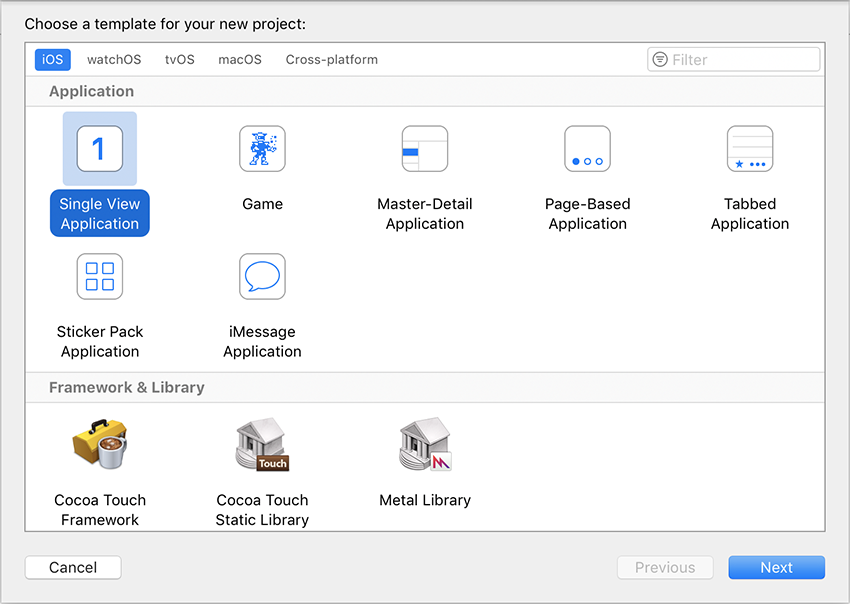
To begin, open up Xcode and create a new project based on the iOS > Application > Single View Application template:
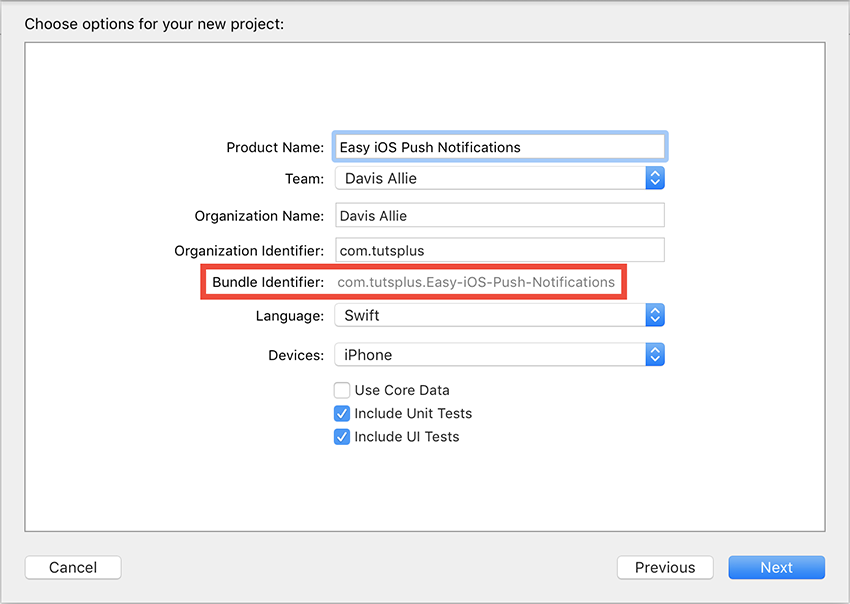
On the next screen, once you have filled in all of the information (you can use the same information as I have), make sure that you take note of the Bundle Identifier as we'll need this later on:
Once Xcode has created your project, open up your AppDelegate.swift file and add the following line of code at the top:
import UserNotifications
Next, replace the application(_:didFinishLaunchingWithOptions:) method with the following:
func application(_ application: UIApplication, didFinishLaunchingWithOptions launchOptions: [UIApplicationLaunchOptionsKey: Any]?) -> Bool {

    let center = UNUserNotificationCenter.current()
    let options: UNAuthorizationOptions = [.alert, .badge, .sound]
    center.requestAuthorization(options: options, completionHandler: { authorized, error in
        if authorized {
            application.registerForRemoteNotifications()
        }
    })

    return true
}
With this code, we request permission from the user to show notifications using the UserNotifications framework. If the user accepts this, we then register for remote (push) notifications by calling the registerForRemoteNotifications method.
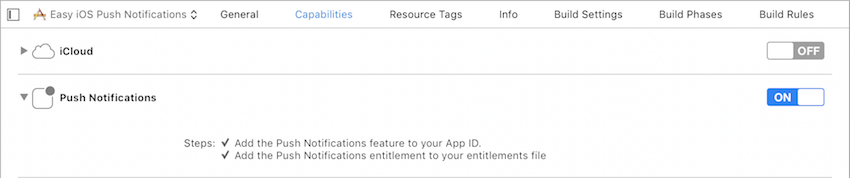
For the last step of the app setup, click on your project name at the top of Xcode's File Navigator and then go to the Capabilities tab. On this screen, turn on the Push Notifications switch to add the proper entitlements to your app:
2. Certificate Setup
Apple Push Notification Service
At a basic level, the push notifications system for iOS works through the following steps:
- The third-party server sends a notification payload to the Apple Push Notification service (APNs).
- The APNs validates the payload to ensure that it is coming from a legitimate source.
- If valid, the APNs then forwards the payload to the correct iOS device.
In order to properly authenticate a notification payload, you must create a signing certificate. To start the process of creating this certificate, you will need to log in with your Apple ID on Apple's developer website.
Registering an Application Identifier
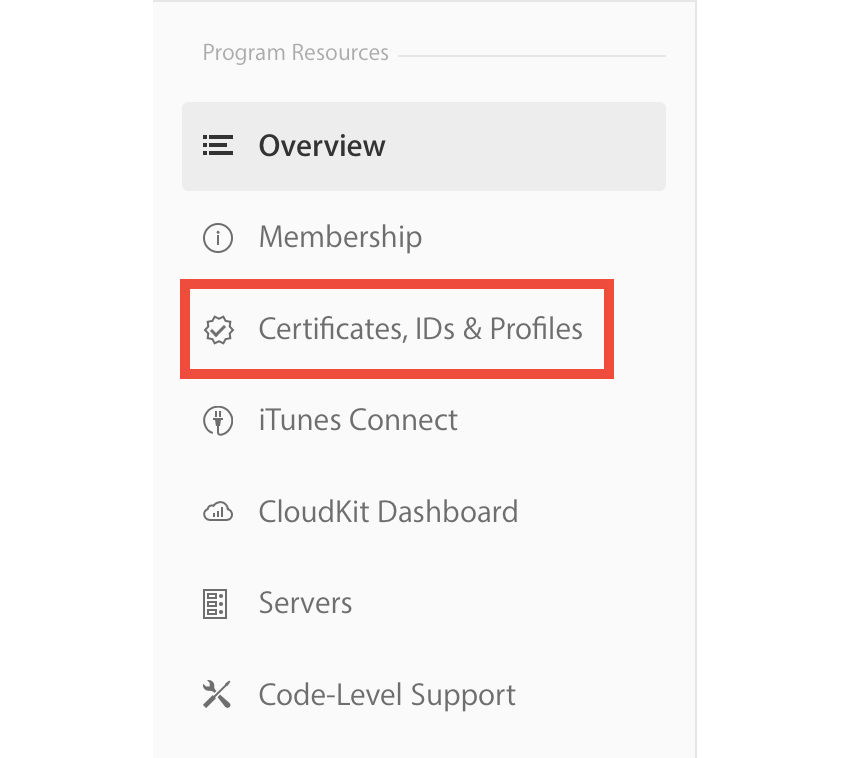
Once you have signed in, click on Certificates, IDs & Profiles in the left sidebar:
On the next screen, select Identifiers > App IDs in the left sidebar and then click on the plus button in the top right corner:

When creating your application identifier, you can enter anything you want for your Name in the App ID Description section. In the App ID Suffix section, select the Explicit App ID option and enter the bundle identifier that you made when creating the project into the Bundle ID field. Lastly, in the App Services section, make sure that you select the checkbox option to enable Push Notifications. Once you have entered all of the information, scroll down to the bottom of the page and select the Continue button.
You will now be presented with an overview of your new app ID as shown in the screenshot below:
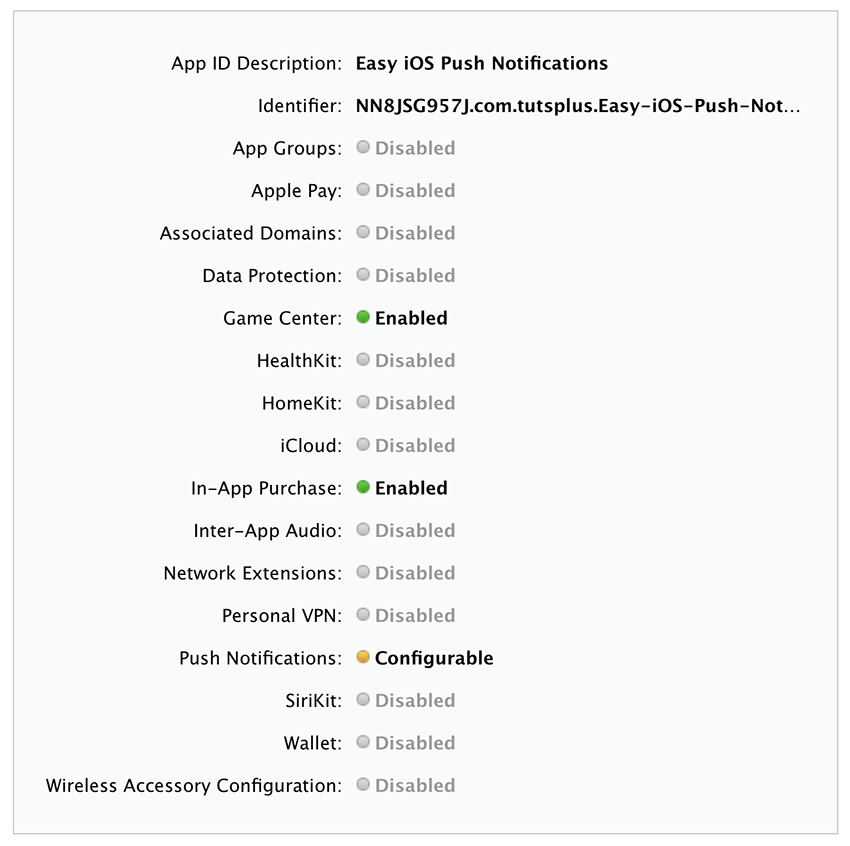
Check that all of the information is correct (at this stage, Push Notifications should be showing as Configurable) and then click Register at the bottom of the screen.
Creating Certificates
Go to Certificates in the left sidebar and click the plus button in the top-right corner again. On the next screen, in the Development section, select the Apple Push Notification service SSL (Sandbox) option and click Continue at the bottom.
On the next screen, select your app ID from the dropdown menu and then click Continue.
If you do not have a certificate signing request (CSR) file already, follow the instructions on the next screen to create one. Once you have a CSR ready, you can continue to the next screen and upload it.
Once your certificate has been created, click the Download button and then open the file with the Keychain Access app on your computer. If you are asked which keychain to add the certificate to, select the login option.
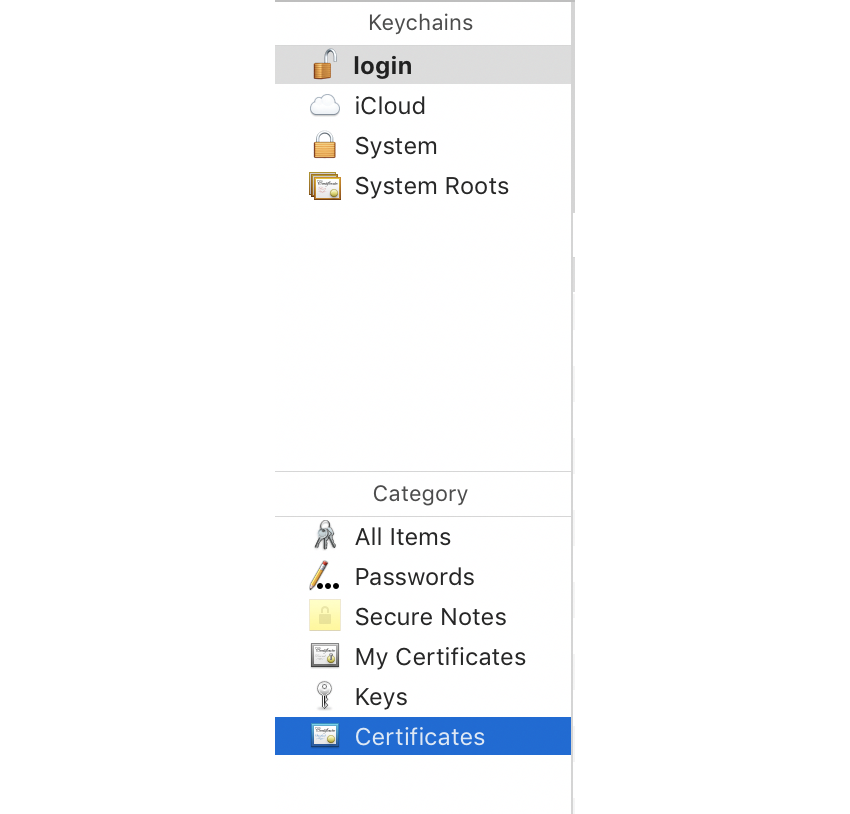
Still in the Keychain Access app, select the Certificates option in the bottom section of the left sidebar:
You will now need to find the certificate you just made; it will have the name Apple Development IOS Push Services: { Bundle ID }. Once you have found your certificate, right-click on this key and select the Export option. In the popup that appears, you can call the file whatever you want, but make sure that the File Format is set to Personal Information Exchange (.p12):
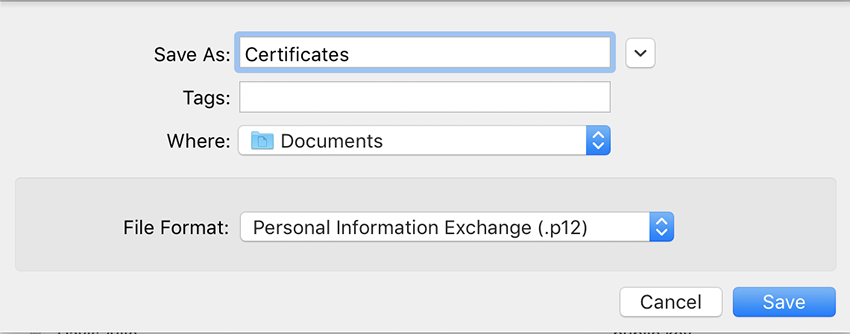
When exporting the certificate, don't provide a password for the p12 file. This is because back4app requires a certificate file without password protection.
The Apple Push Notification service has two separate environments: one for apps in development and one for apps in production.
So far, we have created a certificate to be used for the development environment, which will work when testing your app through Xcode.
When releasing your app on the App Store, you will need to create a production certificate. To do this, repeat the steps we went through in the Creating Certificates section of this tutorial, but select Apple Push Notification service SSL (Sandbox & Production). Please note that in Keychain Access, the certificate's name will be: Apple Push Services: { Bundle ID }.
Please note that you may not need to create two separate certificates, depending on what push notification implementation you are using. Since earlier this year, Apple has allowed the creation of a dual-purpose certificate—the Apple Push Notification service SSL (Sandbox & Production) type—which can be used to connect to both environments. Unfortunately, some services such as back4app haven't been updated yet to take advantage of these new certificates and require a dedicated one for each environment.
3. back4app Setup
For this tutorial, we are going to use back4app to provide the server-side implementation of our push notifications. back4app is a service which provides an easy-to-use and free (with limits) back-end for your app. It works as a hosting server for the Parse Server project.
To get set up with back4app, you will need to go to back4app.com and sign up for an account if you haven't got one already.
Once you have signed up, you will be brought to an empty screen where all of your apps will be shown. To create a new one, click on the Build new Parse app button in the top left corner. On the next screen, enter in the name for your app and then click Next.
Once your app has been created, you will be brought to a screen with a whole bunch of different identifiers and keys. The ones we need to take note of are the App Id, Parse API Address, and Client Key. Once you have a copy of these, you can click the Close button at the bottom of the page.
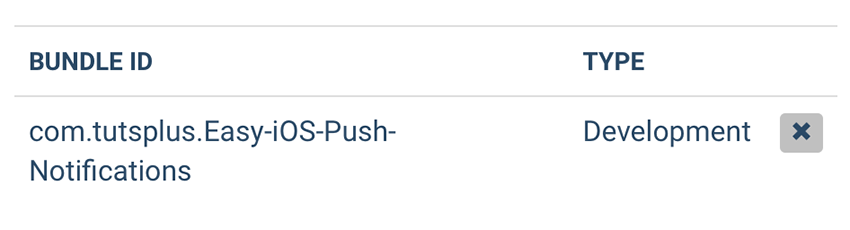
Now you should be on the main dashboard screen for your app. In order to set up the push notifications implementation, go to the iOS Push Notification Settings page. Here, press the Choose File button and upload the .p12 file that you created earlier. Click Send and your bundle ID should then show up in the list as shown in the following screenshot:
4. Parse SDK Setup
As the last stage of our setup, we need to download and add the Parse SDK to our application. To do this, you can follow the first three steps of back4app's iOS Quickstart guide.
Once you have completed the setup of the Parse SDK and added the required configuration code to your application(_:didFinishLaunchingWithOptions:) method, add the following method to your AppDelegate class:
func application(_ application: UIApplication, didRegisterForRemoteNotificationsWithDeviceToken deviceToken: Data) {
    let installation = PFInstallation.current()
    installation?.setDeviceTokenFrom(deviceToken)
    installation?.saveInBackground()
}
This method will be called if the user accepts your app's request to show notifications. Specifically, the registerForRemoteNotifications method we called earlier on in our app delegate will call the application(_:didRegisterForRemoteNotificationsWithDeviceToken:) method once it is done processing. In our implementation of this method, we just get the device data and upload this to the back4app Parse app.
5. Sending a Notification
Now that all of our setup is complete, you can build and run your app on an iOS device. Once your app opens, you will see the following alert:
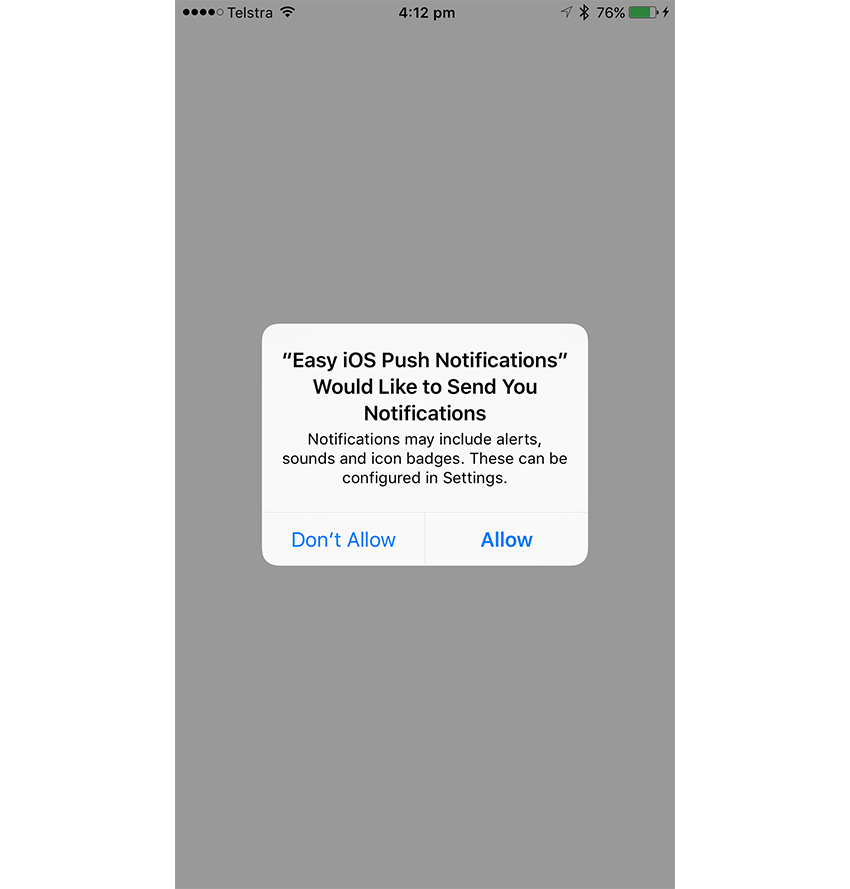
Tap the Allow button and your app will register itself for remote notifications.
Now, you can go to the Parse Dashboard for your application. Once you are in the dashboard for your app, click on Core in the left sidebar if not already selected. Once the Core section has expanded, you will be able to see the total number of Installation objects for your app. At the moment, this should be showing 1 like in this screenshot:
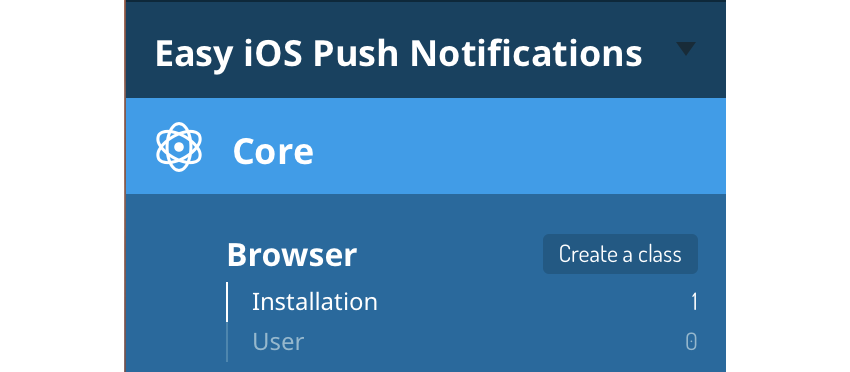
If this number is still 0, then you will need to go back and check that you copied all of the code into your AppDelegate class correctly, including your back4app app identifier and client key.
After making sure your app has saved its installation data on Parse, go to the Push section in the left sidebar of the Parse Dashboard. You should now be on a screen where you can send out your own custom notification. For now, you can leave all of the settings as they are and just type in a custom message under the Write your message subheading.
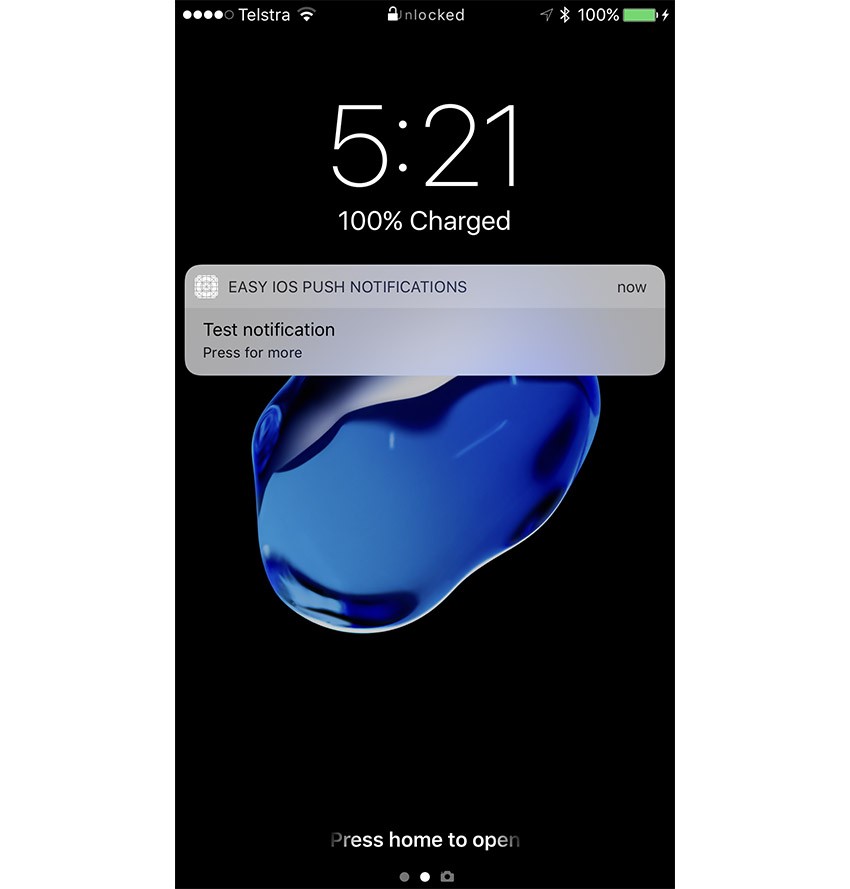
When you are ready, lock the screen of your iOS device and then press the Send push button in the bottom-right corner of the Parse Dashboard. After a few seconds, you should see your push notification appear on your lock screen:
Conclusion
Congratulations! You have just successfully set up push notifications for an iOS application! As you can see, apart from the tedious creation of SSL certificates, using a service such as back4app makes implementing push notifications quite easy.
Of course, there are other services apart from back4app which you can use for push notifications including Backendless, Google's Firebase, and even Apple's own CloudKit. I chose back4app to use for this tutorial as most push notification setups follow a similar process. It also offers many other great free features which any app could take advantage of.
As always, please be sure to leave your comments and feedback in the comments section below. And check out some of our other tutorials on using cloud-based back-end services for mobile apps!


Comments