In the previous tutorial, we implemented the sign-up functionality and also saw how to use AngularJS services to share data between controllers. In this part of the tutorial series, we'll be creating an interface for the logged in user to create a blog post.
Getting Started
Let's start by cloning the third part of the tutorial from GitHub.
git clone https://github.com/jay3dec/AngularJS_Firebase_Part3.git
After cloning the source code, navigate to the project directory and install the required dependencies.
cd AngularJS_Firebase_Part3
npm install
Once the dependencies are installed, start the server.
npm start
Point your browser to http://localhost:8000/app/#/home and you should have the application running.
Creating the Add Post Page
We need a page with which the user can create and publish blog posts. Let's add the require templates and files to create the Add Post page.
Navigate to the AngularJS_Firebase_Part3/app directory and create a folder called addPost. Inside addPost create an HTML file called addPost.html and addPost.js. In addPost.html add the following HTML code:
<html lang="en">

<head>

    <title></title>

    <link href="http://getbootstrap.com/dist/css/bootstrap.min.css" rel="stylesheet">

    <link href="blog.css" rel="stylesheet">


</head>

<body>

    <div class="blog-masthead">
        <div class="container">
            <nav class="blog-nav">
                <a class="blog-nav-item " href="#">Home</a>
                <a class="blog-nav-item active" href="addPost.html">Add Post</a>

            </nav>
        </div>
    </div>

    <div class="container">

        <form class="form-horizontal">
            <fieldset>

                <!-- Form Name -->
                <legend>Create Post</legend>

                <!-- Text input-->
                <div class="form-group">
                    <label class="col-md-4 control-label" for="txtTitle">Title</label>
                    <div class="col-md-4">
                        <input id="txtTitle" name="txtTitle" type="text" placeholder="placeholder" class="form-control input-md">

                    </div>
                </div>

                <!-- Textarea -->
                <div class="form-group">
                    <label class="col-md-4 control-label" for="txtPost">Post</label>
                    <div class="col-md-4">
                        <textarea class="form-control" id="txtPost" name="txtPost"></textarea>
                    </div>
                </div>

                <!-- Button -->
                <div class="form-group">
                    <label class="col-md-4 control-label" for="singlebutton"></label>
                    <div class="col-md-4">
                        <input id="singlebutton" name="singlebutton" class="btn btn-primary" type="submit" value="Publish" />
                    </div>
                </div>

            </fieldset>
        </form>


    </div>
    <!-- /.container -->

    <div class="blog-footer">
        <p>AngularJS & Firebase Blog App</p>

    </div>


</body>

</html>
Inside addPost.js, we'll define the routes for the Add Post view. $routeProvider has a method called when, which we'll use to create a route for our addPost view. We'll set a templateUrl which would be rendered in the index.html. We'll also set a controller (logic which controls a view) for the newly created $scope of the addPost view. Here's how addPost.js finally looks:
'use strict';

angular.module('myApp.addPost', ['ngRoute'])

.config(['$routeProvider', function($routeProvider) {
    $routeProvider.when('/addPost', {
        templateUrl: 'addPost/addPost.html',
        controller: 'AddPostCtrl'
    });
}])

.controller('AddPostCtrl', ['$scope', function($scope) {

}]);
Include the myApp.addPost module in app.js.
angular.module('myApp', [
    'ngRoute',
    'myApp.home',
    'myApp.register',
    'myApp.welcome',
    'myApp.addPost'     // Newly added module
])
Also, add a reference to the addPost.js in the app/index.html page.
<script src="addPost/addPost.js"></script>
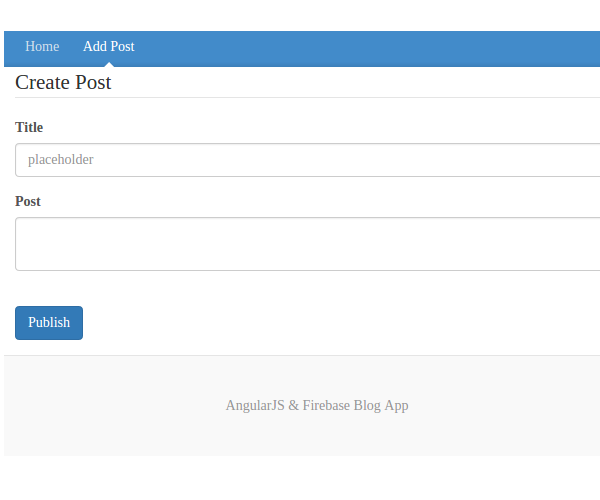
Save the changes, restart the server and point your browser to http://localhost:8000/app/#/addPost and you should be able to see the add post page.
Validating the Add Post Fields
First, we need to add an ngModel directive to the input text box and text area in the add post page to enable the two-way data binding.
<input id="txtTitle" name="txtTitle" ng-model="article.title" type="text" placeholder="placeholder" class="form-control input-md">

<textarea class="form-control" id="txtPost" ng-model="article.post" name="txtPost" ></textarea>
When a user publishes a blog post, it should have a title and post. So we'll add validation to check if a blog post has title and post. If the title and post are provided, we'll enable the publish button and the user can publish his or her blog post. We'll use an ngDisabled directive to disable the publish button. Add the ngDisabled directive to the publish button as shown.
<input id="singlebutton" ng-disabled="!article.title || !article.post" name="singlebutton" class="btn btn-primary" type="submit" value="Publish" />
As seen in the above code, ngDisabled would disable the publish button when the title or post of the article is not provided.
Implementing the Add Post Functionality
Next, we'll save the title and post of the article to Firebase when the user clicks the publish button. In order to save the data to Firebase, we'll use the $push API.
Add the ngController directive to the body of addPost.html and also add the ngSubmit directive to the form in addPost.html.
<body ng-controller="AddPostCtrl">
<form class="form-horizontal" ng-submit="AddPost()">
Open up addPost.js and add a new function called AddPost inside the AddPostCtrl controller as shown:
.controller('AddPostCtrl', ['$scope', function($scope) {
    $scope.AddPost = function() {

      // Add Post logic will be here

    }
}]);
We'll be needing $firebase to push data to Firebase Db, so inject the $firebase module in the AddPostCtrl controller.
.controller('AddPostCtrl', ['$scope','$firebase',function($scope,$firebase) {
Create a Firebase object using your Firebase URL.
var firebaseObj = new Firebase("https://blistering-heat-2473.firebaseio.com");
Using firebaseObj we'll create an instance of $firebase which we'll use to push data to Firebase.
var fb = $firebase(firebaseObj);
Read the title and post entered by the user using $scope.
var title = $scope.article.title;
var post = $scope.article.post;
Since we have the title and post, we'll call the Firebase push API to save data to Firebase.
fb.$push({
    title: title,
    post: post
}).then(function(ref) {
    console.log(ref);
}, function(error) {
    console.log("Error:", error);
});
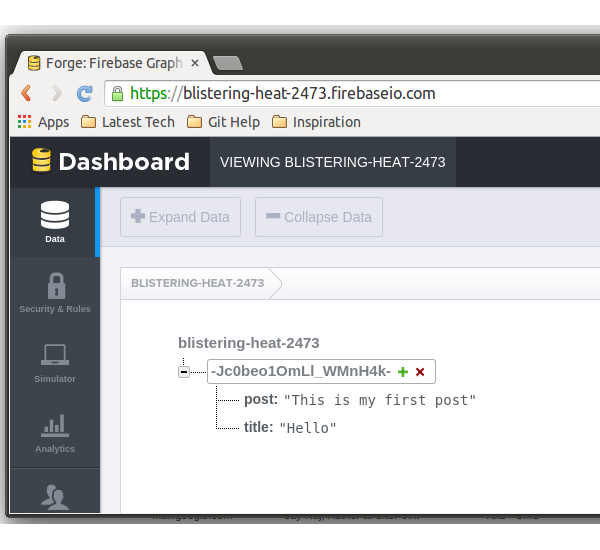
Now, save all the changes, restart the server, and try to add a new blog post. Once you've clicked the publish button, check the browser console for the reference object. After that, log into your Firebase account and you should be able to see the data.
Wrapping It Up
In this part of the series, we created an interface to add or publish blog posts. In the next part of this series, we'll create an interface to fetch and display all the blog posts added by users.
Source code from this tutorial is available on GitHub. Do let us know your thoughts in the comments below!

Comments