In the first part of this series, we saw how to get started with creating an application using AngularJS and Firebase. We created our Sign In page and implemented the sign-in functionality with Firebase as the back end.
In this tutorial, we'll take this series to the next level. We'll create and set up the sign-up page and see how to do form validations in AngularJS.
Getting Started
Let's start by cloning the first part of the tutorial from GitHub.
git clone https://github.com/jay3dec/AngularJS_Firebase_Part1.git
Once the code is fetched, navigate to the project directory and install the required dependencies.
cd AngularJS_Firebase_Part1
npm install
Once all dependencies are installed, start the server.
npm start
Point your browser to http://localhost:8000/app/#/home and you should have the app running.
Creating a Sign-Up Screen
We'll start by creating a page for the guest users to sign up. Navigate to AngularJS_Firebase_Part1/app and create a folder called register. Inside the register folder, create register.html and register.js files. Here is how register.html looks:
<!DOCTYPE html>
<html lang="en">

<head>
    <meta http-equiv="Content-Type" content="text/html; charset=UTF-8">
    <link rel="icon" href="http://getbootstrap.com/favicon.ico">

    <title>AngularJS & Firebase Web App</title>

    <link href="http://getbootstrap.com/dist/css/bootstrap.min.css" rel="stylesheet">
    <link href="http://getbootstrap.com/examples/signin/signin.css" rel="stylesheet">

    <link href="justified-nav.css" rel="stylesheet">

</head>

<body>

    <div class="container">
        <div class="jumbotron" style="padding-bottom:0px;">
            <h2>AngularJS & Firebase App!</h2>
        </div>
        <form class="form-signin" role="form">
            <input type="email" class="form-control" placeholder="Email address" required="" autofocus="">
            <input type="password" class="form-control" placeholder="Password" required="">
            <label class="checkbox">
                <a href="#"> Sign In</>
        </label>
        <button type="button" class="btn btn-lg btn-primary btn-block">Register</button>
      </form>

    </div>

</body></html>
As seen in the above HTML code, we have used Bootstrap for our HTML design.
Inside register.js, we'll declare the routes for the application to access the register view. $routeProvider has a method called when, which we'll use to create a route for our register view. When defining a new route, we'll set a templateUrl which would be rendered in the index.html. Along with that, we'll also set a controllerfor the newly created $scope of the register view. A controller is a logic which controls a particular view. Here's how it should look:
'use strict';

angular.module('myApp.register', ['ngRoute'])

// Declared route
.config(['$routeProvider', function($routeProvider) {
    $routeProvider.when('/register', {
        templateUrl: 'register/register.html',
        controller: 'RegisterCtrl'
    });
}])

// Register controller
.controller('RegisterCtrl', [function() {

}]);
Now open up app.js and include the register module myApp.register in the app.
'use strict';

angular.module('myApp', [
    'ngRoute',
    'myApp.home',
    'myApp.register'  // Newly added register route
]).
config(['$routeProvider', function($routeProvider) {
    // Set defualt view of our app to home

    $routeProvider.otherwise({
        redirectTo: '/home'
    });
}]);
To display the sign-up page, we need to include register.js inside the main HTML template file of the app. Open up index.html and include the following:
<script src="register/register.js"></script>
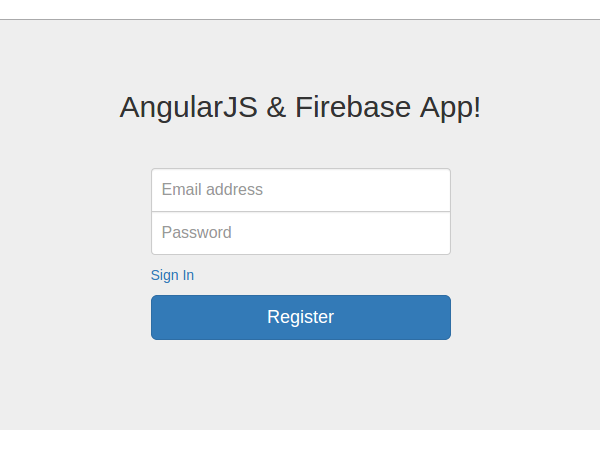
Restart the server and point your browser to http://localhost:8000/app/index.html#/register and you should see the sign-up screen:
Next, let's make the sign-up screen link to the sign-in screen. In home.html and register.html there is a sign up and sign in href respectively. We'll set both the href sources so that they are accessible from both the pages.
In home.html:
<a href="#/register"> Sign Up<a/>
In the register.html:
<a href="#/home"> Sign In<a/>
Form Validation in AngularJS
When a user enters his or her email address and password on the registration screen, we need to validate a few things. First, the email id entered should have a valid email id format, and secondly the password entered should have a minimum length.
AngularJS provides FormController, which keeps track of every element inside a form. From the AngularJS docs:
FormController keeps track of all its controls and nested forms as well as the state of them, such as being valid/invalid or dirty/pristine.
FormController has a few properties like $pristine, $dirty, $invalid, $valid, etc. We'll see what these properties are, and we will be using some of these properties to implement form validation for our registration page.
First, we need to modify our form HTML to add validation messages. In register.html modify the form HTML as shown.
<form class="form-signin" name="regForm">
    <div class="form-group">
        <label>Email</label>
        <input type="email" name="email" class="form-control" ng-model="user.email">
        <p>Enter a valid email.</p>
    </div>
    <div class="form-group">
        <label>Password</label>
        <input type="password" name="password" class="form-control" ng-model="user.password">
        <p>Min password length is 8 characters.</p>
    </div>
    <button type="button" class="btn btn-lg btn-primary btn-block">Register</button>
</form>
Save the changes, restart the server, and refresh the register page. You should see a page like this:
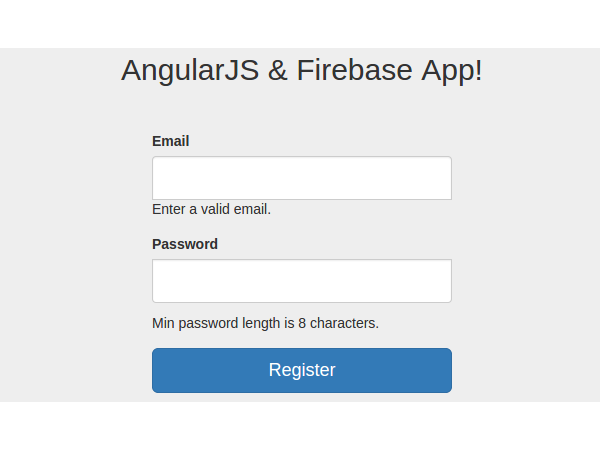
Now, as we can see in the above screen, the validation messages are visible. We need to show them only when the email and password are not valid.
AngularJS provides a directive called ngShow to show HTML based on a certain expression. (An AngularJS directive is an extended HTML attribute provided by AngularJS to enhance the elements' capabilities.) So, we'll use ngShow to show the validation message when the input email has invalid data. But how do we know if the input email is invalid? Well, remember the FormController properties that we discussed earlier. FormController has a property called $invalid which is True if a control is invalid. regForm.email.$invalid would be true if the email entered is not a valid one. So we'll use $invalid and ngShow to show the validation message. Modify the email message span as shown below:
<p ng-show="regForm.email.$invalid">Enter a valid email.</p>
Save the changes, restart the server, and browse to the registration page. You'll see that the validation message for email id doesn't show any longer. Now, try to enter some data into the input email and the error message will pop up. Try entering a valid email address and the validation message will be gone. But the message for the password minimum length still shows up, initially. Let's fix it up.
AngularJS provides another directive called ng-minlength to set the minimum length for any input control. We'll use that to set the minimum length for the password field and then use ngShow to show/hide the validation message. Modify the password field to include the ng-minlength directive as shown:
<input type="password" name="password" class="form-control" ng-model="user.password" ng-minlength="8">
Next modify the validation message span for the password field as shown:
<p ng-show="regForm.password.$error.minlength">Min password length is 8 characters.</p>
So, if the minimum length of the password field is not as per the minimum length set in the password input field, then regForm.password.$error.minlength will be set to "true" and the validation message will be shown.
Save all the changes, restart the server, and browse to the registration page. Try entering a value for password, and the validation message will show up until the password length is 8.
Now, in order to highlight the invalid input elements, we can use some styles. Using an AngularJS directive called ngClass we can dynamically highlight the faulty input elements using the $invalid property. So add the ngClass directive to the parent div of the email and password elements.
<div class="form-group" ng-class="{ 'has-error' : regForm.email.$invalid }">
    <label>Email</label>
    <input type="email" name="email" class="form-control" ng-model="user.email">
    <p class="help-block" ng-show="regForm.email.$invalid">Enter a valid email.</p>
</div>

<div class="form-group" ng-class="{ 'has-error' : regForm.password.$invalid }">
    <label>Password</label>
    <input type="password" name="password" class="form-control" ng-model="user.password" ng-minlength="8">
    <p class="help-block" ng-show="regForm.password.$error.minlength">Min password length is 8 characters.</p>
</div>
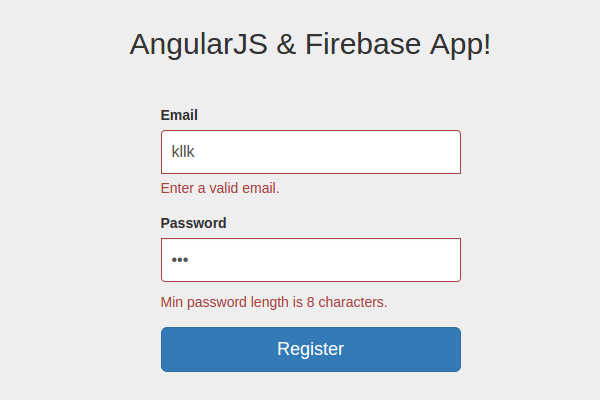
Save the changes, restart the server, and try browsing to the registration page. Now, on invalid entries, the validation messages show up as below:
Now, as you can see in the above screen, on validation errors the Register button is enabled. Let's make it disabled unless the email and password entered are valid. AngularJS provides a directive called ngDisabled which helps to disable elements based on an expression. If email and password are validated then the user.email and user.password models will be set. So, we'll use these two objects to enable/disable the register button using ngDisabled. Modify the register button HTML as shown:
<button type="button" ng-disabled="!user.email || !user.password" class="btn btn-lg btn-primary btn-block">Register</button>
As you can see, ng-disabled will be true if user.email or user.password is not false, which will be the case only when the data is invalid.
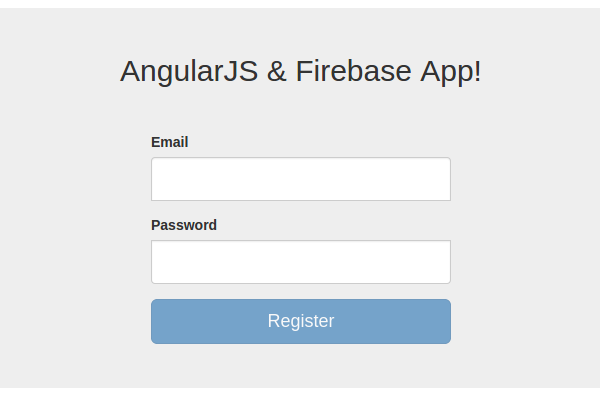
Save all the changes, restart the server, and refresh the registration page. As you'll notice, the Register button is disabled and it will remain so, until a valid email address and password are entered.
Validating Sign-In Screen
Implementing validation on the sign-in screen is quite similar to the way we did it for the sign-up screen. I would suggest that you implement validation yourself for the sign-in screen as an exercise. In case you get stuck, have a look at the modified HTML code for the sign in form in home.html as shown below:
<form class="form-signin" name="signinForm" role="form">
    <div class="form-group" ng-class="{ 'has-error' : signinForm.email.$invalid }">
        <label>Email</label>
        <input type="email" name="email" class="form-control" ng-model="user.email">
        <p class="help-block" ng-show="signinForm.email.$invalid">Enter a valid email.</p>
    </div>
    <div class="form-group" ng-class="{ 'has-error' : signinForm.password.$invalid }">
        <label>Password</label>
        <input type="password" name="password" class="form-control" ng-model="user.password" ng-minlength="3">
        <p class="help-block" ng-show="signinForm.password.$error.minlength">Min password length is 8 characters.</p>
    </div>
    <label class="checkbox">
        <a href="#/register"> Sign Up</a>
    </label>
    <button ng-disabled="!user.email || !user.password" type="button" ng-click="SignIn($event)" class="btn btn-lg btn-primary btn-block">SignIn</button>
</form>
Wrapping It Up
In this part of the tutorial, we created the sign-up page and set up the routes for it. We also saw how to implement validations using AngularJS for the sign-up page.
In the next part, we'll focus on implementing the sign-up functionality and a few other features. Source code from the above tutorial is available on GitHub.
Do let us know your thoughts in the comments below!

Comments