With the release of iOS 7, Apple introduced a text to speech API that allows developers to add text to speech functionality to an application in a quick and easy way. This can be useful when adding an accessibility layer to an application or to include it as a feature in a learning game. In this tutorial, you'll learn how to implement such a feature using Swift.
1. Introduction
In this tutorial, you'll learn how to create a mobile application using Swift and Xcode 6. Whether you're familiar with Xcode or not, this tutorial will help you get comfortable with Apple's IDE and the Swift programming language. With the application, the user will be able to initialize the text to speech functionality by tapping a button on the screen. The user can edit the target text in a text view.
In this tutorial, you'll learn about the following aspects of iOS development:
- creating a new project in Xcode 6
- create a user interface in Interface Builder
- connect the user interface elements using outlets
- trigger methods in the user interface using actions
2. Project Setup
Step 1: Project Template
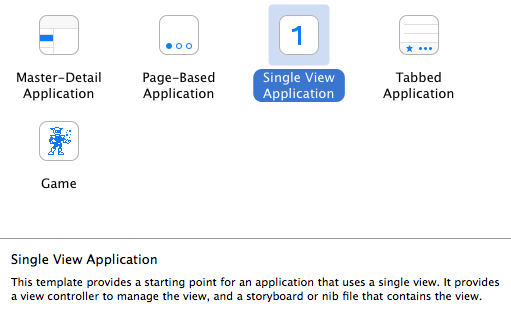
Open Xcode and select New > Project... from the File menu. Choose Single View Application from the list of iOS Application templates and click Next.
Step 2: Project Configuration
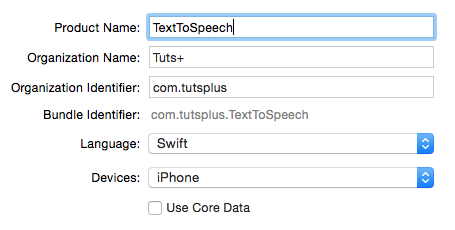
Name your project, enter your organization's name and identifier. Choose iPhone from the Devices list, click Next, and choose a location to save the project. Don't forget to change the language to Swift.
3. User Interface
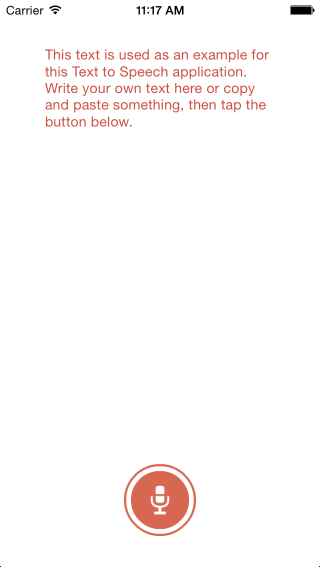
The user interface of the app is straightforward. The screenshot below gives you an idea of the artwork we'll be using and how the final user interface will end up looking. You can find the artwork and additional resources in the tutorial's source files on GitHub.
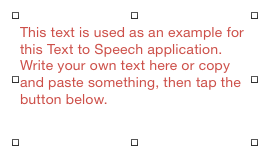
Step 1: Add Text View
Let's create the text view that will contain the text the application will convert to audio. Open Main.storyboard and drag a UITextView object from the Object Library onto the view controller's view. You can change the text view's default text or leave it blank.
Step 2: Add Button
A button in the user interface will trigger the text to speech functionality. Drag and drop a UIButton object from the Object Library onto the view controller's view. You can change the button's title or change its appearance by adding an image in the Attributes Inspector.

4. Import AVFoundation
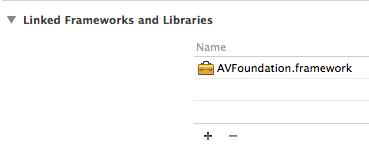
To use the text to speech API, we'll need access to the AVSpeechSynthesizer class, which is part of the AVFoundation framework. Select your project in Xcode and go to the Linked Frameworks and Libraries section at the bottom of the General tab. Click the plus button and select the AVFoundation framework from the list.
Open ViewController.swift and add the following code just below the import UIKit line.
import AVFoundation
This will make the classes of the AVFoundation framework available in the ViewController class, giving us access to the AVSpeechSynthesizer class that we need in a few moments.
5. Text View Outlet
To access the text view in the ViewController class, we need to create an outlet and wire it up in Interface Builder. An outlet is a property that you can set in Interface Builder.
Open the Assistant Editor by choosing Assistant Editor from the View menu. It lets us view the user interface of the ViewController class on the left and its implementation on the right. Be sure Xcode displays the ViewController.swift file on the right.
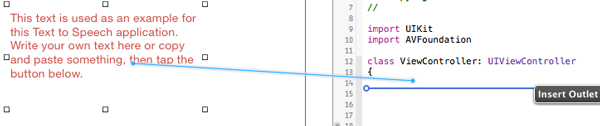
In Interface Builder, create an outlet for the text view by control-dragging from the text view to the code editor on the right. You'll notice a blue line, indicating where Xcode will insert the outlet for the text view.
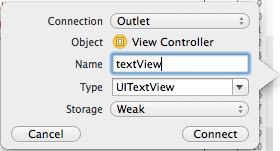
When you release the mouse button, Xcode will show you a dialog in which you can set the name for the outlet. Name your outlet textView and click Connect.
You can recognize outlets by the @IBOutlet compiler directive. This tells the compiler that textView is a reference to the UITextView object we created in Interface Builder. This means that any change we make to textView is reflected in the UITextView object in the user interface.
@IBOutlet weak var textView: UITextView!
You'll notice two keywords following the compiler directive, weak and var. The weak keyword is an attribute used for references that don't need retention. This is commonly used for outlets since they are retained by their superview, the view controller's view in this case.
The second keyword, var, indicates that textView is a variable as opposed to a constant. The variable name is followed by a colon and the variable's type.
6. Speech Variables
Below the textView outlet, we declare a constant, synth, and a variable, myUtterance. The let keyword indicates that synth is declared as a constant. This means that the value of synth cannot be changed.
let synth = AVSpeechSynthesizer()
var myUtterance = AVSpeechUtterance(string: "")
The synth constant holds a reference to an AVSpeechSynthesizer instance. The myUtterance variable holds the string that we'll convert to speech a bit later.
7. Adding an Action
The button in the user interface should trigger a method named textToSpeech. To accomplish this, we need to create an action using the @IBAction type qualifier. By using the @IBAction type qualifier, the method will show up in Interface Builder as an action. Let's see how this works.
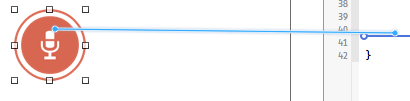
Open the Assistant Editor and make sure the XIB file is shown on the left and the ViewController class on the right. Select the button in Interface Builder and control-drag from the button to the ViewController class on the right as shown below.
Xcode will show you a similar dialog. This time, however, the connection type is Action. Name the action textToSpeech, make sure Event is set to Touch Up Inside, and click Connect.
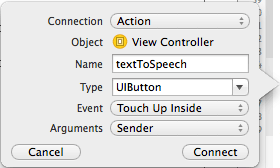
As a result, Xcode will create a function or method or action for you that looks like the one shown below. The action is invoked when the user taps the button.
@IBAction func textToSpeech(sender: UIButton)
{

}
The func keyword declares a function or method. In this case, the name of the function is textToSpeech. You'll also notice a sender parameter of type UIButton, which references the UIButton we created in Interface Builder.
8. Implementing textToSpeech
The next block of code handles the text to speech conversion when the user taps the button.
@IBAction func textToSpeech(sender: UIButton)
{
    myUtterance = AVSpeechUtterance(string: textView.text)
    myUtterance.rate = 0.3
    synth.speakUtterance(myUtterance)
}
We first create an AVSpeechUtterance instance by passing in the text of the textView object in the constructor. In the next line, we set the rate or speed at which the utterance will be spoken. The lower the rate, the slower the speech will be. Finally, we call the speakUtterance method on the AVSpeechSynthesizer instance, passing in the myUtterance object. This will start the text to speech.
This is what the complete the ViewController class should like.
import UIKit
import AVFoundation

class ViewController: UIViewController
{
    @IBOutlet weak var textView: UITextView!

    let synth = AVSpeechSynthesizer()
    var myUtterance = AVSpeechUtterance(string: "")

    override func viewDidLoad()
    {
        super.viewDidLoad()
        // Do any additional setup after loading the view, typically from a nib.

    }

    override func didReceiveMemoryWarning()
    {
        super.didReceiveMemoryWarning()
        // Dispose of any resources that can be recreated.
    }

    @IBAction func textToSpeech(sender: UIButton)
    {
        myUtterance = AVSpeechUtterance(string: textView.text)
        myUtterance.rate = 0.3
        synth.speakUtterance(myUtterance)
    }
}
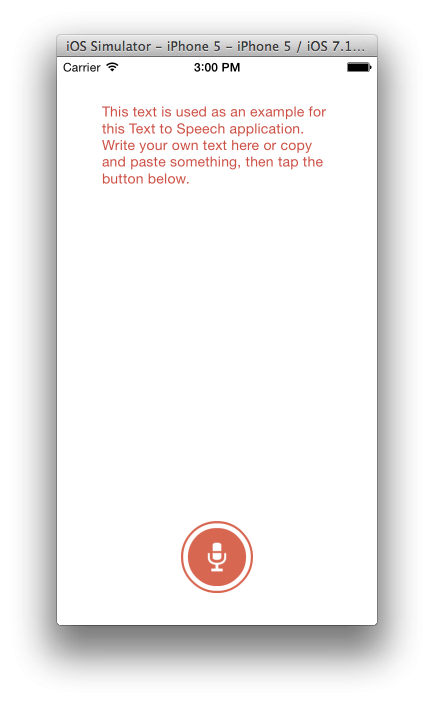
9. Testing in the Simulator
It's time to test our application in the iOS Simulator. Press Command-R or press the play button in the top-left to run the application. Test the app by entering a string in the text view and tapping the button at the bottom.
Conclusion
In this tutorial, we've learned how to implement text to speech on iOS, use Interface Builder, create outlets and actions. I encourage you to experiment with the result and customize the app to make it your own. I hope you liked this tutorial and found it helpful.

Comments