In today's tutorial we're going to leverage the power of custom post types, taxonomies, and custom loops to create a dynamic products listing. There’s a lot of cover so let's get straight to it!
Step 1 Creating a Products Custom Post Type
First, we need to create our products custom post type. Open your functions.php and add the following line to the top of the file after the opening PHP tag:
require_once ('functions/products.php');
If you don't have one already, create a directory called functions inside your theme folder, and a file called products.php inside that directory. In our products.php, we'll register our custom post type:
add_action( 'init', 'product_register' );
function product_register() {
  $labels = array(
    'name' => _x('Products', 'post type general name'),
    'singular_name' => _x('Product', 'post type singular name'),
    'add_new' => _x('Add New', 'Product'),
    'add_new_item' => __('Add New Product'),
    'edit_item' => __('Edit Product'),
    'new_item' => __('New Product'),
    'all_items' => __('All Products'),
    'view_item' => __('View Products'),
    'search_items' => __('Search Products'),
    'not_found' =>  __('No products found'),
    'not_found_in_trash' => __('No products found in Trash'),
    'parent_item_colon' => '',
    'menu_name' => 'Products'

  );
  $args = array(
    'labels' => $labels,
    'public' => true,
    'publicly_queryable' => true,
    'show_ui' => true,
    'show_in_menu' => true,
    'query_var' => true,
    'rewrite' => true,
    'capability_type' => 'post',
    'hierarchical' => false,
    'supports' => array( 'title', 'editor', 'thumbnail', 'page-attributes' )
  );
  register_post_type('products',$args);
}
The first line is a hook that will call our function ‘products_register’ when WP admin is initialized. Within our function we set up two arrays. The first is the labels that will be used throughout our WordPress dashboard. Within our function we create a list of arguments most of which are self-explanatory. Our last argument ‘supports’ allows use to specify what we want to display on the post’s write/edit page. Note that we have added support for page attributes to specify the order of our products within a category (image of panel). We then pass the function register_post_type our custom post type’s name and the arguments.
Let’s add a custom field to store the price of our products.
add_action("admin_init", "price_meta");
 function price_meta(){
  add_meta_box("price", "Price", "Price", "products", "normal", "low");
}

 function price(){
  global $post;
  $custom = get_post_custom($post->ID);
  $price = $custom["price"][0];
  ?>
  <label>Price:</label>
  <input id="price" name="price" type="text"  value="<?php echo $price; ?>" />
  <?php
}

add_action('save_post', 'save_meta');
function save_meta(){
  global $post;
  update_post_meta($post->ID, price, $_POST["price"]);
}
?>
Again when WP admin is initialized, our function price_meta is called that will display our custom field. Next we create a function called price that will create the form field for our custom post type. we've also grabbed it’s current value using get_post_custom so we can display it when we're editing a post if a value has been set. Our last function saves the value assigned to our custom field using update_post_meta(). We pass the function our post’s ID, the name of the field being updated, and the value we're storing.
Step 2 Creating a Products Category Taxonomy
We want to be able to organize our products into categories so let's create a custom taxonomy called Product Categories so we can do just that.
$labels = array(
    'name' => _x( 'Product Categories', 'taxonomy general name' ),
    'singular_name' => _x( 'Product Category', 'taxonomy singular name' ),
    'search_items' =>  __( 'Search Product Categories' ),
    'all_items' => __( 'All Product Categories' ),
    'parent_item' => __( 'Parent Category' ),
    'parent_item_colon' => __( 'Parent Category:' ),
    'edit_item' => __( 'Edit Product Category' ),
    'update_item' => __( 'Update Product Category' ),
    'add_new_item' => __( 'Add Product Category' ),
    'new_item_name' => __( 'New Product Category' ),
    'menu_name' => __( 'Product Categories' )
  );

register_taxonomy('product_categories',array('products'), array(
    'hierarchical' => true,
    'labels' => $labels,
    'query_var' => true,
    'show_ui' => true
 ));
Again we define our labels. Next we call the function register_taxonomy. We tell the function the name of our taxonomy which is product_categories (note the lack of spaces and capital letters), the post type(s) to associate the taxonomy with and pass it a handful of arguments. Importantly, we set hierarchical to true to support nested taxonomies or in our case sub product categories.
Step 3 Dealing With Images
Our products will be making use of featured images so we need to make sure our theme supports it. Check your theme’s functions.php and see if it already supports post thumbnails, if not add this line to the top of the file just under where we required our custom post type.
if ( function_exists( 'add_theme_support' ) ) {
add_theme_support( 'post-thumbnails' );
}
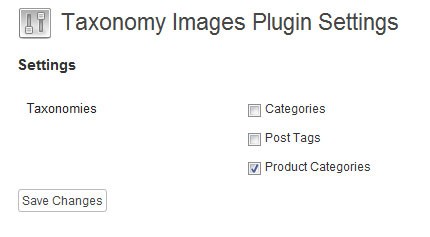
We would like assign each of our product categories an image. For now there is no built-in way to do this so we'll need to install the fantastic Taxonomy Images plugin by Michael Fields. Once we have the plugin installed and activated we navigate to it’s settings page and tell the plugin to add image support to our Product Categories taxonomy.
Next we're going to add support for dynamic image resizing for our product category and product images using Timthumb, a PHP image resizing script. Timbhumb is a joy to work with and a breeze to implement in WordPress themes. We’ll get into the meat of using it in our theme files soon but for now we're just going to get it set up. Let’s download Timthumb and place the script in with our theme files. We’ll also need to create a cache directory in our theme’s directory and give it 777 permissions.
Step 4 Listing our Top Level Product Categories
To list our top level product categories we're going to create a custom page template and call it Products.
<?php
/**
 Template Name: Products
 */

get_header(); ?>
Next we're going to create a query for our top level categories.
$args=array(
	'hide_empty'		=> 0,
	'parent'		=> 0,
	'taxonomy'		=> 'product_categories');
Here we've set up three arguments to pass to the get_categories function. Each argument is essential to retrieving the top level product categories
- Hide_empty => 0 Allows us to show categories that don’t contain any posts
- Parent => 0 By defining a parent we've limited the taxonomies returned to only taxonomies that have a parent with an ID of 0. By setting the parent ID to 0 it means we'll return top level taxonomies since they don’t have a parent
- Taxonomy => ‘product_categories’ here we're defining the taxonomy to query, by default this is set to “category” so we need to tell WordPress we want to query our custom taxonomy instead
Next we pass the arguments to get_categories which returns an array of matched taxonomies. We start a foreach loop and set a couple of variables.
The first is the product category's image that we've retrieved using get_option and passing it the name of the option we want to retrieve. In this case it’s the image set by the taxonomy images plugin. The next variable is the URL of the taxonomy's archive. we've used the get_term_link function to achieve this by passing it the taxonomy slug and the taxonomy name. Next we start outputting the matched product categories.
$categories=get_categories($args);

foreach($categories as $category) {
	echo '<div class="product-cat">';

	$thumb_url = get_option('taxonomy_image_plugin');
	$product_cat_url = get_term_link( $category->slug, 'product_categories' );

	echo '<a href="'.$product_cat_url.'"><img src="'.get_template_directory_uri().'/timthumb.php?src='.wp_get_attachment_url( $thumb_url[$category->term_taxonomy_id]).'&h=200&w=200" /></a>';
	echo '<a class="cat-title" href="' . $product_cat_url .'">' . $category->name.'</a>';
	echo '</div> <!--end product cat-->';
}
Let’s take a look at how the thumbnails are generated using timthumb. We need to set the source to the path of our copy of the script in our theme’s directory. Then we need to give the script the source for the image and set it’s width and height. Simple isn’t it? I’ve also set up an if statement to make sure we have a fallback in place if a category doesn't have an image associated with it.
Next we should add some basic styling to make things take shape. we've just floated the divs and absolutely positioned the titles within the divs.
.product, .product-cat{
	border:10px solid #dfdfdf;
	float:left;
	margin:0 40px 20px 0;
	outline:1px solid #bfbfbf;
	position:relative;
}
	.product img, .product-cat img{
		max-width:100%;
	}
	.product-title, .cat-title{
		background:rgba(0,0,0,.8);
		color:#FFF;
		display:block;
		position:absolute;
        bottom:0;
		left:0;
		padding:10px 0;
		text-align:center;
		width:100%;
	}
You'll notice we've added styles for the products lists as well since we'll be displaying them in a similar fashion to the product categories lists.
Step 5 Listing Subcategories and Products
Create a file called taxonomy-products_categories.php. If you take a look at the template hierarchy you’ll see that this the template we need to create a taxonomy archive. This allows us to create different archives for any custom taxonomy.
The first thing we'll be doing in this file is querying our product categories again.This query serves two purposes. We’ll be using it to output the next level of product categories if one exists and testing whether or not we're on the lowest depth category and if that’s the case we'll need to output that category's products. So let's set that up.
$slug = get_query_var( 'term' );
$term = get_term_by( 'slug', $slug , 'product_categories' );
$term_id = $term->term_id;

$args=array(
		'hide_empty'		=> 0,
		'parent' 		=> $term_id,
		'taxonomy'		=> 'product_categories');

$categories=get_categories($args);
First we've grabbed the current taxonomy's slug using get_query_var(). Next we retrieve all term data with get_term_by() by passing it the field we're supplying, the value of the field and the taxonomy name. With that we can retrieve the current taxonomy's ID using get_term_by which we need for our arguments array for the parent parameter. Finally we've passed our arguments to the get_categories function and defined a variable for the returned array called categories.
Let's quickly look at the structure we'll be following now:
$categories=get_categories($args);
if(!$categories){
	// if there are no subcategories output current product category's products
}
else{
	//if there are subcategories output them instead
}
Now we're going down the route of if the array is empty. If it is, then we're on a lowest products category level and should output the current categories products. Let’s set up our arguments first:
if(!$categories){

	//get the product category name
	echo "<h1 class='entry-title'>".$term->name."</h1>";

	$args = array(
	'posts_per_page' => 2, //remember posts per page should be less or more that what's set in general settings
	'paged' => $paged,
	'meta_key' => 'price',
	'orderby' => 'meta_value_num',
	'order' => 'ASC',
	'tax_query' => array(
				array(
				'taxonomy' => 'product_categories',
				'field' => 'slug',
				'terms' => $slug)
		)
	);
Let's look at the arguments we've set up. The first two arguments enable pagination. The next three arguments handle the order of the products. We're ordering them by the meta key price and also ordering by their price, lowest to highest. If you want to order the products by setting their order when creating a product use the following argument instead:
'orderby' => 'menu_order'
The final array of arguments defines the taxonomy we're querying and what specific product category we're querying. We define the product category by passing ‘term’ the slug of the current product category.
Next we pass these arguments to the WP_query class which will fetch the matched posts. All we need to do then is loop through the returned array of posts and output our products.
<?php
$products_query = new WP_Query($args);
	if (have_posts()) :
	while($products_query->have_posts()) : $products_query->the_post();

		$post_thumbnail_id = get_post_thumbnail_id();
		$post_thumbnail_url = wp_get_attachment_url($post_thumbnail_id);
?>
		<div class="product">
			<a class="product-title" href="<?php the_permalink(); ?>"><?php the_title(); ?></a>
			<a href="<?php the_permalink(); ?>">
				<img src="<?php echo get_template_directory_uri(); ?>/timthumb.php?src=<?php if($post_thumbnail_url){ echo $post_thumbnail_url; } else {  echo get_template_directory_uri()."/images/fallback.png"; } ?>&h=200&w=200" alt="<?php the_title(); ?>" />
			</a>
		</div>
We've retrieved the post thumbnail URL, to use with timthumb, by retrieving its ID and then using wp_get_attachment_url and passing it the ID.
As a fallback, if a category doesn’t contain any products yet, let's add the following:
<?php endwhile; else: ?>
	<p>Sorry no products were found.</p>
<?php endif; ?>
<?php wp_reset_query();  ?>
Finally we'll include our pagination links:
<div class="pagination">
	<?php next_posts_link('« More Products', $products_query->max_num_pages) ?>
	<?php previous_posts_link('Previous Products »') ?>
</div>
Now we're going to go down the other route, if the category did contain sub categories:
<?php
else{

	//output current category name
	echo '<h1 class="entry-title">'.$term->name.'</h1>';
	foreach($categories as $category) {
		echo '<div class="product-cat">';

		$thumb_url = get_option('taxonomy_image_plugin');
		$thumb_url = wp_get_attachment_url( $thumb_url[$category->term_taxonomy_id]);
		$product_cat_url = get_term_link( $category->slug, 'product_categories' );
?>

		<a href="<?php echo $product_cat_url; ?>">
			<img src="<?php echo get_template_directory_uri(); ?>/timthumb.php?src=<?php if($thumb_url){ echo $thumb_url; } else{ echo get_template_directory_uri()."/images/fallback.png"; } ?>&h=200&w=200" alt="<?php the_title(); ?>" />
		</a>
		<a class="cat-title" href="<?php echo $product_cat_url ; ?>"><?php echo $category->name; ?></a>
		</div> <!--end product cat-->

<?php } ?>
We've already covered what happens in the above code in step four so let's move on the last part of the tutorial.
Step 6 Displaying an Individual Product
If you’ve worked with custom post types before you know what’s coming next. We're going to create a single-products.php. Similar to our taxonomy-product_categories.php we used for our product categories taxonomy, we can create a custom single post template unique to our custom post type. In that file we're going to put:
<?php get_header(); ?>

	<?php if ( have_posts() ) while ( have_posts() ) : the_post(); ?>

		<?php
			//get post thumbnail url
			$post_thumbnail_id = get_post_thumbnail_id();
			$post_thumbnail_url = wp_get_attachment_url($post_thumbnail_id);
		?>
		<img id="product-img" src="<?php echo get_template_directory_uri(); ?>/timthumb.php?src=<?php if(!empty($post_thumbnail_url)){ echo $post_thumbnail_url; } else {  echo get_template_directory_uri()."/images/fallback.png"; } ?>&h=300&w=300" alt="<?php the_title(); ?>" />

		<div id="product-desc">
			<h1 class="entry-title"><?php the_title(); ?></h1>
		<?php the_content(); ?>

		<?php if( get_post_meta($post->ID, 'price', true)): ?>
			Price: <?php echo get_post_meta($post->ID, 'price', true); ?>
		<?php endif; ?>

		<div>

	<?php endwhile; ?>

<?php get_footer(); ?>
You should be familiar with most of the template tags used here but let's take a look at the use of get_post_meta that retrieves our price custom field we set in step one. We’ve set up an if statement to check if a price has been set, if one has, we output the price. We do this by passing the function the post ID, the meta key we want to retrieve, and whether we want a single result. We do, so we set it to true.
Again let's add some basic styles to layout our products:
#prouct-img{
	float:left;
	width:100%;
}
#product-desc{
	float:right;
	width:50%;
}
Wrapping Up
We’ve covered quite a bit here but hopefully now you should have a learned some new techniques and gained an understanding of the power of custom post types, taxonomies, and custom queries. Any questions or ideas for improvements? Let’s discuss them in the comments.

Comments