About Parse SDK and back{4}app
You may have read that Facebook is shutting down Parse, but don't worry that the Parse SDK will die. Facebook will retire the parse.com hosting service in January 2017, but the Parse SDK has been made open source . This means that the Parse SDK is here to stay! Parse SDK has lots of great developers working on it, and there are a number of brand new websites that offer backend hosting as a service.
One of the best is back{4}app. It offers the following features with a free account:
- 10 requests / second
- 50 K requests / month
- 5 GB file storage
- 1 GB database storage
- 1 cloud code job
Pretty nice, right? Check out their pricing table for more options.
Create a Free Account on back{4}app
Let's start by simply creating a free account on back{4}app. First, go to their website and create a new account. After you've successfully signed up, you'll be redirected to the dashboard. Click the green Build new Parse app button and you'll be redirected to the screen where you can type a name for your app:

The last option is about making your app's API public so any other developer can access it if you share your App ID with them. This may be useful if you hire somebody to work on your Parse Dashboard without giving him your Login credentials of your back{4}app account. Anyway, I usually leave it unchecked.
Then press the blue NEXT button to access your app's keys.
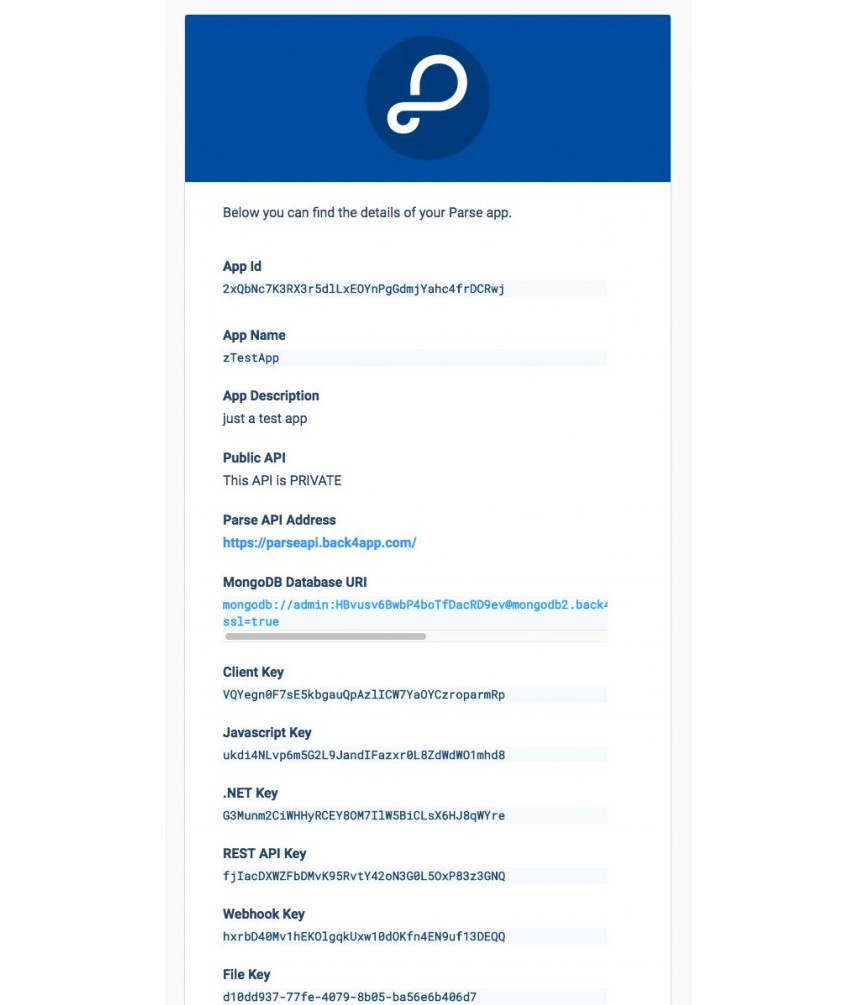
In the window shown above you can find all the keys you need to setup your own project, whether it's an iOS or Android app, a Javascript project, or something else. If you're an iOS developer, all you need to copy is the App ID and Client ID strings and paste them into your code, in the Parse init method in AppDelegate.swift.
    func application(application: UIApplication, didFinishLaunchingWithOptions launchOptions: [NSObject: AnyObject]?) -> Bool {
        // Override point for customization after application launch.

        // Init Parse
        let configuration = ParseClientConfiguration {
            $0.applicationId = "1234dgsh23ghg5d4h5g3dh4fg5h63fdg"
            $0.clientKey = "54355464fgdhfghf845bndfgsv8ew&/(%g"
            $0.server = "https://parseapi.back4app.com"
        }
        Parse.initializeWithConfiguration(configuration)

        return true
    }
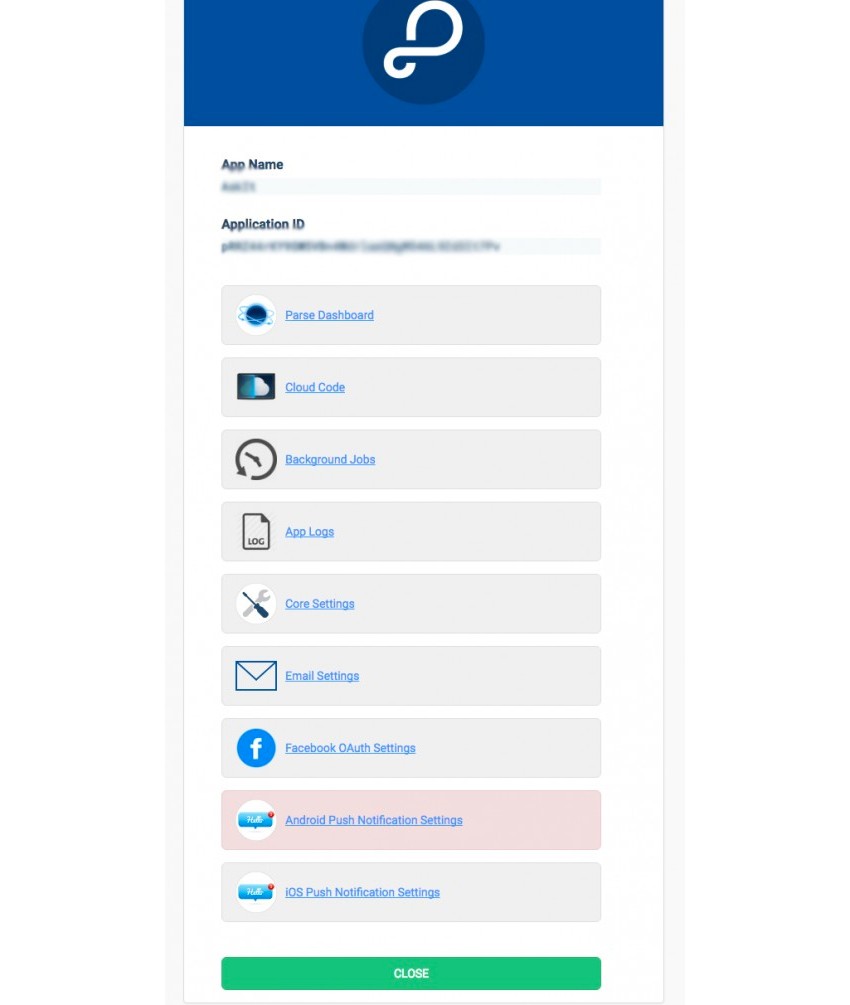
From the info screen, you may also delete your app from that info screen, or go back to the main page for your app where can access the Parse Dashboard. Click on the Parse Dashboard button to enter your dashboard where you can add classes and rows easily as easy as if you were working with an Excel file.
The Parse Dashboard
Now that your app is set up on back{4}app, you can start testing with no worries about incurring fees, thanks to the free account tier.
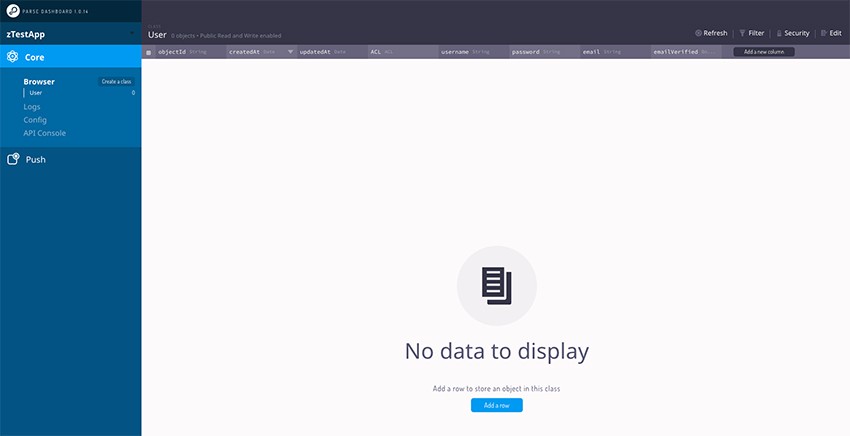
The Parse Dashboard of a brand new app is empty and it shows only the pre-made User class with its primary columns: objectId, createdAt, updatedAt, ACL, username, password, email, and emailVerified.
If you want to add a custom column to this user class just click on the dark Add a new column button in the top right of the window. If you want to add a row instead, you can either click on the blue Add a row button or use Edit -> Add a row. Try adding a new row and enter something in the username, password, and email fields.

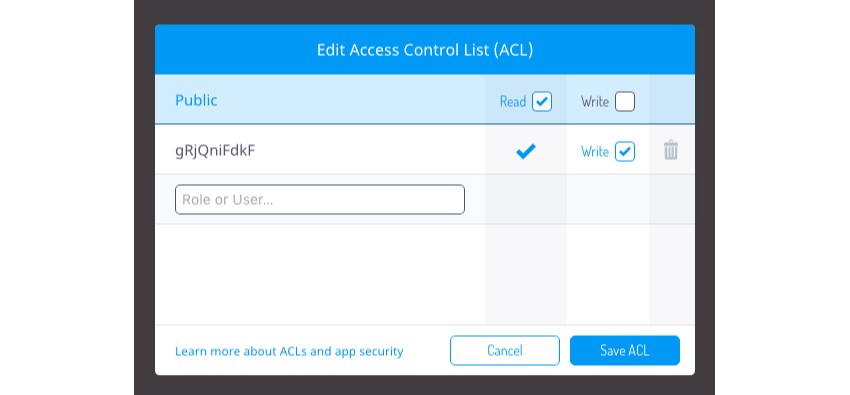
You've just created a new user with the User class. You'll see that the objectId, createdAt, updatedAt and ACL fields got filled automatically. Please note that ACL is for Access Control List, where you can set the Read and Write properties for the public and for the selected user.
If you want to create a new class, just click on Create class button in the sidebar on the left. Let's try to create a class called Products, of type Custom.

This time you'll get a screen with only objectId, createdAt, updatedAt, and ACL columns—these are the basic fields for every class. You can add your own columns to define your custom class datatype.
Conclusion
If you're writing an app that works with Parse SDK, you can also have it create the necessary classes, columns and rows in code. For example, my AskIt app template on CodeCanyon makes it easy to get set up with a Parse backend for your next iOS app. All you need to do is configure it with your back{4}app credentials, and the template will do the rest.
If you'd like to learn more about Parse SDK, check out some of our other courses and tutorials.


Comments