Introduction
A UIAlertController is used to display an alert message in an app. For example, if an error occurs, the alert can show a description and buttons to take further action. You can use alerts to make users log in or sign up, show the results of an action they made, or offer a few more settings options—for example when you have no room for extra buttons on a screen but you need users to be able to perform some more actions on a specific object in the app.
Since iOS 9, Apple has replaced UIAlertView with UIAlertController. You no longer have to add the UIAlertViewDelegate into your class and are now able to style your alert as you wish. You can customize the title and message fonts, change the background color, and add text fields. For the sake of this tutorial we have created a demo app with three buttons, and each one will fire a different customized alert. You can download it from the tutorial source repo on GitHub. Now let's see how easy it is to build these custom alerts!
Alert With a Text Field
The first alert we're going to build has a TextField attached where you can input anything you want from the iOS keyboard. In order to initialize a UIAlertController, you have to start with these three lines:
    let alert = UIAlertController(title: "AlertController Tutorial",
        message: "Submit something",
        preferredStyle: .alert)
In the first line, we set a simple string as a title of the alert. In the second line is the message string that will be displayed right below the title. In the third line, the alert's type is set to .alert. (Another option is .actionSheet, but you can't customize an action sheet like you can an alert.)
In an alert controller, buttons are defined as UIAlertAction elements. So we're going to create a UIAlertAction, which will be the first button on the bottom-left side of our alert.
   // Submit button
    let submitAction = UIAlertAction(title: "Submit", style: .default, handler: { (action) -> Void in
        // Get 1st TextField's text
        let textField = alert.textFields![0]
        print(textField.text!)
    })
We've called this action submitAction, set its title to "Submit", given it the default style, and for its handler, printed the content of a text field. Since text fields in the alert have an index, we've selected the first one at position 0. Later on we'll see how to add multiple text fields to an alert.
Once you've tapped the Submit button in your alert, the Xcode console will print the text you've entered and dismiss the alert.
Let's create a button to just hide our alert:
  // Cancel button
    let cancel = UIAlertAction(title: "Cancel", style: .destructive, handler: { (action) -> Void in })
As you can see, this action has no handler. That's because we want to dismiss the alert and perform no other actions. This button will show a red Cancel title because we've set its style as .destructive, which the Apple API will understand.
Before adding these two actions to the Alert, we have to initialize our text field:
// Add 1 textField and customize it
    alert.addTextField { (textField: UITextField) in
        textField.keyboardAppearance = .dark
        textField.keyboardType = .default
        textField.autocorrectionType = .default
        textField.placeholder = "Type something here"
        textField.clearButtonMode = .whileEditing
    }
If you're familiar with UITextFields, you'll recognize these as standard attributes which set properties such as the keyboard appearance and type, autocorrection type, placeholder message, and clear button. (We've set the clear button to show up when you start typing something.)
Now, let's finish off our alert.
    // Add action buttons and present the Alert
    alert.addAction(submitAction)
    alert.addAction(cancel)
    present(alert, animated: true, completion: nil)
The UIAlertController doesn't handle arrays of actions, so we must add them one by one. Lastly, we present the alert as we would any other controller—with the present() function.
In our demo app, we've embedded all the code above into a Button, so if you run the app and tap it, you should see something like this:
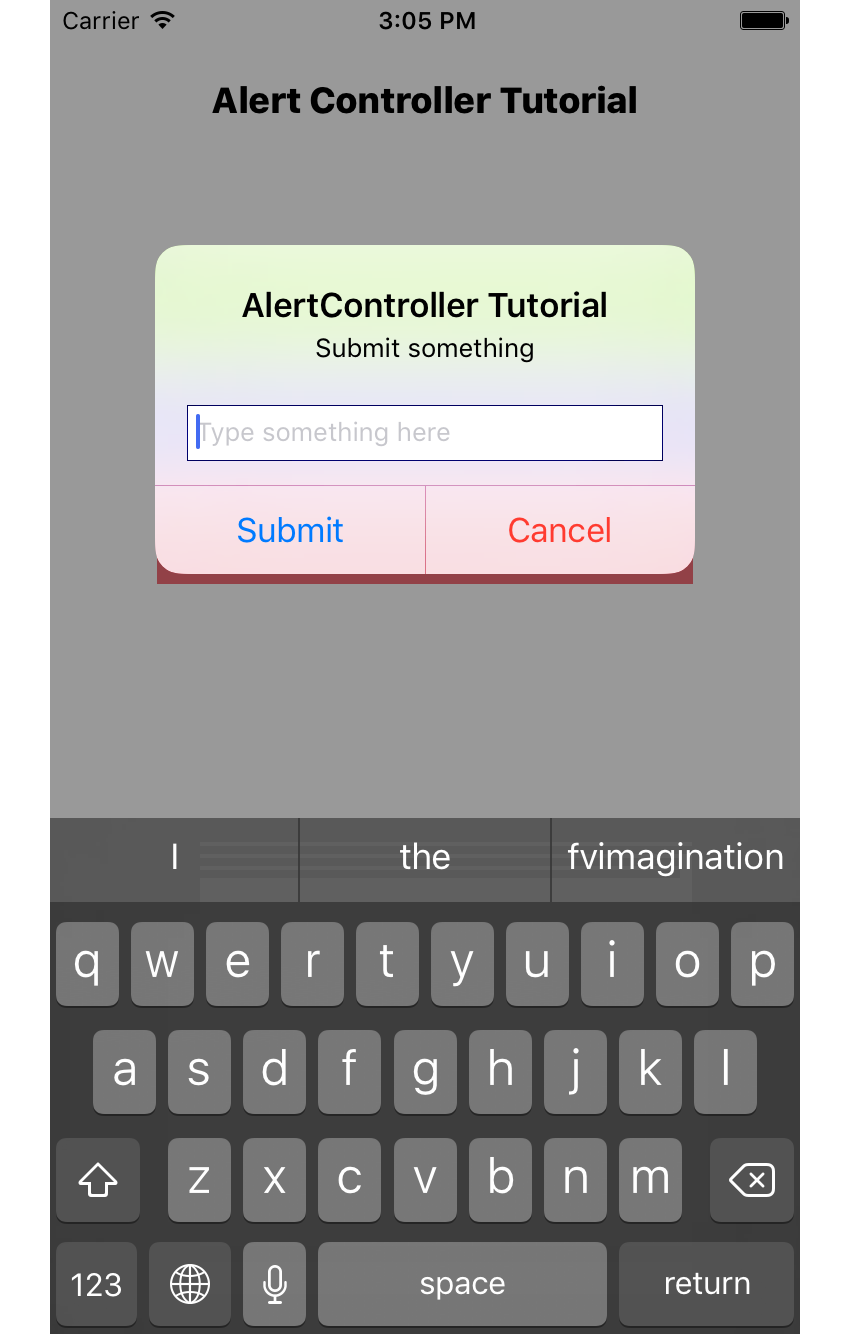
If you type something in the empty text field and hit Submit, your Xcode console will print it out.
Alert With Three Text Fields
Now let's create a new alert with multiple Text Fields to create a login prompt. We'll start again with the three lines that initialize our alert:
  let alert = UIAlertController(title: "Login example",
        message: "Insert username, password & phone No.",
        preferredStyle: .alert)
We still have two Buttons, one to perform a login action and the cancel button:
 // Login button
    let loginAction = UIAlertAction(title: "Login", style: .default, handler: { (action) -> Void in
        // Get TextFields text
        let usernameTxt = alert.textFields![0]
        let passwordTxt = alert.textFields![1]
        let phoneTxt = alert.textFields![2]

        print("USERNAME: \(usernameTxt.text!)\nPASSWORD: \(passwordTxt.text!)\nPHONE NO.: \(phoneTxt.text!)")
    })
As you can see, our alert has three text fields. These are indexed by their position. We'll treat the top one as the user name, the middle one as the password, and the last one as a phone number.
Now add a Cancel button:
 // Cancel button
    let cancel = UIAlertAction(title: "Cancel", style: .destructive, handler: { (action) -> Void in })
Next we're going to create and customize the username Text Field:
 // Add 1 textField (for username)
    alert.addTextField { (textField: UITextField) in
        textField.keyboardAppearance = .dark
        textField.keyboardType = .default
        textField.autocorrectionType = .default
        textField.placeholder = "Type your username"
        textField.textColor = UIColor.green
    }
The code above looks pretty similar to our first example, with the addition of the textColor instance.
Similarly for the second text field:
    // Add 2nd textField (for password)
    alert.addTextField { (textField: UITextField) in
        textField.keyboardAppearance = .dark
        textField.keyboardType = .default
        textField.placeholder = "Type your password"
        textField.isSecureTextEntry = true
        textField.textColor = UIColor.red
    }
Since passwords must usually be hidden, we've set the isSecureTextEntry attribute on our Text Field. This command will replace characters that you type with dots, as password fields do on a website. We've also set the text color to red.
And the third text element, for the phone number field:
    // Add 3rd textField (for phone no.)
    alert.addTextField { (textField: UITextField) in
        textField.keyboardAppearance = .dark
        textField.keyboardType = .numberPad
        textField.placeholder = "Type your phone no."
        textField.textColor = UIColor.blue
        textField.font = UIFont(name: "AmericanTypewriter", size: 14)
    }
The keyboardType attribute is set as .numberPad here, so the app will display the numeric keyboard only. You may also notice that we've changed the font of this text field to American Typewriter in the last line of code.
We're almost done—we just need to add our actions and present the AlertController again:
    // Add action buttons and present the Alert
    alert.addAction(loginAction)
    alert.addAction(cancel)
    present(alert, animated: true, completion: nil)
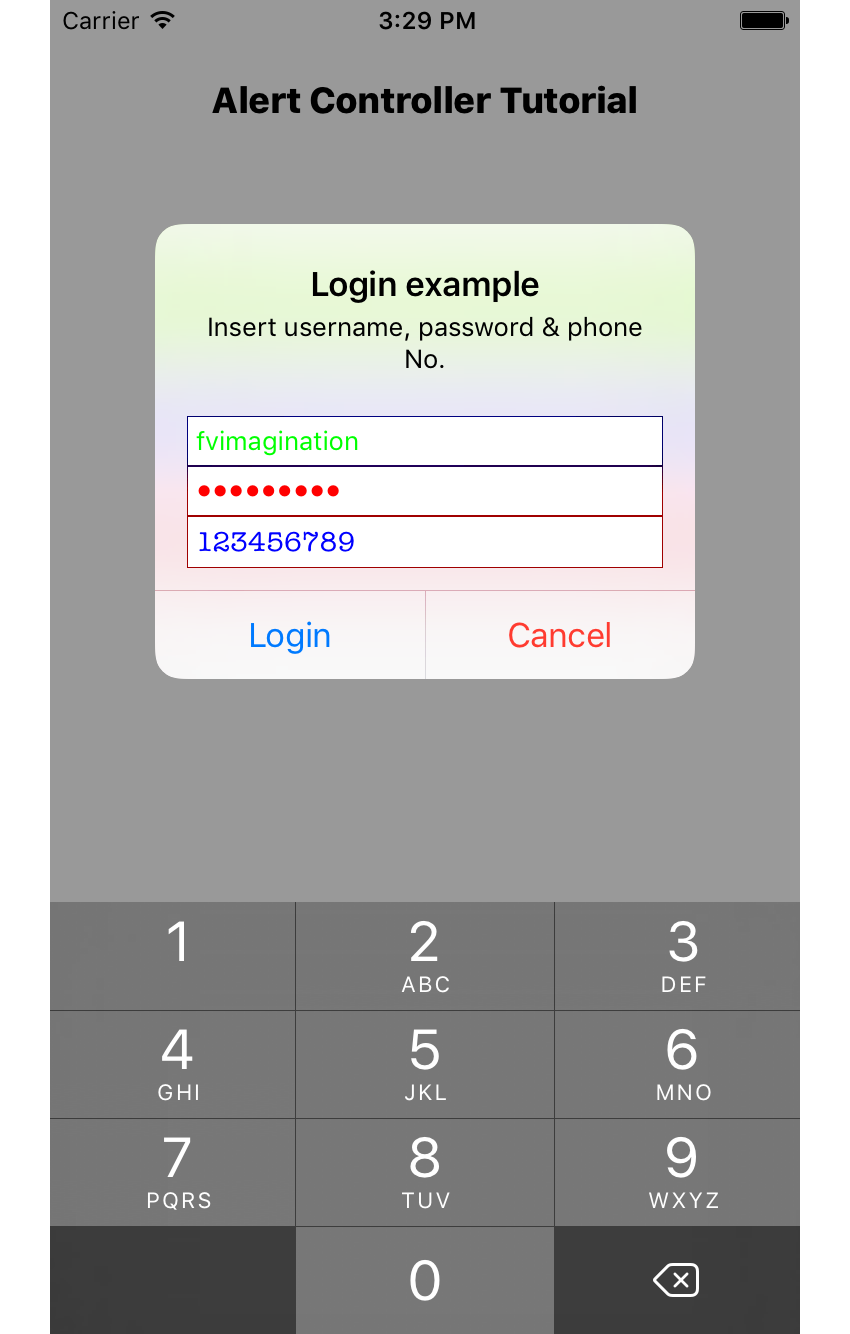
Now, if you run the app and fire this alert, you will see something like this:
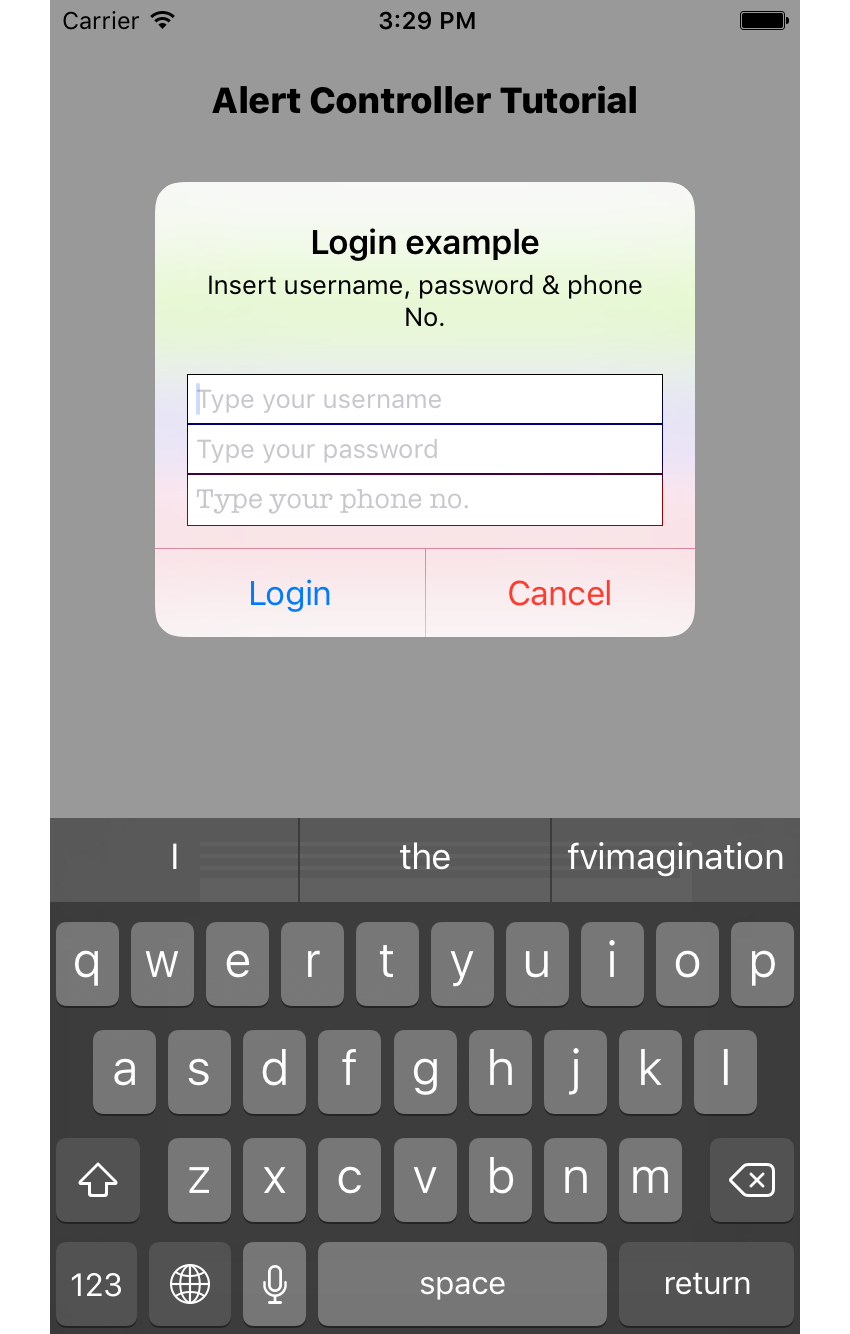
If you try typing something in the text fields, you'll see the custom styling we applied.
Alert With Four Buttons
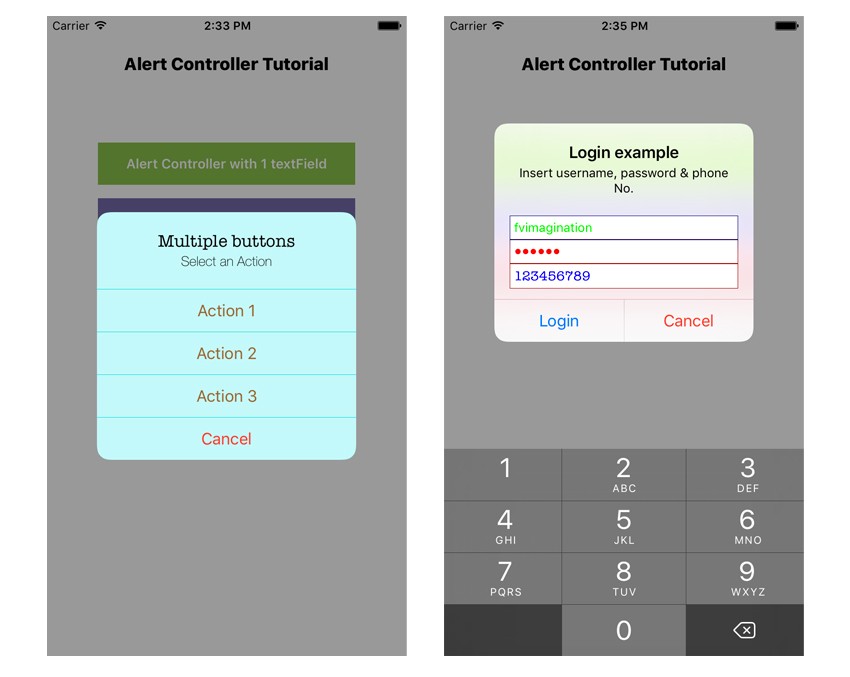
For a final example, I'll show you an alert with four actions and some different styling.
Since we'll customize the title and message attributes of this alert later, our initialization code will have empty strings for now:
    let alert = UIAlertController(title: "",
        message: "",
        preferredStyle: .alert)
Here's how we'll set up the font and size of the title and message fields:
 // Change font of the title and message
    let titleFont:[String : AnyObject] = [ NSFontAttributeName : UIFont(name: "AmericanTypewriter", size: 18)! ]
    let messageFont:[String : AnyObject] = [ NSFontAttributeName : UIFont(name: "HelveticaNeue-Thin", size: 14)! ]
    let attributedTitle = NSMutableAttributedString(string: "Multiple buttons", attributes: titleFont)
    let attributedMessage = NSMutableAttributedString(string: "Select an Action", attributes: messageFont)
    alert.setValue(attributedTitle, forKey: "attributedTitle")
    alert.setValue(attributedMessage, forKey: "attributedMessage")
In the first two lines we set the font name and size as a Dictionary of NSFontAttributeName. Please note that you will have to type the right PostScript name of the font you want to use, otherwise Xcode will not recognize it and will show the default font. The iOS Fonts site is a reference to the correct font names.
Here we'll also set the title and message strings with an instance of NSMutableAttributedString.
Let's create four actions, including the default Cancel one:
let action1 = UIAlertAction(title: "Action 1", style: .default, handler: { (action) -> Void in
        print("ACTION 1 selected!")
    })

    let action2 = UIAlertAction(title: "Action 2", style: .default, handler: { (action) -> Void in
        print("ACTION 2 selected!")
    })

    let action3 = UIAlertAction(title: "Action 3", style: .default, handler: { (action) -> Void in
        print("ACTION 3 selected!")
    })

    // Cancel button
    let cancel = UIAlertAction(title: "Cancel", style: .destructive, handler: { (action) -> Void in })
Before attaching these actions to our alert, let's style it a little bit.
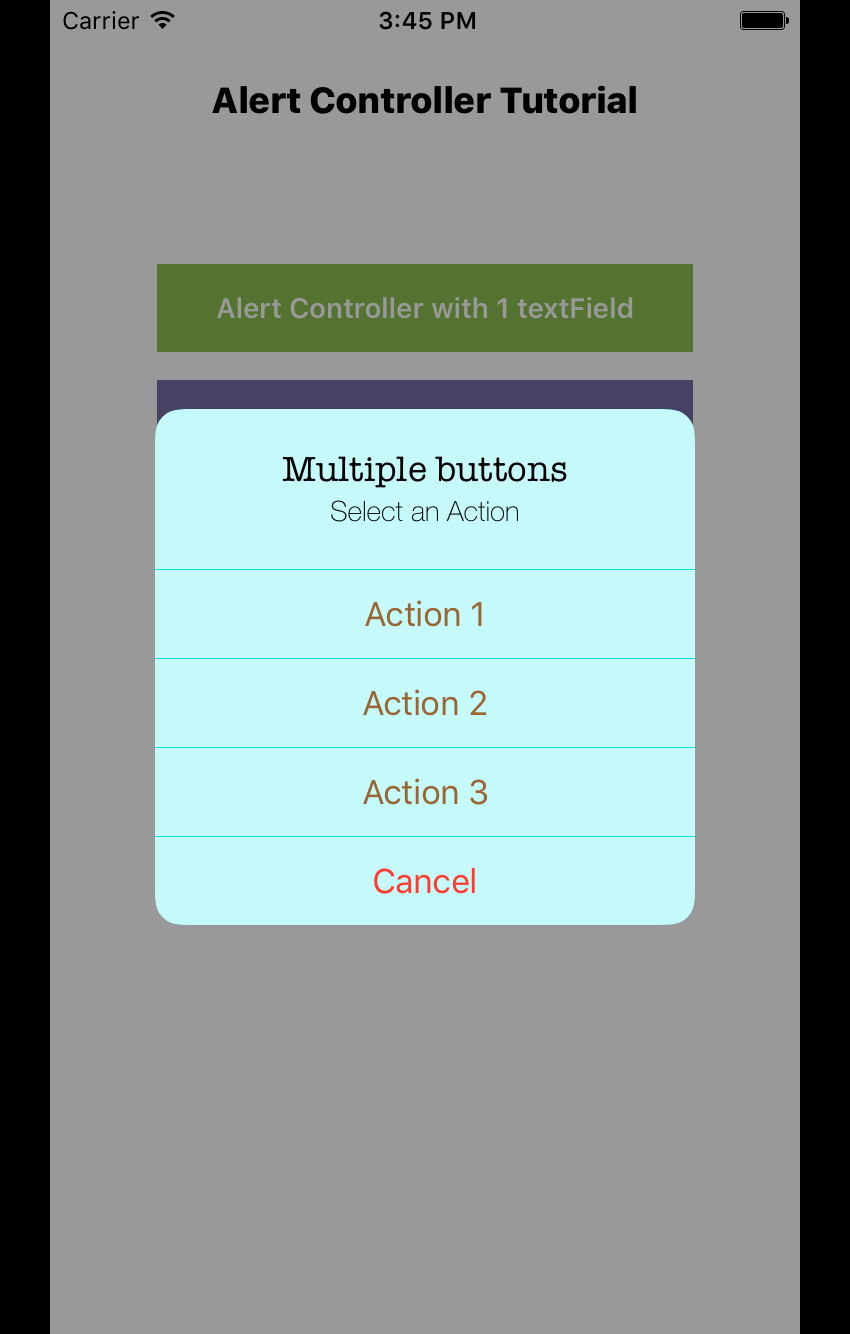
    // Restyle the view of the Alert
    alert.view.tintColor = UIColor.brown  // change text color of the buttons
    alert.view.backgroundColor = UIColor.cyan  // change background color
    alert.view.layer.cornerRadius = 25   // change corner radius
Although the UIAlertController API is limited, so that developers can't completely change its default structure, we can edit its style as we've done with the code above.
Finally we can add all actions and present our alert:
    // Add action buttons and present the Alert
    alert.addAction(action1)
    alert.addAction(action2)
    alert.addAction(action3)
    alert.addAction(cancel)
    present(alert, animated: true, completion: nil)
Now, if you run your code, you'll get something like this:
Conclusion
In this tutorial, we've created a series of custom UIAlertViews with text fields and custom styling. I hope you're able to put this knowledge into use for your next iOS app.
In the meantime, check out some of our other tutorials on Swift and iOS app development.


Comments