
In this set of two tutorials, we're creating a slider to display posts from a custom post type in such a way as to create a conversation effect between two speakers in an image.
In the previous part, we registered the post type, set up the sliders and added them to our site header. Now we need to position the text and add styling.
What You'll Need
To follow along, you'll need:
- a development installation of WordPress
- a code editor
- the free Responsive theme installed
- the child theme for Responsive from the previous part
The example I'm be working through is a real-world site I'm developing for a client, which is running a child theme of the Responsive theme. I've created a child of the Responsive theme and added custom styling to that as well as functions in the theme's functions.php file. You could either add this to your own theme or create a child theme of Responsive like me.
The Current Sliders
Here's what the site looks like right now:
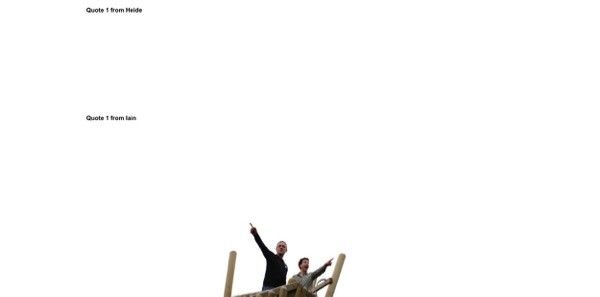
The sliders are there, but they're in the wrong place and they need styling.
So in this tutorial, we'll do the following:
- Add positioning for the sliders to place them next to the appropriate speaker.
- Register a font using Google Fonts and add that to the text.
- Add quotes around the text.
- Add a media query to fix any layout issues on smaller screens.
Note that for each quote I've just added a post title as the text to be shown. If you also add post content then that will be displayed too, so make sure your quotes just have a title and no content.
Position the Sliders
Let's add positioning to the sliders to overlay them over the image.
Add Absolute Positioning
Open your child theme's style.css file and add this:
.tutsplus-sliders {
    position: relative;
	max-width: 1000px;
	margin: 0px auto;
}
.smooth_slider {
	position: absolute;
}
This gives the div we created to contain our sliders relative positioning and the sliders themselves absolute positioning within that div. It also sets up the correct width for our div so it's centred with the image.
Now the sliders are over the image:
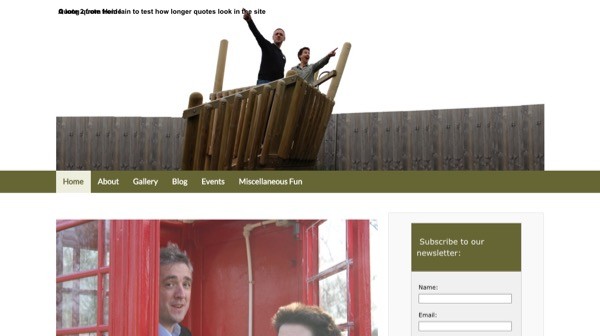
The problem is that they're superimposed over each other, and they need to be next to the relevant person. Let's fix that.
Position the Sliders Next to the Speakers
The Smooth Slider plugin gives each slider a unique ID in the markup. So the 'Heide' slider has an ID of #smooth_slider_3 and the 'Iain' slider has an ID of #smooth_slider_4. We can target those to position each slider correctly.
Add this to your stylesheet:
#smooth_slider_3 {
    top: 70px;
	right: 90px;
	text-align: right;
	width: 250px;
}
#smooth_slider_4 {
	top: 10px;
	left: 90px;
	width: 250px;
}
You'll need to check the ID the plugin has given each of your sliders by checking the output markup: they might be different from mine.
Now my sliders are in the right place:
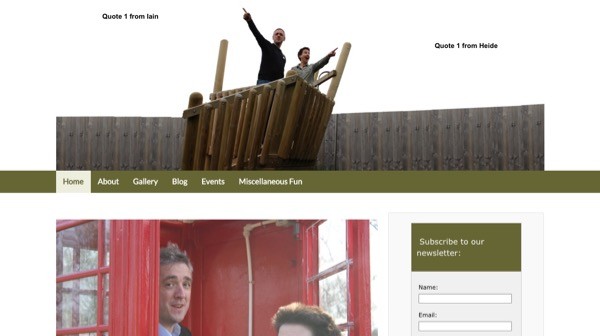
That's looking better. Now to add some styling.
Style the Text
I want to change the font and add quotation marks around the text.
Change the Font and Font Size
First, let's register a font using Google Fonts. Go back to your theme's functions.php file and add this:
function tutsplus_add_google_fonts() {
    wp_register_style( 'googleFonts', 'http://fonts.googleapis.com/css?family=Droid+Serif');
	wp_enqueue_style( 'googleFonts');
}
add_action( 'wp_enqueue_scripts', 'tutsplus_add_google_fonts' );
Note: in the source code there are two fonts enqueued because I've used another Google font elsewhere in the site, but not for the sliders.
Save your functions file and return to your stylesheet. Add this:
.smooth_slider h2 {
    font-size: 19px !important;
	font-family: 'Droid Serif', serif  !important;
	color: #666633 !important;
	line-height: 26px !important;
}
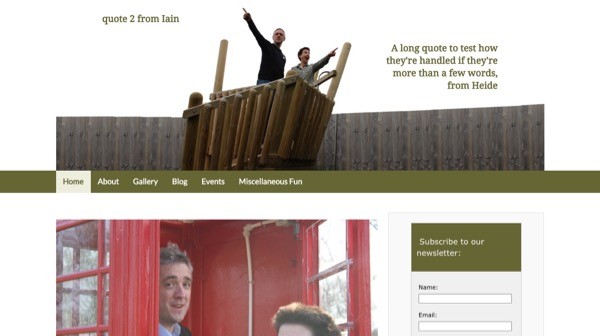
I've had to add !important to each line as otherwise it doesn't override the styling added by the plugin. If you wanted to, you could edit the fonts using the settings screen: I haven't because that doesn't let me use my Google font.
Our font now looks much better:
Add Quotation Marks
Finally, I want to add quotation marks around each piece of text, to emphasise the fact that the people in the image are supposed to be talking. To do this, I use the before and after pseudo elements.
In your stylesheet, add this:
.smooth_slider h2::before {
  content: open-quote;
}
.smooth_slider h2::after {
  content: close-quote;
}
This will enclose our h2 elements in double quotes.
Note: some older browsers won't support this as they don't support pseudo-elements. However I'm not concerned about this as the sliders are not essential to the content, and the number of people using those browsers is very small now.
Now save your stylesheet and check the site:
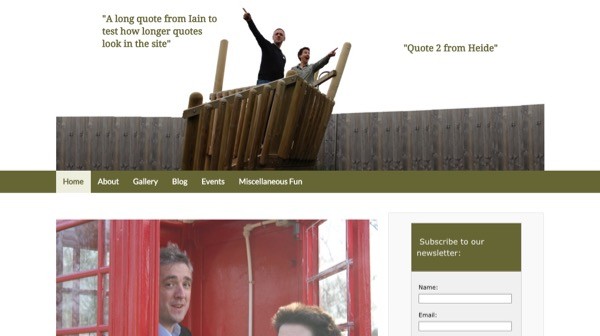
Fantastic! I now have my text in the right place with quotation marks around it. My client can now add as many quotes as they want, assign them to the appropriate sliders, and the conversation will continue.
Add a Media Query
Because I've used absolute positioning, the position of my text will break on smaller screens; the font sizes would also have to be so small as to make the text unreadable. So I'm going to add a media query to hide the sliders on smaller screens.
First I'll check the point at which the layout breaks: it's at approximately 900 px wide. So I need to add a media query to target screens smaller than 900 px wide.
At the bottom of your stylesheet, add the media query:
@media screen and (max-width: 900px) {
    .tutsplus-sliders {
		display: none;
	}
}
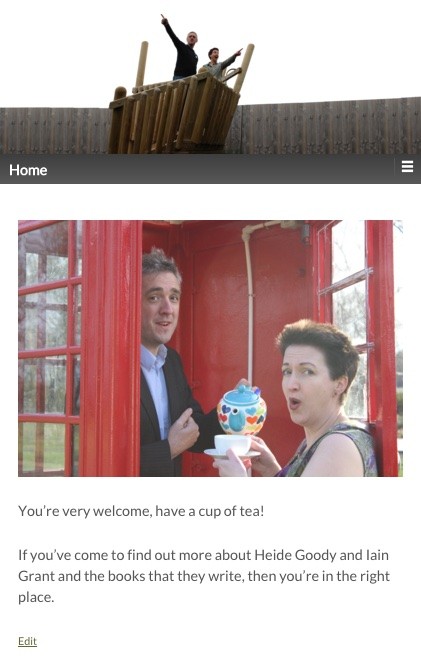
Now the sliders disappear on smaller screens:
If you wanted to, you could add alternative styling in your media query for mid-sized screens, making the font size a bit smaller and positioning the text to fit.
Summary
Using sliders for text can help you add interesting effects in your site: here I've added a conversation effect which is superimposed over an image of two people.
In this set of two tutorials, you've learned how to create this effect by:
- registering a post type
- installing a slider plugin and assigning posts to it
- displaying sliders in the header using a function hooked to an action hook provided by the theme
- positioning the text next to the two speakers
- styling the text and adding speech marks around it
- removing the text on smaller screens using a media query
You could use this technique to create pop-up text anywhere in your pages—get creative!

Comments