1. Introduction
Earlier in this series, we created Done, a simple application to learn more about the NSFetchedResultsController class. In that project, we used key value coding (KVC) and key value observing (KVO) to create and update records. This works fine, but from the moment your project has any kind of complexity, you'll quickly run into issues. Not only is the KVC syntax verbose, valueForKey: and setValue:forKey:, it may also introduce errors that are the result of typos. The following code snippet is a good example of the latter problem.
[record setValue:[NSDate date] forKey:@"createdat"];
[record setValue:[NSDate date] forKey:@"CreatedAt"];
[record setValue:[NSDate date] forKey:@"createdAt"];
[record setValue:[NSDate date] forKey:@"CREATEDAT"];
Each statement in the above code snippet returns a different result. In fact, every statement will result in an exception apart from the third statement, which uses the correct key as specified in the project's data model.
The above problem is easily solved by using string constants, but that's not the point I'm trying to make. Key value coding is great, but it is verbose and difficult to read if you're used to Objective-C's dot syntax. To make working with NSManagedObject instances easier, it's better to create an NSManagedObject subclass for each entity of the data model and that's what you'll learn in this article.
2. Subclassing NSManagedObject
To save some time, we're going to revisit Done, the application we created earlier in this series. Download it from GitHub and open it in Xcode.
Creating an NSManagedObject subclass is very easy. While it's possible to manually create an NSManagedObject subclass for an entity, it's easier to let Xcode do the work for you.
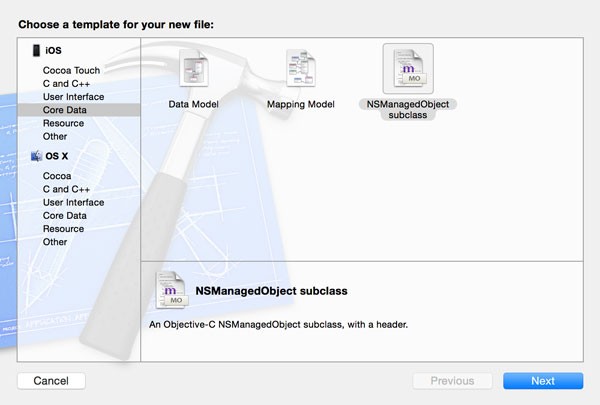
Open the project's data model, Done.xcdatamodeld, and select the TSPItem entity. Select New > File... from Xcode's File menu, choose the NSManagedObject subclass template from the Core Data section, and click Next.
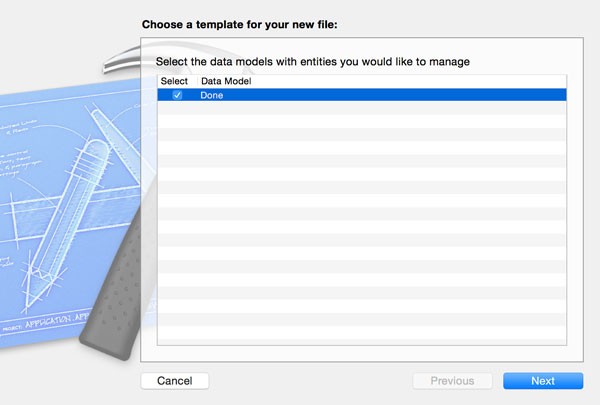
Check the checkbox of the correct data model, Done, from the list of data models and click Next.
In the next step, you are asked to select the entities for which you want to create an NSManagedObject subclass. Check the checkbox of the TSPItem entity and click Next.

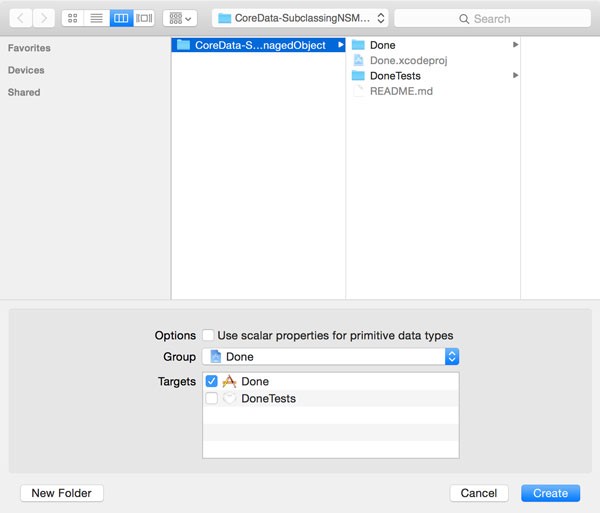
Choose a location to store the class files of the NSManagedObject subclass and make sure that Use scalar properties for primitive data types is unchecked. I'll explain the meaning of this option in a few moments. Click Create to create the NSManagedObject subclass for the TSPItem entity.
3. NSManagedObject Anatomy
Interface
Navigate to the files Xcode created for you and take a look at their contents. The header file, TSPItem.h, should look similar to what is shown below.
#import <Foundation/Foundation.h>
#import <CoreData/CoreData.h>

@interface TSPItem : NSManagedObject

@property (nonatomic, retain) NSDate * createdAt;
@property (nonatomic, retain) NSNumber * done;
@property (nonatomic, retain) NSString * name;

@end
At the top, you should see import statements for the Foundation and the Core Data frameworks. The NSManagedObject subclass contains three properties, corresponding with the attributes of the TSPItem entity of the data model. There are a few differences though.
The types of the name and createdAt properties, NSString, isn't surprising. The type of the done property, however, is less obvious. Even though we declared the type of the done attribute as a boolean in the data model, the done property is of type NSNumber. The reason is simple. When we created the NSManagedObject subclass a few moments ago, we left the checkbox labeled Use scalar properties for primitive data types unchecked. If we had checked that checkbox, the done property would be of type BOOL.
While it's up to you to decide whether you want to work with objects or primitive data types, there is a reason why the checkbox is unchecked by default. You'll quickly find out that it's less convenient to use primitive data types for the properties of an NSManagedObject subclass. It may look good on paper, but it becomes a hassle when you, for example, want to store primitive data types in Objective-C collections, which only accept objects.
Implementation
The implementation of the TSPItem class is even shorter and it uses a compiler directive that may be new to you.
#import "TSPItem.h"

@implementation TSPItem

@dynamic createdAt;
@dynamic done;
@dynamic name;

@end
By using the @dynamic directive, the compiler knows that the accessors (getters and setters) for the properties declared in the class's interface will be generated at runtime. The compiler takes our word for it and doesn't issue any warnings.
If you comment out the @dynamic statements, the compiler generates three warnings, telling us that the accessors for the three properties are missing.
4. Updating the Project
With the TSPItem class ready to use, it's time to update the project by replacing any occurrences of valueForKey: and setValue:forKey:.
TSPViewController
Open the implementation file of the TSPViewController class and start by adding an import statement for the TSPItem class at the top.
#import "TSPItem.h"
Navigate to the configureCell:atIndexPath: and update the implementation as shown below.
- (void)configureCell:(TSPToDoCell *)cell atIndexPath:(NSIndexPath *)indexPath {
    // Fetch Record
    TSPItem *record = [self.fetchedResultsController objectAtIndexPath:indexPath];

    // Update Cell
    [cell.nameLabel setText:record.name];
    [cell.doneButton setSelected:[record.done boolValue]];

    [cell setDidTapButtonBlock:^{
        BOOL isDone = [record.done boolValue];

        // Update Record
        record.done = @(!isDone);
    }];
}
We've made five changes. We first changed the type of the record variable to TSPItem. The objectAtIndexPath: method of the NSFetchedResultsController class returns an instance of the NSManagedObject class. This is still true since the TSPItem class is a NSManagedObject subclass.
We also substitute the valueForKey: calls. Instead, we use the properties of the record object, name and done. Thanks to Objective-C's dot syntax, the result is very legible. Note that we call boolValue on the record's done property. Remember that the done property is of type NSNumber, which is why we need to call boolValue on it to get the actual boolean value. To set the value of the isDone variable, we repeat this step.
To update the record, we no longer call setValue:forKey:. Instead, we use the dot syntax to set the record's done property. I'm sure you agree that this is much more elegant than using straight key value coding.
Remember that KVC and KVO remain an integral part of Core Data. Core Data uses valueForKey: and setValue:forKey: under the hood to get the job done.
TSPAddToDoViewController
We also need to make a few changes in the TSPAddToDoViewController class. Start by adding an import statement for the TSPItem class. In the save: method, we first need to update the initialization of the NSManagedObject instance. Instead of initializing an NSManagedObject instance, we create a TSPItem instance.
// Initialize Record
TSPItem *record = [[TSPItem alloc] initWithEntity:entity insertIntoManagedObjectContext:self.managedObjectContext];
To populate the record, we use the dot syntax instead of the setValue:forKey method as shown below.
// Populate Record
record.name = name;
record.createdAt = [NSDate date];
TSPUpdateToDoViewController
The last class we need to update is the TSPUpdateToDoViewController class. Let's start with the class's interface. Open TSPUpdateToDoViewController.h and update its contents as shown below. We add a forward class declaration for the TSPItem class at the top and change the type of the record property to TSPItem.
#import <UIKit/UIKit.h>
#import <CoreData/CoreData.h>

@class TSPItem;

@interface TSPUpdateToDoViewController : UIViewController

@property (weak, nonatomic) IBOutlet UITextField *textField;

@property (strong, nonatomic) NSManagedObjectContext *managedObjectContext;

@property (strong, nonatomic) TSPItem *record;

@end
This change will result in a warning in the TSPViewController class. To see what's wrong, open the implementation file of the TSPViewController class and navigate to the prepareForSegue:sender: method.
We ask the fetched results controller for the record at the selected index path, self.selection. The type of the record variable is NSManagedObject, but the TSPUpdateToDoViewController class expects a TSPItem instance. The solution is very simple as you can see below.
if (self.selection) {
    // Fetch Record
    TSPItem *record = [self.fetchedResultsController objectAtIndexPath:self.selection];

    if (record) {
        [vc setRecord:record];
    }

    // Reset Selection
    [self setSelection:nil];
}
Head back to the TSPUpdateToDoViewController class and add an import statement for the TSPItem class at the top of its implementation file. Update the viewDidLoad method as shown below.
- (void)viewDidLoad {
    [super viewDidLoad];

    if (self.record) {
        // Update Text Field
        [self.textField setText:self.record.name];
    }
}
We also need to update the save: method, in which we replace setValue:forKey: with the dot syntax.
// Populate Record
self.record.name = name;
Build the project and run the application in the iOS Simulator to see if everything is still working as expected.
5. Relationships
The current data model doesn't contain any relationships, but let's add a few to see how an NSManagedObject subclass with relationships looks like. As we've seen in the previous article of this series, we first need to create a new version of the data model. Select the data model in the Project Navigator and choose Add Model Version... from the Editor menu. Set Version name to Done 2 and base the model on the current data model, Done. Click Finish to create the new data model version.
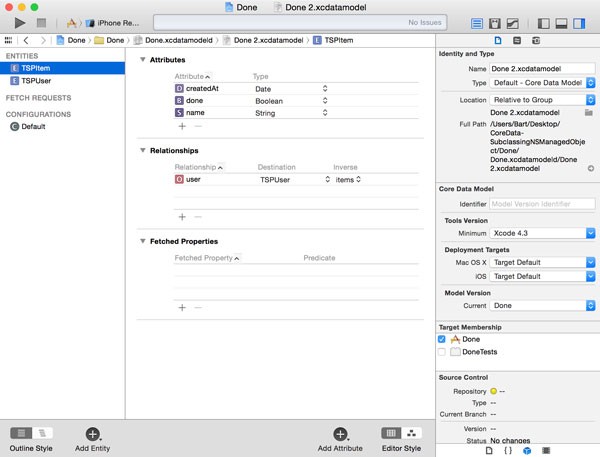
Open Done 2.xcdatamodel, create a new entity named TSPUser, and add an attribute name of type String. Add a relationship items and set the destination to TSPItem. Leave the inverse relationship blank for now. With the items relationship selected, open the Data Model Inspector on the right and set the relationship type to To Many. A user can have more than one item associated with it.
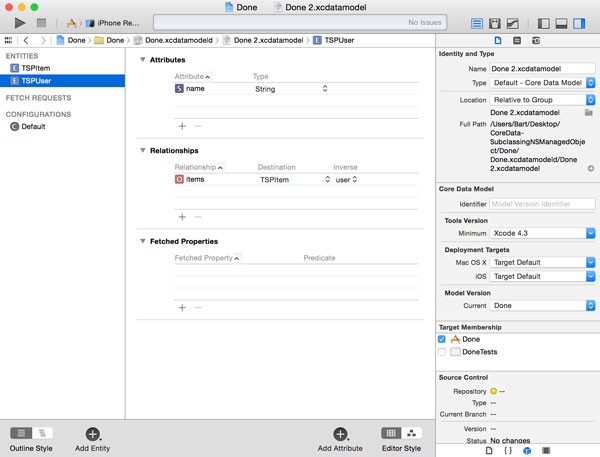
Select the TSPItem entity, create a relationship user, and set the destination to TSPUser. Set the inverse relationship to items. This will automatically set the inverse relationship of the items relationship of the TSPUser entity.
Before we create the NSManagedObject subclasses for both entities, we need to tell the data model which data model version it should use. Select Done.xcdatamodeld, open the File Inspector on the right, and set the current model version to Done 2. When you do this, double-check that you've selected Done.xcdatamodeld, not Done.xcdatamodel.
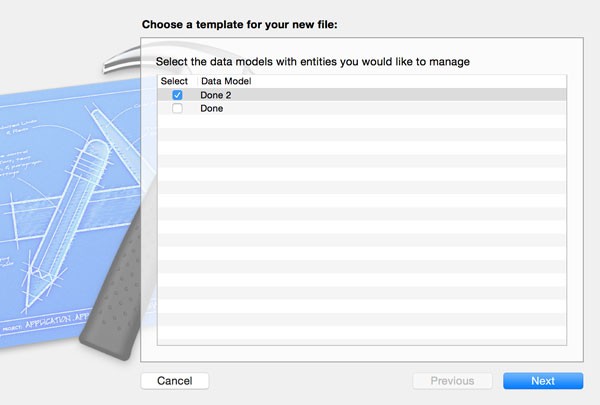
Remove TSPItem.h and TSPItem.m from the project. Select New > File... from the File menu and choose the NSManagedObject subclass template from the Core Data section. From the list of data models, select Done 2.
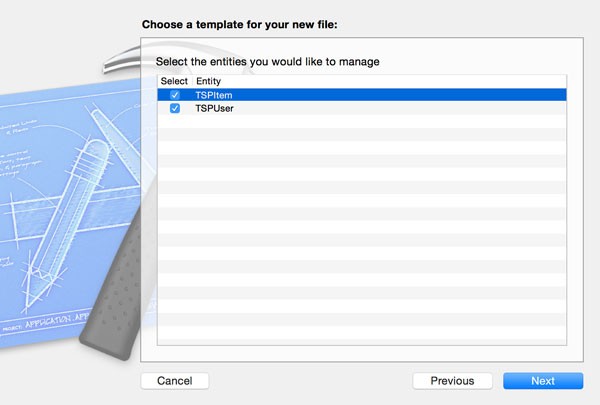
Select both entities from the list of entities. Because we've modified the TSPItem entity, we need to regenerate the corresponding NSManagedObject subclass.
TSPItem
Let's first take a look at the changes of the newly generated TSPItem class. As you can see below, the header file contains one additional property, user of type TSPUser. To satisfy the compiler, Xcode also added a forward class declaration at the top.
#import <Foundation/Foundation.h>
#import <CoreData/CoreData.h>

@class TSPUser;

@interface TSPItem : NSManagedObject

@property (nonatomic, retain) NSDate * createdAt;
@property (nonatomic, retain) NSNumber * done;
@property (nonatomic, retain) NSString * name;
@property (nonatomic, retain) TSPUser *user;

@end
The implementation file reflects the addition of the user property.
#import "TSPItem.h"
#import "TSPUser.h"

@implementation TSPItem

@dynamic createdAt;
@dynamic done;
@dynamic name;
@dynamic user;

@end
This is what a To One relationship looks like in an NSManagedObject subclass. Xcode is smart enough to infer that the type of the user property is TSPUser, the NSManagedObject subclass we created a moment ago.
TSPUser
The TSPUser class is a bit more complex. Take a look at the class's interface. The first thing you'll notice is that the type of the items property is NSSet. This shouldn't be a surprise, because we already knew that Core Data uses the NSSet class for storing the members of a To Many relationship.
#import <Foundation/Foundation.h>
#import <CoreData/CoreData.h>

@class TSPItem;

@interface TSPUser : NSManagedObject

@property (nonatomic, retain) NSString * name;
@property (nonatomic, retain) NSSet *items;
@end
The header file of the TSPUser class also contains a class extension that includes four convenience methods. This is another benefit of using an NSManagedObject subclass and let Xcode generate it for us. Instead of directly manipulating the items property, we can add and remove TSPItem instances using these convenience methods.
@interface TSPUser (CoreDataGeneratedAccessors)

- (void)addItemsObject:(TSPItem *)value;
- (void)removeItemsObject:(TSPItem *)value;
- (void)addItems:(NSSet *)values;
- (void)removeItems:(NSSet *)values;

@end
Let me show you why these convenience methods are so useful. Let's see what it takes to add a TSPItem object to a TSPUser instance with and without these convenience methods.
/**
 *  With Convenience Methods
 */
[user addItemsObject:item];

/**
 *  Without Convenience Methods
 */
NSMutableSet *items = [[user items] mutableCopy];
[items addObject:item];
[user setItems:items];
Under the hood, however, Core Data uses key value coding to add the TSPItem instance to the items property of the user object.
NSMutableSet *items = [user mutableSetValueForKey:@"items"];
[items addObject:item];
6. Migrations
If you build the project and run the application in the iOS Simulator, you'll notice that the application crashes. The output in Xcode's console tells us that the data model used to open the persistent store is not compatible with the one that was used to create it. The reason of this problem is explained in detail in the previous article of this series. If you want to learn more about migrations and how to safely modify the data model, then I suggest you read that article.
Conclusion
Subclassing NSManagedObject is very common when working with Core Data. Not only does it add type safety, it also makes working with relationships much easier.
In the next installment of this series, we take a closer look at Core Data and concurrency. Concurrency is a tricky concept in almost any programming language, but knowing which pitfalls to avoid, makes it much less scary.

Comments