Getting started with the Twitter API may seem a bit complicated, but it’s actually quite straightforward. There are a number of libraries for common languages that make the process quite easy. Twitter’s API documentation has also improved greatly over time.
In March 2013, Twitter began requiring OAuth for all API sessions, and that’s led to improvements for users and developers all round. OAuth’s secure authenticated platform has helped Twitter protect user privacy while improving tracking; this in turn has allowed the company to increase the limits for developers on individual API calls.
This series consists of three parts. Part one will cover:
- an introduction to the Twitter API
- building a database schema for Twitter
- building out a PHP application in the Yii Framework for working with Twitter
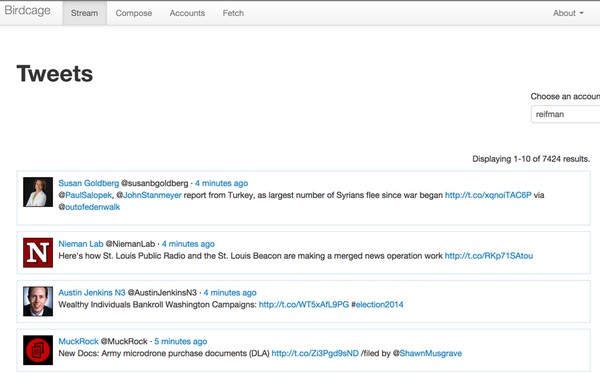
Birdcage, our basic Yii Twitter application used in this tutorial, is available to you via open source. If you’d like to learn more about Yii, check out Introduction to the Yii Framework.
Part two of this series will cover:
- authentication with Twitter via OAuth
- processing incoming tweets in the background using the REST API
- posting tweets
Part three will cover use of the real time Twitter Streaming API and the open source Phirehose streaming implementation. While part two processes tweets using the REST API, part three will describe how to build an always-on connection with the Twitter data stream. This may be a new topic for many PHP developers.
Introduction to the Twitter API
For the most part, this series of tutorials will focus on three parts of the Twitter platform:
- OAuth authentication
- the REST API
- the Streaming API
You can read the Twitter API documentation here.
OAuth Authentication
As of version 1.1, the Twitter API now requires OAuth authentication, either application-only authentication or application-user authentication. The latter requires your Twitter user to click through to the Twitter website, sign in with their credentials, and then return to your site. Application-user authentication is required for many user-specific API calls.
In other words, when you begin to access the Twitter API on behalf of a user, your user will be directed to Twitter to authorize your application. Twitter will return tokens which do not expire until the user revokes them. You’ll use these tokens to authenticate your calls on behalf of this user.
The REST API
The most common way to access Twitter data is through the REST API. Using the secure tokens obtained via OAuth, your application makes requests to Twitter for specific data, e.g. the user's home timeline or their own statuses, or a request to post a tweet for a specific user.
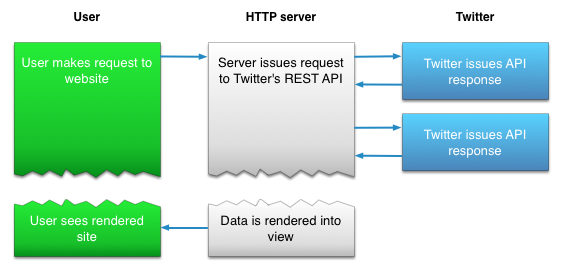
The REST API should meet the needs of most Twitter application programmers.
The Streaming API
The Twitter Streaming API allows you to receive tweets and notifications in real time from Twitter. However, it requires a high-performance, persistent, always-on connection between your server and Twitter.
Fortunately, there is a great open-source library called Phirehose by Fenn Bailey which implements most of the Twitter streaming API requirements. We'll review how to set up Phirehose and adapt it to your application in part three of this tutorial.
There are three variations of the Twitter Streaming API:
- The Public Stream. This allows your application to monitor public data on Twitter, such as public tweets, hashtag filters, etc.
- The User Stream. This allows you to track a user's tweet stream in real time. Part three of this tutorial will focus on the user stream.
- Site Streams (require prior approval from Twitter). Site streams allow your application to monitor real-time Twitter feeds for a large number of users.
The job of your streaming implementation is to log the incoming events as quickly as possible and process them in the background using the REST API as necessary to harvest deeper data. Twitter sometimes calls this gathering of deeper data about events "hydrating".
Use of the REST API is subject to various rate limits by Twitter. It’s important to be a responsible user of Twitter’s API by planning limits to your activity within your application and monitoring the API rate limit responses. The Streaming API doesn't have rate limits since data is pushed to your server as it comes in.
Building a Database Schema for the Twitter API
While Twitter from a distance seems simple, it’s actually a very deep and complex data stream including the always growing timeline, relationships between users, mentions, notifications, favorites, lists, geolocation, multimedia, places, et al.
As a developer you have to decide which of this data is most important to your application to store in your own database. A minimalist approach may serve you well. The Twitter API is flexible enough that you can always go back and expand (or hydrate) the data related to the events you store.
Birdcage is a free, open-source, Yii-based application which implements the Twitter API framework for the purposes of this tutorial. If you're not familiar with Yii, please read my Introduction to the Yii Framework. Even if you're unfamiliar with Yii, the individual PHP code segments in this tutorial should be quite easy to follow.
If you wish to see a Twitter API implementation in basic PHP, check out Adam Greene's 140Dev. He's done a great job providing a basic platform for Twitter API access. His book Twitter API Engagement Programming has a creative take on using the Twitter API to organically build your influence on Twitter.
One of the benefits of Birdcage and the Yii Framework code is that we can use Yii's scaffolding component, Gii, to generate a web user interface for the basic application in minutes—something that you just can't do in basic PHP.
As a Yii application, Birdcage uses ActiveRecord database migrations to build its database. Database migrations make it possible to programmatically build and extend our schema. This is especially useful if you implement a minimalist consumption of the Twitter API and later choose to expand what you gather.
I'll walk you through several examples of constructing the database schema in Yii and the power of its web-based scaffolding constructor, Gii.
If you'd like to try out the Birdcage code on your own, please visit my site for a complete walk-through of installation instructions.
First, we’ll create an account table to store the OAuth tokens and secrets from Twitter for the accounts we wish to log in for. These accounts are linked to the registered user in the user table by our internal user_id.
From the command line, we'll tell Yii to create a new table migration for Twitter accounts: ./app/protected/yiic migrate create create_account_table.
We'll complete the migration manually like this:
<?php

class m140911_212834_create_account_table extends CDbMigration
{
   protected $MySqlOptions = 'ENGINE=InnoDB CHARSET=utf8 COLLATE=utf8_unicode_ci';
   public $tablePrefix;
   public $tableName;

   public function before() {
     $this->tablePrefix = Yii::app()->getDb()->tablePrefix;
     if ($this->tablePrefix <> '')
       $this->tableName = $this->tablePrefix.'account';
   }

     public function safeUp()
 	{
 	  $this->before();
  $this->createTable($this->tableName, array(
             'id' => 'pk',
             'user_id' => 'integer default 0',
             'screen_name' => 'string NOT NULL',
             'oauth_token' => 'string NOT NULL',
             'oauth_token_secret' => 'string NOT NULL',
             'last_checked' => 'TIMESTAMP DEFAULT 0',
             'created_at' => 'DATETIME NOT NULL DEFAULT 0',
             'modified_at' => 'TIMESTAMP DEFAULT CURRENT_TIMESTAMP ON UPDATE CURRENT_TIMESTAMP',
               ), $this->MySqlOptions);
               $this->addForeignKey('fk_account_user', $this->tableName, 'user_id', $this->tablePrefix.'users', 'id', 'CASCADE', 'CASCADE');
 	}

 	public function safeDown()
 	{
 	  	$this->before();
 	  	$this->dropForeignKey('fk_account_user', $this->tableName);
 	    $this->dropTable($this->tableName);
 	}
}
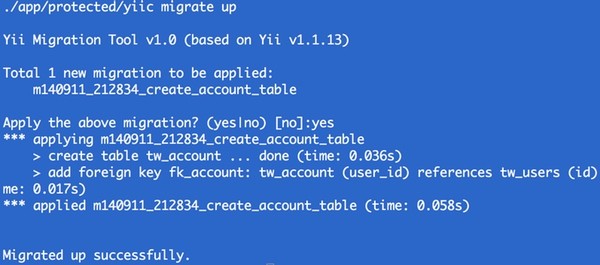
To have Yii run the migration which will construct the SQL table, we do this: ./app/protected/yiic migrate up.
You'll see something like this:
We can use Gii, Yii's web-based scaffolding generator, to build our model view controllers for the database.
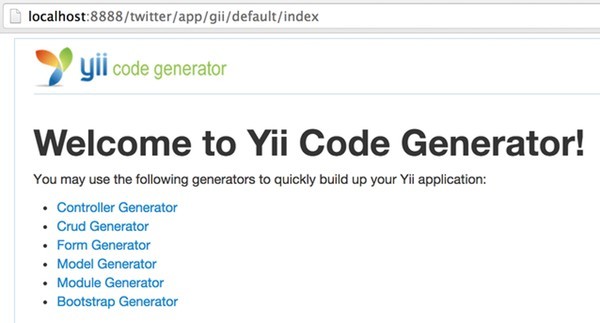
In my development environment, I point my web browser to localhost:8888/twitter/app/gii, type in my Gii password (stored in my twitter.ini file), and choose Model Generator:
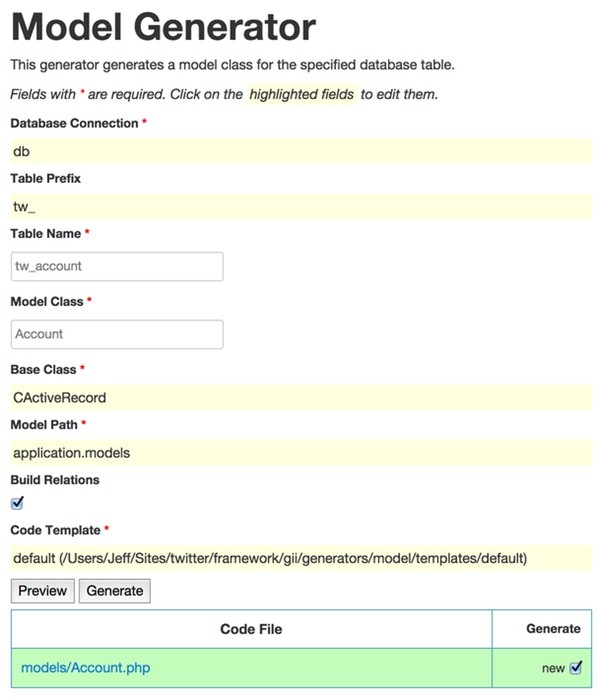
It only takes a second and should show this success message:
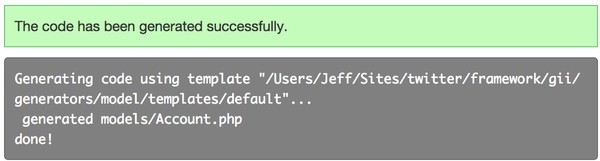
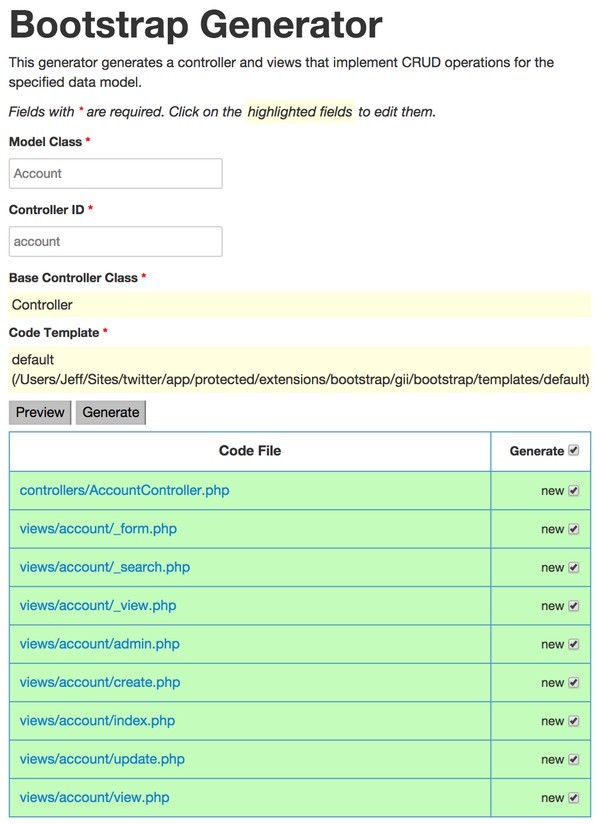
The model code Gii generates can be used to build a variety of methods related to the Account table. But Gii can also generate the beginnings of the web user interface for managing Twitter accounts.
Click on Bootstrap Generator, specify the Account model, and Gii will build out the scaffolding for your Account web user interface:
The resulting code creates a default model view controller user interface which looks something like this:
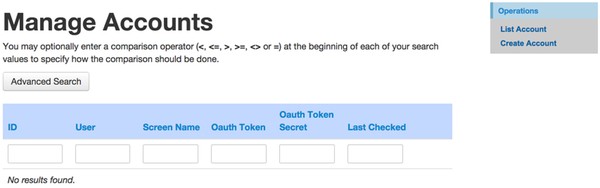
Using Yii Active Record Migrations and Gii is an extremely powerful timesaver for building out a basic web user interface. Once the default scaffolding code is in place, it's straightforward to customize and extend it.
Next, we’ll build the database tables for storing Twitter data, including our Twitter_User and Tweet tables. Here's the Twitter_User table:
      $this->createTable($this->tableName, array(
               'id' => 'pk',
               'twitter_user_id' => 'bigint(20) unsigned NOT NULL',
               'screen_name' => 'string NOT NULL',
               'name' => 'string DEFAULT NULL',
               'profile_image_url' => 'string DEFAULT NULL',
               'location' => 'string DEFAULT NULL',
               'url' => 'string DEFAULT NULL',
               'description' => 'string DEFAULT NULL',
               'followers_count' => 'int(10) unsigned DEFAULT NULL',
               'friends_count' => 'int(10) unsigned DEFAULT NULL',
               'statuses_count' => 'int(10) unsigned DEFAULT NULL',
               'time_zone' => 'string DEFAULT NULL',
               'created_at' => 'DATETIME NOT NULL DEFAULT 0',
               'modified_at' => 'TIMESTAMP DEFAULT CURRENT_TIMESTAMP ON UPDATE CURRENT_TIMESTAMP',
                 ), $this->MySqlOptions);
                 $this->createIndex('twitter_user_id', $this->tableName , 'twitter_user_id', true);
Here's the Tweet table:
    $this->createTable($this->tableName, array(
             'id' => 'pk',
             'account_id'=>'integer default 0',
             'twitter_user_id'=>'bigint(20) unsigned NOT NULL',
             'last_checked' => 'TIMESTAMP DEFAULT 0',
             'tweet_id' => 'BIGINT(20) unsigned NOT NULL',
             'tweet_text' => 'TEXT NOT NULL',
             'is_rt' => 'TINYINT DEFAULT 0',
             'created_at' => 'DATETIME NOT NULL DEFAULT 0',
             'modified_at' => 'TIMESTAMP DEFAULT CURRENT_TIMESTAMP ON UPDATE CURRENT_TIMESTAMP',
               ), $this->MySqlOptions);
               $this->createIndex('tweet_id', $this->tableName , 'tweet_id', true);
               $this->addForeignKey('fk_tweet_account', $this->tableName, 'account_id', $this->tablePrefix.'account', 'id', 'CASCADE', 'CASCADE');
               $this->addForeignKey('fk_tweet_user_id', $this->tableName, 'twitter_user_id', $this->tablePrefix.'twitter_user', 'twitter_user_id', 'CASCADE', 'CASCADE');
Notice that we use a foreign key relation to the TwitterUser table. Gii smartly builds relations for us in the Tweet model:
    public function relations()
	{
		// NOTE: you may need to adjust the relation name and the related
		// class name for the relations automatically generated below.
		return array(
			'hashtags' => array(self::HAS_MANY, 'Hashtag', 'tweet_id'),
			'mentions' => array(self::HAS_MANY, 'Mention', 'tweet_id'),
			'account' => array(self::BELONGS_TO, 'Account', 'account_id'),
			'twitterUser' => array(self::BELONGS_TO, 'TwitterUser', 'twitter_user_id'),
			'urls' => array(self::HAS_MANY, 'Url', 'tweet_id'),
		);
	}
Yii Active Record then automatically manages joins for us. Thus, you can reference TwitterUser properties in your queries with code such as echo $tweet->twitterUser->profile_image_url.
In general, Birdcage is intended as a simple framework that you might expand on your own. I did not make great attempts here to minimize storage space based on Twitter size definitions or to optimize relations within the schema. I primarily designed this for personal use.
Twitter pre-parses tweets into what it calls entities, which help filter out metadata for you. These are divided into Mentions, URLs, and Hashtags.
Mentions
When tweets mention other users, e.g. @tommcfarlin, Twitter provides metadata describing those mentions. Here's the schema we'll use to store them:
    $this->createTable($this->tableName, array(
             'id' => 'pk',
             'tweet_id' => 'BIGINT(20) unsigned NOT NULL',
             'source_user_id'=>'bigint(20) unsigned NOT NULL',
             'target_user_id'=>'bigint(20) unsigned NOT NULL',
               ), $this->MySqlOptions);
               $this->addForeignKey('fk_mention_tweet', $this->tableName, 'tweet_id', $this->tablePrefix.'tweet', 'tweet_id', 'CASCADE', 'CASCADE');
URLs
Whenever tweets include links, Twitter provides metadata listing them. Here's the schema we'll use for storing URLs included in the tweets:
    $this->createTable($this->tableName, array(
             'id' => 'pk',
             'tweet_id' => 'BIGINT(20) unsigned NOT NULL',
             'url'=>'string NOT NULL',
               ), $this->MySqlOptions);
    $this->addForeignKey('fk_url_tweet', $this->tableName, 'tweet_id', $this->tablePrefix.'tweet', 'tweet_id', 'CASCADE', 'CASCADE');
Hashtags
Whenever tweets include hashtags, e.g. #php, Twitter provides metadata describing them. Here's the schema we'll use for storing hashtags included in the tweets:
    $this->createTable($this->tableName, array(
             'id' => 'pk',
             'tweet_id' => 'BIGINT(20) unsigned NOT NULL',
             'tag'=>'string NOT NULL',
               ), $this->MySqlOptions);
              $this->addForeignKey('fk_hashtag_tweet', $this->tableName, 'tweet_id', $this->tablePrefix.'tweet', 'tweet_id', 'CASCADE', 'CASCADE');
These migrations build the primary tables with which we'll store data from the Twitter API.
In the Birdcage code, you'll see that there are a variety of other migrations as well; most of these support the broader application.
Building the Birdcage Application
You'll need to register an application with Twitter to obtain your first OAuth application keys. Visit the Twitter Developer site and click Manage Your Apps. Click Create New Apps; I call mine the Twitter Framework for Yii:
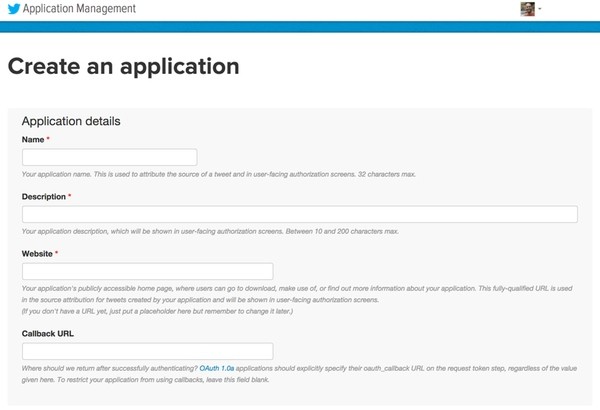
The callback URL for using Birdcage should be http://yourdomain.com/twitter/callback. This is the address that Twitter will return OAuth requests to. It's also the address in Birdcage of our Twitter controller for API calls.
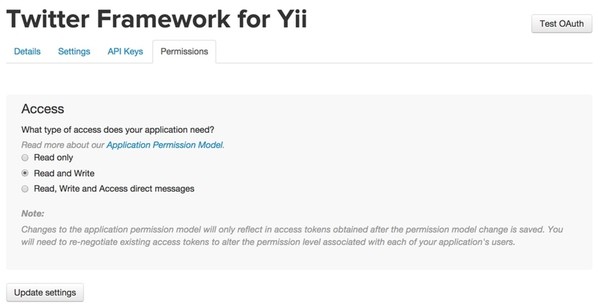
During the creation process, you'll need to configure the app permissions (use read and write for Birdcage) and make notes of the application OAuth key and secret:
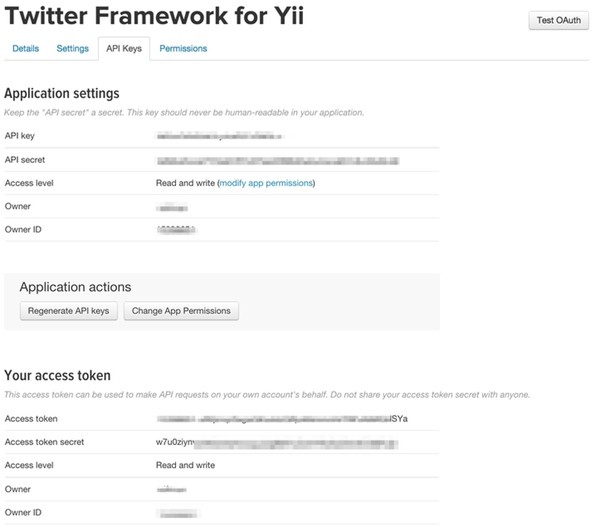
Here's what the API keys page will appear like. The top API key and secret will be needed to set up Birdcage initially:
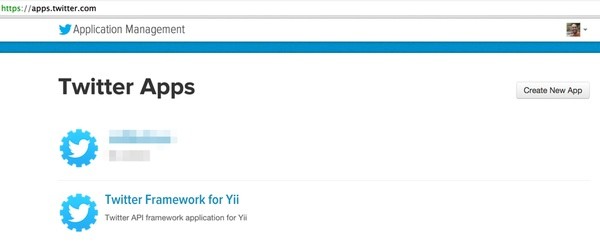
Once you've added the application, you'll see it in the Twitter App menu:
Once you install the code, you'll need to initialize the MySQL database by running the migrations. I do this in two steps.
First, I run the Yii-User migration. This is an extension for Yii which manages most of my user login and registration needs:
./app/protected/yiic migrate --migrationPath=application.modules.user.migrations
The migration will ask you to create credentials for your primary user account for the web application:
Admin login [admin]:
Admin email [[email protected]]:
Admin password [admin]:
This is the account you'll use to log into the Birdcage web application, not your Twitter account credentials.
Then, I run the rest of the migrations: ./app/protected/yiic up.
Once you configure Birdcage, visit your site in your web browser, e.g. http://birdcage.yourdomain.com.
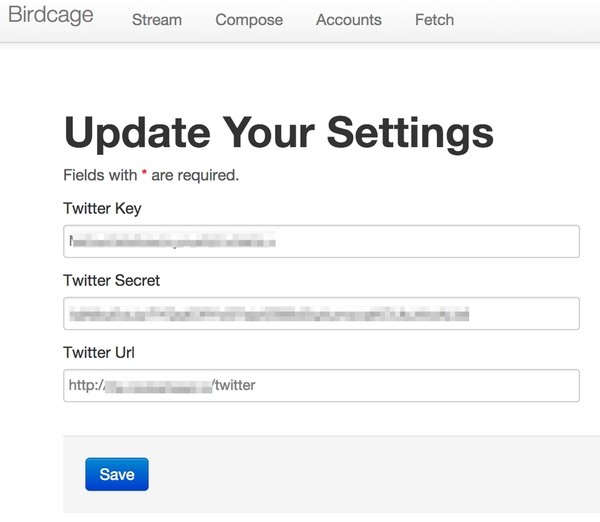
Once you log in, it will ask you to enter your application OAuth keys and address for the Twitter controller, e.g. http://yourdomain.com/twitter (just the controller, not the callback) shown in the above images:
Now, we're about ready to make interesting things happen.
Conclusion
Stay tuned for part two of this tutorial. Part two covers:
- OAuth user authentication
- processing tweets in the background
- posting to Twitter
Then, in part three, we will look at using the Twitter Streaming API and the open source Phirehose streaming implementation. While part two processes tweets using the REST API, part three will describe how to build an always on connection with the Twitter data stream.
I hope you've found this useful. Please post any comments, corrections or additional ideas below. You can browse my other Tuts+ tutorials on my author page or follow me on Twitter @reifman.

Comments