Visit the website for any chain restaurant or store and you’re likely to find a “store finder”: a seemingly simple little page where you enter your address or postal/zip code and it provides the locations near you. As a customer, it’s great because you can find what’s close, and the business implications are obvious.
Constructing a “store finder” is actually a challenging task. In this tutorial, we’ll cover the basics of how to work with geospatial data in Node.js and Redis and build a rudimentary store finder.
We’ll be using the “geo” commands of Redis. These commands were added in version 3.2, so you’ll need to have that installed on your development machine. Let’s do a short check—fire up redis-cli and type GEOADD. You should see an error message that looks like this:
(error) ERR wrong number of arguments for 'GEOADD' command
Despite the error message, that’s a good sign—it is showing that you have the command GEOADD. If you run the command and you get the following error:
(error) ERR unknown command 'GEOADD'
You’ll need to download, build and install a version of Redis that supports the geo commands before you go any further.
Now that you’ve got a supported Redis server, let’s take a tour through the geo commands. Redis has six commands that are directly involved with geospatial indexing: GEOADD, GEOHASH, GEOPOS, GEODIST, GEORADIUS, and GEORADIUSBYMEMBER.
Let’s start with GEOADD. This command, as you might imagine, adds a geospatial item. It has four required arguments: key, longitude, latitude, and member. The key is like a grouping and represents a single value in the keyspace. Longitude and latitude are obviously the coordinates as floats; note the order of these values, as they are likely reversed from what you’re used to seeing. Finally, ‘member’ is how you’re going to identify a location. In redis-cli, let’s run the following commands:
geoadd va-universities -76.493 37.063 christopher-newport-university
geoadd va-universities -76.706944 37.270833 college-of-william-and-mary
geoadd va-universities -78.868889 38.449444 james-madison-university
geoadd va-universities -78.395833 37.297778 longwood-university
geoadd va-universities -76.2625 36.8487 norfolk-state-university
geoadd va-universities -76.30522 36.88654 old-dominion-university
geoadd va-universities -80.569444 37.1275 radford-university
geoadd va-universities -77.475 38.301944 university-of-mary-washington
geoadd va-universities -78.478889 38.03 university-of-virginia
geoadd va-universities -82.576944 36.978056 uva-wise
geoadd va-universities -77.453255 37.546615 virginia-commonwealth-university
geoadd va-universities -79.44 37.79 virginia-military-institute
geoadd va-universities -77.425556 37.242778 virginia-state-university
geoadd va-universities -80.425 37.225 virginia-tech
This is the long-hand way of adding multiple entries, but it’s good to see the pattern. If you wanted to shorten this process, you could accomplish the same thing by repeating the longitude, latitude, and member for each additional place as more arguments. This is an example of the short-hand representation of the last two items:
geoadd va-universities -77.425556 37.242778 virginia-state-university -80.425 37.225 virginia-tech
Internally, these geo items aren’t actually anything special—they are stored by Redis as a zset, or sorted set. To show this, let’s run a few more commands on the key va-universities:
TYPE va-universities
This, returns zset, just like any other sorted set. Now, what happens if we attempt to get back all the values and include the scores?
ZRANGE va-universities 0 -1 WITHSCORES
This returns a bulk reply of the members entered above, with a very large number—a 52-bit integer. The integer is actually a representation of a geohash, a clever little structure that can represent any place on the globe. We’ll dive a bit more deeply later on and won’t really be interacting with the geospatial data this way, but it is always good to know how your data is being stored.
Now that we have some data to play with, let’s look at the GEODIST command. With this command, you can determine the distance between two points that you’ve previously entered under the same key. So, let’s find the distance between the members virginia-tech and christopher-newport-university:
GEODIST va-universities virginia-tech christopher-newport-university
This should output 349054.2554687438, or the distance between the two places in meters. You can also supply a third argument as a unit mi (miles), km (kilometers), ft (feet), or m (meters, the default). Let’s get the distance in miles:
GEODIST va-universities virginia-tech christopher-newport-university mi
Which should respond with “216.89279795987412.”
Before we go further, let’s talk about why calculating the distance between two geospatial points isn’t just a straightforward geometric calculation. The earth is round (or nearly), so as you go away from the equator, the distance between the lines of longitude start to converge and they “meet” at the poles. So, to calculate the distance, you need to take into account the globe.
Thankfully, Redis shields us from this math (if you're interested, there is an example of a pure JavaScript implementation). One note, Redis does make the assumption that the earth is a perfect sphere (the Haversine formula), and it can introduce error of up to 0.5%, which is good enough for most applications, especially for something like a store finder.
Most of the time we’re going to want all the points within a certain radius of a location, not just the distance between two points. We can do this with the GEORADIUS command. The GEORADIUS command expects, at least, the key, longitude, latitude, distance, and a unit. So, let’s find all the universities in the dataset within 100 miles of this point.
GEORADIUS va-universities -78.245278 37.496111 100 mi
Which returns:
1) "longwood-university"
2) "virginia-state-university"
3) "virginia-commonwealth-university"
4) "university-of-virginia"
5) "university-of-mary-washington"
6) "college-of-william-and-mary"
7) "virginia-military-institute"
8) "james-madison-university”
GEORADIUS has a few options. Say we wanted to get the distance between our specified point and all locations. We can do this by adding the WITHDIST argument at the end:
GEORADIUS va-universities -78.245278 37.496111 100 mi WITHDIST
This returns a bulk reply with the location member and the distance (in the specified unit):
1) 1) "longwood-university"
   2) "16.0072"
2) 1) "virginia-state-university"
   2) "48.3090"
3) 1) "virginia-commonwealth-university"
   2) "43.5549"
4) 1) "university-of-virginia"
   2) "39.0439"
5) 1) "university-of-mary-washington"
   2) "69.7595"
6) 1) "college-of-william-and-mary"
   2) "85.9017"
7) 1) "virginia-military-institute"
   2) "68.4639"
8) 1) "james-madison-university"
   2) “74.1314"
Another optional argument is WITHCOORD, which, as you might have guessed, gives you back the longitude and latitude coordinates. You can mix this with the WITHDIST argument as well. Let’s try this:
GEORADIUS va-universities -78.245278 37.496111 100 mi WITHCOORD WITHDIST
The result set gets a bit more complicated:
1) 1) "longwood-university"
   2) "16.0072"
   3) 1) "-78.395833075046539"
      2) "37.297776773137613"
2) 1) "virginia-state-university"
   2) "48.3090"
   3) 1) "-77.425554692745209"
      2) "37.242778393422277"
3) 1) "virginia-commonwealth-university"
   2) "43.5549"
   3) 1) "-77.453256547451019"
      2) "37.546615418792236"
4) 1) "university-of-virginia"
   2) "39.0439"
   3) 1) "-78.478890359401703"
      2) "38.029999417483971"
5) 1) "university-of-mary-washington"
   2) "69.7595"
   3) 1) "-77.474998533725739"
      2) "38.301944581227126"
6) 1) "college-of-william-and-mary"
   2) "85.9017"
   3) 1) "-76.706942617893219"
      2) "37.27083268721384"
7) 1) "virginia-military-institute"
   2) "68.4639"
   3) 1) "-79.440000951290131"
      2) "37.789999344511962"
8) 1) "james-madison-university"
   2) "74.1314"
   3) 1) "-78.868888914585114"
      2) "38.449445074931383"
Notice that the distance is coming before the coordinates, despite the reversed order in our arguments. Redis doesn’t care which order you specify the WITH* argument in, but it will return the distance before the coordinates. There is one more with argument (WITHHASH), but we’ll cover that in a later section—just know that it will come last in your response.
A short aside on the calculations going on here—if you think about the math we previously covered in how GEODIST works, let’s think about a radius. Since a radius is a circle, we have to think about a circle being laid over a sphere, which is quite different than a simple circle applied over a flat plane. Again, Redis does all these calculations for us (thankfully).
Now, let’s cover a related command to GEORADIUS, GEORADIUSBYMEMBER. GEORADIUSBYMEMBER works exactly the same as the GEORADIUS, but instead of specifying a longitude and a latitude in the arguments, you can specify a member already in your key. So this, for example, will return all the members within 100 miles of the member university-of-virginia.
GEORADIUSBYMEMBER va-universities university-of-virginia 100 mi
You can use the same units and WITH* arguments and units on GEORADIUSBYMEMBER as you could on GEORADIUS.
Earlier, when we ran ZRANGE on our key, you may have wondered how to get the coordinates back out of a position you added with GEOADD—we can accomplish this with the GEOPOS command. By supplying the key and a member, we can get back out the coordinates:
GEOPOS va-universities university-of-virginia
Which should yield a result of:
1) 1) "-78.478890359401703"
   2) “38.029999417483971"
If you look back to when we added the value for university-of-virginia, the numbers are slightly different, although they round to the same amount. This is due to how Redis is storing the coordinates in the geohash format. Again, this is very close and good enough for most applications—in the example above, the actual distance difference between the input and the output of GEOPOS is 5.5 inches / 14 cm.
This leads us to our final Redis GEO command: GEOHASH. This will return the geohash value used to hold coordinates. Mentioned earlier, this is a clever system that is based on a grid and can be represented in a variety of ways—Redis uses a 52-bit integer, but a more commonly seen representation is a base-32 string. Using the GEOHASH command with the key and a member, Redis will return the base-32 string that represents this location. If we run the command:
GEOHASH va-universities university-of-virginia
You’ll get back:
1) "dqb0q5jkv30"
This is the geohash base-32 string representation. Geohash strings have a neat property that if you remove characters from the right of the string, you progressively reduce the precision of the coordinates. This can be illustrated with the geohash website—look at these links and see how the coordinates and the map move away from the original location:
- http://geohash.org/dqb0q5jkv30 (very accurate)
- http://geohash.org/dqb0q5jkv3
- http://geohash.org/dqb0q5jkv
- http://geohash.org/dqb0q5jk
- http://geohash.org/dqb0q5j
- http://geohash.org/dqb0q5
- http://geohash.org/dqb0q
- http://geohash.org/dqb0
- http://geohash.org/dqb
- http://geohash.org/dq
- http://geohash.org/d (very inaccurate)
There's one more function we’ll need to cover, and if you’re already familiar with Redis sorted sets you already know it. Since your geospatial data is really just stored in a zset, we can remove an item with ZREM:
ZREM va-universities university-of-virginia
Store Finder Server
Now that we’ve got the basics down for using the Redis GEO commands, let’s build a Node.js-based store finder server as an example. We're going to use the data from above, so I guess this is technically a university finder rather than a store finder, but the concept is identical. Before you begin, make sure you have both Node.js and npm installed. Make a directory for your project and switch into that directory at your command line. At the command line, type:
npm init
This will create your package.json file by asking you a few questions. After you’ve initialized your project, we’ll install four modules. Again, from the command line, run the following four commands:
npm install express --save
npm install pug --save
npm install redis --save
npm install body-parser --save
The first module is Express.js, a web server module. To go along with the server, we’ll also need to install a templating system. For this project we’ll use pug (formally known as Jade). Pug integrates nicely with Express and will allow us to create a basic page template in only a few lines. We also installed node_redis, which manages the connection between Node.js and the Redis server. Finally, we’ll need another module to handle interpreting HTTP POST values: body-parser.
For our first step, we’re just going to stand up the server to the point that it can accept HTTP requests and populate the template with values.
var
  bodyParser  = require('body-parser'),
  express     = require('express'),

  app = express();

app.set('view engine', 'pug'); //this associates the pug module with the res.render function

app.get(  // method "get"
  '/',    // the route, aka "Home"
  function(req, res) {
    res.render('index', { //you can pass any value to the template here
      pageTitle: 'University Finder'
    });
  }
);

app.post( // method "post"
  '/',
  bodyParser.urlencoded({ extended : false }), // this allows us to parse the values POST'ed from the form
  function(req,res) {
    var
      latitude  = req.body.latitude,    // req.body contains the post values
      longitude = req.body.longitude;

    res.render('index', {
      pageTitle : 'University Finder Results',
      latitude  : latitude,
      longitude : longitude,
      results   : []                  // we'll populate it later
    });
  }
);

app.listen(3000, function () {
  console.log('Sample store finder running on port 3000.');
});
This server will only successfully serve out the top-level page ('/') and only if the HTTP client (a.k.a. browser) requests with a GET or POST method.
We are going to need a bare-bones template—just enough to be able to show a heading, the form, and (later) show the results. Pug is a very terse templating language with relevant whitespace. So, with the indentations tag nesting, the first word of a line after the indentation is the tag (and closing tags are inferred by the parser) and we are interpolating values with #{}. This takes some getting used to, but you can create a lot of HTML with minimal characters—take a look at the pug website to learn more. Note at the time of this article, the official Pug website has not been updated. Here's the official GitHub ticket regarding the problem.
//- Anything that starts with "//-" is a non-rendered comment
//- add the doctype for HTML 5
doctype html
//- the HTML tag with the attribute "lang" equal to "en"
html(lang="en")
  head
    //- this produces a title tag and the "=" means to assign the entire value of pageTitle (passed from our server) between the opening and closing tag
    title= pageTitle
  body
    h1 University Finder
    form(action="/" method="post")
      div
        label(for="#latitude") Latitude
        //- "value=" will pull in the 'latitude' variable in from the server, ignoring it if the variable doesn't exist
        input#latitude(type="text" name="latitude" value= latitude)
      div
        label(for="#longitude") Longitude
        input#longitude(type="text" name="longitude" value= longitude)
      button(type="submit") Find
    //- "if" is a reserved word in Pug - anything that follows and is indented one more level will only be rendered if the 'results' variable is present
    if results
      h2 Showing Results for #{latitude}, #{longitude}
We can try out our store finder by starting the server at the command line:
node app.js
Then pointing your browser at http://localhost:3000/.
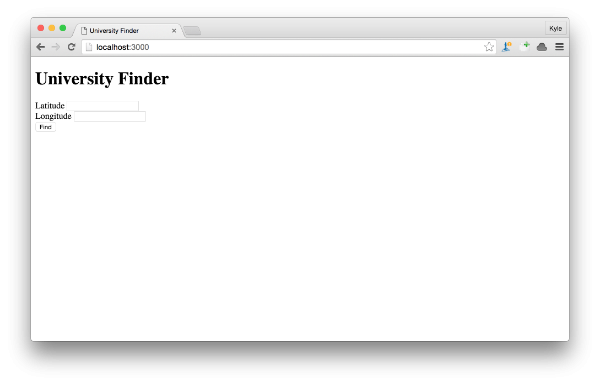
You should see a plain, unstyled page with a large header that says "University Finder” and a form with a couple of text boxes. Since a normal page request by a browser is a GET request, this page is being generated by the function in the argument for app.get.
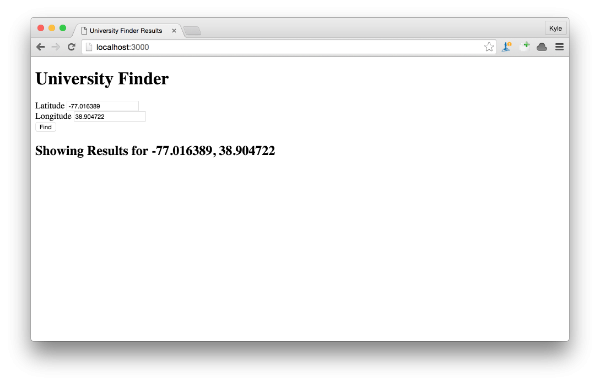
If you enter values into the Latitude and Longitude textbooks and click “find”, you’ll see that those results are rendered and shown on the line that reads “ Showing Results for…” At this point, you won’t have any results, as we haven’t actually integrated Redis yet.
Integrating Redis
To integrate Redis, first we’ll need to do a little setup. In the variable declaration, include both the module and a variable (as yet undefined) for the client.
    ...
    redis       = require('redis'),
    client,
    ...
After the variable declaration, we’ll need to create the connection to Redis. In our example, we’ll assume a localhost connection at the default port and with no authentication (in a production environment, make sure to protect your Redis server).
client = redis.createClient();
A neat feature of node_redis is that the client will queue up commands while a connection is being established, so there's no need to worry about waiting to establish a connection with the Redis server.
Now that our node instance has a Redis client that can accept connections, let’s work on the heart of our store finder. We’ll take the user's latitude and longitude and apply it to the GEORADIUS command. Our example is using a 100-mile radius. We’re also going to want to get the distance and the coordinates of those results.
In the callback, we handle any errors, should they arise. If no errors are found, then map over the results to make them more meaningful and easier to integrate into the template. Those results are then fed into the template.
app.post( // method "post"
  '/',
  bodyParser.urlencoded({ extended : false }), // this allows us to parse the values POST'ed from the form
  function(req,res,next) {
    var
      latitude  = req.body.latitude,    // req.body contains the post values
      longitude = req.body.longitude;

     client.georadius(
      'va-universities',    //va-universities is the key where our geo data is stored
      longitude,            //the longitude from the user
      latitude,             //the latitude from the user
      '100',                //radius value
      'mi',                 //radius unit (in this case, Miles)
      'WITHCOORD',          //include the coordinates in the result
      'WITHDIST',           //include the distance from the supplied latitude & longitude
      'ASC',                //sort with closest first
      function(err, results) {
        if (err) { next(err); } else { //if there is an error, we'll give it back to the user
          //the results are in a funny nested array. Example:
          //1) "longwood-university"        [0]
          //2) "16.0072"                    [1]
          //3)  1) "-78.395833075046539"    [2][0]
          //    2) "37.297776773137613"     [2][1]
          //by using the `map` function we'll turn it into a collection (array of objects)
          results = results.map(function(aResult) {
            var
              resultObject = {
                key       : aResult[0],
                distance  : aResult[1],
                longitude : aResult[2][0],
                latitude  : aResult[2][1]
              };

            return resultObject;
          })
          res.render('index', {
            pageTitle : 'University Finder Results',
            latitude  : latitude,
            longitude : longitude,
            results   : results
          });
        }
      }
    );

  }
);
In the template, we need to handle the result set. Pug has seamless iteration over arrays (with an almost verbal syntax). It is a matter of pulling in those values for a single result; the template will handle everything else.
each result in results
    div
      h3 #{result.key}
      div
        strong Distance:
        | #{result.distance}
        |  miles
      div
        strong Coordinates:
        | #{result.latitude}
        | ,
        | #{result.longitude}
        | (
        a(href="https://www.openstreetmap.org/#map=18/"+result.latitude+"/"+result.longitude) Map
        | )
After you’ve got your final template and node code in place, start up your app.js server again and point your browser back at http://localhost:3000/.
If you enter a latitude of 38.904722 and a longitude of -77.016389 (the coordinates for Washington, DC, on the north border of Virginia) into the boxes and click find, you’ll get three results. If you change the values to a latitude of 37.533333 and a longitude of -77.466667 (Richmond, Virginia, the state capital and in the central/eastern part of the state), you’ll see ten results.

At this point, you have the basic parts of a store finder, but you’ll need to adjust it to suit your own project.
-
Most users don’t think in terms of coordinates, so you’ll need to consider a more user-friendly approach such as:
1. Using client-side JavaScript to detect the location using the Geolocation API
2. Using an IP-based geolocator service
3. Ask the user for a postal code or address and use a geocoding service that converts either into coordinates. Many different geocoding services are on the market, so pick one that works well for your target area. -
This script does no form validation. If you leave the latitude and longitude input boxes, you’ll want to make sure that you are validating your data and avoiding an error message.
-
Expand the location key into more useful information. If you are using Redis to store more information about each location, consider storing that information in hashes with a key that matches your returned members from
GEORADIUS. You'll need to make additional call(s) to Redis. -
More closely integrate with a mapping service like Google Maps, OpenStreetMap, or Bing Maps to provide embedded maps and directions.

Comments