In the past tutorials, I have shown you how to create a flat file system content management system (CMS) using Go, Node.js, and Ruby.
In this tutorial, I am going to take the same design model and build a server using PHP. Since PHP isn’t a server by itself, but is usually paired with the Apache web server, I will show you how to set up the Apache web server inside a Vagrant virtual system.
Setup and Loading the Libraries
To start off, you need to have PHP installed on your system. Go to the PHP website and download the version for your system. Most Linux distributions and all Mac OS X systems have PHP already installed.
Next, install Composer, a package manager for PHP similar to npm for Node.js. To install Composer, type the following in a terminal:
php -r “readfile(‘https://getcomposer.org/installer’);” | php
With Composer installed, installing the libraries for the server is next. First, create a directory for the project with the files from Building a CMS: Structure and Styling or extract the download for this tutorial. Once set up, go to that directory and type:
composer require slim/slim “^3.0”
composer require erusev/parsedown
composer require zordius/lightncandy:dev-master
composer require “talesoft/tale-jade:*”
composer install
These lines install the four libraries that make up the server: Slim Router is the routing library to process the incoming server requests, Parsedown translates Markdown to HTML, Handlebars is the templating library, and the Jade Library is a short-hand form of HTML that I use to make the index pages for posts.
Creating the index.php
In the top of the project directory, create the file index.php. The Apache server expects the main page for the site to have this name. In this file, place the following code:
<?php
//
// Program:    phpPress
//
// Description:  This is a full flat file
//         system CMS that mimics the
//        organization of goPress.
//        Since goPress server can not
//        be run on a shared server,
//        phpPress will work there and
//        offer easy migration to
//        goPress if the site is moved
//        to a VPS.
//
require ‘vendor/autoload.php’;

//
// Load libraries used.
//

//
// HandleBars:   https://github.com/zordius/lightncandy
//
use LightnCandy\LightnCandy;

//
// Jade Library: https://github.com/Talesoft/tale-jade
//
use Tale\Jade;
The require statement allows PHP know how to load the different libraries installed with Composer. Then you tell PHP to use the LightnCandy and Jade libraries.
//
// Slim Router:  http://www.slimframework.com/
//
use \Psr\Http\Message\ServerRequestInterface as Request;
use \Psr\Http\Message\ResponseInterface as Response;

$app = new \Slim\App;

//
// Set an Error Handler.
//
$c = $app->getContainer();
$c[‘errorHandler’] = function ($c) {
    return function ($request, $response, $exception) use ($c) {
        return $c[‘response’]->withStatus(400)
                             ->withHeader(‘Content-Type’, ‘text/html’)
                             ->write(ProcessPage($parts[‘layout’],“ErrorPage”));
    };
};

//
// This line will cause Slim not to catch errors. Please commit out for
// production server.
//
unset($app->getContainer()[‘errorHandler’]);
Next, you set up the Slim router by creating an instance of the Slim app object and setting the error handler. With the error handler set, you never get debugging information when an error happens. Therefore, while developing, you need to unset the error handler. But for production, comment out the last line with unset.
//
// Get the server.json information in to global site variables.
//

$site = __DIR__ . ‘/site’;
$style = “Basic”;
$layout = “SingleCol”;
$styleDir = ‘./themes/styling/’ . $style;
$layoutDir = ‘./themes/layouts/’ . $layout;
$parts = Array();
$parts[“CurrentLayout”] = “SingleCol”;
$parts[“CurrentStyling”] = “Basic”;
$parts[“ServerAddress”] = “http://localhost:8080”;
$parts[“SiteTitle”] = “Test Site”;
$parts[“Sitebase”] = “./site/“;
$parts[“TemplatBase”] = “./themes/“;
$parts[“Cache”] = false;
$parts[“MainBase”] = ““;

//
// Load relevant items in the layouts directory.
//
$parts[“layout”] = file_get_contents($layoutDir . ‘/template.html’);

//
// Load relevant items in the styles directory.
//
$parts[“404”] = file_get_contents($styleDir . ‘/404.html’);
$parts[“footer”] = file_get_contents($styleDir . ‘/footer.html’);
$parts[“header”] = file_get_contents($styleDir . ‘/header.html’);
$parts[“sidebar”] = file_get_contents($styleDir . ‘/sidebar.html’);
$parts[“ErrorPage”] = “<h1 class=‘Error’>There was a server error!</h1>“;

//
// Load everything in the parts directory.
//
$d = dir($site . ‘/parts/‘);
while (false !== ($entry = $d->read())) {
    if((strcmp($entry,“..“)!=0)&&(strcmp($entry,“.“)!=0)) {
        $pathparts = pathinfo($entry);
        $parts[basename($pathparts[‘filename’])] = figurePage($site . ‘/parts/’ . $pathparts[‘filename’]);
    }
 }
 $d->close();
The next section of code is the creating of the $parts hash table for storing the pieces of information used in the templates. The program then adds everything in the site’s parts directory to the hash table. That way, you can create reusable pieces to add to any page.
//
// Function:         SetBasicHeader
//
// Description:    This function will set the basic header
//                 information needed.
//
// Inputs:
//                 $response    The response object to be
//                              sent to the browser.
//
function SetBasicHeader($response) {
   $newResponse = $response->withAddedHeader(“Cache-Control”, “max-age=2592000, cache”);
   $newResponse = $newResponse->withAddedHeader(“Server”, “phpPress - a CMS written in PHP from Custom Computer Tools: http://customct.com.“);
   return($newResponse);
}
The SetBasicHeader() function sets the return header for all of the pages. This sets the cache control functions and the name of the server. If you need more header information, this is where you would set it.
//
// Array of shortcodes and their functions.
//
$shcodes = Array(
   ‘box’ => function($args, $inside) {
      return(“<div class=‘box’>” . $inside . “</div>“);
   },
   ‘Column1’ => function($args, $inside) {
      return(“<div class=‘col1’>” . $inside . “</div>“);
   },
   ‘Column2’ => function($args, $inside) {
      return(“<div class=‘col2’>” . $inside . “</div>“);
   },
   ‘Column1of3’ => function($args, $inside) {
      return(“<div class=‘col1of3’>” . $inside . “</div>“);
   },
   ‘Column2of3’ => function($args, $inside) {
      return(“<div class=‘col2of3’>” . $inside . “</div>“);
   },
   ‘Column3of3’ => function($args, $inside) {
      return(“<div class=‘col3of3’>” . $inside . “</div>“);
   },
   ‘php’ => function($args, $inside) {
      return(“<div class=‘showcode’><pre type=‘syntaxhighlighter’ class=‘brush: php’>” . $inside . “</pre></div>“);
   },
   ‘js’ => function($args, $inside) {
      return(“<div class=‘showcode’><pre type=‘syntaxhighlighter’ class=‘brush: javascript’>” . $inside . “</pre></div>“);
   },
   ‘html’ => function($args, $inside) {
      return(“<div class=‘showcode’><pre type=‘syntaxhighlighter’ class=‘brush: html’>” . $inside . “</pre></div>“);
   },
   ‘css’ => function($args, $inside) {
      return(“<div class=‘showcode’><pre type=‘syntaxhighlighter’ class=‘brush: css’>” . $inside . “</pre></div>“);
   }
);
The $shcodes hash table contains all the shortcode functions for processing items in a web page. The functions that I wrote here are simple, but they can be more complex if needed. This gives a way of embedding more dynamic code into your web pages.
//
// Function:      processShortcodes
//
// Description:   This function will expand all
//          shortcodes in the page given to
//          it.
//
function processShortcodes($page) {
        global $shcodes;

        $result = ““;
        while(preg_match(“/\-\[(\w+)(.*)\]\-/i”, $page, $match) == 1) {
                $num = count($match);
                $command = $match[1];
                $cmdarg = ““;
                if($num > 2) {
                        $cmdarg = $match[2];
                }
                $spos = strpos($page,“-[{$command}“);
                $result .= substr($page, 0, $spos);
                $page = substr($page,$spos + 4 + strlen($command) + strlen( $cmdarg));
                $sepos = strpos($page,“-[/{$command}]-“);
                $inside = trim(substr($page, 0, $sepos));
                if(strcmp($inside,““) != 0) {
                        $inside = processShortcodes($inside);
                }
                $page = substr($page, $sepos + 5 + strlen($command));

                //
                // If the command name exists in the
                // shortcodes hash table, then run the
                // function.
                //
                if( array_key_exists($command, $shcodes) ) {
                        $result .= call_user_func($shcodes[$command], $cmdarg, $inside);
                }
        }
        $result .= $page;
        return($result);
}
The processShortCodes() function will find, execute, and insert the results of a shortcode. This function finds all shortcodes in a page by calling itself recursively on the enclosed contents and the rest of the page.
A shortcode has the following syntax:
-[name arg]-
contents
-[/name]-
The name is the name of the shortcode, arg is the arguments passed to the shortcode, and contents are the part of the page the shortcode encloses. The -[ and ]- act just like the < and > in HTML.
//
// Create the HandleBar helpers array.
//
$helpers = Array(
      ‘flags’ => LightnCandy::FLAG_HANDLEBARS | LightnCandy::FLAG_ADVARNAME | LightnCandy::FLAG_EXTHELPER,
      ‘helpers’ => Array(
            ‘save’ => ‘save_helper’,
            ‘date’ => ‘date_helper’,
            ‘cdate’ => ‘cdate_helper’
         )
   );

//
// Function:         save_helper
//
// Description:      This helper will save the given text to
//                   the given name. That name can be use
//                   latter in the document.
//
// Inputs:
//                   $args    The arguments sent to the
//                            helper function.
//
function save_helper($args) {
   global $parts;

   $arg = implode(” “, $args);
   $hparts = explode(“|“, $arg);
   if(count($hparts) == 2) {
      $parts[$hparts[0]] = $hparts[1];

      return $hparts[1];
   } else {
      return $parts[$hparts[0]];
   }
}

//
// Function:     date_helper
//
// Description:  This function formats the current date
//               according to the formatting string given.
//
// Inputs:
//               $args      The arguments sent to the helper
//
function date_helper($args) {
   $dateFormat = implode(” “, $args);
   return date($dateFormat);
}

//
// Function:     cdate_helper
//
// Description:  This function formats the date given
//               according to the formatting string given.
//
// Inputs:
//               $args      The arguments sent to the helper
//
function cdate_helper($args) {
        return date($args[0], $args[1]);
}
The next section contains the helper functions for adding helpers to the Handlebars template engine. The helper functions are save, date, and cdate. The save function takes a name and some text. Anywhere the name given is in a macro, the text given will replace it. The date function takes the current date and formats it according to the formatting string given. The cdate function takes a date and a formatting string. It will put the given date to the given format.
//
// Function:        ProcessPage
//
// Description:     This function will process a page into
//                  the template, process all Mustache
//                  macros, and process all shortcodes.
//
// Inputs:
//                  $layout     The layout for the page
//                  $page       The pages main contents
//
function ProcessPage( $layout, $page ) {
   global $site, $parts, $helpers;

   //
   // We need a temporary file for creating the
   // Handlebars rendering function. You might
   // need to change this depending on your system.
   //
   $php_inc = “/var/tmp/handlebarsTemp.php”;

   //
   // Get the page contents.
   //
   $parts[‘content’] = figurePage($page);

   //
   // First pass on Handlebars.
   //
   $phpStr = LightnCandy::compile($layout, $helpers);
   file_put_contents($php_inc, $phpStr);
   $renderer = include($php_inc);
   $page = $renderer($parts);

   //
   // Process the shortcodes.
   //
   $pageShort = processShortcodes($page);

   //
   // Second pass Handlebars.
   //
   $phpStr = LightnCandy::compile($pageShort, $helpers);
   file_put_contents($php_inc, $phpStr);
   if($phpStr != ““) {
      $renderer = include($php_inc);
      $page = $renderer($parts);
   }

   //
   // Return the results.
   //
   return($page);
}
The next function is ProcessPage(). This function takes the layout for the page and the contents of the page. It will combine them using the LightnCandy Handlebars template engine. The resulting page is then searched for shortcodes. The resulting page after that is run through LightnCandy again. The browser receives the output from LightnCandy.
//
// Setup the routes routines.
//

function page( $pageAddress ) {
   global $site,  $parts;

   $page = ProcessPage( $parts[‘layout’], “{$site}/pages/{$pageAddress}“);
   return($page);
}
The page() function determines the page to send to the user. The function receives the page address from the router and calls ProcessPage() to create the page.
function posts($postType, $blog, $pageAddress ) {
   global $site,  $parts;

   $page = ProcessPage( $parts[‘layout’],“{$site}/posts/{$postType}/{$blog}/{$pageAddress}“);
   return($page);
}
The posts() function works just like the page() function for post contents. The router passes the post type, blog, and page address values from the route. This function then uses ProcessPage() to create the page to return.
function figurePage( $page ) {
   global $site, $parts;

   $result = ““;
   if(isset($parts[$page])) {
      //
      // A site partial was specified. Use it.
      //
      $result = $parts[$page];
   }else if(file_exists(“{$page}.html”)) {
      //
      // It is a html piece. Just get it and pass it on.
      //
      $result = file_get_contents(“{$page}.html”);
   } else if(file_exists(“{$page}.md”)) {
      //
      // It is a markdown piece. Process into HTML and pass
      // it on.
      //
      $Parsedown = new Parsedown();
      $result = file_get_contents(“{$page}.md”);
      $result = $Parsedown->text($result);
      $result = str_replace(“"“,“\““,$result);
   } else if(file_exists(“{$page}.amber”)) {
      //
      // It is a Jade (using the golang name for the
      // extension) page.
      //
      $jade = new Jade\Renderer();
      $jade->addPath(dirname($page));
      $result = $jade->render(basename($page));
   } else {

      $result = $parts[“404”] ;
   }
   //
   // give the resulting page content.
   //
   return($result);
}
The figurePage() function gets the correct page content based on the name given. The function will look for a file with the .html extension. If there is one, it reads it in and sends it to the calling routine.
Next, the function looks for a .md extension. If there is one, it reads it, converts the Markdown to HTML, and returns it to the calling routine. Next, the function sees if there is one with the .amber extension. If there is one, it reads it, converts the Jade syntax to HTML, and returns it to the calling function.
//
// This route handles the main or home page.
//
$app->get(‘/‘, function(Request $request, Response $response) {
   $newResponse = SetBasicHeader($response);
   $newResponse = $newResponse->getBody()->write(page(‘main’));
   return($newResponse);
});
This route function maps the main or home page for the web site. This will fire for all requests to the domain name with or without a ’/’.
//
// This route handles the favicon loading.
//
$app->get(‘/favicon.ico’, function(Request $request, Response $response){
   global $site;

   $newResponse = SetBasicHeader($response);
   $newResponse = $newResponse->withAddedHeader(“Content-type”, “image/ico”);
   $newResponse->getBody()->write(file_get_contents(“{$site}/images/favicon.ico”));
   return($newResponse);
});
This route definition maps to the specific request: /favicon.ico. This gives the favicon for the web site. It returns the image “/images/favicon.ico” in the site directory.
//
// This route handles all the stylesheets loading as one
// sheet.
//
$app->get(‘/stylesheets’, function(Request $request, Response $response) {
   global $site;

   $newResponse = $response->withHeader(“Content-type”, “text/css”);
   $newResponse = SetBasicHeader($newResponse);
   $newResponse->getBody()->write(file_get_contents(“{$site}/css/final/final.css”));
   return($newResponse);
});
This route gets the compiled style sheet and returns it to the requester. The compiled style sheet is always “/css/final/final.css”.
//
// This route handles the loading of the scripts.
//
$app->get(‘/scripts’, function(Request $request, Response $response) {
   global $site;

   $newResponse = $response->withAddedHeader(“Content-type”, “text/javascript”);
   $newResponse = SetBasicHeader($newResponse);
   $newResponse->getBody()->write(file_get_contents(“{$site}/js/final/final.js”));
   return($newResponse);
});
This route always returns the compiled JavaScript file found at “/js/final/final.js”.
//
// This route handles all the image routes.
//
$app->get(‘/images/{image}‘, function(Request $request, Response $response) {
   global $site;

   $ext = pathinfo($request->getAttribute(‘image’), PATHINFO_EXTENSION);
   $newResponse = SetBasicHeader($response);
   $newResponse = $newResponse->withAddedHeader(“Content-type”, “image/$ext”);
   $newResponse->getBody()->write(file_get_contents(“{$site}/images/” . $request->getAttribute(‘image’)));
   return($newResponse);
});
This route processes all requests for images. The {image} tells the router code to give the image name to the function. The call to the $request->getAttribute() function retrieves the value.
//
// This route handles all the video items.
//
$app->get(‘/videos/{video}‘, function(Request $request, Response $response) {
   global $site;

   $newResponse = SetBasicHeader($response);
   $newResponse = $response->withAddedHeader(“Content-type”, “video/mp4”);
   $newResponse->getBody()->write(file_get_contents(“{$site}/video/” . $request->getAttribute(‘video’)));
   return($newResponse);
});
This route gets all the video requests and sends them to the browser.
//
// This route handles all the blog posts pages.
//
$app->get(‘/posts/blogs/{blog}‘, function( Request $request, Response $response) {
   $newResponse = SetBasicHeader($response);
   $newResponse->getBody()->write(posts(“blogs”,$request->getAttribute(‘blog’), “index”));
   return($newResponse);
});
This route returns a list of blog entries and their summaries. The {blog} variable will be the blog name for which to list entries.
$app->get(‘/posts/blogs/{blog}/{post}‘, function( Request $request, Response $response) {
   $newResponse = SetBasicHeader($response);
   $newResponse->getBody()->write(posts(“blogs”,$request->getAttribute(‘blog’), $request->getAttribute(‘post’)));
   return($newResponse);
});
This route gets an individual blog entry. {blog} is the name of the blog, and {post} is the blog entry to get.
//
// This route handles all the news posts pages.
//
$app->get(‘/posts/news/{news}‘, function( Request $request, Response $response) {
   $newResponse = SetBasicHeader($response);
   $newResponse->getBody()->write(posts(“news”,$request->getAttribute(‘news’), “index”));
   return($newResponse);
});

$app->get(‘/posts/news/{news}/{post}‘, function( Request $request, Response $response) {
   $newResponse = SetBasicHeader($response);
   $newResponse->getBody()->write(posts(“news”,$request->getAttribute(‘news’), $request->getAttribute(‘post’)));
   return($newResponse);
});
The news router requests work just like the blog router requests.
//
// This route will process all the pages. Since this should
// catch all types of routes other than the home page, this
// route should handle the unknown pages as well.
//
$app->get(‘/{page}‘, function( Request $request, Response $response) {
   $newResponse = SetBasicHeader($response);
   $newResponse->getBody()->write(page($request->getAttribute(‘page’)));
   return($newResponse);
});
This is the generic page route. All requests that do not match any of the previous requests will trigger this request.
//
// Respond to requests.
//
$app->run();

?>
This last bit of code starts the server. This function will do all the processing for the request. Upon returning, the PHP interpreter will end and close the connect to the user’s browser.
This PHP server works completely differently from the other servers in this series. This routine starts and ends for each request, while the other servers keep processing requests. Therefore, this PHP server takes longer to process requests due to loading and unloading of the routines.
Getting the Server Up
Now to set up the server. One of the easiest ways to get an Apache and PHP stack is to use Vagrant. To install on a Mac, use Homebrew with this command:
brew cask install vagrant
If you have a Windows or Linux system, use the installers from the Vagrant website. The website also has a standalone installer for the Mac, but by installing with Homebrew, you can get automatic updates by running:
brew update
Once installed, create a file named Vagrant in the project directory. In this file, place the following code:
Vagrant.configure(“2”) do |config|
  config.vm.box = “ubuntu/trusty64”
        config.vm.provision :shell, path: “bootstrap.sh”
        config.vm.network :forwarded_port, host: 8080, guest: 8080
        config.vm.synced_folder “/full/path/to/code/directory”, “/vagrant”
end
This is Vagrant’s configuration file. It tells Vagrant what virtual machine box to build upon, the script to run to set up the box for your server, what ports in the virtual machine to map to ports on your main computer, and the folder to sync to the /vagrant folder in the virtual machine. You need to set the full path to the directory on your computer instead of /full/path/to/code/directory.
Next, create the file bootstrap.sh and add this script to it:
sudo apt-get update
sudo apt-get install -y apache2

#
# Setup modules in apache that will be needed.
#
sudo ln -s /etc/apache2/mods-available/headers.load /etc/apache2/mods-enabled/headers.load
sudo ln -s /etc/apache2/mods-available/rewrite.load /etc/apache2/mods-enabled/rewrite.load

#
# Setup apache on port 8080 and configure apache to read the .htaccess files for
# access changes.
#
sudo cat /etc/apache2/sites-available/000-default.conf | sed ‘s/80/8080/g’ > /var/tmp/sites.conf
sudo mv /var/tmp/sites.conf /etc/apache2/sites-available/000-default.conf
sudo cat /etc/apache2/ports.conf | sed ‘s/80/8080/g’ > /var/tmp/ports.conf
sudo mv /var/tmp/ports.conf /etc/apache2/ports.conf
sudo cat /etc/apache2/apache2.conf | sed ‘s/AllowOverride None/AllowOverride All/’ >/var/tmp/apache2.conf
sudo mv /var/tmp/apache2.conf /etc/apache2/apache2.conf

#
# setup php5
#
sudo apt-get install -y php5

#
# Setup the server root directory
#
sudo rm -rf /var/www/html
sudo ln -fs /vagrant /var/www/html

#
# reload apache
#
sudo service apache2 reload
This script will load in the Apache web server and configure it. With Apache configured, it then installs PHP version 5, sets up the root directory for the server, and launches the Apache service. All of this will configure the virtual machine as needed for this project and have the root directory of the server getting files from your project’s directory. Any edits you make in your project directory are instantly available to the server.
In the project directory, create a file named .htaccess and place this code:
RewriteEngine On
RewriteCond %{REQUEST_FILENAME} !-f
RewriteCond %{REQUEST_FILENAME} !-d
RewriteRule ^ index.php [QSA,L]

# 1 YEAR
<FilesMatch “\.(ico|pdf|flv)$“>
Header set Cache-Control “max-age=29030400, public”
</FilesMatch>

# 1 WEEK
<FilesMatch “\.(jpg|jpeg|png|gif|swf)$“>
Header set Cache-Control “max-age=604800, public”
</FilesMatch>

# 2 DAYS
<FilesMatch “\.(xml|txt|css|js)$“>
Header set Cache-Control “max-age=172800, proxy-revalidate”
</FilesMatch>

# 1 MIN
<FilesMatch “\.(html|htm|php)$“>
Header set Cache-Control “max-age=60, private, proxy-revalidate”
</FilesMatch>
This tells the Apache server how to handle requests for this site and for automatic caching of requests. The index.php file gets every request to the server.
Running the Server
To start the server, run the following command in the project directory:
vagrant up
This will download the virtual machine if it hasn’t already on your system, run the provisioning script, and launch the server. To view the site, open your browser to http://localhost:8080.
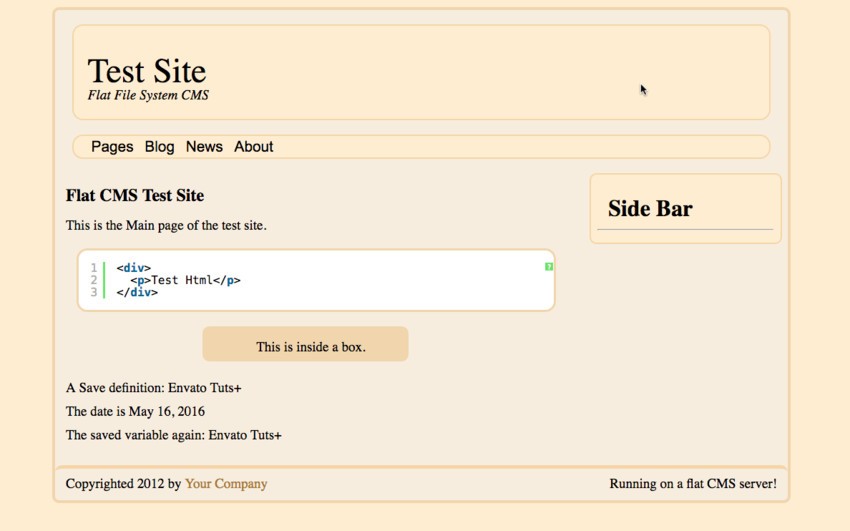
The browser should show the above page. The server is now online and ready for your additions.
If the web site isn’t viewable, you should check the permissions for all the files in the site. OS X often has them set to own readable only. You need to make them world readable with the following command in the project directory:
chmod -R a+r .
That will ensure that the Apache server in the virtual machine is able to read the files.
To stop the server, run the following command in the project directory:
vagrant halt
To learn more about using Vagrant, please read the Vagrant Documentation. You can also check out the many Vagrant tutorials here on Envato Tuts+. I used the tool Hobo for creating my Vagrant files. It is a great tool for configuring, running, and managing Vagrant systems on OS X.
Conclusion
Now that you know how to build a simple yet powerful web server using the PHP language, it’s time for you to experiment. Create new pages, posts, embeddable parts, and shortcodes. This simple platform is far faster than using WordPress, and it is totally in your control.
Unlike the other web servers in this series, this PHP-based CMS can run on any shared hosting account. I am using it for my ministry’s website on DreamHost. I haven’t optimized the pictures any, but it still does fairly well. Tell me about your server in the comments below.

Comments