Want to learn how to write a complete mobile application using PhoneGap, but don't know how to get started? Follow this two-part tutorial series and I'll show you how to build a mobile app that tracks, records, and maps your exercise route using the GPS features on your phone!
Project Overview
This section is a broad overview of ExerciseTracker, the application we will be building.
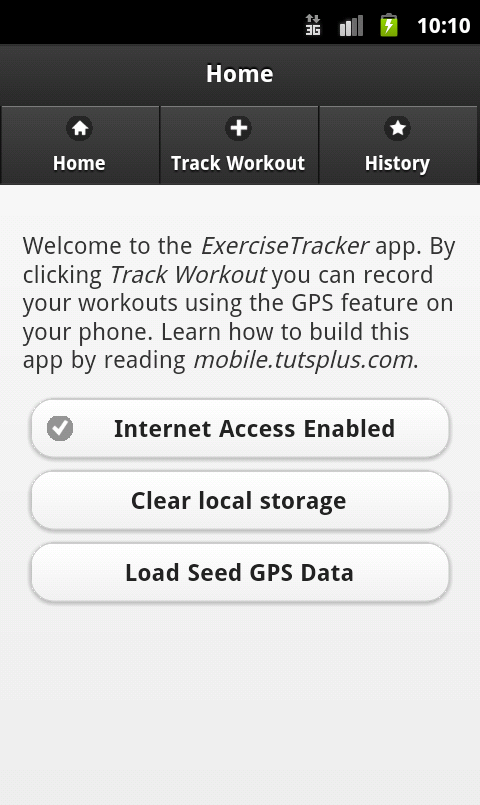
The home page checks that the phone has an active network connection (we need this to load
Google Maps to plot the exercise route). It also has two buttons that are useful for testing the app, but they can be removed easily later if desired.

The Track Workout page has a single text entry field for the user to enter a name or ID for their workout. When they click "Start Tracking", the phone will start recording their GPS location. When they click "Stop Tracking" the GPS data is saved on the phone.
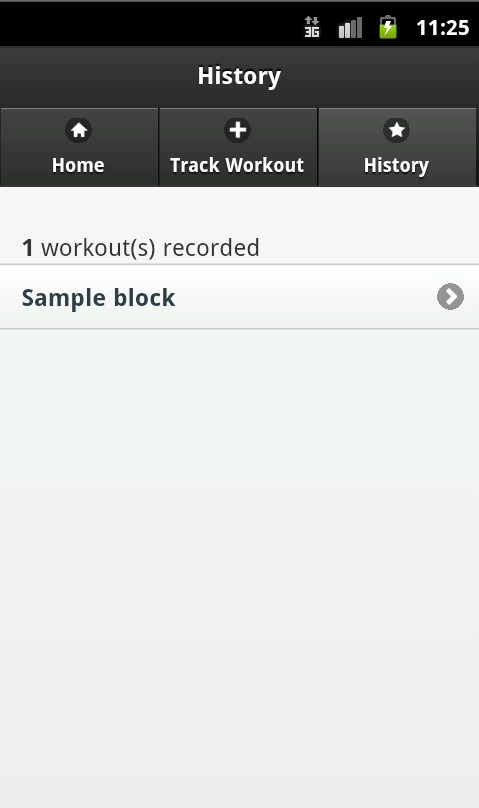
The History page lists all of the tracked workouts the user has completed.
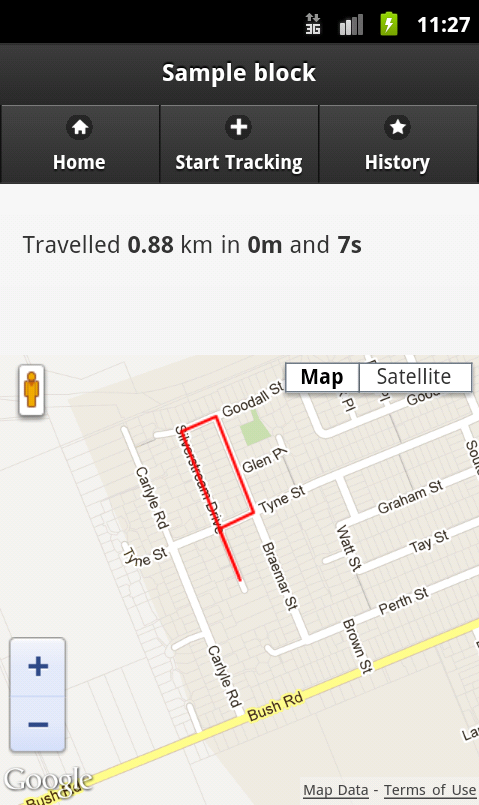
The Track Info page presents workout specific information. It displays the total distance travelled in kilometers and the total time taken for the workout, and it then plots the route the user travelled on a Google Map.
Technologies Implemented
Our application, ExerciseTracker, is going to run on the PhoneGap mobile platform. PhoneGap allows us to easily create mobile applications using familiar web technologies such as HTML 5, CSS, and JavaScript, and then seamlessly deploys them as native apps on platforms such as iOS, Android, and Windows Phone.
The exercise tracker app we will be building utilizes the following technologies:
- PhoneGap Location API
- jQueryMobile
- Google Maps JavaScript API
- HTML5 & Local Storage
In this two-part series of tutorials, you will learn how to use the above to build a complete PhoneGap application.
Beginning Development
PhoneGap Setup
The first thing we need to do is set up the PhoneGap development environment. PhoneGap provides a great Start Page which walks you through setting up the PhoneGap development environment for each of the different mobile platforms. Choose the platform you want to develop for and follow the instructions to set up the basic PhoneGap application. In this tutorial, I will be developing on an Android setup (Android 4.0.3 API v15), however the code in this tutorial should work on all platforms.
You should now have a minimal index.html file which you can view on your device emulator.
Dependencies and Scripts
Let's start development of our app by downloading and including all of the required JavaScript and CSS files.
- jquery-1.7.2.min.js
-
jquery.mobile-1.1.0.zip
- jquery.mobile.1.1.0.min.css
- jquery.mobile-1.1.0.min.js
- images/
- json2.js
- exercisetracker.js (create this, our JS will go here)
Download and copy each of these files into the same directory as the index.html and cordova-1.7.0.js files.
At this stage, the directory structure of my Android app looks like this:
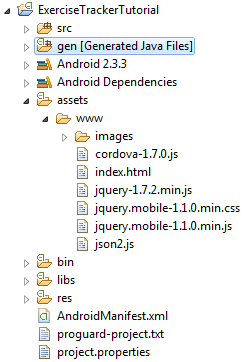
Your directory structure should look like this.
Google Maps API Key
In order for our application to use Google Maps, we must have an API key. API keys are free to get and support up to 25,000 queries per day. Follow the guide that Google provides to register your API key. Note it down, as we will need it in the next step!
Skeleton index.html
Let's write the first version of index.html. This will include all of the JavaScript and CSS dependencies ExerciseTracker will have.
<!DOCTYPE HTML>
<html>
<head>
  <title>ExerciseTracker</title>

  <script type="text/javascript" src="cordova-1.7.0.js"></script>
  <script type="text/javascript" src="http://maps.googleapis.com/maps/api/js?key=AIzaSyDD353fOPh-KBUQ-2ekPCg75uxXRn0D9Tk&sensor=false"></script>
  <script type="text/javascript" src="json2.js"></script>
  <script type="text/javascript" src="jquery-1.7.2.min.js"></script>
  <script type="text/javascript" src="jquery.mobile-1.1.0.min.js"></script>
    <script type="text/javascript" src="exercisetracker.js"></script>
  <link rel="stylesheet" href="jquery.mobile-1.1.0.min.css" />

</head>
<body>
<h1>Hello World</h1>
</body>
</html>
Be sure to replace YOUR_API_KEY_HERE with your actual Google Maps API Key.
You should be able to launch this in your emulator and recieve no errors.
Creating the Home Page
Now lets create the Home page. jQueryMobile allows us to define our user interface using standard HTML tags. Pages in our app are <div> elements, buttons are <button> or <a> elements and lists are made up of <ul> and <li> elements. We describe semantic information about each of these elements by defining data attributes. For example, the data-role attribute tells jQueryMobile the role of the HTML element and the data-icon attribute specifies what icon will be shown inside the element. You can see below how the home page is composed of HTML elements with data-role attributes.
<div data-role="page" id="home">

  <div data-role="header">

    <h1>Home</h1>

    <div data-role="navbar">
      <ul>
        <li><a href="#home" data-transition="none" data-icon="home">Home</a></li>
        <li><a href="#startTracking" data-transition="none" data-icon="plus">Track Workout</a></li>
        <li><a href="#history" data-transition="none" data-icon="star">History</a></li>
      </ul>
    </div>
  </div>

  <div data-role="content">
    <p>Welcome to the <em>ExerciseTracker</em> app. By clicking <em>Track Workout</em> you can record your workouts using the GPS feature on your phone. Learn how to build this app by reading <em>mobile.tutsplus.com</em>.</p>

    <button id="home_network_button" data-icon="check">Internet Access Enabled</button>
    <button id="home_clearstorage_button">Clear local storage</button>
    <button id="home_seedgps_button">Load Seed GPS Data</button>
  </div>


</div>
jQueryMobile parses and interprets the meanings of the various data-role, data-transition, and data-icon attributes and automatically applies the appropriate CSS formatting to them.
Checking for Network Access
We now need to check to see if the user has access to the internet. If they don't, then the Google Map will not load and the app will be cripppled.
We start by listening for the deviceready event which is fired when PhoneGap has finished loading. We then use the PhoneGap Connection API to query if we have access to the Internet. If we don't have Internet access, then we need to update the button on the Home page. We update the text, set a new icon, and call the button('refresh') method, which forces jQuery Mobile to redraw the button.
document.addEventListener("deviceready", function(){

  if(navigator.network.connection.type == Connection.NONE){
    $("#home_network_button").text('No Internet Access')
                 .attr("data-icon", "delete")
                 .button('refresh');
  }

});
Building the Track Workout Page
Track Workout page
With the home page finished, we can now start making the Track Workout page. The HTML/CSS code for both pages is similar, however in the data-role="content" section of the Track Workout page, we define a text field (for the user to enter a name for their workout) as well as two buttons which start and stop the workout.
<div data-role="page" id="startTracking">

  <div data-role="header">
    <h1>Track Workout</h1>

    <div data-role="navbar">
      <ul>
        <li><a href="#home" data-transition="none" data-icon="home">Home</a></li>
        <li><a href="#startTracking" data-transition="none" data-icon="plus">Track Workout</a></li>
        <li><a href="#history" data-transition="none" data-icon="star">History</a></li>
      </ul>
    </div>
  </div>

  <div data-role="content">
    <p id="startTracking_status"></p>
      <div data-role="fieldcontain" class="ui-hide-label">
        <label for="track_id">Track ID/Name:</label>
        <input type="text" name="track_id" id="track_id" placeholder="Workout ID/Name"/>
      </div>

    <button data-role="button" id="startTracking_start">Start Tracking</button>
    <button data-role="button" id="startTracking_stop">Stop Tracking</button>

        <p id="startTracking_debug"></p>

  </div>


</div>
Tracking the User's Movements
We can monitor the user's location using the PhoneGap Geolocation API. It provides two main functions: getCurrentPosition() and watchPosition(). The getCurrentPosition() function would be used when you want to get a one-off fix on the user's location (such as saving the location of the user when they take a photo). Our app will use watchPosition() to do this, which regularly polls the GPS feature of the phone and recieves constant updates on the user's location.
The watchPosition() accepts three arguments. The first is a function which is called every time the phone successfully returns a GPS location, the second is a function which is called when there is a GPS error, and the third is an object of settings.
Every time the "success" function is called, it is passed a Position object. This contains information about the user's GPS position, such as their latitude, longitude, and altitude. Whenever the "success" function is called in ExerciseTracker, we append the latest Position object to the array tracking_data.
var track_id = '';      // Name/ID of the exercise
var watch_id = null;    // ID of the geolocation
var tracking_data = []; // Array containing GPS position objects

$("#startTracking_start").live('click', function(){

    // Start tracking the User
    watch_id = navigator.geolocation.watchPosition(

        // Success
        function(position){
            tracking_data.push(position);
        },

        // Error
        function(error){
            console.log(error);
        },

        // Settings
        { frequency: 3000, enableHighAccuracy: true });

    // Tidy up the UI
    track_id = $("#track_id").val();

    $("#track_id").hide();

    $("#startTracking_status").html("Tracking workout: <strong>" + track_id + "</strong>");
});
Conclusion
In this tutorial, we looked at an overview of the ExerciseTracker app, constructed the Home page, and started work on the Track Workout page. In the next tutorial, we will complete the Track Workout page and finish the ExerciseTracker app by allowing the user to view saved workouts plotted on a Google Map.

Comments