During the first part on Mobiletuts+, we covered the basics of AIR for Android development and also put in place the fundamentals for our speedometer app by using GPS support to determine our current speed.
Now we'll put the finishing touches to the app by building its user interface and also adding code to allow the app to maintain its state.
Check out part one of this tutorial Build a GPS Speedometer: Getting Into AIR for Android over on our sister site Mobiletuts+!
Step 1: Working FLA
Launch Flash Professional CS5 and open the FLA you were working with from Part 1.
The artwork required for this tutorial was provided in Part 1 within source/speedometer-artwork.fla, which was used as a starting point. Your working FLA should therefore contain the same artwork in its library.
Confirm this by checking that your FLA's library looks like this:
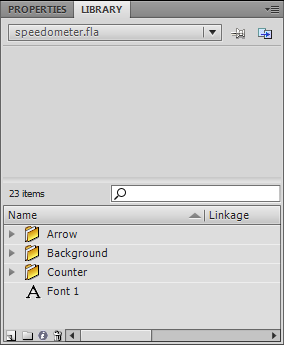
If your library doesn't contain the artwork then copy it from source/speedometer-artwork.fla, which was provided in Part 1.
Step 2: Speedometer UI
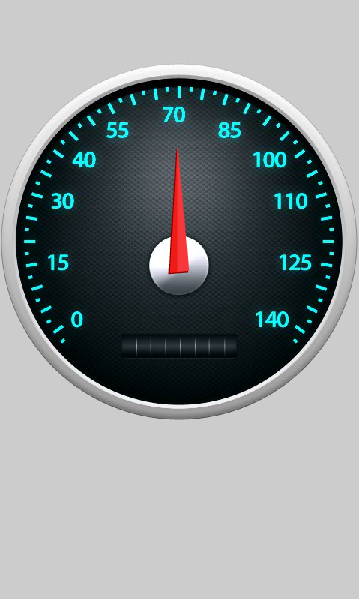
Currently the UI consists of two dynamic text fields - one showing your current speed in metres per second, the other in miles per hour.
Using the artwork from the library let's now create a speedometer dial that we can use to replace these text fields.
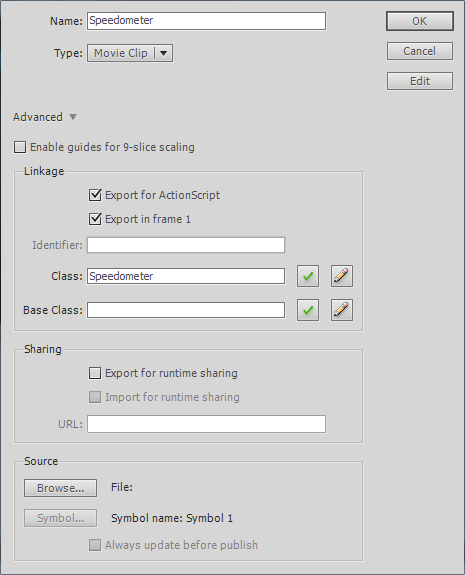
Select Insert | New Symbol... (Ctrl + F8).
Within the Create New Symbol panel, name the symbol 'Speedometer' and ensure that its type is set to 'Movie Clip':
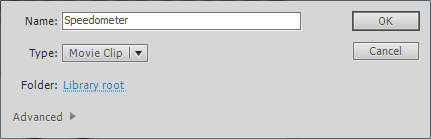
Click OK.
From the Flash IDE you can now directly edit the movie clip that you have created.
Name your timeline layer 'Meter Background':
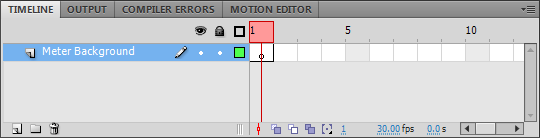
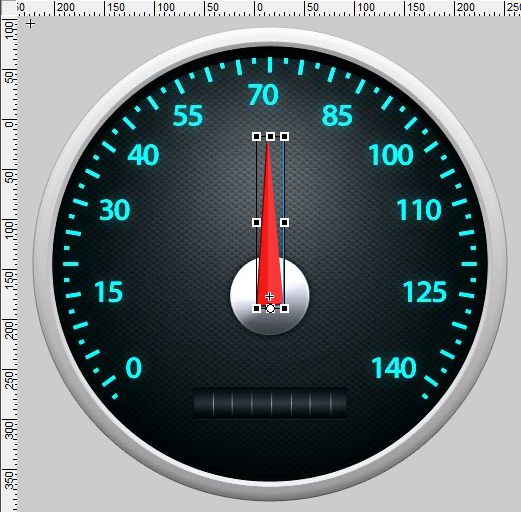
Within your library, expand the 'Background' folder and drag 'meter-background.png' to your stage.
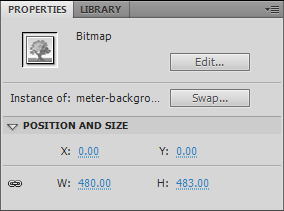
From the Properties Inspector panel, set the clip's x and y values to '0':
Step 3: Adding the Needle
Staying within the timeline for 'Speedometer', add a new layer and name it 'Arrow':
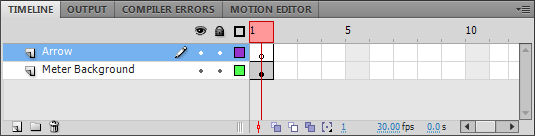
Within your library, expand the 'Arrow' folder and drag the 'Arrow' movie clip onto your stage. Ensure that you drag it onto the layer named 'Arrow'.
From the Properties Inspector panel, set the clip's x-value to 239 and its y-value to 273.
Name the instance 'arrow' within the Property Inspector panel.
With the clip still highlighted, select the Free Transform Tool (Q) from the Tools bar. A bounding box will appear around the clip with the point of origin shown as a white circle in the center:

Reposition the clip's point of origin to the bottom-center of the bounding box:
Move back to the root timeline.
Step 4: Replacing the Temporary UI
We can now remove the text fields that previously represented the UI.
Click on the Selection Tool (V) from the Tools bar and individually select and delete each of the text fields from the stage.
Also remove any embedded fonts from your library that may have been associated with the text fields.
Drag from the library to the stage, the 'Speedometer' movie clip you created in Step 3. Name the clip's instance 'speedometer' and position it at ( 0, 81 ).
Rename the timeline layer that your clip is sitting on to 'Speedometer'.
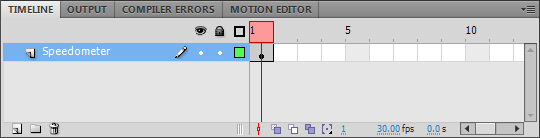
Your root timeline's stage should now look like this:
Save your FLA.
Step 5: Updating the Document Class
We also need to reflect these changes in the document class.
Open Application.as and remove the following two member variable declarations:
public  var metresPerSecond	:TextField;
public  var milesPerHour	:TextField;
You'll also need to remove references to these variables from the handleGeolocationUpdate() method. Remove the following two lines:
private function handleGeolocationUpdate( e :GeolocationEvent ) :void
{
	metresPerSecond.text = String( Math.round( e.speed ) );
	milesPerHour.text = String( Math.round( convertToMilesPerHour( e.speed ) ) );
}
You can also remove the import statement used for the text fields:
import flash.events.KeyboardEvent;
import flash.text.TextField;
import flash.ui.Keyboard;
Finally add a new member variable that references the new speedometer movie clip instance that is sitting on the stage:
public  var speedometer :Speedometer;
private var geolocation :IGeolocation;
Save Application.as.
We'll come back to Application.as once we've written a class that represents the speedometer.
Step 6: Speedometer Class
Create a new class and add the following to it:
package
{
	import flash.display.MovieClip;
	import flash.display.Sprite;
	import flash.events.Event;

	public class Speedometer extends Sprite
	{
		/*
			Constants
		*/

		static private const SPEED_CONVERSION_BASE    :Number =  2.2369362920544;
		static private const ROTATION_CONVERSION_BASE :Number =  1.671428571;
		static private const START_ROTATION           :Number = -117


		/*
			Member Variables
		*/

		public var arrow :MovieClip;


		/*
			Class Methods
		*/

		public function Speedometer()
		{
			addEventListener( Event.ADDED_TO_STAGE, handleAddedToStage );
		}

		public function set speed( metresPerSecond :Number ) :void
		{
			var milesPerHour :Number = convertToMilesPerHour( metresPerSecond );
			arrow.rotation = convertToRotation( milesPerHour );
		}

		private function handleAddedToStage( e :Event ) :void
		{
			removeEventListener( Event.ADDED_TO_STAGE, handleAddedToStage );
			arrow.rotation = START_ROTATION;
		}

		private function convertToRotation( milesPerHour ) :Number
		{
			return START_ROTATION + ( milesPerHour * ROTATION_CONVERSION_BASE );
		}

		private function convertToMilesPerHour( metresPerSecond :Number ) :Number
		{
			return metresPerSecond * SPEED_CONVERSION_BASE;
		}
	}
}
Save the class as Speedometer.as.
Move to your library and right-click on the Speedometer clip and select Properties.... Within the Symbol Properties panel, expand the 'Advanced' section. Click on the 'Export for ActionScript' checkbox and set the Class field to 'Speedometer':
Click OK to commit the changes. The Speedometer class will now be linked to the Speedometer movie clip within your library.
The class has one member variable named arrow, which holds a reference to the movie clip instance that represents the speedometer's needle.
The handleAddedToStage() method gets called when the speedometer's ADDED_TO_STAGE event is triggered. At the moment the method simply rotates the arrow movie clip instance so that it is initially pointing at 0 miles per hour on the speedometer.
The Speedometer class's public API consists of a single property named speed, which accepts a speed measured in metres per second. You can see the method that handles this here:
public function set speed( metresPerSecond :Number ) :void
{
	var milesPerHour :Number = convertToMilesPerHour( metresPerSecond );
	arrow.rotation = convertToRotation( milesPerHour );
}
Essentially, the method converts the speed from metres per second into miles per hour before calculating the angle of rotation to be applied to the needle in order to make it point to the correct position on the speedometer. The class also has two private methods that help it do this - convertToMilesPerHour() and convertToRotation().
Step 7: Updating the Speedometer
Let's return to Application.as.
Add the following line of code to the handleGeolocationUpdate() method:
private function handleGeolocationUpdate( e :GeolocationEvent ) :void
{
	speedometer.speed = e.speed;
}
This will force the speedometer to update every time new GPS data is available.
Save Application.as.
Step 8: Testing What We Have
Okay now we're in a position to test what we currently have.
If you're testing directly on an Android device and relying on its GPS unit then select the 'Real' publish profile that we set up in Part 1 and also remember to activate the GPS sensor. If you're testing on the desktop or on an Android device without relying on its GPS unit then select the 'Simulate' publish profile.
If you're testing within Flash Professional select Control | Test Movie | in Flash Professional. If you're testing on an Android device select File | Publish (Alt + Shift + F12).
Also, if you're building an AIR for Android app for the first time today you will be presented with the Application & Installer Settings panel when you attempt to publish:
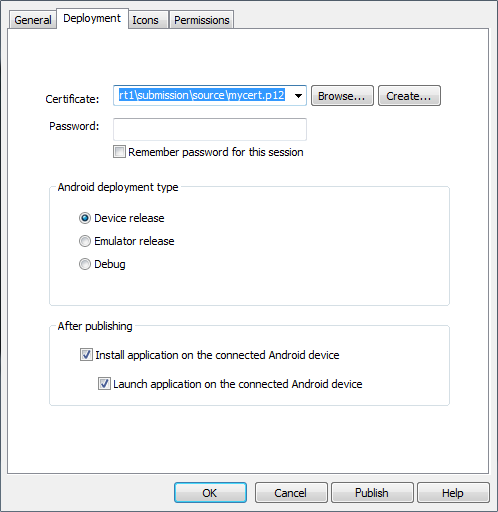
You'll need to re-enter the password you associated with your certificate from Part 1. Also select the 'Remember password for this session' checkbox to prevent this panel appearing each time you attempt to publish and deploy to your Android handset.
We're certainly one step closer but there are things that still need to be addressed. Probably the most obvious is that the speedometer's needle doesn't smoothly travel between speeds. Instead it jumps to each target speed upon receiving updated data from the device's GPS unit. Secondly, the speedometer doesn't have a working mileage counter.
We'll fix both these issues soon but first let's look at some optimisation techniques that will benefit apps running on mobile.
Step 9: Improving Performance on Mobile
When developing for mobile, optimisation and performance should be a major consideration. There are a few things we can do to the Speedometer class to aid performance on mobile.
Add the following two lines of code to the handleAddedToStage() method within Speedometer.as:
private function handleAddedToStage( e :Event ) :void
{
	removeEventListener( Event.ADDED_TO_STAGE, handleAddedToStage );

	mouseEnabled  = false;
	mouseChildren = false;

	arrow.rotation = START_ROTATION;
}
Since it isn't required, we disable mouse interaction within the speedometer by setting both the mouseEnabled and mouseChildren properties to false.
This is good practice when writing mobile applications and although it won't give any visible benefit in an app as trivial as this one, the gains can be significant in projects that have deeply nested display lists where event bubbling can cause performance issues.
Staying within the handleAddedToStage() method add the following two lines of code:
private function handleAddedToStage( e :Event ) :void
{
	removeEventListener( Event.ADDED_TO_STAGE, handleAddedToStage );

	mouseEnabled  = false;
	mouseChildren = false;

	arrow.cacheAsBitmap = true;
	arrow.cacheAsBitmapMatrix = new Matrix();

	arrow.rotation = START_ROTATION;
}
Again to primarily aid performance on mobile devices, we also cache the needle's movie clip on the device's GPU using both the cacheAsBitmap and cacheAsBitmapMatrix properties.
GPU caching forces a bitmap version of a display object to be sent to the device's graphics processing unit where it can be drawn to the screen much faster.
By setting a display object's cacheAsBitmap property to true you state to the Flash runtime that you want a bitmap representation of that object to be stored on the GPU. The bitmap will stay on the GPU until the display object it represents changes, upon which a new bitmap is created for the display object and sent to the GPU.
For GPU caching to be effective you need to minimise the number of times your display object changes. Changing the object's x or y position is okay since the cached bitmap data can still be used, but moving the playhead within your display object or rotating it will invalidate the cached version, forcing a new bitmap to be rendered and uploaded to the GPU. This process is expensive and having display objects that continually need to be re-cached will actually hamper performance rather than improve it.
Considering the speedometer's needle is constantly being rotated you might ask why we bother caching it. After all, doesn't it force the arrow movie clip to be constantly re-cached? The short answer is yes if we had only set the cacheAsBitmap property to true. However an additional property - cacheAsBitmapMatrix - was also set. This property allows additional graphical operations to be performed on the GPU such as rotation.
In other words, by setting both cacheAsBitmap and cacheAsBitmapMatrix you can force a bitmap representation of our speedometer's needle to be uploaded to the GPU and also have the GPU rotate that cached bitmap every time the needle is rotated by our code.
Finally, add the following import statement to your class:
import flash.events.Event;
import flash.geom.Matrix;
GPU caching is a powerful technique and gives significant performance benefits over bitmap caching but it needs to be used with care - it isn't ideal for everything and incorrect usage can cripple your app.
The performance gains aren't likely to be seen in this app but this small introduction to GPU caching should come in useful in many of your future mobile projects.
Save Speedometer.as.
Step 10: Setting GPU Render Mode
Adobe AIR for Android provides two render modes that can be used by the runtime. To date we have been using CPU render mode, which forces all graphics rendering to take place on the CPU. To take advantage of the on-device GPU you need to specifically set your app to use GPU render mode.
Let's do that now.
Within the Flash IDE select File | AIR Android Settings... to bring up the Application & Installer Settings panel:
Ensure that the General tab is selected. Using the drop-down box, set the 'Render mode' field to 'GPU'.
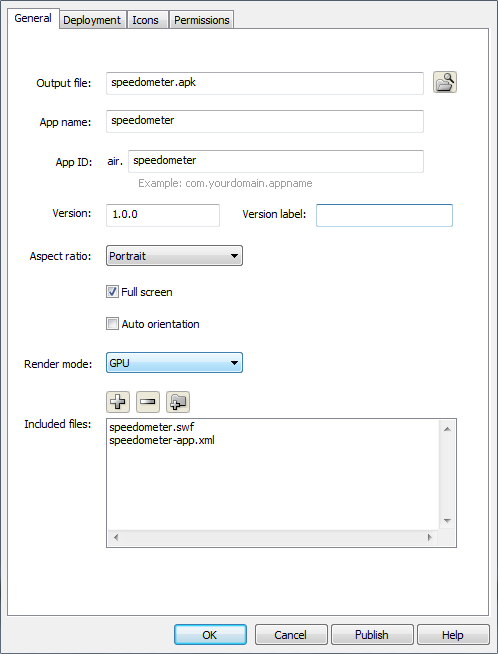
Now Click OK.
Using the 'Simulate' profile, publish and deploy this latest version onto your Android device.
Step 11: Handling Errors in the GPS Data
You may remember from Part 1 that GPS receivers aren't always accurate meaning that the data you receive from your phone's sensor may not always be correct. Even the test data I provided for the GeolocationSimulate class contained errors.
It should be expected that the data coming from your GPS receiver may sometimes be incorrect and you should write code to handle this, especially spikes that may make your application behave in a strange manner.
Here are the values for the first fifteen seconds of data output by GeolocationSimulate:
2, 128, 5, 6, 128, 7, 128, 7, 128, 8, 6, 5, 128, 7, 9
As you can see there are several odd glitches that cause the receiver to report that you are travelling at 128 metres per second. We want to catch these spikes and prevent them showing within the speedometer app.
We'll take a somewhat simplistic approach within our app. We'll attempt to limit the spikes by setting an upper limit for the increase in metres per second that we can be travelling at. Anything higher than this value will be ignored.
First, within Speedometer.as, add the following constant:
static private const START_ROTATION           :Number = -117
static private const MAX_SPEED_INCREASE       :Number =  20;
We'll also need a member variable to remember the speed you are travelling at. Add the following line to the class:
public  var arrow               :MovieClip;
private var currMetresPerSecond :Number;
Let's initialise that member variable within the constructor:
public function Speedometer()
{
	currMetresPerSecond = 0;
	addEventListener( Event.ADDED_TO_STAGE, handleAddedToStage );
}
Now all that's left to do is add some code to determine whether to use the latest speed or to continue to use the previously recorded speed if the latest speed is deemed invalid. Add the following lines:
public function set speed( metresPerSecond :Number ) :void
{
	// Prevent geolocation errors from being used.
	if( Math.abs( currMetresPerSecond - metresPerSecond ) < MAX_SPEED_INCREASE )
	{
		currMetresPerSecond = metresPerSecond;
	}

	var milesPerHour :Number = convertToMilesPerHour( currMetresPerSecond );
	arrow.rotation = convertToRotation( milesPerHour );
}
Also note that we've changed the following line within the method from:
var milesPerHour :Number = convertToMilesPerHour( metresPerSecond );
to:
var milesPerHour :Number = convertToMilesPerHour( currMetresPerSecond );
Save Speedometer.as.
That's taken care of any erroneous data. Now build and test the latest version of the app. You should notice that the needle no longer jumps when the data spikes are encountered.
Step 12: Animating the Needle
As noted previously, the speedometer's needle jumps to values rather than smoothly moving between them.
Let's rectify this by using GreenSock's TweenLite tweening engine.
Add the following import to the Speedometer class:
import flash.geom.Matrix;
import com.greensock.TweenLite;
Now within the set speed() method replace the following line:
arrow.rotation = convertToRotation( milesPerHour );
with this:
TweenLite.to( arrow, 1, { rotation: convertToRotation( milesPerHour ) } );
This new line of code initiates an animation on the arrow movie clip instance that takes place over a period of one second. During that period of time, the arrow instance's rotation property smoothly transitions from its current value to the new value calculated by convertToRotation().
Save Speedometer.as.
Of course, we need to actually download the TweenLite SDK and set up Flash Professional CS5 to use it. Let's do that in the next step.
Step 13: Installing Greensock Tweenlite
Open a web browser and go to the TweenLite page on the GreenSock site: http://www.greensock.com/tweenlite/
On the right-hand side of the page is a 'Download AS3' button. Click on it and download the zip file. Once downloaded, copy the zip file to your desktop.
For desktop, here's where to copy the zip file to:
- Windows Vista and Windows 7: C:\Users\your_username\Desktop
- Windows XP: C:\Documents and Settings\your_username\Desktop
- Mac OS X: Macintosh HD/Users/your_username/Desktop
Extract all the files and delete the original zip file.
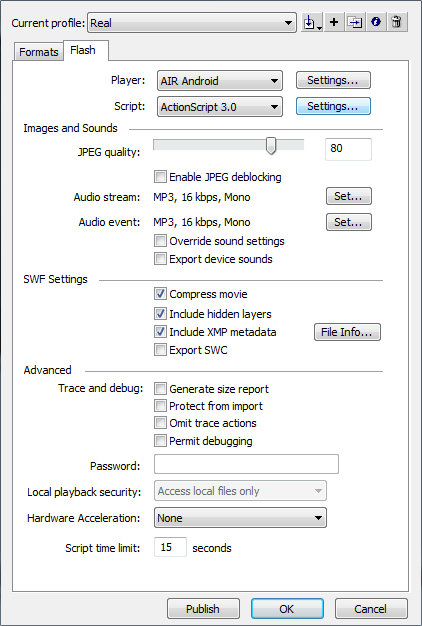
Within Flash Professional CS5 select File | Publish Settings....
Within the Publish Settings panel select the 'Simulate' publish profile and select the 'Flash' tab:
Click the Settings... button on the far-right of the Script field. The Advanced ActionScript 3.0 Settings panel will appear. Ensure that the 'Source path' tab is selected:
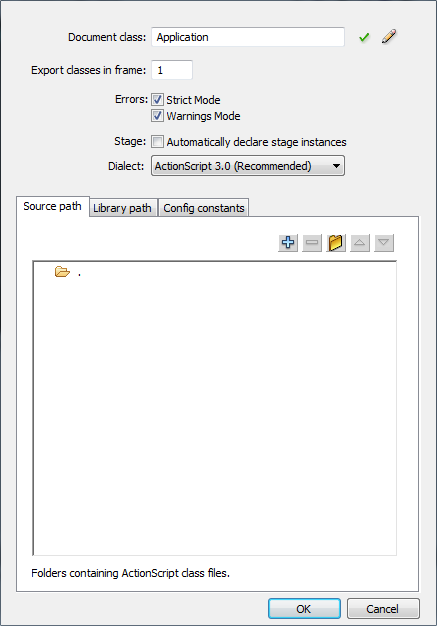
Click the 'Add New Path' button within the 'Source path' pane (The plus button). Now click the 'Browse to Path' button.
Browse to the greensock-as3 folder that contains the sub-folder named 'com'. If you extracted the zip file to your desktop then the path should be:
- Windows Vista and Windows 7: C:\Users\your_username\Desktop\greensock-as3\greensock-as3\
- Windows XP: C:\Documents and Settings\your_username\Desktop\greensock-as3\greensock-as3\
- Mac OS X: Macintosh HD/Users/your_username/Desktop/greensock-as3/greensock-as3/
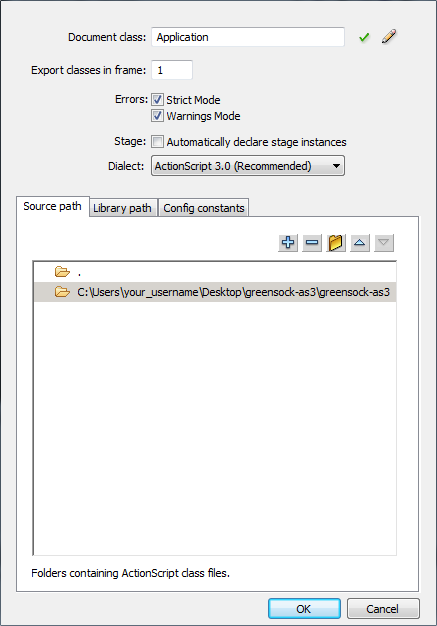
If successful your Advanced ActionScript 3.0 Settings panel should look something like this:
Click OK to commit your changes.
Now change to the 'Real' publish profile and add the library path to its ActionScript 3.0 Settings too.
Ensure that both profiles successfully build.
Select the appropriate profile and test your latest version of the code either on the desktop or on a device.
The speedometer's needle should now move smoothly to the target speed.
You can find the API Documentation for TweenLite and GreenSock's other tweening engines at http://www.greensock.com/as/docs/tween/. You can also find interactive examples and sample code for TweenLite at http://www.greensock.com/timelinelite/.
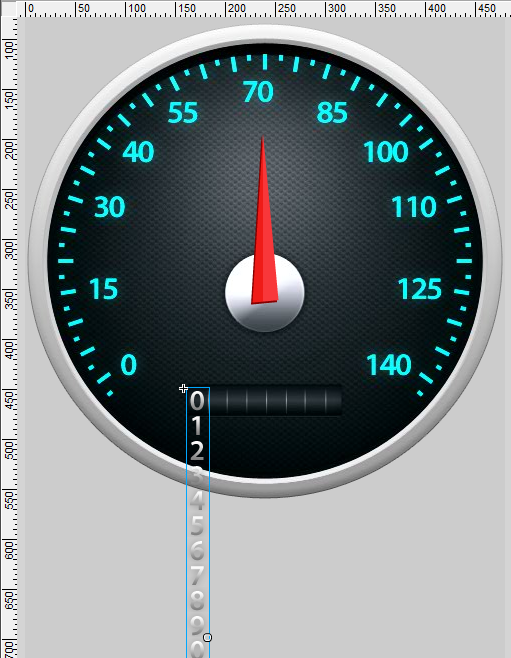
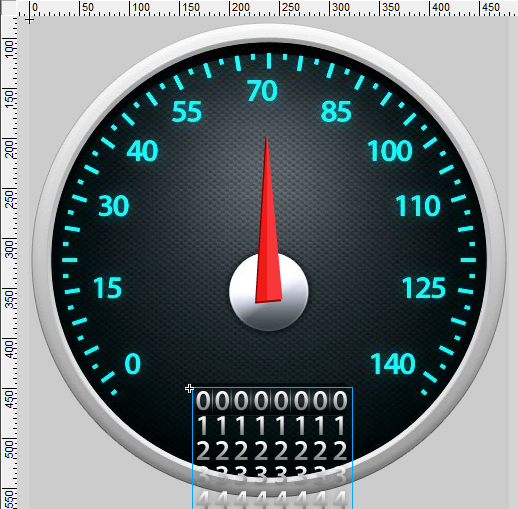
Step 14: Starting the Mileage Counter
We are now in a position to start work on the speedometer's mileage counter. Our app will track the total distance you have travelled and will update the mileage counter to reflect this. Here's how the mileage counter will look:
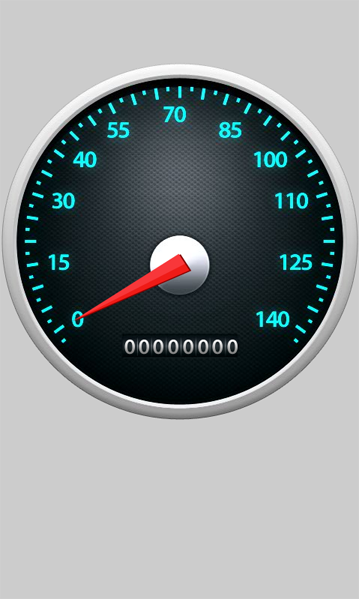
We want the digits within the counter to smoothly roll between values. To see this in action take a look at the preview SWF shown at the start of this tutorial. Every time an additional mile is chalked up you will see the digits in the counter move.
Our counter consists of eight digits and we will start by writing a class that represents a single digit.
Step 15: The Digit Movie Clip
To save you the effort you will find a movie clip within your library named 'Digit'. You can find it within the 'Counter' folder. Double-click 'Digit' to move into its timeline.
Sitting on the timeline is a movie clip instance named 'column'. This movie clip contains the individual bitmaps that represent each of the numbers used by the digit. Only one of those numbers will eventually be visible at any one time via a mask.
It may initially seem odd, but the column actually contains each number twice - 0 to 9 and 0 to 9 again. This duplication allows us to effectively simulate the digit rolling round, for example, from 9 to 0.
The diagram below should illustrate this along with a few other scenarios:
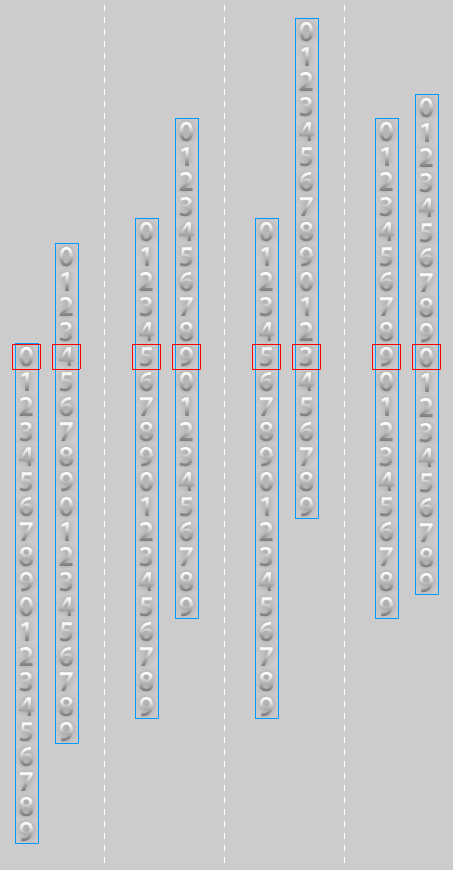
In the diagram above, the red square represents the area of the 'Digit' movie clip that will actually be visible to the user. To show the user a different number, the 'column' instance will be scrolled upwards - the mask area will always remain in the same place.
The first example above shows a movement from the number '0' to the number '4'. As you can see, we only use the top half of the column for this - we never move to the repeated numbers in the bottom half. The same is also true of the second example where we move from the number '5' to the number '9'.
The third example however is different. It shows the digit moving from the number '5' to the number '3'. This time we move from the numbers in the top-half of the column to the duplicate numbers in the bottom-half of the column. The same is also true of the final example, where we move from the number '9' to the number '0'.
Essentially, moving from a lower number to a higher number will always take place entirely within the top-half of the column. However, to give the illusion of scrolling back round from a higher number to a lower number we must always move from the top-half of the column to one of the duplicate numbers in the bottom-half.
Step 16: The Digit Class
Let's actually write the class that is associated with and controls the 'Digit' movie clip.
Create a new class and add the following to it:
package
{
	import flash.display.MovieClip;
	import flash.events.Event;
	import flash.geom.Rectangle;
	import com.greensock.TweenLite;
	import com.greensock.easing.Linear;

	public class Digit extends MovieClip
	{
		static private const DIGIT_HEIGHT :uint = 25;
		static private const DIGIT_WIDTH  :uint = 23;

		public  var column  :MovieClip;
		private var currVal :int;
		private var prevVal :int;

		public function Digit()
		{
			currVal = -1;
			prevVal = -1;
			scrollRect = new Rectangle( 0, 0, DIGIT_WIDTH, DIGIT_HEIGHT );
		}

		public function set value( value :int ) :void
		{
			// Set the digit's value.
			prevVal = currVal;
			currVal = value % 10;

			// If it's the first time then snap to the value.
			// Otherwise move to the value.
			if( prevVal == -1 )
			{
				snapColumn();
			}
			else
			{
				moveColumn();
			}
		}

		public function get value() :int
		{
			return currVal;
		}

		private function snapColumn() :void
		{
			column.y = -currVal * DIGIT_HEIGHT;
		}

		private function moveColumn() :void
		{
			// Stop the column from animating.
			TweenLite.killTweensOf( column );

			// Ensure that we start from the top-half of the column.
			if( column.y < -( DIGIT_HEIGHT * 10 ) )
			{
				column.y += ( DIGIT_HEIGHT * 10 );
			}

			// Find out the number we are currently stopped at.
			var valStoppedAt :int = Math.abs( column.y / DIGIT_HEIGHT );

			// Calculate the y-position the column needs to be moved to to
			// show the new current number.
			var targY :Number = -currVal * DIGIT_HEIGHT;

			// If the new current value is less than the value we stopped at
			// then we need to simulate the digit wrapping back round. To do
			// this, we'll scroll into the bottom-half of the column.
			if( currVal < valStoppedAt )
			{
				targY -= ( DIGIT_HEIGHT * 10 );
			}

			// Perform the actual scroll animation on the column.
			var duration :uint = Math.abs( column.y - targY ) / DIGIT_HEIGHT;
			TweenLite.to( column, duration, { y: targY, ease:Linear.easeNone } );
		}
	}
}
Save the class as Digit.as.
The Digit class's public API consists of a single property named value. By setting this property, the digit will scroll to that value. There is one exception to this however. If the value property is being set for the first time then the class will simply position the digit at this value rather than scroll to it. This allows the digit to be set in an initial default position the first time its value property is set.
Take a look at the import statements in the class. You will see that this class, like the Speedometer class, takes advantage of the TweenLite API:
import com.greensock.TweenLite;
import com.greensock.easing.Linear;
However, as well as using the TweenLite class, we also import one of the TweenLite easing classes named Linear, which will be used to define how the column of numbers within the 'Digit' movie clip is tweened.
Three member variables are used within Digit.as:
public  var column  :MovieClip;
private var currVal :int;
private var prevVal :int;
The first - column - simply holds a reference to the column instance that sits on the 'Digit' movie clip's timeline. The other two member variables - currVal and prevVal - are used to store the current value that the digit represents and the previous value it represented.
The class has two constants declared that specify the width and height of each of the numeric values within the 'Digit' movie clip:
static private const DIGIT_HEIGHT :uint = 25;
static private const DIGIT_WIDTH  :uint = 23;
These constants get used in various places throughout the class, the first being within the constructor:
public function Digit()
{
	currVal = -1;
	prevVal = -1;
	scrollRect = new Rectangle( 0, 0, DIGIT_WIDTH, DIGIT_HEIGHT );
}
As mentioned previously, only one value will be shown at any one time within the 'Digit' movie clip. This can be achieved by drawing a mask in the 'Digit' movie clip's timeline, however masks are CPU intensive and aren't recommended for mobile devices. An alternative approach to creating a mask is to set a display object's scrollRect property. The DIGIT_WIDTH and DIGIT_HEIGHT constants are used here to define a rectangular region that sits over the first digit in the movie clip's column.
Additionally within the constructor both currVal and prevVal are defaulted to -1, indicating that a value has not yet been set for the digit via its value property.
Now let's look at the method that allows the setting of the value property:
public function set value( value :int ) :void
{
	// Set the digit's value.
	prevVal = currVal;
	currVal = value % 10;

	// If it's the first time then snap to the value.
	// Otherwise move to the value.
	if( prevVal == -1 )
	{
		snapColumn();
	}
	else
	{
		moveColumn();
	}
}
Other than setting the new value and storing the previous value, this method decides whether to scroll the 'column' instance's movie clip to the new value or whether to snap to it. Remember, when the value is being set for the first time we simply want to position the 'column' instance at that value rather than scrolling.
The most complex method within this class is moveColumn(), which is responsible for sliding the 'column' instance to reveal the correct value to the user. The method is well commented and is shown below:
private function moveColumn() :void
{
	// Stop the column from animating.
	TweenLite.killTweensOf( column );

	// Ensure that we start from the top-half of the column.
	if( column.y < -( DIGIT_HEIGHT * 10 ) )
	{
		column.y += ( DIGIT_HEIGHT * 10 );
	}

	// Find out the number we are currently stopped at.
	var valStoppedAt :int = Math.abs( column.y / DIGIT_HEIGHT );

	// Calculate the y-position the column needs to be moved to to
	// show the new current number.
	var targY :Number = -currVal * DIGIT_HEIGHT;

	// If the new current value is less than the value we stopped at
	// then we need to simulate the digit wrapping back round. To do
	// this, we'll scroll into the bottom-half of the column.
	if( currVal < valStoppedAt )
	{
		targY -= ( DIGIT_HEIGHT * 10 );
	}

	// Perform the actual scroll animation on the column.
	var duration :uint = Math.abs( column.y - targY ) / DIGIT_HEIGHT;
	TweenLite.to( column, duration, { y: targY, ease:Linear.easeNone } );
}
For those requiring further explanation, here's some pseudo code that should make things clearer:
- If the 'column' is scrolling to a position, stop it.
- If at a value in the bottom-half of the 'column' then jump to the same value in the top-half.
- Calculate the target y-position the 'column' needs to be moved to in order to reveal the current value within the top-half of the column.
- If the current value is less than the previous value then adjust the target y-position to ensure that we scroll to the same value within the bottom-half.
- Using TweenLite, trigger the scrolling animation to the target y-position.
All that's left to do now is link the class to the 'Digit' movie clip in the library.
Right-click on the 'Digit' movie clip within the library and select Properties... to bring-up the Symbol Properties dialog box.
Within the dialog box, click on the 'Export for ActionScript' checkbox and enter 'Digit' into the Class field:
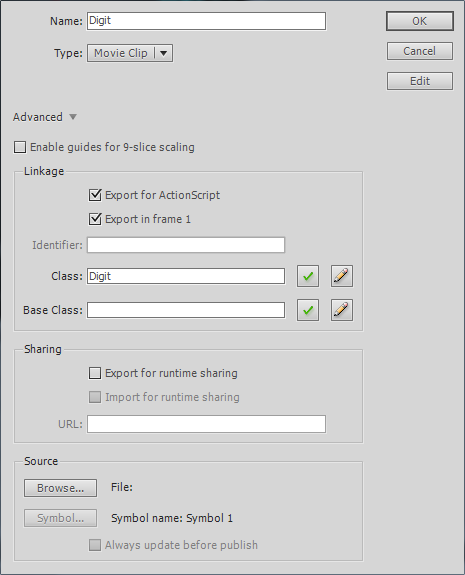
Click OK and save your FLA.
Now it's time to test the Digit class and make sure it works as expected.
Step 17: Testing a Digit
We're getting closer to completing the mileage counter, but before we proceed let's test the Digit class and see it in action.
We'll use the Application class for this quick test.
First, drag an instance of the 'Digit' movie clip from the library onto the root timeline. Name the instance 'digit' and position it on the stage at (158, 449):
Within Application.as, add the following member variable to reference the 'digit' movie clip instance:
public  var digit       :Digit;
public  var speedometer :Speedometer;
private var geolocation :IGeolocation;
Now, let's give the digit a default value by adding the following line at the end of the Application class's constructor:
geolocation.setRequestedUpdateInterval( 1000 );
geolocation.addEventListener( GeolocationEvent.UPDATE, handleGeolocationUpdate );

digit.value = 6;
Save the class.
Publish and test this on your desktop by selecting Control | Test Movie | in Flash Professional. You should see the digit sitting within the speedometer and defaulted to the number '6'.
Now let's test that we can move between values. Let's try moving from '6' to '9'. Add the following line to your constructor:
digit.value = 6;
digit.value = 9;
Save the class and test within Flash Professional again. This time you should see the digit scrolling from '6' to '9'.
As a final test, let's check that the digit can roll back round from a higher value to a lower value. Change your two test lines of code to the following:
digit.value = 8;
digit.value = 4;
Save the class and test within Flash Professional. If all goes according to plan you should see the digit starting at '8' and rolling all the way round until it stops at the number '4'.
Remove the lines of code you added in this step, including the digit member variable. Also remove the 'digit' movie clip instance from the stage.
Save both Application.as and your FLA.
Step 18: The Mileage Counter Movie Clip
Okay, it's time to create a movie clip that actually represents the mileage counter. Fortunately the hard part has been done for you.
Take a look in your library. Inside the 'Counter' folder you will find a movie clip named 'Counter'. Double-click on the 'Counter' movie clip to move to its timeline.
Sitting on the stage you will find eight instances of the 'Digit' movie clip. Each of the instances has been given a unique instance name from 'd7' on the far left to 'd0' on the far right.
Although you can see all the numbers within each column, remember that the Digit class linked to each instance will apply a mask forcing only a single value to be visible at runtime.
Step 19: The Counter Class
We can now write a class to represent the 'Counter' movie clip symbol.
Create a new class and add the following to it:
package
{
	import flash.display.MovieClip;

	public class Counter extends MovieClip
	{
		public var d0 :Digit;
		public var d1 :Digit;
		public var d2 :Digit;
		public var d3 :Digit;
		public var d4 :Digit;
		public var d5 :Digit;
		public var d6 :Digit;
		public var d7: Digit;

		private var digits :Vector.<Digit>;
		private var dist   :Number;

		public function Counter()
		{
			digits = new <Digit>[ d7, d6, d5, d4, d3, d2, d1, d0 ];
			dist   = 0;
		}

		public function set distance( value :Number ) :void
		{
			dist = value;
			updateDigits();
		}

		public function get distance() :Number
		{
			return dist;
		}

		private function updateDigits() :void
		{
			// Convert the distance to a string.
			var distString :String = String( dist );

			// If the string is too long then reduce it.
			// If the string is too short then pad the beginning out with some zeros.
			if( distString.length > digits.length )
			{
				distString = distString.substr( ( distString.length - digits.length ), digits.length );
			}
			else if( distString.length < digits.length )
			{
				distString = createZerosString( digits.length - distString.length ) + distString;
			}

			// Walk the string and assign each digit a value from the string.
			var digit :Digit;
			for( var i :int = 0; i < digits.length; i++ )
			{
				digit = digits[ i ];
				digit.value = parseInt( distString.substr( i, 1 ) );
			}
		}

		private function createZerosString( count :uint ) :String
		{
			var s :String = "";
			for( var i :uint = 0; i < count; i++ )
			{
				s += "0";
			}
			return s;
		}
	}
}
Save the class as Counter.as.
This class simply manages the 'Digit' instances by accepting a mileage and then assigning a value to each of the digits in order to display that mileage.
For example, a distance of 16,500,250 miles, will be split into the following individual values: '1', '6', '5', '0', '0', '2', '5', '0'. Each of these values will then be assigned to a Digit instance. For example, 'd7' will be set to '1', 'd6' will be set to '6', and so on.
The Counter class's API exposes a single public property named distance which is used to set the counter's mileage. Here is the code again:
public function set distance( value :Number ) :void
{
	dist = value;
	updateDigits();
}
As you can see, the distance is stored in a member variable named dist. A call is then made to the private updateDigits() method, which is responsible for splitting the distance into individual digits and displaying them.
Here's the code:
private function updateDigits() :void
{
	// Convert the distance to a string.
	var distString :String = String( dist );

	// If the string is too long then reduce it.
	// If the string is too short then pad the beginning out with some zeros.
	if( distString.length > digits.length )
	{
		distString = distString.substr( ( distString.length - digits.length ), digits.length );
	}
	else if( distString.length < digits.length )
	{
		distString = createZerosString( digits.length - distString.length ) + distString;
	}

	// Walk the string and assign each digit a value from the string.
	var digit :Digit;
	for( var i :int = 0; i < digits.length; i++ )
	{
		digit = digits[ i ];
		digit.value = parseInt( distString.substr( i, 1 ) );
	}
}
Essentially the method takes a distance and converts it to a string. It then walks through the string one character at a time; converts each character to an integer; and then assigns that integer to the appropriate Digit instance.
There's also some additional code to handle strings that are too long or too short. If the string is too short then it gets padding with some additional zeros. If it's too long then some characters get chopped.
The Digit instances are referenced by the following public member variables:
public var d0 :Digit;
public var d1 :Digit;
public var d2 :Digit;
public var d3 :Digit;
public var d4 :Digit;
public var d5 :Digit;
public var d6 :Digit;
Additionally a vector is used to store these references in the order they should be set:
digits = new <Digit>[ d7, d6, d5, d4, d3, d2, d1, d0 ];
If you look at the for-loop at the end of the updateDigits() method you will see the digits vector being accessed in order to retrieve a reference to the next Digit instance whose value is to be set.
You may be wondering why a Vector was used to hold the Digit references rather than an Array. Vectors tend to be more memory efficient and have improved performance over arrays and are therefore ideal when writing mobile apps. Again, with this app the performance benefits won't be noticeable but you should try to get into the habit of saving CPU cycles and memory when developing for mobile.
For more information regarding the Vector class visit the Adobe LiveDocs site.
Now let's link this class to the 'Counter' movie clip symbol within the library. Right-click on the movie clip and select Properties.... Within the Symbol Properties dialog box, click the 'Export for ActionScript' checkbox and enter 'Counter' into the Class field:
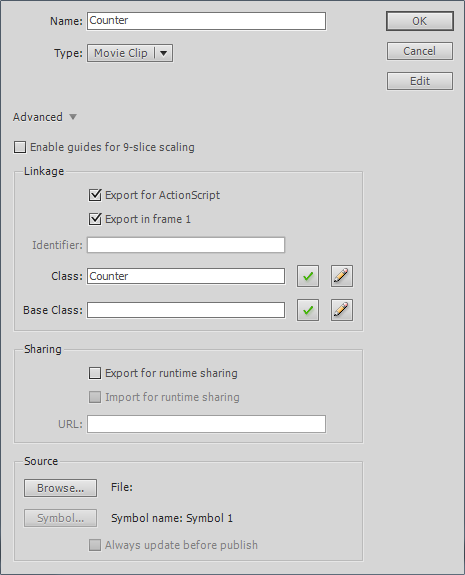
Click OK and save your FLA.
Now it's time to wire up the counter to the rest of the application.
Step 20: Adding the Mileage Counter
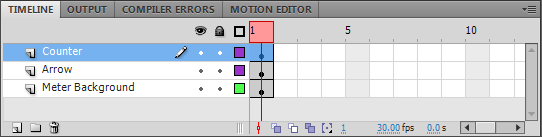
Double-click on the 'Speedometer' movie clip symbol within your library. Add a new layer to its timeline, name it 'Counter' and ensure that it sits on top of the other layers:
Ensure that the new layer is selected and drag the 'Counter' movie clip symbol from the library onto the stage. Name the instance 'counter' and position it at ( 160, 369 ):
Save your FLA.
Now let's add some code to the Speedometer class to handle the counter.
The Speedometer class will actually track the total distance travelled and pass it to the counter. The class will store the total distance in metres and convert it to miles before passing it to the counter.
Add to the class the following constant which will be used to perform the distance conversion:
static private const MAX_SPEED_INCREASE       :Number =  20;
static private const DISTANCE_CONVERSION_BASE :Number =  0.000621371192237334;
Also, add two new member variables - one to hold a reference to the 'counter' instance and another to store the distance travelled:
public  var arrow               :MovieClip;
public  var counter             :Counter;
private var currMetresPerSecond :Number;
private var dist                :Number;
Within the constructor default the dist member variable:
public function Speedometer()
{
	currMetresPerSecond = 0;
	dist = 0;
	addEventListener( Event.ADDED_TO_STAGE, handleAddedToStage );
}
At the end of the class, add a new private method that will convert metres to miles:
private function convertToMiles( metres :Number ) :Number
{
	return metres * DISTANCE_CONVERSION_BASE;
}
Now finally, add some code to the set speed() method to update the distance travelled and to pass the distance to the counter for displaying:
public function set speed( metresPerSecond :Number ) :void
{
	// Prevent geolocation errors from being used.
	if( metresPerSecond < MAX_METRES_PER_SECOND )
	{
		currMetresPerSecond = metresPerSecond;
	}

	var milesPerHour :Number = convertToMilesPerHour( currMetresPerSecond );
	TweenLite.to( arrow, 1, { rotation: convertToRotation( milesPerHour ) } );

	dist += currMetresPerSecond;
	counter.distance = Math.floor( convertToMiles( dist ) );
}
Save Speedometer.as.
Select the 'Simulate' publish profile and test from within Flash by selecting Control | Test Movie | in Flash Professional.
Once a mile has been covered (wait for just over two minutes) you should see the counter increment. It will continue to increment for each mile travelled.
Step 21: Managing State
You almost have a complete app. The last thing we'll add is some state management to allow the app to store the distance travelled when the user quits and to retrieve the distance travelled when the app is next launched.
We'll make use of the SharedObject class provided by the ActionScript API. SharedObject is used to read and write a limited amount of data to a user's desktop computer or Android device.
We will save the distance travelled to the SharedObject when our app receives the Event.DEACTIVATE event, which is triggered just before an app quits. If you remember from Part 1, we added the handleDeactivate() event listener to our Application class for this very event.
However before we add the code to deal with the SharedObject we first need to add to the Speedometer class's public API to allow the distance to be set and retrieved.
Open Speedometer.as and add the following two methods to it:
public function set distance( metres :Number ) :void
{
	dist = metres;
	counter.distance = Math.floor( convertToMiles( dist ) );
}

public function get distance() :Number
{
	return dist;
}
This gives us the means to set a default distance when one is retrieved from the shared object, and also to obtain the current distance travelled so that it can be saved to the shared object when the app is being quit.
Save Speedometer.as.
Now let's add the state management code to Application.as.
First add an import statement for the SharedObject class:
import flash.events.KeyboardEvent;
import flash.net.SharedObject;
import flash.ui.Keyboard;
Add a new member variable to represent the shared object:
public  var speedometer  :Speedometer;
private var geolocation	 :IGeolocation;
private var sharedObject :SharedObject;
Now initialise the shared object by adding the following code at the end of the class's constructor:
sharedObject = SharedObject.getLocal( "speedometer" );
if( sharedObject.size == 0 )
{
	sharedObject.data.distance = 0;
}
speedometer.distance = sharedObject.data.distance;
You don't directly instantiate a shared object, instead you make a request to receive a reference to a locally shared object via getLocal(). You pass to getLocal() a unique string that is used to access the shared object for your app. If the shared object doesn't exist then the Flash runtime will create it and pass a reference to you. In our code above, we have given our shared object the unique name 'speedometer'.
Once we have a reference to our shared object we need to check to see if it contains data. The code above checks the shared object's size property to see if there is any data. If a size of 0 is returned then we need to add data to the object. The distance is the only data we need to store, so we add a property named distance to our shared object and set it to a default value of 0.
The final line of code simply takes the distance stored in the shared object and uses it to set the speedometer member variable's initial distance.
All that's left to do now is save the current distance when exiting the app. We can do that by adding the following code to the handleDeactivate() method:
private function handleDeactivate( e :Event ) :void
{
	sharedObject.data.distance = speedometer.distance;
	sharedObject.flush();

	NativeApplication.nativeApplication.exit();
}
The first line obtains the current distance from the speedometer and sets it within the shared object. Then a call is made to the shared object's flush() method. This forces the data to be saved locally.
Save Application.as.
Your speedometer app can now maintain state when it has been closed.
Publish and run your app. If you are an Android owner then deploy it to your device. If you want to actually use the device's GPS unit then remember to switch to the 'Real' profile before publishing. Oh and remember to switch on your phone's GPS sensor before launching your app.
Test that your speedometer's state is being correctly managed by exiting the app and then re-launching it (wait until you have chalked up some mileage first). You should notice that the speedometer's counter remembers the distance you have travelled.
You should be aware that re-publishing and deploying your app to your Android device will wipe any data stored by your shared object.
Conclusion
You should now feel fairly comfortable with the basics of Adobe AIR for Android development. Not only have you built a visually rich app that maintains state and utilizes your Android's GPS sensor, you've also touched on more advanced subjects such as hardware acceleration and code optimization.
Thanks for reading and good luck with your future Adobe AIR for Android projects!
Acknowledgements
The artwork used in this tutorial was created using the steps outlined in 'How to Design a Speedometer Icon in Photoshop' - a tutorial by Spanish graphic design guru, Roberto Abril Hidalgo.
A special thank you to my sister-in-law, Helen Caleb, who always comes to my rescue with her Photoshop expertise.

Comments