When creating a single-page app we should use some kind of framework to do some of the job for us so we can focus on the actual functionality.
AngularJS fits here perfectly, because features like dynamic dependency injection and bi-directional data binding are just great. Sometimes we also require some kind of server. If you've chosen PHP then Laravel may be your best option, as it's easy to work with and pretty powerful.
In this part of the tutorial, we will build the front-end of our application using AngularJS. Angular is a really unique framework. Instead of abstracting the HTML or providing some way of DOM manipulation they extended the HTML to deal with the fact that it was surely not designed to work with dynamic data.
Because of that Angular may need some more learning than other frameworks, but it's really worth the time spent.
Preparation
Before we start programming our front-end ,we have to modify the Laravel part a bit. Go to app/views, delete the example stuff that is there and create the file named home.php. Now let's create the layout.
Start with the DOCTYPE and the html tag:
<!DOCTYPE html>
<html ng-app="app">
As you can see we are already using some AngularJS stuff - the ng-app directive. This tells Angular to use the module named app for this application (we will define it later). After that, add the head with a title and CSS:
<title>Customer Management</title>
<link rel="stylesheet" href="style.css">
Now you can put the script tags in with Angular, it's routing module and our app:
<script src="http://code.angularjs.org/1.2.3/angular.js"></script>
<script src="http://code.angularjs.org/1.2.3/angular-route.js"></script>
<script src="./app.js"></script>
This directive tells Angular to put the template that was requested into that element.
After that we only need to add a route to show the template (in app/routes.php). Add this before the routes for controllers:
Route::get('/', function () { return View::make('layout'); });
Now if you start the server (with php artisan serve) you should see our basic layout when you navigate to http://localhost:8000/ in your browser:
The Style
This article will not be focusing on anything related to CSS, but to make the app more pleasing to the eye while you are developing we will add some style to it. Go to the public/ directory of your app (it's next to app/) and create the style.css with this code in it:
body {
    font-family: Calibri, sans-serif;
	width: 800px;
	margin: auto;
}

a {
	cursor: pointer;
	color: blue;
	text-decoration: none;
}

table {
	width: 100%;
}

table thead tr {
	background: #ccc;
}

table tbody tr {
	background: #ddd;
}

table tbody tr:nth-child(2n + 1) {
	background: #eee;
}

table tr td:nth-child(1) {
	text-align: center;
}

table tr td:nth-child(3), table tr td:nth-child(4) {
	text-align: right;
}

.error {
	color: red;
}
Now open the app in your browser and the layout should be centered with a nicer font in the heading:
Basic Application Structure
We will start with a module declaration. Modules in Angular are pretty much the same thing as in any AMD library, but with the addition of dependency injection which is a really useful thing, as you will see. Here is the declaration of our app module:
var app = angular.module('app', [ 'ngRoute' ]);
The syntax is simple - first goes the module's name, and then the array of dependencies - we will only be using ngRoute here to handle the navigation, which will go next.
Routing
The routing is defined in the module's config() method:
app.config(function configure($routeProvider) {
Here is when the dependency injection kicks in for the first time - our callback will take $routeProvider as the only argument, and this module will be injected by Angular.
You have to make sure that the argument names are exactly the same as the module names, because Angular uses them to match the appropriate modules.
Now let's actually use the $routeProvider to set up the routes:
$routeProvider
	.when('/', { controller: 'CustomersController', templateUrl: './templates/customers.html' })
	.when('/customer/:id', { controller: 'CustomerController', templateUrl: './templates/customer.html' })
	.otherwise({ redirect: '/' });
});
As you can see to define a route you have to call the when() method of the provider (note that they can be chained).
The first parameter is the URI, and the second one is an object with route's options. Here, we attach appropriate controllers and templates to every route. In the second one we also use :id at the end to mark a route parameter that we will use later. The otherwise() method defines what will happen if any other URI is accessed.
Factory
Before we write the controllers, we have to create a thing called factory. factory is a function that returns a service, which is helpful if you want to separate any data getting/setting functions from the controllers (which is of course what you always want to do). We define it using the factory() method of the module:
app.factory('Data', function Data($http) {
The first parameter is the service's name, and the second one is a function which returns the service that will be created using this factory.
We will use the $http module to access our server using Ajax. It provides shortcut methods for all HTTP methods and each of them returns a promise (if you don't know what that is take a look here and here).
We have to return the service as an object with all of the methods that will be used in our controllers:
return {
The first one will GET all of the customers so we can show them in a list:
getCustomers: function getCustomers() { return $http.get('/customers/all'); },
Second one will GET only one customer by his id:
getCustomer: function getCustomer(id) { return $http.get('/customers?id='+ id); },
Third will POST the request to add user to the database:
addCustomer: function addCustomer(data) { return $http.post('/customers', data); },
The second argument in $http.post() is the data that will be sent to the server.
Next one will DELETE the customer with the id provided:
removeCustomer: function removeCustomer(id) { return $http.delete('/customers?id='+ id); },
Now there will be few similar ones for transactions. One to get all of them:
getTransactions: function getTransactions(id) { return $http.get('/transactions?id='+ id); },
One to add new one:
addTransaction: function addTransaction(data) { return $http.post('/transactions', data); },
And one to delete:
removeTransaction: function removeTransaction(id) { return $http.delete('/transactions?id='+ id); } } });
Customers Controller
The controllers in Angular are (like the name suggests) a way to control the application's behaviour. We will have one for every template. First we will make one for the main page. Start by defining it:
app.controller('CustomersController', function CustomersController($scope, Data) {
The second parameter here is the constructor function for the controller. It's first argument ($scope) is the link between the DOM and the controller. It's the heart of Angular's bidirectional data binding. The second one is the service from the factory that we created earlier.
Getting the List
Now we will get the customers list from the server using our service:
Data.getCustomers().success(parseCustomers);
All promises in Angular provide the success() and error() methods which can be used to add appropriate callbacks. Now let's define the function that will parse the incoming data to show it on the page:
function parseCustomers(data) { $scope.customers = data; }
Yes, that is all it takes to feed the template with data. No need for any innerHTML/appendChild()-ish code.
Adding New Customers
We also need to provide the ability to add and remove customers. First let's create an object in the scope where we will hold the data of the new customer:
$scope.newCustomer = { name: '', email: '' };
This way we can avoid accessing DOM when the user adds a customer. Now the function that will actually add the customer:
$scope.addCustomer = function addCustomer() {
Since the user full name will be displayed in the table the input for it will be the same, so we have to split it to get first and last name:
var names = $scope.newCustomer.name.split(' ');
Now we call the appropriate function from our factory with the data from $scope:
Data.addCustomer({ first_name: names[0], last_name: names[1], email: $scope.newCustomer.email })
After that we add success and error listeners to the promise returned:
.success(customerAddSuccess).error(customerAddError); }
Let's define the success callback first:
function customerAddSuccess(data) {
The data argument holds the response's text. We have to clear the $scope.error variable:
$scope.error = null;
Push the newly added customer to $scope.customers:
$scope.customers.push(data);
And set $scope.newCustomer to its initial state to clear the inputs:
$scope.newCustomer = { name: '', email: '' }; }
The error callback will just set the $scope.error variable to the text received from the server:
function customerAddError(data) { $scope.error = data; }
Removing Customers
The function to remove the customer will take his id as a parameter:
$scope.removeCustomer = function removeCustomer(id) {
We will also display a confirmation box so the user has a chance to cancel the action:
if (confirm('Do you really want to remove this customer?')) {
If the user is sure he wants to continue, we delete the customer:
Data.removeCustomer(id).success(customerRemoveSuccess); } }
The callback here will have to remove the customer from $scope.customers using the id gotten from the server:
function customerRemoveSuccess(data) {
	var i = $scope.customers.length;
	while (i--) {
		if ($scope.customers[i].id == data) {
			$scope.customers.splice(i, 1);
		}
	}
}
The Result
The complete code should look like this:
app.controller('CustomersController', function CustomersController($scope, Data) {
    Data.getCustomers().success(parseCustomers);

	function parseCustomers(data) {
		$scope.customers = data;
	}

	$scope.newCustomer = { name: '', email: '' };

	$scope.addCustomer = function addCustomer() {
		var names = $scope.newCustomer.name.split(' ');
		Data.addCustomer({
			first_name: names[0],
			last_name: names[1],
			email: $scope.newCustomer.email
		})
		.success(customerAddSuccess).error(customerAddError);
	}

	function customerAddSuccess(data) {
		$scope.error = null;
		$scope.customers.push(data);
		$scope.newCustomer = { name: '', email: '' };
	}

	function customerAddError(data) {
		$scope.error = data;
	}

	$scope.removeCustomer = function removeCustomer(id) {
		if (confirm('Do you really want to remove this customer?')) {
			Data.removeCustomer(id).success(customerRemoveSuccess);
		}
	}

	function customerRemoveSuccess(data) {
		var i = $scope.customers.length;
		while (i--) {
			if ($scope.customers[i].id == data) {
				$scope.customers.splice(i, 1);
			}
		}
	}
});
Customers Template
Now to actually show the data to our users we have to create a template. We defined it in the route to be ./templates/customers.html, so create the public/templates directory and the customers.html file in it.
First add the heading so the user knows where he is:
<h2>Customers</h2>
Next we need a table with a nice heading to show the data:
Now add the tbody element. And here is where Angular's magic comes in again. Using the ng-repeat directive we tell Angular to repeat the element:
<tr ng-repeat="customer in customers">
The syntax is as in JavaScript's for...in loop. Now we can access the customer variable to get all the data we need. In Angular you insert variables using double curly braces:
<tbody>
    <tr>
        <td>{{ customer.id }}</td>
        <td>
	        <a ng-click="removeCustomer({{ customer.id }})">[-]</a>
	        <a href="#/customer/{{ customer.id }}">
		        {{ customer.first_name }} {{ customer.last_name }}
	        </a>
        </td>
        <td>{{ customer.email }}</td>
    </tr>
</tbody>
There is also a ng-click directive which will act as a onclick event callback, we use it to add the ability to remove customers. Next there is a footer with inputs so the user can add new customers:
<tfoot>
	<tr>
		<td></td>
		<td><input ng-model="newCustomer.name" style="width: 99%"></td>
		<td><input ng-model="newCustomer.email" style="width: 170px"><a ng-click="addCustomer()">[+]</a></td>
	</tr>
</tfoot>
We use the ng-model directive to bind appropriate variables from the scope to the inputs, so they are updated every there is a change in the inputs' value.
The last thing to do is to show a error message if there is any. To achieve that we will use ng-show directive which will only show the element if specified expression is true:
<p ng-show="error" class="error">
    {{ error }}
</p>
That's it! Now you can open the app in your browser and you should see this:
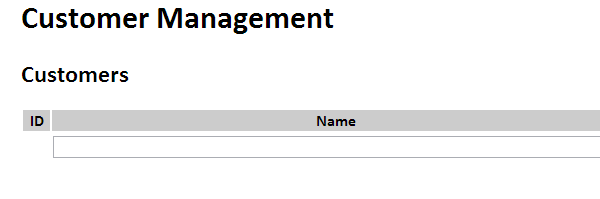
You can add new customer by clicking the plus sign on the right-bottom corner of the table.
Customer Controller
Now let's create a controller for a single-customer view:
app.controller('CustomerController', function CustomerController($scope, $routeParams, Data) {
Getting the Data
We get the customer's data using $routeParams module which holds all of the route parameters like the :id we specified earlier:
Data.getCustomer($routeParams.id).success(parseCustomer);

function parseCustomer(data) {
	$scope.customer = data;
}
The callback is pretty much the same as in the CustomersController. Now let's get all of the customer's transactions:
Data.getTransactions($routeParams.id).success(parseCustomersTransactions);

function parseCustomersTransactions(data) {
	$scope.transactions = data;
	$scope.sum = 0;
	for (var k in data) {
		$scope.sum += parseFloat(data[k].amount);
	}
}
The callback is a bit different than the last one because we also want to show the sum of the transactions' amounts. We need to use parseFloat() because Laravel sends floats as strings.
Adding New Transactions
The code will be very similar to the one used to create new customers:
$scope.newTransaction = { name: '', amount: 0 };

$scope.addTransaction = function addTransaction() {
    $scope.newTransaction.customer_id = $scope.customer.id;
	Data.addTransaction($scope.newTransaction).success(transactionAddSuccess).error(transactionAddError);
}

function transactionAddSuccess(data) {
	$scope.error = null;
	data.amount = parseFloat(data.amount);
	$scope.transactions.push(data);

	$scope.sum += data.amount;
	$scope.newTransaction = { name: '', amount: 0 };
}

function transactionAddError(data) {
	$scope.error = data;
}
The only difference is that we add the customer's id to the data so the server knows whos transaction it is. The success callback is also a bit modified, because we have to parse the float before adding it to the $scope and we have to add the amount to our sum.
Removing Transactions
The code for removeTransaction() function is almost identical to removeCustomer being different only in the variable names:
$scope.removeTransaction = function removeTransaction(id) {
    if (confirm('Do you really want to remove this transaction?')) {
		Data.removeTransaction(id).success(transactionRemoveSuccess);
	}
}

function transactionRemoveSuccess(data) {
	var i = $scope.transactions.length;
	while (i--) {
		if ($scope.transactions[i].id == data) {
			$scope.sum -= $scope.transactions[i].amount;
			$scope.transactions.splice(i, 1);
		}
	}
}
The Result
Whole controller should look like this:
app.controller('CustomerController', function CustomerController($scope, $routeParams, Data) {
    Data.getCustomer($routeParams.id).success(parseCustomer);

	function parseCustomer(data) {
		$scope.customer = data;
	}

	Data.getTransactions($routeParams.id).success(parseCustomersTransactions);

	function parseCustomersTransactions(data) {
		$scope.transactions = data;
		$scope.sum = 0;
		for (var k in data) {
			$scope.sum += parseFloat(data[k].amount);
		}
	}

	$scope.newTransaction = { name: '', amount: 0 };

	$scope.addTransaction = function addTransaction() {
		$scope.newTransaction.customer_id = $scope.customer.id;
		Data.addTransaction($scope.newTransaction).success(transactionAddSuccess).error(transactionAddError);
	}

	function transactionAddSuccess(data) {
		$scope.error = null;
		data.amount = parseFloat(data.amount);
		$scope.transactions.push(data);

		$scope.sum += data.amount;
		$scope.newTransaction = { name: '', amount: 0 };
	}

	function transactionAddError(data) {
		$scope.error = data;
	}

	$scope.removeTransaction = function removeTransaction(id) {
		if (confirm('Do you really want to remove this transaction?')) {
			Data.removeTransaction(id).success(transactionRemoveSuccess);
		}
	}

	function transactionRemoveSuccess(data) {
		var i = $scope.transactions.length;
		while (i--) {
			if ($scope.transactions[i].id == data) {
				$scope.sum -= $scope.transactions[i].amount;
				$scope.transactions.splice(i, 1);
			}
		}
	}
});
Customer Template
The template for single customer has no new Angular's directives, so just make a file named customer.html in public/templates/ and place this code there:
<h2>Customer Info</h2>
<p>Name: <strong>{{ customer.first_name }} {{ customer.last_name }}</strong></p>
<p>E-mail: <strong>{{ customer.email }}</strong></p>

<h3>Transactions List</h3>
<table>
    <thead>
		<tr>
			<th width="25">ID</th>
			<th width="*">Name</th>
			<th width="85">Amount</th>
			<th width="160">Date</th>
		</tr>
	</thead>
	<tbody>
		<tr ng-repeat="transaction in transactions">
			<td>{{ transaction.id }}</td>
			<td><a ng-click="removeTransaction({{ transaction.id }})">[-]</a> {{ transaction.name }}</td>
			<td>${{ transaction.amount.toFixed(2) }}</td>
			<td>{{ transaction.created_at }}</td>
		</tr>
	</tbody>
	<tfoot>
		<tr>
			<td></td>
			<td><input type="text" ng-model="newTransaction.name" style="width: 99%"></td>
			<td><input type="text" ng-model="newTransaction.amount" style="width: 85px"></td>
			<td><a ng-click="addTransaction()">[+]</a></td>
		</tr>
		<tr>
			<td></td><td>Sum:</td><td>${{ sum.toFixed(2) }}</td>
		</tr>
	</tfoot>
</table>
<p ng-show="error" class="error">
	{{ error }}
</p>
Note that we are using toFixed(2) to round the floats so they have only two decimal fields, because the way Laravel handles floats in JSON.
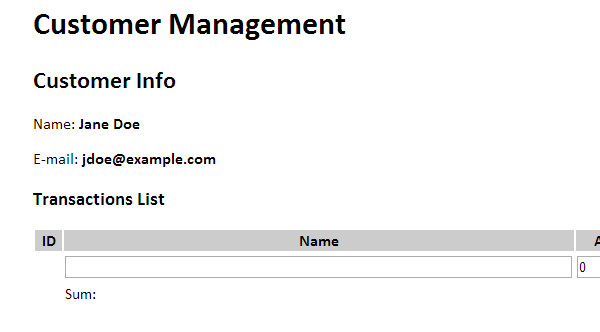
Now you can open the browser and click on one of the customers you created. You should see the controller and template in action:
Conclusion
Now if you've added some functionality after the first part, including it in the front-end should be a matter of adding few lines of code here and there.
I hope that after you've done reading the article and your app is finished and working you will start thinking how you could create single-page applications without AngularJS and any PHP apps without Laravel. Let me know if you had any problems with any of the frameworks presented here.

Comments