In the previous article of this series, you learned about the various types of peripheral input and output devices and connections that can be used with Android Things. Next, you can expand on this knowledge to write new classes, known as drivers, that make interfacing with peripherals even easier. This article will focus on the type of drivers that can be written for Android Things.
Android Things User-Space Drivers
User-space drivers allow developers to inject new hardware into the Android framework, allowing them to interact with the already established Android APIs. While you can communicate directly with devices using the standard input/output APIs, writing a custom driver will allow your app to support various hardware profiles and directly work with the Android OS. In addition, your code will be more structured and easily support code reuse.
There are three primary driver classifications that you will learn about in this article: GPS drivers, Human Input Device (HID) drivers, and sensor drivers.
GPS Drivers
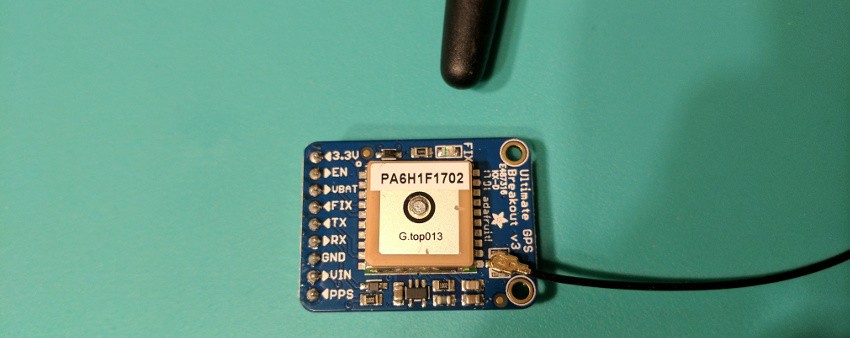
If your device needs location information, then you may want to add a GPS device into your app. By registering your GPS peripheral with the UserDriverManager, you will be able to inject your device's location data into the Android framework, allowing it to be used by Android's location services. This will combine the GPS data with WiFi and any other location source to provide more accurate data results for your app.
Typically, your GPS modules will connect to an Android Things device through a UART connection. We won't go too in-depth about UART in this tutorial, but you can learn all about how it works for peripherals in the previous tutorial of this series.
To work with your GPS module, you will need to create a new Java component to communicate with your new device. We will call this class GpsDriverService.
In order to register your GPS module with the Android framework for location data, you will first need to create a GpsDriver object in your GpsDriverService. This object can be registered with the UserDriverManager with the registerGpsDriver() call.
private GpsDriver mDriver;

@Override
public void onCreate() {
    super.onCreate();

    mDriver = new GpsDriver();

    UserDriverManager manager = UserDriverManager.getManager();
    manager.registerGpsDriver( mDriver );
}
Once your GPS module has received location data and sent it to your Android Things device over your serial UART connection, you will need to parse it and add it to a Location object.
Most GPS modules will return location data in the NMEA format, though parsing this data is beyond the scope of this tutorial. There are four required data items for your Location object: accuracy, time, latitude, and longitude. You can also optionally include altitude, bearing, and speed (if the device is moving).
private Location parseLocationFromString(String gpsData) {
    Location result = new Location(LocationManager.GPS_PROVIDER);

    //parse gpsData

    //required
    result.setAccuracy( getAccuracyFromGpsData( gpsData ) );
    result.setTime( getTimeFromGpsData( gpsData ) );
    result.setLatitude( getLatitudeFromGpsData( gpsData ) );
    result.setLongitude( getLongitudeFromGpsData( gpsData ) );

    //optional
    result.setAltitude( getAltitudeFromGpsData( gpsData ) );
    result.setBearing( getBearingFromGpsData( gpsData ) );
    result.setSpeed( getSpeedFromGpsData( gpsData ) );

    return result;
}
Once you have your Location object populated, you can pass it to the GpsDriver by calling reportLocation().
Location location = parseLocationFromString( rawGpsData );
mDriver.reportLocation( location );
Once your component is created, you will need to instantiate it, start reading data, and listen to updates in your app.
private LocationListener mLocationListener = new LocationListener() {
    @Override
    public void onLocationChanged(Location location) {
        Log.v("Test", "Location update: " + location);
    }

    @Override
    public void onStatusChanged(String provider, int status, Bundle extras) {
        Log.e("Test", "onstatuschanged");
    }

    @Override
    public void onProviderEnabled(String provider) {
        Log.e("Test", "onproviderenabled");
    }

    @Override
    public void onProviderDisabled(String provider) {
        Log.e("Test", "onproviderdisabled");
    }
};

...

mLocationManager = (LocationManager) getSystemService(LOCATION_SERVICE);

// Create and start the GPS component
mGpsDriver = new GpsDriverService();
mGpsDriver.register();

// Register for location updates
mLocationManager.requestLocationUpdates(LocationManager.GPS_PROVIDER, 0, 0, mLocationListener);
When your app is finished, you will need to unregister your driver and remove your location listener.
@Override
protected void onDestroy() {
    super.onDestroy();

    if (mGpsDriver != null) {
        mGpsDriver.unregister();
        mLocationManager.removeUpdates(mLocationListener);

        try {
            mGpsDriver.close();
        } catch (IOException e) {
        }
    }
}
In addition, you will need to ensure that your app has the ACCESS_FINE_LOCATION permission. You can find details for ensuring an app has required permissions in this tutorial.
When first working with an app that uses a new permission in Android Things, you will need to reboot your device after you install your app to ensure that the permission has been granted.
Human Input Device Drivers
The Android framework comes with a built-in pipeline for handling input from user button and motion events, which is used for things such as media buttons, controller joysticks, and keyboard key presses. By creating an InputDriver, you can tie your own human interactions to the standard Android input pipeline so that your device can properly react to your users.
For simplicity, we will only look at button input events and how to tie them into the Android framework, though motion events are handled in a very similar fashion. Similarly to the last portion of this tutorial, we will ignore the more specific implementation details of the input devices and focus on tying received events to the Android platform.
Button Events
When a button event occurs from a button that you have attached to your Android Things device, you will want to record that and send it through the Android pipeline.
The first thing you will need to do is create an InputDriver object in a new Service and initialize it. The driver can be initialized using a builder that accepts the input type, a name for your input, a version, and a key code that the button represents.
private InputDriver mDriver;

@Override
public void onCreate() {
    super.onCreate();

    mDriver = InputDriver.builder(InputDevice.SOURCE_CLASS_BUTTON)
            .setName("ButtonInputDriver")
            .setVersion(1)
            .setKeys(new int[] {KeyEvent.KEYCODE_SPACE})
            .build();
}
Once your InputDriver is initialized, you can register it with the UserDriverManager using the registerInputDriver() call.
UserDriverManager manager = UserDriverManager.getManager();
manager.registerInputDriver(mDriver);
Once you have registered your InputDriver, your driver service can wait for events to be sent to it from your button implementation class. If your custom button is pressed, you can notify the service and create a new KeyEvent, which can be placed on the Android input pipeline using the emit(KeyEvent) method. This method will return true if the KeyEvent is able to be sent to the Android framework, and false if an error occurs.
if( buttonPressed ) {
    KeyEvent[] events = new KeyEvent[] {new KeyEvent(KeyEvent.ACTION_DOWN, KeyEvent.KEYCODE_SPACE)};

    if (!mDriver.emit(events)) {
        //something went wrong
    }
}
The final thing you will need to do is unregister your InputDriver object from the UserDriverManager when your app has finished running.
@Override
public void onDestroy() {
    super.onDestroy();

    UserDriverManager manager = UserDriverManager.getManager();
    manager.unregisterInputDriver(mDriver);
}
Listening for Input Events
Now that you are able to emit button input events to the Android input pipeline, it's time to listen for them. This is where all of the work to funnel your new button events into the Android framework pays off. In your application's Activity, you simply need to add a method for when a KeyEvent is down, and another for when a KeyEvent is up. In those methods, you can check the KeyEvent's key code and handle the event appropriately.
@Override
public boolean onKeyDown(int keyCode, KeyEvent event) {

    if( event.getKeyCode() == KeyEvent.KEYCODE_SPACE ) {
        //handle it
    }

    return true;
}

@Override
public boolean onKeyUp(int keyCode, KeyEvent event) {
    return true;
}
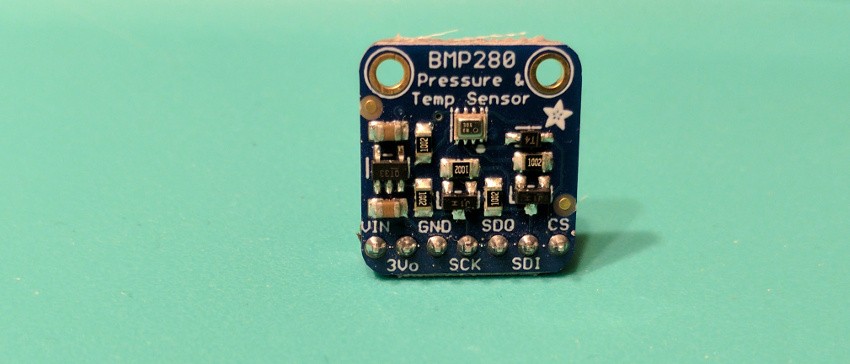
Sensor Drivers
Some of the most common components you will use with an Android Things board are sensors. As Android has a fairly robust sensor framework, it only makes sense that we would want to be able to add data from our external components into that pipeline.
To start, you will need to make a new Java class that interacts with your hardware sensor. This class will need to extend UserSensorDriver and implement the read() method. In addition, if your sensor supports low power or sleep modes, you can override the setEnabled() method and act accordingly.
The following code snippet is a stubbed version of a component class that would read data through the Peripheral I/O API to retrieve an X, Y and Z data value and return a new UserSensorReading. If the data is not currently available, your class can throw a new IOException.
public class ExampleSensorComponent extends UserSensorDriver {
    float x, y, z;

    @Override
    public UserSensorReading read() throws IOException{
        try {
            // Read data from the sensor hardware and return it
            x = getXValueFromHardware();
            y = getYValueFromHardware();
            z = getZValueFromHardware();

            return new UserSensorReading(new float[]{x, y, z});
        } catch (Exception e) {
            // Error occurred reading the sensor hardware
            throw new IOException("Unable to read sensor");
        }
    }

    //Used if supporting low power/sleep mode
    @Override
    public void setEnabled(boolean enabled) throws IOException {
        super.setEnabled(enabled);
    }
}
Once your component class is created, you can create a new Service that will instantiate it, as well as create a new UserSensor object and attach it to the Android sensor pipeline.
There are two types of sensors you can add to this pipeline. The first are predefined types, such as gyroscopes, accelerometers, light, and proximity, and can be added to the pipeline like so:
private ExampleSensorComponent mExampleSensor;
private UserSensor mSensor;

private SensorManager mSensorManager;

@Override
public void onCreate() {
    super.onCreate();

    mExampleSensor = new ExampleSensorComponent();

    mSensor = UserSensor.builder()
            .setName("ExampleSensorComponent")
            .setVendor("VendorName")
            .setType(Sensor.TYPE_ACCELEROMETER)
            .setDriver(mExampleSensor)
            .build();

    UserDriverManager manager = UserDriverManager.getManager();

    // Register the new driver with the framework
    manager.registerSensor(mSensor);

    mSensorManager = (SensorManager) getSystemService(Context.SENSOR_SERVICE);
    mSensorManager.registerDynamicSensorCallback(new SensorCallback());
}

private class SensorCallback extends SensorManager.DynamicSensorCallback {
    @Override
    public void onDynamicSensorConnected(Sensor sensor) {
        //Sensor connected
        mSensorManager.registerListener(SensorDriverService.this, sensor,
                SensorManager.SENSOR_DELAY_NORMAL);
    }

    @Override
    public void onDynamicSensorDisconnected(Sensor sensor) {
        //Sensor disconnected
        mSensorManager.unregisterListener(SensorDriverService.this);
    }
}
You'll notice that a SensorManager.DynamicSensorCallback is used in the above example. This notifies your app when the sensor is available to the framework, as registration can take some time, so that the framework does not attempt to read data from an unavailable device.
The second type is custom, which covers anything not already supported in Android. Some examples include water pH levels, wind speed, motion detection, or anything else that you can measure with new hardware.
By replacing the setType() builder parameter with setCustomType(), you can add your device's name and reporting mode to control how it will trigger on the pipeline.
mSensor = UserSensor.builder()
        .setName("ExampleSensorComponent")
        .setVendor("VendorName")
        .setType(Sensor.TYPE_ACCELEROMETER)
        .setCustomType(Sensor.TYPE_DEVICE_PRIVATE_BASE,
                "com.tutsplus.examplesensor",
                Sensor.REPORTING_MODE_ON_CHANGE)
        .setDriver(mExampleSensor)
        .build();
Finally, when your app is finished running, you will need to unregister your new component from the UserDriverManager.
@Override
public void onDestroy() {
    super.onDestroy();
    UserDriverManager manager = UserDriverManager.getManager();
    manager.unregisterSensor(mSensor);
}
Conclusion
In this tutorial, you have learned how to take components built using the Peripheral I/O API and tie them into the appropriate Android frameworks for use in your Android Things apps.
At this point in the series, you have all of the tools necessary to create some more in-depth Android Things projects. In addition to writing your own drivers, you can find drivers that were written and implement them into your own project. You can find the source for these drivers from the Android Things GitHub repo, or check out some working samples using these drivers.
In the next article of this series, we will go a step further and create a full Android Things project that takes pictures from a Raspberry Pi and uploads them to Firebase. In the meantime, check out some of our other tutorials on Android app development here on Envato Tuts+!


Comments