Do you want to get a better understanding of Android TV? Maybe you want to extend your existing Android projects to support this new platform, or maybe you have an idea for an Android TV app you want to develop.
Whatever your motivation, this article will introduce you to the Android TV platform, from what Android TV is and the characteristics of an effective TV app, right through to creating and testing your very own Android TV sample project.
1. What Is Android TV?
Announced at Google IO 2014, Android TV is the new smart TV platform from Google. Users can either purchase a TV with the new platform built in, or they can add Android TV to their existing television by purchasing a standalone set-top box, such as the Nexus Player.
Essentially, Android TV brings the apps and functionality users already enjoy on smaller Android devices to the big screen. Users can download Android TV apps from the familiar Google Play store, and the platform supports Google Cast, so users can cast content from their smartphone or tablet onto their Android TV device.
2. Designing for Android TV
If you have experience developing for Android smartphones or tablets, Android TV will feel immediately familiar, but there are some crucial differences you need to be aware of. This section covers the best practices that are unique to Android TV.
Deliver an Effective '10 Foot Experience'
According to the official Android TV documentation, the average TV viewer sits around 10 feet away from their screen, so all your onscreen content must be clearly visible from 10 feet away.
One trick for delivering an effective '10 foot experience' is to design a user interface that resizes automatically, depending on the size of the TV screen. This means using layout-relative sizing, such as fill_parent, rather than absolute sizing, and opting for density-independent pixel units rather than absolute pixel units.
You should also keep text to a minimum as text becomes more difficult to read at a distance. As much as possible, you should communicate with your users via other methods, such as voiceover, sound effects, video, and images.
If you do need to include text, make it easier to read by:
- avoiding lightweight fonts
- avoiding fonts that have very narrow or very broad strokes
- using light text on dark backgrounds
- breaking text into small chunks
Minimize and Simplify Interaction
Think about how you interact with your TV. You usually perform a few simple interactions to get to the content you want, whether that's changing the channel, booting up the DVD player, or launching your favorite content-streaming app.
You don’t expect to have to perform complicated interactions—and neither do Android TV users. If you want to hold the user's attention, your app needs to have the fewest possible screens between the app entry point and content immersion.
Even once the user is immersed in your app, you should keep interactions to a minimum and avoid any complicated interactions as your typical TV user has limited controls at their disposal —usually either a remote control, a game controller, or the official Android TV app installed on their smartphone or tablet.
Easy Navigation
TV controls tend to be restricted to a directional pad and a select button, so your challenge is to create an effective navigation scheme for your app, using these limited controls.
One trick is to use a view group (such as List View or Grid View) that automatically arranges your app's user interface elements into lists or grids, which are easy to navigate with a directional pad and a select button.
Your users should also to be able to tell at a glance which object is currently selected. You can highlight the currently selected object using visual cues, such as size, shadow, brightness, animation, and opacity.
Simple and Uncluttered
Android TV may give you more screen real estate to play with, but don't get carried away and try to fill every inch of space. A simple, uncluttered user interface isn't only more visually appealing, it's also easier to navigate—something that's particularly important considering the limited controls available to your typical Android TV user.
A user interface containing a few big, bold user interface elements is also going to provide a better '10 foot experience' than a screen filled with lots of smaller user interface elements.
Support Landscape Mode
All of your project's activities must support landscape orientation or your app won't appear to Android TV users in the Google Play store.
If you're developing an app that can also run on smartphones and tablets, be aware that if your project contains android:screenOrientation="portrait" the android.hardware.screen.portrait requirement is implicitly set to true. You need to specify that although your app supports portrait orientation where available, it can run on devices where portrait mode isn't supported (i.e. Android TV):
<uses-feature
android:name="android.hardware.screen.portrait"
android:required="false" />
Allow for Overscan
To ensure there's never any blank space around the edges of your screen, TVs can clip the edges of content in a process known as overscan. Since you don't want to lose any important content to overscan, you should leave a margin around the edges of your app that's free from any user interface elements.
The v17 Leanback library automatically applies overscan-safe margins to your app. Alternatively, you can create your own overscan-safe margins by leaving 10% of blank space around the edges of your app. This translates to a 48dp margin around the left and right edges (android:layout_marginRight="48dp"), and 27dp along the top and bottom (android:layout_marginBottom="27dp").
Design for Android TV's Hardware Limitations
Android TVs don't have many of the hardware features typically available to other Android-powered devices. When you're developing for the Android TV platform, you can't use the following:
- Near Field Communication (NFC)
- GPS
- Camera
- Microphone
- Touchscreen
- Telephony
If you want your app to run on non-TV devices, such as smartphones and tablets, you can specify that although your app doesn't require these hardware features, it will use them where available, for example:
<uses-feature android:name="android.hardware.touchscreen"
android:required="false"/>
Also be aware that the following uses-permission manifest declarations imply hardware features that Android TV doesn't support:
RECORD_AUDIOCAMERAACCESS_COARSE_LOCATIONACCESS_FINE_LOCATION
3. Creating an Android TV Sample Project
In the final part of this tutorial, we'll take a first-hand look at some TV-ready code by creating and testing a basic Android TV project.
Before you can develop anything for the Android TV platform, make sure you've updated your SDK to Android 5.0 (API 21) or higher, and your SDK tools to version 24.0.0 or higher.
Once you're up to date, it's time to create your app:
- Launch Android Studio.
- Select Start a new Android Studio Project.
- Give your project a name and a domain. Click Next.
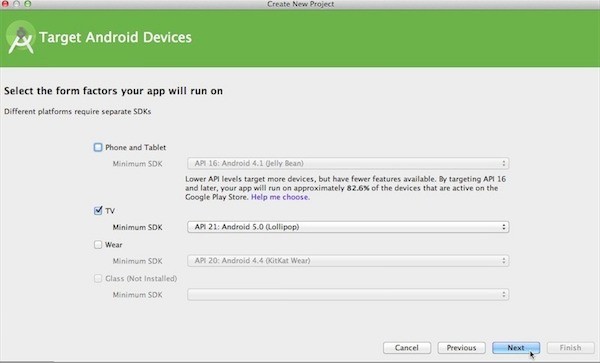
- Select TV, and then deselect all the other checkboxes. Although you can create Android TV projects that have a smartphone, tablet and/or Android Wear module, for the sake of simplicity we'll be creating a single-module project. Click Next.
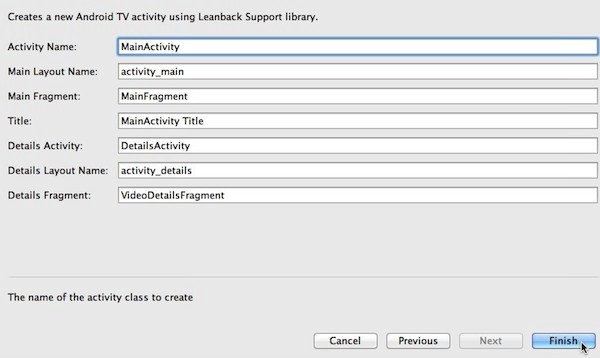
5. Select Android TV Activity and click Next.
6. Stick to the default settings and click Finish.
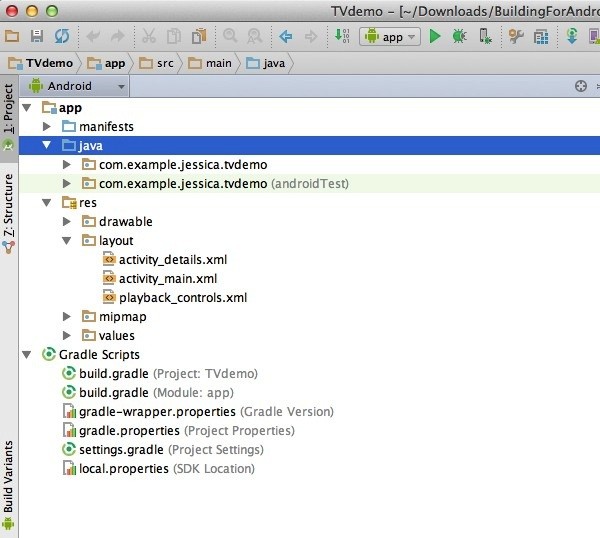
Android Studio will then create your project.
4. Breaking Down the Manifest
Now you've created your sample project, we'll take a line-by-line look at the Android Manifest, as this file contains lots of TV-specific code.
Note that although the majority of this code is generated automatically when you create an Android TV project, I've made some minor additions and adjustments that are all clearly marked in the text.
<?xml version="1.0" encoding="utf-8"?>
http://schemas.android.com/apk/res/android"
   package="com.example.jessica.tvdemo" >
<uses-permission android:name="android.permission.INTERNET" />
<uses-permission android:name="android.permission.RECORD_AUDIO" />
As already mentioned, the android.permission.RECORD_AUDIO permission implies that your app requires android.hardware.microphone. So this line of code effectively prevents your app from being installed on devices that don't have access to a microphone. If your app can function without a microphone, you should make the following addition:
<uses-feature
       android:name="android.hardware.microphone"
       android:required="false" />
Adding the above code means that users can install your app on devices that don't have access to microphone hardware.
<uses-feature
       android:name="android.hardware.touchscreen"
       android:required="false" />
While touchscreen support is found on many Android-powered devices, this isn't the case with Android TV. Your Android TV app must declare that it doesn't require touchscreen support.
 <uses-feature
       android:name="android.software.leanback"
The above snippet declares that your app uses the Leanback interface we discussed earlier.
android:required="true" />
If you want your app to run on non-TV devices where Leanback isn't supported, you'll need to change the above line to android:required="false".
<application
       android:allowBackup="true"
       android:icon="@mipmap/ic_launcher"
       android:label="@string/app_name"
       android:theme="@style/Theme.Leanback"
The above addition applies the Leanback theme to your project.
android:banner="@drawable/banner" >
App banners represent your app on the Android TV homescreen and are how the user launches your app. Your app banner must be a 320px x 180px xhdpi image and should include text.
If you want to use the same banner across all your activities, you should add the android:banner attribute to your manifest's <application> tag as I've done here. If you want to provide a different banner for each activity, you'll need to add an android:banner attribute to all of your application's <activity> tags instead.
  <activity
           android:name=".MainActivity"
           android:icon="@drawable/app_icon_your_company"
           android:label="@string/app_name"
           android:logo="@drawable/app_icon_your_company"
           android:screenOrientation="landscape" >
        <intent-filter>
               <action android:name="android.intent.action.MAIN" />
               <category android:name="android.intent.category.LEANBACK_LAUNCHER" />
This snippet declares a launcher activity for TV.
  </intent-filter>
       </activity>
       <activity android:name=".DetailsActivity" />
       <activity android:name=".PlaybackOverlayActivity" />
     <activity android:name=".BrowseErrorActivity" />
   </application>
</manifest>
5. Testing the Sample App
The next step is testing how your app functions from the user perspective. Even if you have access to a physical Android TV, you'll want to test your project across multiple devices, so you should always create at least one Android TV AVD.
To create your AVD:
- Launch the AVD Manager, either by clicking the AVD Manager button in the toolbar or by selecting Tools > Android > AVD Manager.
- Click Create New Virtual Device.
- Select the TV category.
- Choose one of the Android TV devices listed and click Next.
- Select your system image and click Next.
- Give your AVD a name and click Finish.
To test your sample project, select Run > Run app, followed by your TV AVD. Once the AVD has finished loading, you'll see the Android TV user interface with your app's banner in the bottom-left corner.
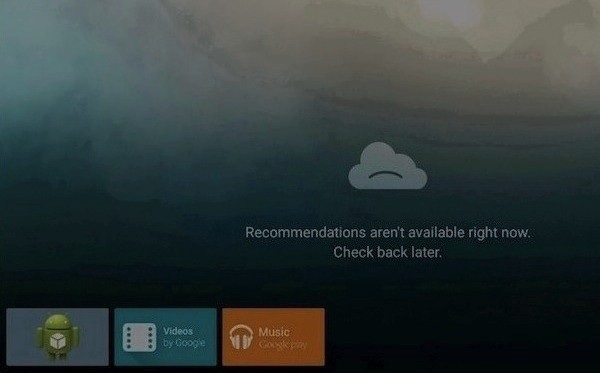
To launch your app, click the banner image. After a short delay, your app will appear in the AVD window.
6. More to Explore
This article has given you an introduction to Android TV and has shown you how to create a sample app. If you want to explore more of the Android TV platform, you can continue developing your sample app by taking a look at the following areas:
-
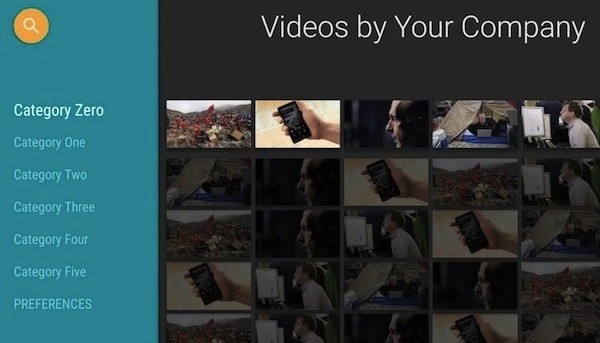
BrowseFragment. In the sample app, each row of content corresponds to a category. This portion of the user interface is created with the
BrowseFragmentclass. You can learn more about this fragment in the Creating a Catalog Browser section of the official Android TV docs. -
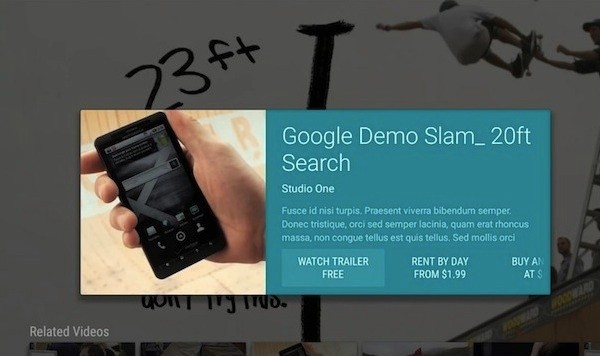
DetailsFragment. Click any piece of content to see more information about that content. To expand this functionality, take a look at the
DetailsFragmentclass in Building a Details View.
-
SearchFragment. Despite the search icon in the app’s upper-left corner, the search function isn’t working in your sample app. To get it working you'll need to take a look at the
SearchFragmentclass, which you can also find more information about in the Android TV documentation.
Conclusion
You should now have a better understanding of what developing for Android TV involves. There are a few caveats to watch out for, but developing for Android TV shouldn't be too difficult if you already have experience developing for Android.


Comments