In the first part of this two part series, I showed you how to create the settings and controls for a color scheme in the WordPress theme customizer. In this part, you'll use these to define CSS in the theme based on what users select using the customizer.
This consists of four steps:
- Defining a variable based on each of the options your users select in the customizer
- Using the value of these variables to define CSS
- Adding classes to the body element based on the radio box selections in your 'Solid Backgrounds' section
- Using these classes to define the CSS for the header and footer.
We'll start by defining variables for the colors.
Defining Variables for the Colors in Your Color Scheme
In your customizer.php file that you created in the previous part of this tutorial, add a new function:
function wptutsplus_customize_colors() {

}
add_action( 'wp_head', 'wptutsplus_customize_colors' );
This function will contain everything you need to generate CSS based on selections made in the theme customizer, and is hooked to the wp_head action hook so that any styles are added to the <head> section of the page being displayed.
Adding inline CSS like this isn't normally best practice but for now it is the only way of adding colors via the theme customizer so that's how we'll do it.
Now inside your function, add the variables for the four colors:
/**********************
text colors
**********************/
// main color
$color_scheme_1 = get_option( 'color_scheme_1' );

// secondary color
$color_scheme_2 = get_option( 'color_scheme_2' );

// link color
$link_color = get_option( 'link_color' );

// hover or active link color
$hover_link_color = get_option( 'hover_link_color' );
This defines four variables based on the options for each of the color settings in the theme customizer. The value of each variable will be a hexadecimal value which you can then use in your CSS.
Add Styling Based on Your Color Scheme
Now you need to add the CSS for the four colors, each of which will be applied to multiple elements in the theme.
Note: The styling below works in my theme because it uses all of these elements or classes. If your theme uses different elements and/or classes, you'll have to amend the styling to fit.
Still inside your wptutsplus_customize_colors() function and after the code for the variables you just defined, add the following:
/****************************************
styling
****************************************/
?>
<style>


/* color scheme */

/* main color */
#site-title a, h1, h2, h2.page-title, h2.post-title, h2 a:link, h2 a:visited, .menu.main a:link, .menu.main a:visited, footer h3 {
    color:  <?php echo $color_scheme_1; ?>;
}

/* secondary color */
#site-description, .sidebar h3, h3, h5, .menu.main a:active, .menu.main a:hover {
	color:  <?php echo $color_scheme_2; ?>;
}
.menu.main,
.fatfooter {
	border-top: 1px solid <?php echo $color_scheme_2; ?>;
}
.menu.main {
	border-bottom: 1px solid <?php echo $color_scheme_2; ?>;
}
.fatfooter {
	border-bottom: 1px solid <?php echo $color_scheme_2; ?>;
}

/* links color */
a:link, a:visited {
	color:  <?php echo $link_color; ?>;
}

/* hover links color */
a:hover, a:active {
	color:  <?php echo $hover_link_color; ?>;
}

</style>

<?php
This adds styling for each of the four colors by echoing the value of each variable as the value of the color declaration. It also uses the colors to define the color of borders. You could amend this to add backgrounds, gradients and more.
Now if you open the theme customizer and use the color pickers, the colors will change:
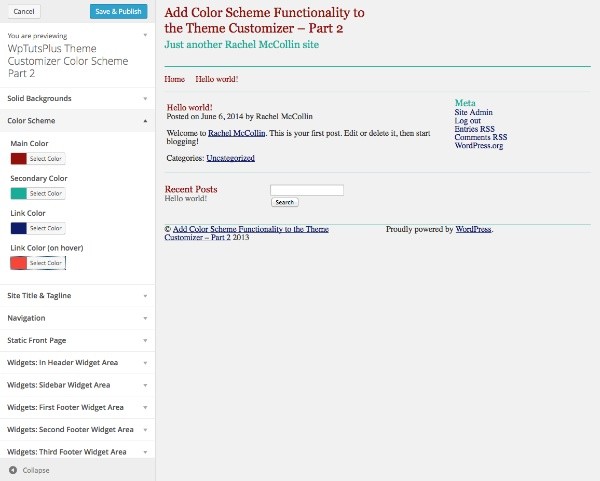
I'm not claiming that the color scheme above is the most beautiful, but it demonstrates that the color pickers are working!
Adding CSS for the Solid Backgrounds
So that's the main color scheme working. Now we need to add CSS for the solid backgrounds.
This works slightly differently: you need to add a class to the body element based on whether the user has selected 'yes' or 'no', and this will then be used for styling.
Adding a Class to the body Element
To add a class to the body element, you use the body_class filter.
Create a new function in your customizer.php file as follows:
/*******************************************************************************
 add class to body if backgrounds turned on using the body_class filter
 ********************************************************************************/
function wptutsplus_add_background_color_style( $classes ) {

    // set the header background
	$header_background = get_theme_mod( 'header-background' );
	$classes[] = $header_background;

	// set the footer background
	$footer_background = get_theme_mod( 'footer-background' );
	$classes[] = $footer_background;

	return $classes;

}
add_filter('body_class', 'wptutsplus_add_background_color_style');
This uses get_theme_mod() to fetch the option set by the radio buttons, returns those as a $classes variable and then adds the value of that variable to the body element using the body_class filter. The value of this option will be based on the arguments defined for the 'choices' array when you created the settings for the radio buttons. This means it will be:
- For the header:
header-background-offorheader-background-on - For the footer:
footer-background-offorfooter-background-on.
Your body element will now have two of these classes based on the options selected. Your next step is to use these classes to define the relevant styles.
Adding Styling for Solid Backgrounds
The styles for the solid background go inside the <style> element you already added to the wptutsplus_customize_colors() function:
/* background colors */

/* header */
.header-background-on .header-wrapper {
    background-color: <?php echo $color_scheme_1; ?>;
}
.header-background-on #site-title a, .header-background-on h1, .header-background-on #site-description, .header-background-on address, .header-background-on header a:link, .header-background-on header a:visited, .header-background-on header a:active, .header-background-on header a:hover {
	color: #fff;
}
.header-background-on header a:link, .header-background-on header a:visited {
	text-decoration: underline;
}
.header-background-on header a:active, .header-background-on header a:hover {
	text-decoration: none;
}
.header-background-on .menu.main {
	border: none;
}

/* footer */
.footer-background-on footer {
	background-color: <?php echo $color_scheme_1; ?>;
}
.footer-background-on footer, .footer-background-on footer h3, .footer-background-on footer a:link, .footer-background-on footer a:visited, .footer-background-on footer a:active, .footer-background-on footer a:hover {
	color: #fff;
}
.footer-background-on footer a:link, .footer-background-on footer a:visited {
	text-decoration: underline;
}
.footer-background-on footer a:active, .footer-background-on footer a:hover {
	text-decoration: none;
}
.footer-background-on .fatfooter {
	border: none;
}
This defines background colors and text colors based on whether or not each of the header and footer has a solid background.
As you can see, I've used the $color_scheme_1 variable for the backgrounds, so that each will have the color scheme's main color as its background - you could change this to the secondary color or create additional color settings for the backgrounds if you want. Alternatively, you could give users the option to choose between the main and secondary colors by adding extra radio buttons.
Your entire wptutsplus_customize_colors() function will now look like this:
function wptutsplus_customize_colors() {

/**********************
text colors
**********************/
// main color
$color_scheme_1 = get_option( 'color_scheme_1' );

// secondary color
$color_scheme_2 = get_option( 'color_scheme_2' );

// link color
$link_color = get_option( 'link_color' );

// hover or active link color
$hover_link_color = get_option( 'hover_link_color' );


/****************************************
styling
****************************************/
?>
<style>


	/* color scheme */

	/* main color */
	#site-title a, h1, h2, h2.page-title, h2.post-title, h2 a:link, h2 a:visited, .menu.main a:link, .menu.main a:visited, footer h3 {
		color:  <?php echo $color_scheme_1; ?>;
	}

	/* secondary color */
	#site-description, .sidebar h3, h3, h5, .menu.main a:active, .menu.main a:hover {
		color:  <?php echo $color_scheme_2; ?>;
	}
	.menu.main,
	.fatfooter {
		border-top: 1px solid <?php echo $color_scheme_2; ?>;
	}
	.menu.main {
		border-bottom: 1px solid <?php echo $color_scheme_2; ?>;
	}
	.fatfooter {
		border-bottom: 1px solid <?php echo $color_scheme_2; ?>;
	}

	/* links color */
	a:link, a:visited {
		color:  <?php echo $link_color; ?>;
	}

	/* hover links color */
	a:hover, a:active {
		color:  <?php echo $hover_link_color; ?>;
	}


	/* background colors */

	/* header */
	.header-background-on .header-wrapper {
		background-color: <?php echo $color_scheme_1; ?>;
	}
	.header-background-on #site-title a, .header-background-on h1, .header-background-on #site-description, .header-background-on address, .header-background-on header a:link, .header-background-on header a:visited, .header-background-on header a:active, .header-background-on header a:hover {
		color: #fff;
	}
	.header-background-on header a:link, .header-background-on header a:visited {
		text-decoration: underline;
	}
	.header-background-on header a:active, .header-background-on header a:hover {
		text-decoration: none;
	}
	.header-background-on .menu.main {
		border: none;
	}

	/* footer */
	.footer-background-on footer {
		background-color: <?php echo $color_scheme_1; ?>;
	}
	.footer-background-on footer, .footer-background-on footer h3, .footer-background-on footer a:link, .footer-background-on footer a:visited, .footer-background-on footer a:active, .footer-background-on footer a:hover {
		color: #fff;
	}
	.footer-background-on footer a:link, .footer-background-on footer a:visited {
		text-decoration: underline;
	}
	.footer-background-on footer a:active, .footer-background-on footer a:hover {
		text-decoration: none;
	}
	.footer-background-on .fatfooter {
		border: none;
	}

</style>

<?php }
And when you use the theme customizer to add background colors, it will change the colors.
Here's a background color set for both the header and footer:
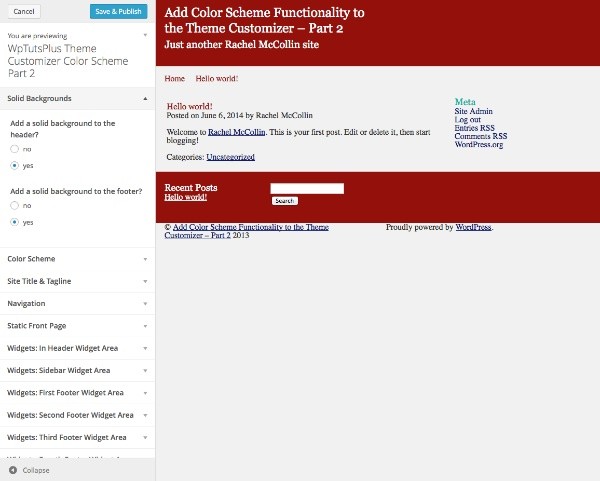
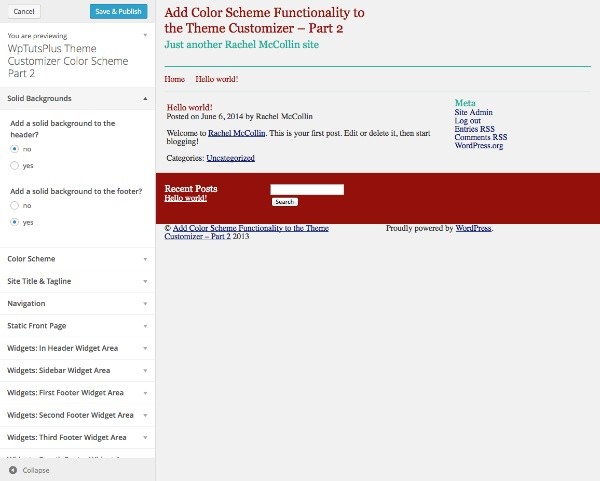
And here's background color on just the footer (which I think looks better!):
Summary
In this second part you've learned how to add CSS for your color scheme to the theme so that when users select colors and options in the customizer, it will carry through to the theme.
You could easily take this further - perhaps by using radio buttons to provide layout options or by giving users a choice as to which colors from their scheme are used where. I would warn against making things too complicated though - in my opinion, the benefit of this approach is that it keeps things simple.

Comments