In the previous post in this series, we started working with the latest iteration of the WordPress Media Uploader in order to get a clearer understanding of how to begin to incorporate it into our projects.
The tough part of working with this new (well, new since 3.5) feature is that it's not as well documented as other features. This obviously leaves a lot of developers - especially beginners - scratching their heads with how to get started with it. Couple that with a complete overhaul of the underlying system, and you have a lot to cover.
Based on the feedback from the first article, we're going to look at expanding the scope of this series a little bit more. In this article, we're going to look at practically applying the functionality that we introduced in the last article. Then, in a follow-up article (or perhaps more than one follow-up article) we'll look at some more of the finer points of how the Media Uploader works.
Picking Up Where We Left Off
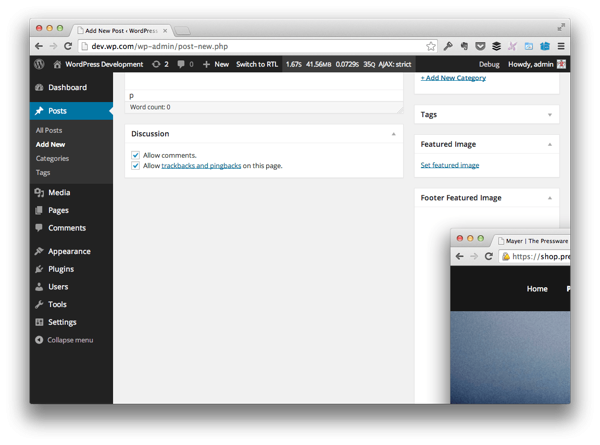
In the last post, we started working on a plugin that introduced a "Featured Footer Image" to the bottom of each post, if an image is selected. This meta box is available on both post and page post types.
Up to this point, we've successfully added the meta box, launched the WordPress Media Uploader and selected an image to use as our featured image, but we haven't actually done anything with the information that is returned to us from the Media Uploader.
In this post, we're going to continue with implementing the functionality so that we feature images at the bottom of our posts. After that, we'll turn our attention to some more of the technical details of the APIs that are available to us.
To pick up right where we left off, we need to be able to replicate the functionality that the standard "Featured Image" meta box offers. In order to do this:
- We need to capture information from the Media Uploader
- Display the image that's selected
- Properly size the image that's selected
- Setup an option to remove the image
Clearly, we have our work cut out for us.
Before we do anything, make sure that you update the renderMediaUploader function to accept $ as a parameter so that we can use jQuery throughout our examples.
The function declaration should look like this:
function renderMediaUploader( $ ) { ... }
And the call to the function should now look like this:
renderMediaUploader( $ );
Now, let's get started.
1. Capture the Image
Once you've selected an image from the Media Uploader, data will be returned to you in JavaScript. Specifically, the data will be returned to us in JSON. This will allow us to parse out various properties of the image so that we can render and save it along with our post.
But first, let's update our code. Find the line of code in admin.js that looks like this:
file_frame.on( 'insert', function() {

    /**
     * We'll cover this in the next version.
     */

});
And replace it with this:
file_frame.on( 'insert', function() {

    // Read the JSON data returned from the Media Uploader
    json = file_frame.state().get( 'selection' ).first().toJSON();

});
Obviously, this is nothing terribly complicated; however, remember to add json as a variable defined at the top of the file along with file_frame and image_data.
If you're curious about what's returned, feel free to dump the contents of json out into your favorite console debugger. We won't be doing that in this particular article, but we will may be doing more of that in future, in-depth articles.
2. Display Selected Image
In order for us to display the image that's selected, we need to make sure that we have an image element in our meta box that's accessible via JavaScript so that we can update its attributes whenever an image is selected.
In views/admin.php, let's add the following code to our template. This is contains the empty image element that we'll use to render the image.
<p class="hide-if-no-js">
    <a title="Set Footer Image" href="javascript:;" id="set-footer-thumbnail">Set featured image</a>
</p>

<div id="featured-footer-image-container" class="hidden">
    <img src="" alt="" title="" />
</div><!-- #featured-footer-image-container -->
Note that we're taking advantage of the WordPress CSS class hidden to hide the container. Using JavaScript, we'll remove this class in order to display the image (and will basically do the opposite to hide the image and display the anchor for selecting an image again).
Now, we can revisit the JavaScript and render the image whenever it has been selected. We need to do two things:
- Hide the anchor for allowing the user to select the image
- Display the featured image in the container
To do this, let's revisit the JavaScript code that we looked at earlier in the article. After we've retrieved the JSON data, let's make sure that we have a URL of an image and then we'll proceed.
file_frame.on( 'insert', function() {

    // Read the JSON data returned from the Media Uploader
    json = file_frame.state().get( 'selection' ).first().toJSON();

	// First, make sure that we have the URL of an image to display
	if ( 0 > $.trim( json.url.length ) ) {
		return;
	}

	// After that, set the properties of the image and display it
	$( '#featured-footer-image-container' )
		.children( 'img' )
			.attr( 'src', json.url )
			.attr( 'alt', json.caption )
			.attr( 'title', json.title )
                        .show()
		.parent()
		.removeClass( 'hidden' );

	// Next, hide the anchor responsible for allowing the user to select an image
	$( '#featured-footer-image-container' )
		.prev()
		.hide();

});
Clearly, the code is commented to explain what's going on, but we're relying on jQuery quite a bit in order to make sure that we're properly showing and hiding elements.
First, we're checking the URL property of json to make sure its length is greater than zero. I like to use $.trim in order to do this as a defensive coding practice. If it is equal to zero, then we'll return because we have no image to display.
After that, we take advantage of the new div element that we created in the previous step. We grab the image element via the children() function and then we set its src, alt, and title attributes all based on properties that are accessible via the json object.
From there, we select the parent container of the image and then we remove the hidden class.
After all, we use the featured-footer-image-container element as a point from which we can access the anchor - in this case, it's the previous element - and then we hide it.
At this point, the image should appear in the post meta box.
But we have one obvious problem: The image is far too big for the container. This means that we need to introduce a bit of CSS.
3. Styling Our Featured Image
To do this, we're going to need to add a CSS file and update the core plugin file so that it enqueues the stylesheet.
First, create a css directory in your plugin's folder, then add admin.css to the directory. In that file, add the following code:
#featured-footer-image-container img {

    width:  100%;
    height: auto;

}
Then add the following hook in the run() function of your plugin:
add_action( 'admin_enqueue_scripts', array( $this, 'enqueue_styles' ) );
Finally, add the following function:
/**
 * Registers the stylesheets for handling the meta box
 *
 * @since 0.2.0
 */
public function enqueue_styles() {

    wp_enqueue_style(
        $this->name,
        plugin_dir_url( __FILE__ ) . 'css/admin.css',
        array()
    );

}
Permitting you've properly setup your selectors and you've properly registered and enqueued your style sheet, you should see something like this:

Much better, isn't it?
4. How Do We Remove the Image?
Just as we added an element to display the image, we need add an element that will allow us to remove the image as well.
To do that, revisit views/admin.php and add the following code:
<p class="hide-if-no-js hidden">
    <a title="Remove Footer Image" href="javascript:;" id="remove-footer-thumbnail">Remove featured image</a>
</p><!-- .hide-if-no-js -->
Next, we need to write some additional JavaScript so that when the image is displayed, the above anchor is displayed. To accomplish that, revisit the admin.js and let's add this below the code we've added earlier in the article:
// Display the anchor for the removing the featured image
$( '#featured-footer-image-container' )
    .next()
    .show();
And just as we did with the initial anchor, we need to setup an event handler so that when the "remove" anchor is clicked, the image will be removed and the "Set Featured Image" anchor will be restored.
To do that, first revisit the function that's fired as soon as the DOM is loaded and add the following code:
$( '#remove-footer-thumbnail' ).on( 'click', function( evt ) {

	// Stop the anchor's default behavior
	evt.preventDefault();

	// Remove the image, toggle the anchors
	resetUploadForm( $ );

});
Now we need to define the resetUploadForm function, so let's do that now. Remember that this needs to remove the image, hide the "remove link" container, and restore the "set image" link anchor.
/**
 * Callback function for the 'click' event of the 'Remove Footer Image'
 * anchor in its meta box.
 *
 * Resets the meta box by hiding the image and by hiding the 'Remove
 * Footer Image' container.
 *
 * @param    object    $    A reference to the jQuery object
 * @since    0.2.0
 */
function resetUploadForm( $ ) {
    'use strict';

	// First, we'll hide the image
	$( '#featured-footer-image-container' )
		.children( 'img' )
		.hide();

	// Then display the previous container
	$( '#featured-footer-image-container' )
		.prev()
		.show();

	// Finally, we add the 'hidden' class back to this anchor's parent
	$( '#featured-footer-image-container' )
		.next()
		.hide()
		.addClass( 'hidden' );

}
At this point, we've got everything we need in order to select an image, remove an image, and continue to do so.
There's still work left to be done, but we'll be covering that in the next article. In the meantime, don't forget to checkout the associated repository on GitHub for the current version of the source code of this project.
Coming Up Next...
Obviously, we've taken care of a lot of the back-end work as it relates to selecting an image, displaying an image, and removing an image, but we're still missing a crucial piece of functionality: Saving the image so that it's associated with the post.
In order to connect what the site visitor's see with the what we've specified on the back-end, we need to do some work with saving the JSON data to the database, sanitizing it, retrieving it, and then displaying it on the front.
In the next article in the series, we'll take a look at doing exactly that. In the meantime, feel free to leave any comments or questions in the feed below.

Comments