
Using featured images in post archives is a common feature of themes, but sometimes you might want to use featured images a bit differently. Occasionally I've worked on sites where the images to be displayed relate to the category a post is in and not to the post itself. Instead of adding the same featured image to every post in each category, it would be much simpler if I could just assign the category to each of my images, and then display the featured image for the category with the post.
Examples of when you might want to do this include:
- when each post is each associated with a brand and you want to display the logo
- when each post is associated with one of a number of places and you want to display an image (or map) of that place
- when each post relates to a given topic (for example on a learning site) and you want to display an icon for that topic
- when posts are part of a number of series (as is sometimes the case on this site) and you want to use an image to identify each series
In this tutorial I'll be using some of the techniques I've already demonstrated in two earlier tutorials:
- Applying categories to attachments: we'll need to do this so that each category has its own attachments.
- Creating a 'featured image' for a category: in this tutorial I demonstrated how to create 'featured images' for categories and then display them on the category archive. This tutorial is slightly different as I'll be displaying the category images on the main blog page.
This tutorial will work through these steps:
- registering the category taxonomy for attachments
- setting up categories and adding images to them
- in the loop, identifying which category a post is in and then running a query to output the attachment from that category
Note: For each post only one category will be identified, and for each category only one image will be output (the most recent).
I'll also look at how you can adapt this technique for other archive pages, such as custom post type archives.
What You'll Need
To follow this tutorial you'll need the following:
- a development installation of WordPress
- a theme you can edit (I'll create a child theme for Twenty Fourteen)
- FTP access (or MAMP or similar if you're working locally)
- a code editor
Setting Up Your Theme Files
To follow this tutorial, you'll need to create or edit a theme. I'm going to create a child theme of the Twenty Fourteen theme.
Here's my stylesheet:
/*
Theme Name: Automatic Featured Image Based On Category
Theme URI: http://code.tutsplus.com/tutorials/add-an-automatic-featured-image-to-blog-posts-based-on-category--cms-22664
Version: 1.0.0
Description: heme to accompany tutorial on adding category featured images to an archive page for tutsplus, at http://bit.ly/14cm0ya
Author: Rachel McCollin
Author URI: http://rachelmccollin.co.uk
License: GPL-3.0+
License URI: http://www.gnu.org/licenses/gpl-3.0.html
Domain Path: /lang
Text Domain: tutsplus
Template: twentyfourteen
*/

@import url('../twentyfourteen/style.css');
This sets the theme up as a child theme of Twenty Fourteen. If you need to know more about creating child themes, take a look at the relevant Codex page.
As you work through this tutorial you'll also create a functions.php file for your theme (or edit the existing one if you already have one in your theme), and create an index.php file too.
Registering Categories for Attachments
By default WordPress doesn't let you assign categories to attachments, but this is easily changed.
If your theme doesn't already have a functions file, create a file called functions.php and add the following to it:
<?php

/**
 * Add featured image to category.
 */
function tutsplus_add_attachments_to_categories() {

    register_taxonomy_for_object_type( 'category', 'attachment' );

}

add_action( 'init' , 'tutsplus_add_attachments_to_categories' );
Save your file and go to your site's Media screen. You'll see that categories have been added to the media submenu:
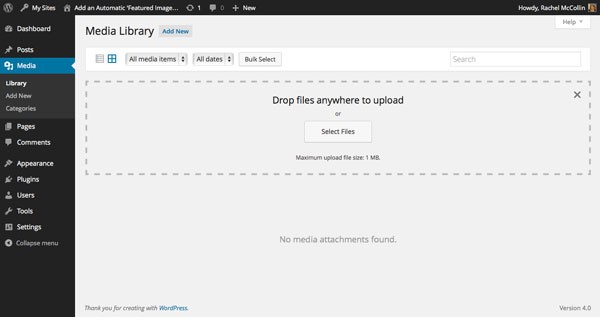
Note: For more on this, see this tutorial.
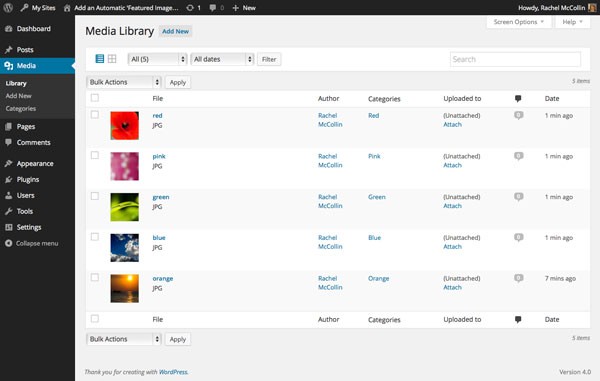
Adding Category Images
I now need to upload a number of images and give each of them a category. The images you upload will depend on the needs of your site: I've used colors for my categories so have found some images featuring each of those colors. I've assigned the relevant categories so this is what my Media Library looks like:
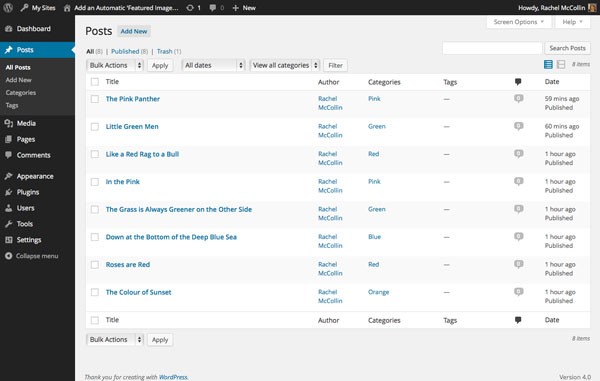
Now I'll add some posts and assign categories to them:
Creating the index.php File
Now that we have the posts set up and the category images in place, we need to edit the index.php file to display the category featured images.
Setting Up the File
You'll either need to edit your existing index.php file or add a new one. I've created one based on the index.php template file and the content.php include file from the Twenty Fourteen theme. Right now it looks like this:
<?php
/**
* The primary template file.
*
* Based on the `index.php` file from TwentyFourteen, with an edited version of the `content.php` include file from that theme also included here.
*/
?>
<?php get_header(); ?>
<div id="main-content" class="main-content">
<?php
if ( is_front_page() && twentyfourteen_has_featured_posts() ) {
// Include the featured content template.
get_template_part( 'featured-content' );
}
?>
<div id="primary" class="content-area">
<div id="content" class="site-content" role="main">
<?php
if ( have_posts() ) {
while ( have_posts() ) {
the_post();
?>
<article id="post-<?php the_ID(); ?>" <?php post_class(); ?>>
<?php twentyfourteen_post_thumbnail(); ?>
<header class="entry-header">
<?php if ( in_array( 'category', get_object_taxonomies( get_post_type() ) ) && twentyfourteen_categorized_blog() ) { ?>
<div class="entry-meta">
<span class="cat-links"><?php echo get_the_category_list( _x( ', ', 'Used between list items, there is a space after the comma.', 'twentyfourteen' ) ); ?></span>
</div>
<?php } ?>
<?php the_title( '<h1 class="entry-title"><a href="' . esc_url( get_permalink() ) . '" rel="bookmark">', '</a></h1>' ); ?>
</header>
<div class="entry-content">
<?php
the_content( __( 'Continue reading <span class="meta-nav">→</span>', 'twentyfourteen' ) );
wp_link_pages(
array(
'before' => '<div class="page-links"><span class="page-links-title">' . __( 'Pages:', 'twentyfourteen' ) . '</span>',
'after' => '</div>',
'link_before' => '<span>',
'link_after' => '</span>',
)
);
?>
</div>
<?php the_tags( '<footer class="entry-meta"><span class="tag-links">', '', '</span></footer>' ); ?>
</article>
<?php
}
// Display previous / next post navigation.
twentyfourteen_paging_nav();
} else {
// If there is no content, include the "No posts found" template.
get_template_part( 'content', 'none' );
}
?>
</div>
</div>
<?php get_sidebar( 'content' ); ?>
</div>
<?php get_sidebar(); ?>
<?php get_footer(); ?>
Identifying the Current Post's Category
To display the relevant category image, you'll need to identify what category the current post is in. You'll need to do this inside the loop.
First, if you're working with Twenty Fourteen, remove the function that outputs the post featured image. Remove this line:
<?php twentyfourteen_post_thumbnail(); ?>
Immediately inside the opening <article> tag, add the following:
<?php

// Find the first category the post is in.
$categories = get_the_category();
$category = $categories[ 0 ]->term_id;
This creates a variable called $category, whose value is the ID of the first category the post is in, using the get_the_category() function.
Creating Arguments for the Query
Now you can use this variable in the arguments for your query. Below what you just added, add this:
$args = array(
    'cat' => $category,
    'post_status' => 'inherit',
    'post_type' => 'attachment',
    'posts_per_page' => '1'
);
These arguments mean that your query will output just one attachment in the category you've already identified. Note that you must use the 'post_status' argument because attachments default to 'post_status' => 'inherit', not 'public' like other post types.
Now add the query itself:
$query = new WP_Query( $args );

if ( $query->have_posts() ) {

    while ( $query->have_posts() ) {

        $query->the_post();

        ?>

        <div class="category-featured-image">
            <?php echo wp_get_attachment_image( $post->ID, 'thumbnail' ); ?>
        </div>

        <?php

    }
}

// Reset postdata to restore ordinal query.
wp_reset_postdata();

?>
This puts the image inside a div with the category-featured-image class, which you can use for styling. It then uses the wp_get_attachment_image() function to display the image.
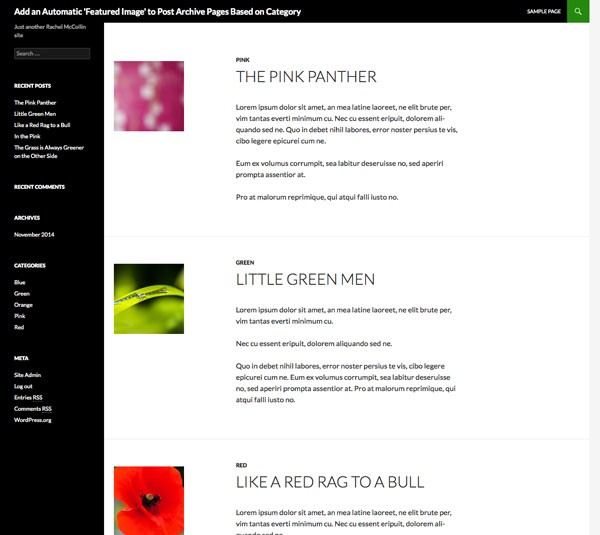
Now if you refresh your blog's home page, you'll see the images displayed:

Right now there's too much empty space, so let's add some styling.
Styling the Images
Open your theme's stylesheet and add whatever styling you want to give your images. I've added the following:
.category-featured-image {
    float: left;
    margin: 10px 2%;
}

.blog .entry-header .entry-title,
.blog .entry-header .entry-meta {
    clear: none;
}
This brings the images up to the left of the post:
Adapting This Technique for Other Content Types
You could use this technique with other content types. For example:
- With a custom post type, you would create a
archive-$posttype.phptemplate file for that post type with a similar loop to the one above. - If you're using a custom taxonomy instead of categories, you would add the
'attachment'posts type to the post types the taxonomy is registered to when you first register it. You'd then replace theget_the_category()function withget_the_terms()and the category arguments for your query with taxonomy arguments. - You could combine two taxonomies by displaying the images from one taxonomy with posts on the archive template for another taxonomy, maybe with the image linking to the archive page for its taxonomy term.
- You could use a similar technique to the above in your
archive.phpfile if your theme has one, so that posts in archives also have a category featured image displayed. - If you wanted to combine one or more of the above, you could create an include file with your loop (including the category featured image) and call that in the relevant template files.
Summary
As I outlined at the beginning of this tutorial, there can be scenarios where instead of showing a featured image for each post, you want to display an image relating to the category the post is in.
In this tutorial you've learned how to do this, by adding categories to attachments, identifying the first category for each post in your loop, and then creating a query to output the image for that category.

Comments