
Acuity Scheduling's Developer Solutions
Welcome to the third episode in our series on Acuity's developer-friendly scheduling and booking platform. In prior episodes, we provided a general introduction to its calendar booking and appointment service and Acuity's embedding, developer API and integration services.
Today, we'll continue coverage of Acuity's developer platform, moving on to its unique OAuth support, its notification webhooks, and its API-based reporting capabilities.
Since this tutorial is focusing on its developer platform, I encourage you to sign up at Acuity and explore more on your own.
Acuity Scheduling may be the most developer-friendly scheduling solution available. But it's also an extremely effective web service for all of your scheduling, booking, and calendar appointment making needs.
If you'd like to learn more about it, watch the scheduling video below:
Before I get started, I want to encourage you to reach out with any questions you may have about Acuity Scheduling and our tutorial series. Please post them in the comments below or feel free to reach out to me @lookahead_io on Twitter.
Now, let's dive back in for the third episode...
Acuity Scheduling OAuth2 Integration
If you're extending your application to work with a number of Acuity accounts, let's say scheduling for a large company with many Acuity team member accounts, you can use Acuity OAuth integration so that each user can quickly and easily work with and manage their calendars and bookings.
You're likely familiar with OAuth from signing in to an application using your Facebook or Google account. Acuity provides this same capability for its accounts (see featured image above).
How OAuth2 Works
OAuth2 is a standard for applications to grant authorization and exchange credentials for an API securely. It's the best option for allowing users of your application to connect to Acuity.
A user clicks a connect button in the client (your application) and is redirected to Acuity to enter their credentials. After authorizing your app, the user is redirected back to your application with an authorization code, which you'll exchange for an API access token.
You'll need to register an Acuity OAuth2 client account to get started:
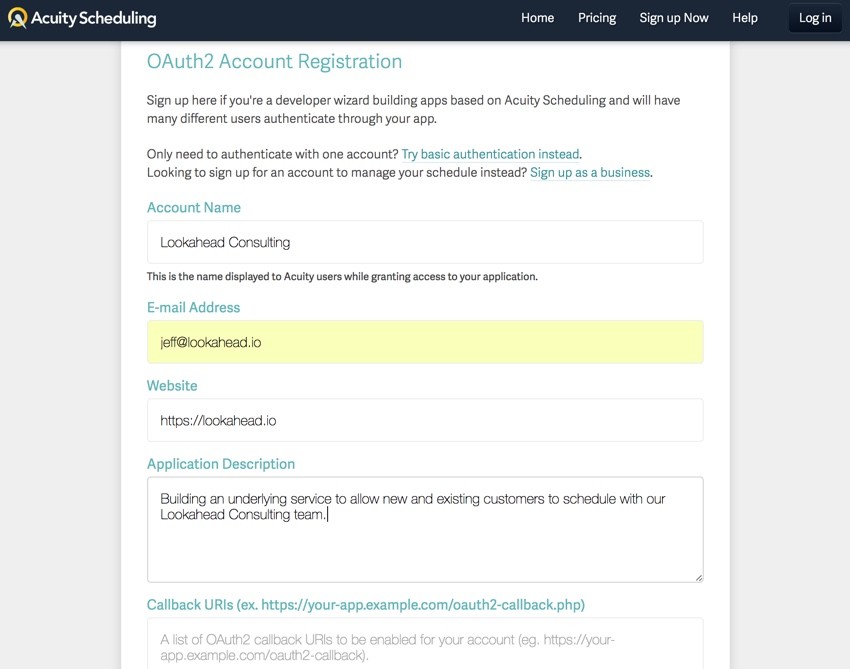
The callback URI is the URL where Acuity will deliver an OAuth authorization code for the requesting user. You'll then need to use that code and your API keys to request a permanent token to store in your database. The token will allow you to make scheduling and calendar API calls on behalf of that user.
Here's an example callback URI:
https://your-app.example.com/oauth2-callback.php
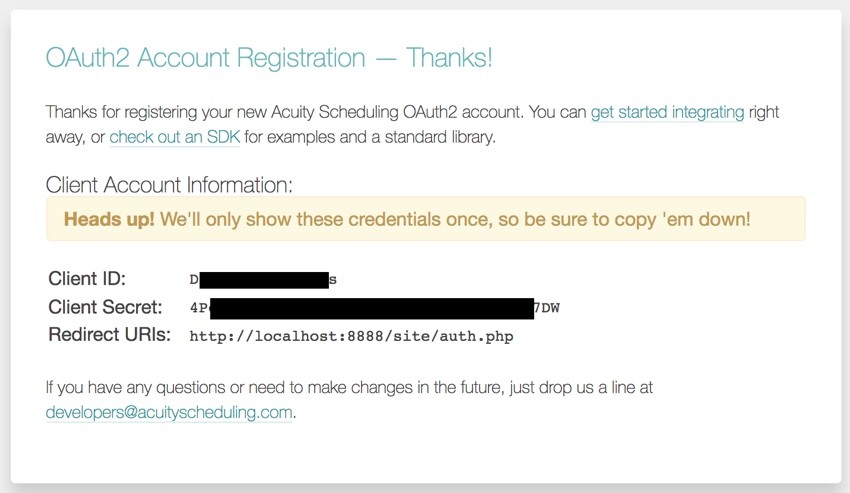
Once you submit the form, Acuity will grant you a Client ID and Client Secret which you'll need for OAuth calls:
Integrating With Acuity OAuth2
Once you've got a client account, you'll be ready to start integrating. The first step is to redirect the user to our authorization_url. It's usually a good idea to display a button like "Connect to Acuity."
For example, you can link the user from a Connect button to a URL with your Client ID and Redirect URI, like this:
https://acuityscheduling.com/oauth2/authorize?
    response_type=code&scope=api-v1&client_id=YOUR_CLIENT_ID
    &redirect_uri=YOUR_REDIRECT_URI
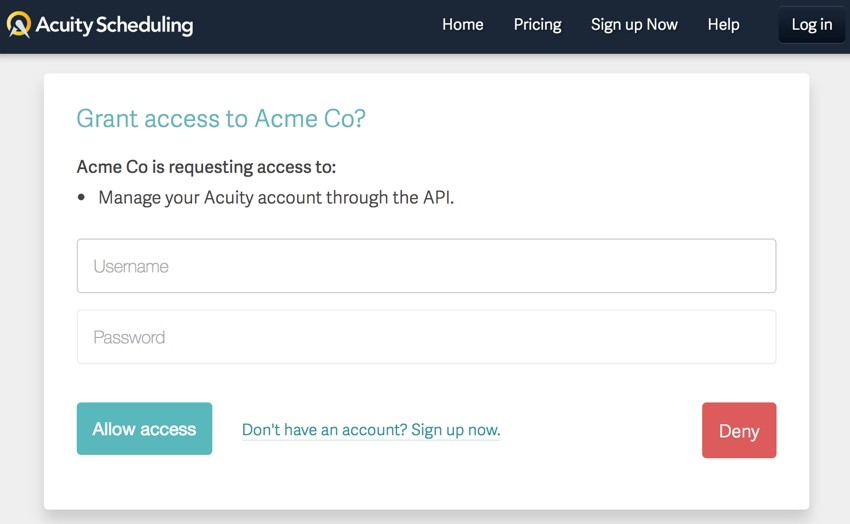
People will be taken to a client authorization request for their account:
You can also rely on Acuity's SDK libraries for PHP and JavaScript, for example:
<?php
require_once('vendor/autoload.php');

$acuity = new AcuitySchedulingOAuth(array(
  'clientId' => 'YOUR_CLIENT_ID',
  'clientSecret' => 'YOUR_CLIENT_SECRET',
  'redirectUri' => 'YOUR_REDIRECT_URI'
));

$acuity->authorizeRedirect(array('scope' => 'api-v1'));
Acuity will verify your client_id, redirect_uri and scope, and then display a login screen to the user allowing them to grant your application access to their Acuity account. Once the user is connected, Acuity will send them back to your redirect_uri with an authorization_code. Like this, where example.org is your application's URL:
http://example.org/oauth2?code=AN_AUTHORIZATION_CODE
In response to the AUTHORIZATION_CODE, you'll execute something like this to request an access_token:
curl https://acuityscheduling.com/oauth2/token \
 -d grant_type=authorization_code \
 -d code=AN_AUTHORIZATION_CODE \
 -d redirect_uri= YOUR_REDIRECT_URI \
 -d client_id=YOUR_CLIENT_ID \
 -d client_secret=YOUR_CLIENT_SECRET
Or, in JavaScript:
var Acuity = require('acuityscheduling');
var express = require('express');
var url = require('url');
var port = process.env.PORT || 8000;

var app = express();

app.get(url.parse('YOUR_REDIRECT_URI').path, function (req, res) {
  var acuity = Acuity.oauth({
    clientId: 'YOUR_CLIENT_ID',
    clientSecret: 'YOUR_CLIENT_SECRET',
    redirectUri: 'YOUR_REDIRECT_URI'
  });
  acuity.requestAccessToken(req.query.code, function (err, tokenResponse) {
    if (err) return res.send(err);
    res.send(tokenResponse);
  });
});

app.listen(port, function () {
  console.log('Listening on %s', port);
}).on('error', function () {
  if (e) return console.error(e);
});
If everything checks out, you'll receive a response via JSON which includes access_token:
{
  "access_token": "AN_ACCESS_TOKEN",
  "token_type": "Bearer"
}
Then, store the ACCESS_TOKEN for your user to be used for ongoing API requests.
Here's an example of making a request on behalf of an Acuity team member or account using the ACCESS_TOKEN you acquired:
<?php
require_once('vendor/autoload.php');

$acuity = new AcuitySchedulingOAuth(array(
  'accessToken' => 'AN_ACCESS_TOKEN'
));

$me = $acuity->request('me');
print_r($me);
For deeply integrated services, Acuity provides a near instant expansion of your platform and its capabilities, as well as an easy way to extend your team's use of Acuity into other services.
As I've written before, if you can imagine it, Acuity's developer platform pretty much provides it already.
Acuity Webhooks
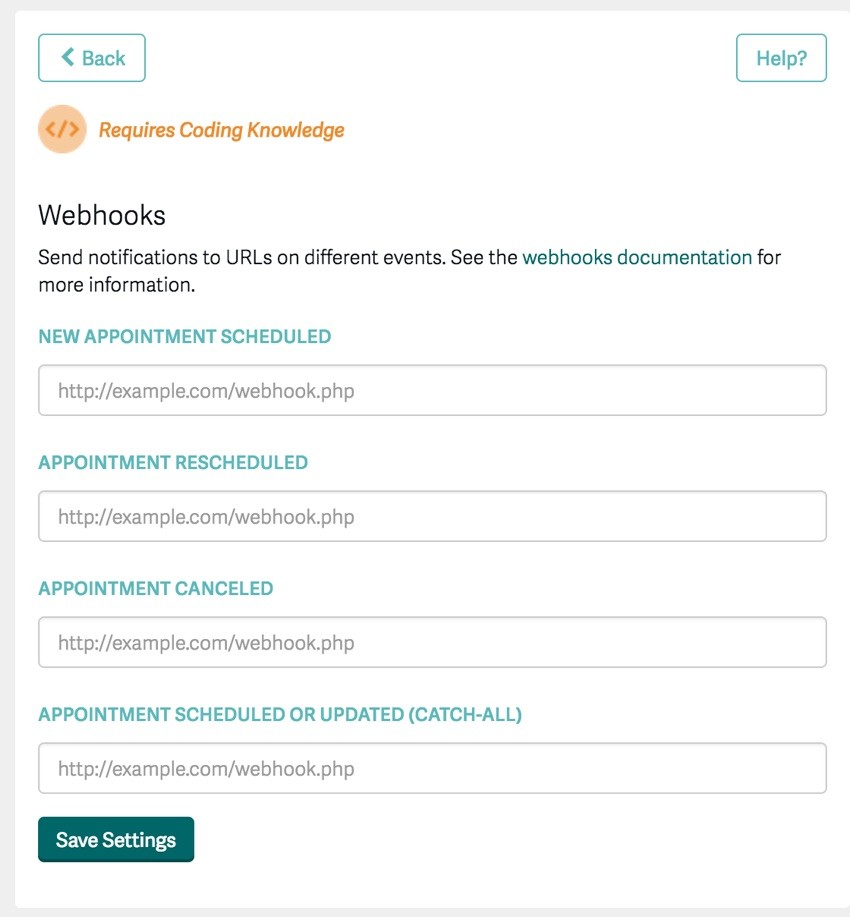
The Acuity API also provides webhooks to notify your application when an appointment is scheduled, canceled, or rescheduled. Under Acuity's Integrations menu, set the Webhook integration with the URL to be notified on changes to appointments (as shown above). The URL must be to port 443 or 80.
Webhook requests are application/x-www-form-urlencoded POST requests with these variables:
-
action: either
scheduled,rescheduled,canceled, orchanged, depending on the action that initiated the webhook call. - id: the ID for the appointment, get the appointment details through the get appointment API call.
- calendarID: the ID of the calendar for the appointment.
- appointmentTypeID: the ID of the type of the appointment.
The different actions:
-
scheduledis called once when an appointment is initially booked. -
rescheduledis called when the appointment is rescheduled to a new time. -
canceledis called whenever an appointment is canceled. -
changedis called when the appointment is changed in any way. This includes when it is initially scheduled, rescheduled, or canceled, as well as when appointment details such as email address or intake forms are updated.
Acuity will post to your API like this, and you can translate the data received to record updates to new and existing appointments:
POST https://example.com/webhook-callback action=changed&id=13
    &calendarID=1&appointmentTypeID=13
You can also use curl to simulate Acuity webhooks to assist with development:
curl -d "action=changed&id=1&calendarID=1
    &appointmentTypeID=1"
     "https://example.com/webhook-callback"
Verifying Webhook Requests
Webhook notifications are signed by Acuity using your API key, so you can verify that a notification is from Acuity. There's rich information and examples specifically for this in the API Documentation.
Dynamic Webhooks for Created Events and Bookings
If you take a look at Acuity's API, you'll notice that you can now dynamically create subscriptions via webhooks. This feature is currently in testing but you can try out the feature right here.
Reporting With the Acuity Developer API
The more you integrate your application and service with Acuity's calendar and booking API, the more important it will be for you to track what's happening. That's where using the API for reporting can come in very useful.
How to Report on Appointments
One obvious reporting requirement is to show appointments coming into the system for various team members from customers and clients. The API makes this straightforward.
Here's a PHP SDK example to request appointments from the system:
<?php
require_once('vendor/autoload.php');

$acuity = new AcuityScheduling(array(
  'userId' => ACUITY_USER_ID,
  'apiKey' => 'ACUITY_API_KEY'
));

$appointments = $acuity->request('appointments');
print_r($appointments);
Here's a similar curl request for a specific user's calendar:
curl -u ACUITY_USER_ID:ACUITY_API_KEY "https://acuityscheduling.com/api/v1/appointments?max=25
    &calendarID=27238"
Here's an example response:
[{
    "id": 54321,
	"firstName": "Bob",
	"lastName": "McTest",
	"phone": "",
	"email": "[email protected]",
	"date": "June 17, 2013",
	"time": "10:15am",
	"endTime": "11:15am",
  "dateCreated": "July 2, 2013",
  "datetime": "2013-07-02T10:15:00-0700",
	"price": "10.00",
	"paid": "no",
  "amountPaid": "0.00",
	"type": "Regular Visit",
  "appointmentTypeID": 1,
  "classID": null,
	"duration": "60",
	"calendar": "My Calendar",
	"calendarID": 27238,
  "certificate": null,
	"confirmationPage": "https://acuityscheduling.com/schedule.php?owner=11145481&id[]=1220aa9f41091c50c0cc659385cfa1d0&action=appt",
	"formsText": "...",
	"notes": "Notes",
	"timezone": "America/New_York",
	"forms": [
		{
			"id": 1,
			"name": "Example Intake Form",
			"values": [
				{
					"value": "yes",
					"name": "Is this your first visit?",
					"fieldID": 1,
					"id": 21502993
				},
				{
					"value": "Ninja",
					"name": "What is your goal for this appointment?",
					"fieldID": 2,
					"id": 21502994
				}
			]
		}
	]
},
{
	"id": 2051308,
	"firstName": "Eve",
	"lastName": "Cooper",
	"phone": "1231231234",
	"email": "[email protected]",
	"date": "June 24, 2013",
  "datetime": "2013-06-24T09:00:00-0700",
	"time": " 9:00am",
	"endTime": "10:00am",
	"price": "0.00",
	"paid": "no",
	"type": "Another Type",
  "appointmentTypeID": 2,
  "classID": 1,
	"duration": "60",
	"calendar": "My Calendar",
	"calendarID": 27238,
	"confirmationPage": "https://acuityscheduling.com/schedule.php?owner=11145481&id[]=3320aa9f41091c50c0cc659385cfa1d0&action=appt",
	"formsText": "...",
	"notes": "Notes",
	"timezone": "America/New_York",
	"forms": []
}]
These are the supported arguments for appointments:
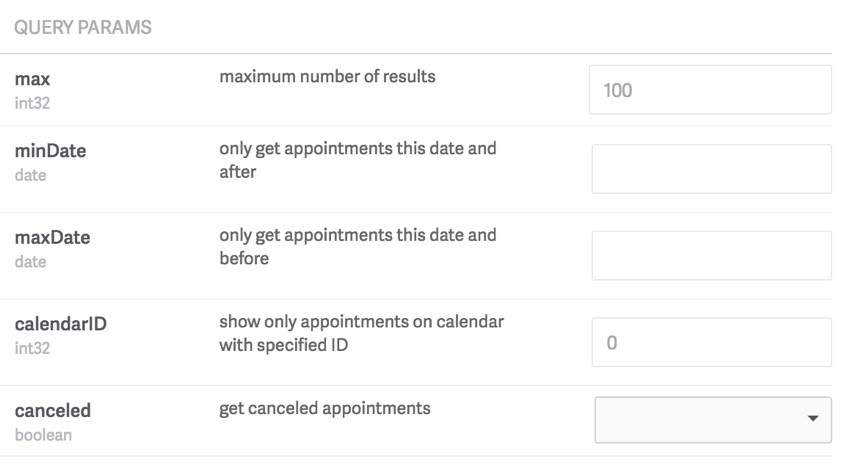
By default, canceled appointments are not returned. To retrieve canceled appointments, use the query ?canceled=true. Canceled appointment responses include a noShow field which is true if the admin has marked the appointment as a no-show, and false if the appointment is simply canceled.
Reporting Orders
Since Acuity also allows you to list and sell products with its appointment booking services, /orders retrieves a list of orders from the online store with the most recent first.
Here's a curl example:
curl -u ACUITY_USER_ID:ACUITY_API_KEY
    "https://acuityscheduling.com/api/v1/orders"
While not shown above, you can request status as delivered, paid, or unpaid and request product names using the title variable, as a semi-colon separated list of the product names ordered.
Here's an example of the results:
[
  {
      "id":1234,
  	"total":"55",
  	"status": "paid",
  	"time": "2014-09-23 14:22",
  	"firstName": "Testy",
  	"lastName": "McTest",
  	"phone": "1234567890",
  	"email": "[email protected]",
  	"title": "Massage Gift Certificate, Relaxing Candle",
  	"notes": "Some notes from the client"
  }
]
Pretty simple... and yet all of what Acuity provides in its platform impresses me as in depth and advanced.
In Closing
We've learned a lot about Acuity Scheduling's capabilities in this series to date. To recap, today we learned about:
- OAuth2: Allowing Acuity users via OAuth to work from with your application or service to manage their calendars and appointments.
- Webhooks: Using webhooks to channel notifications into your service or application when appointments are scheduled or changed.
- Reporting: Enumerating appointments and orders within your Acuity account network.
I hope you've enjoyed the series to date. Please keep letting us know which areas you'd like to see covered in more detail in upcoming episodes. Post your ideas and questions in the comments below or reach me on Twitter @lookahead_io.
If you liked this tutorial, please be sure to check out my Envato Tuts+ instructor page to see some of my other tutorials and series.

Comments