While building WordPress themes, I often find myself in a position where I need the end user to enter a number within a given range to do something at the front-end. Titan Framework offers a cool number range option, which is what I'll be discussing today. Let's add a number range option in an admin panel, a meta box and a customizer section via Titan Framework.
The Number Type Option in Titan Framework
There is a number type option in Titan Framework, which looks like this:
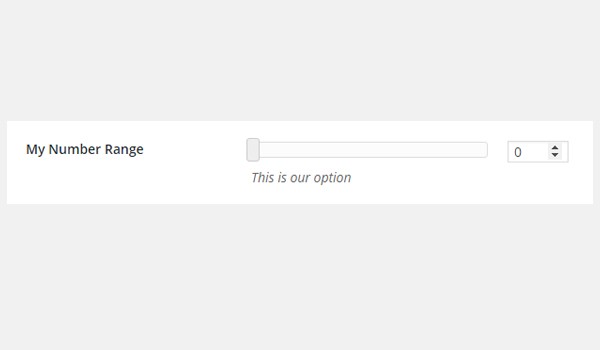
You can see in the above screenshot that this option type allows you to add any number in your development project. There is a bar with a slider, and next to it is a counter which can be incremented or decremented.
So, you can either drag the slider or use the counter to enter the value. Now let's take a look at the parameters which this option supports:
- name: It displays the name of the option.
- id: This parameter assigns a unique name which is later used to get values.
-
desc: It displays a brief description with the
numbertype option. - default: (Optional) It specifies the default value.
- livepreview: (Optional) This parameter allows you to look at the live preview of changes inside a theme customizer section.
- css: (Optional) Whenever you add this option inside an admin page and/or theme customizer section, this parameter automatically generates CSS.
- placeholder: (Optional) It displays dummy text each time this option type is empty.
-
size: (Optional) It defines the width of the field. It may carry values like
mediumorlarge. - min: (Optional) It sets the minimum allowable value.
- max: (Optional) It sets the maximum allowable value.
-
step: (Optional) This parameter configures the increment value for the counter, i.e. for every increment how much the value increases. The default value is set to
1. - unit: (Optional) It works as an extra label which appears right after the option type. This parameter accepts values like alphanumerics and symbols.
Most of these parameters are of the type string. However, min, max and step are number by type.
Available Containers for the Number Type Option
The number type option can be added inside:
- Admin Panel
- Admin Tabs
- Meta Boxes
- Theme Customizer Sections
The code for creating these containers is beyond the scope of this article, but you can surely find its details in previous articles of the series.
However, a uniform pattern is followed throughout to create this option type:
- Get a unique instance via the
getInstance()function. - Add the option type via the
createOption()function. - Retrieve the saved values via
getOption()function.
Creating a Number Type Option Inside an Admin Panel
Example Declaration
First I'll show how you can add this option inside an admin panel:
<?php
    /**
     *
     * Create the number option
     *
     */
    $aa_panel->createOption( array(

        'id'   => 'aa_numb_type', // The ID which will be used to get the value of this option
        'type' => 'number', // Type of option we are creating
        'name' => 'My Number Option', // Name of the option which will be displayed in the admin panel
        'desc' => 'This is our option' // Description of the option which will be displayed in the admin panel

    ) );
I'm adding a number type option via the createOption() function inside an admin panel $aa_panel. I've used the parameters id, type, name and desc. Look at their values. Of all these, ID and type are the most important ones. ID defines the unique name used to get the values, whereas type specifies the option you're using.
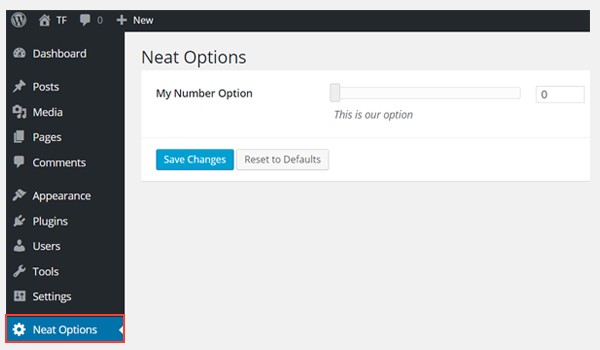
The above screenshot shows a number type option My Number Option inside the admin panel Neat Options.
Example Usage
Now I'll retrieve the saved options values.
<?php
// 1. Get the titan framework instance and save it to a variable
$titan = TitanFramework::getInstance( 'neat' ); // we will initialize $titan only once for every file where we use it.

// 2. Get the value via ID using getOption function
$aa_numb_type_val = $titan->getOption( 'aa_numb_type' );

/**
 *
 * Print the saved value
 *
 */

?>
<div>
    Value of number type option in admin panel is : <?php echo $aa_numb_type_val; ?>
 </div>
First, I get a unique instance of titan framework as per a parameter, preferably my theme name, i.e. neat. Then I used the getOption() function and registered ID (i.e. aa_numb_type) as a parameter. In the end, I added a div and echoed the result at the front-end.
Displaying the Result at the Front-End
Suppose I entered '500' as my demo value and saved it.
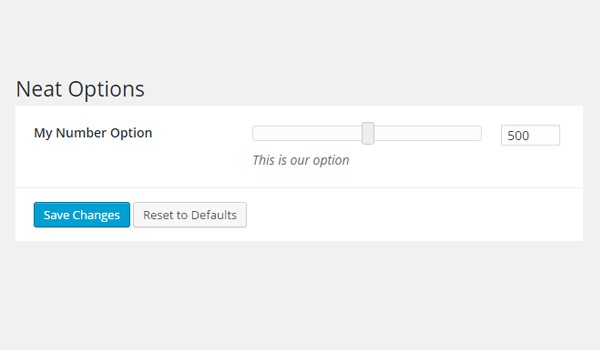
You can find the position of the slider clearly. Let's display the output at the front-end. Here it is:

Creating a Number Type Option Inside an Admin Tab
Example Declaration
Let's type its code:
<?php

    // Create options for $aa_panel2 inside the $aa_tab1
    $aa_tab1->createOption( array(

        'id'   => 'aa_numb_in_tab1_panel2', // IDs should always be unique. The ID which will be used to get the value of this option
        'type' => 'number', // Type of option we are creating
        'name' => 'My Number Option', // Name of the option which will be displayed in the admin panel
        'desc' => 'This is our option', // Description of the option which will be displayed in the admin panel
        'min'  => '100', // Minimum value of the option which will be displayed
        'max'  => '500' // Maximum value of the option which will be displayed

    ) );
This time I created a number type option inside an admin tab $aa_tab1. Its ID is aa_numb_in_tab1_panel2. If you look at the code closely, you'll find some new parameters added. These are the min and max type parameters, whose function has been already discussed. Now due to these parameters, a limit is set between 100 and 500, and I won't be able to overrule it till I change their respective values.
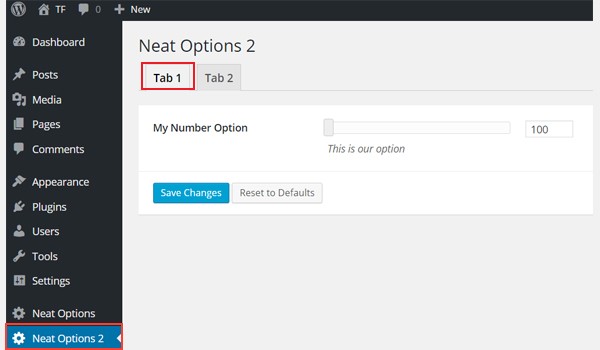
Look at the My Number Option inside Tab 1 of admin panel Neat Options 2.
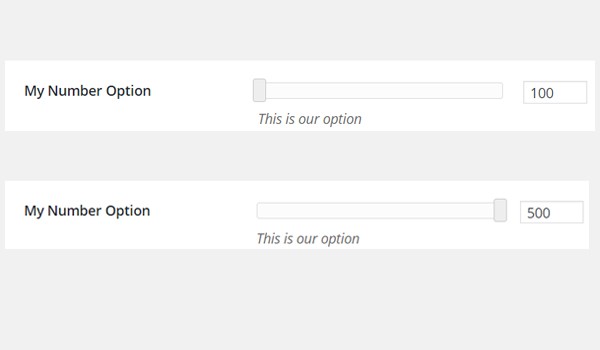
The above screenshot displays the min and max range of the option.
Example Usage
Let's get its values:
<?php
// 1. Get the titan framework instance and save it to a variable
$titan = TitanFramework::getInstance( 'neat' ); // we will initialize $titan only once for every file where we use it.
// Value of tab.
$aa_numb_in_tab1_panel2_val = $titan->getOption( 'aa_numb_in_tab1_panel2' );
/**
*
* Print the option values
*
*/
?>
<div>
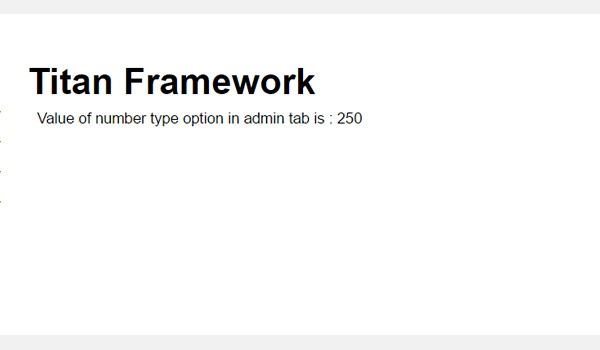
Value of number type option in admin tab is : <?php echo $aa_numb_in_tab1_panel2_val; ?>
</div>
First an instance is called, after which the getOption() function retrieves the value of ID aa_numb_in_tab1_panel2 and saves it in a variable aa_numb_in_tab1_panel2_val. Then I'll print this value via the echo command.
Displaying the Result at the Front-End
Now I entered '250' as my demo value and saved it. So, this is how the front-end appears:
Creating a Number Type Option Inside a Metabox
Example Declaration
Now I'll create this option inside a metabox:
<?php
    /**
     *
     * Create the options for metabox
     *
     */
    $aa_metbox->createOption( array(

        'id'   => 'aa_mb_numb', // The ID which will be used to get the value of this option
        'type' => 'numb', // Type of option we are creating
        'name' => 'My Number Option', // Name of the option which will be displayed
        'desc' => 'This is our option' // Description of the option which will be displayed

    ) );
A number type option with ID aa_mb_numb exists inside a metabox $aa_metbox.
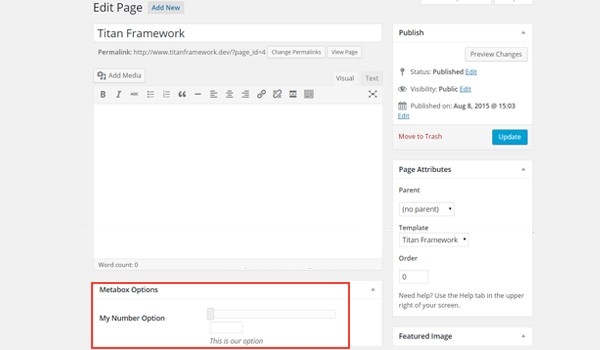
In the above image, you can find this option displayed at the end of a page editing screen.
Example Usage
Let's get its values:
<?php
// 1. Get the titan framework instance and save it to a variable
$titan = TitanFramework::getInstance( 'neat' ); // we will initialize $titan only once for every file where we use it.
/**
Get option values
*/
/**
*
* Value of first tab text box.
*
* Notice the use of get_the_ID(). It is because metabox is created for all
* the post types we defined. TO get the value of a metabox option for a specific page/post
* we need to give getOptions() function the ID of our post/page. Which is done like this.
*
*/
$aa_mb_numb_val = $titan->getOption( 'aa_mb_numb', get_the_ID() );
/**
*
* Print option value
*
*/
?>
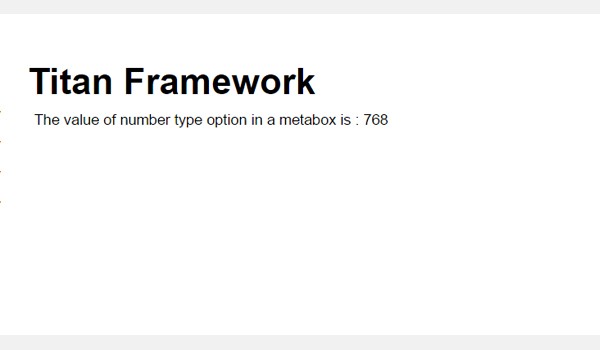
<div>The value of number type option in a metabox is : <?php echo $aa_mb_numb_val; ?></div>
The process of getting values is exactly the same. Only the IDs and variables have new values, and we provide the getOption() function with two parameters, one being the ID of the option and the other the ID of the post_type.
Displaying the Result at the Front-End
This time I entered '768' as the demo value and viewed the front-end, which looked like this:
Creating a Number Type Option Inside a Theme Customizer
Example Declaration
Finally, let's add this option inside a customizer.
<?php
    /**
     *
     * Create the options for $aa_section1
     *
     */
    $aa_section1->createOption( array(

        'id'   => 'aa_sec_numb', // The ID which will be used to get the value of this option
        'type' => 'number', // Type of option we are creating
        'name' => 'My Number Option',// Name of the option which will be displayed
        'desc' => 'This is an option' // Description of our option

    ) );
A number type option with ID aa_sec_numb is created inside a theme customizer section $aa_section1.
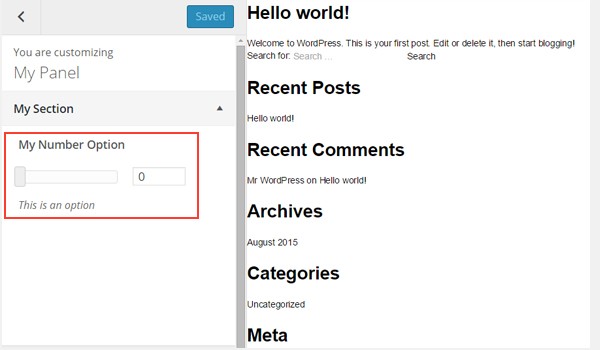
In the above screenshot, you can find My Number Option inside the My Section customizer panel.
Example Usage
Let's get the values:
<?php
// 1. Get the titan framework instance and save it to a variable
$titan = TitanFramework::getInstance( 'neat' ); // we will initialize $titan only once for every file where we use it.
//2. Getting option values
$aa_sec_numb_val = $titan->getOption( 'aa_sec_numb' );

/**
 *
 * Print values at the front end
 *
 */
?>

<div>
    The value of number type option in customizer section is: <?php echo $aa_sec_numb_val; ?>
</div>
Get an instance and then use the getOption() function. Enter the ID as the parameter and save its value in a new variable called $aa_sec_numb_val. In the end print the value via the echo command.
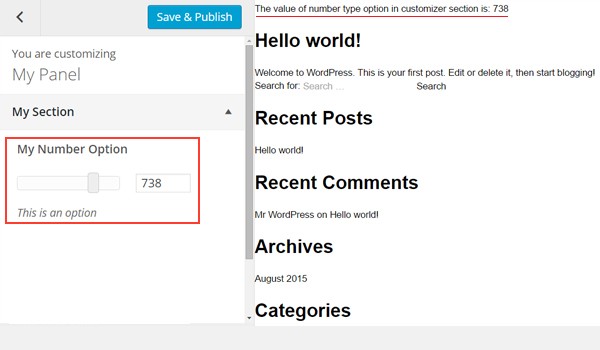
Displaying the Result at the Front-End
Let's enter '738' as the demo value and display a live preview of the changes.
The Editor Type
WordPress comes with a built-in TinyMCE editor which can be found on the post editing page. However, adding this rich text editor in an admin panel, a meta box or a customizer section can be an intimidating task for beginners. So how about going for an easier way? Titan Framework lets you add the WYSIWYG/TinyMCE editor via an option type callededitor. Let's dive into this topic and learn about it in detail.
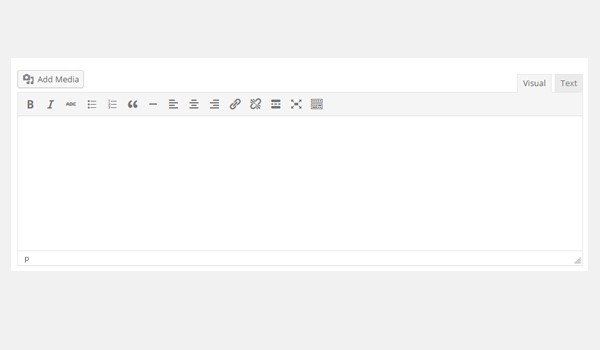
The Editor Type Option in Titan Framework
In Titan Framework, you can find TinyMCE editor as one of the option types which you can add. It looks like this:
There are several parameters which this option supports:
-
name: This parameter shows the name of an
editortype option. - id: It defines a unique name which gets the saved values.
- desc: It shows a one-line description with the option name.
- default: (Optional) It sets the default value.
-
livepreview: (Optional) This parameter displays the live preview of changes each time an
editortype option is added inside a theme customizer section. - css: (Optional) It automatically generates CSS when you add this option inside an admin page and/or theme customizer section.
- wpautop: (Optional) This parameter wraps the entered text inside paragraph tags if it holds true.
- media_buttons: (Optional) It places an "Add Media" button alongside the WYSIWYG editor if this parameter is true.
- rows: (Optional) It control the number of rows of the WYSIWYG editor.
The parameters media_buttons and wpautop are boolean and rows is of type int. The rest of the parameters are string by type.
Available Containers for the Editor Type Option
The editor type option can be created inside:
- Admin Panel
- Admin Tabs
- Meta Boxes
Note: In the customizer, this option converts itself to a text type option.
You can add this option via following these steps:
- First of all, get a unique instance via the
getInstance()function. - Next, create an option via the
createOption()function. - In the end, you'll get saved values via the
getOption()function.
Let's add a TinyMCE editor inside all these containers.
Creating an Editor Type Option Inside an Admin Panel
Example Declaration
First I'll create this option inside an admin panel.
<?php
    /**
     * Create editor type option
     */
    $aa_panel->createOption( array(

        'id'   => 'aa_editor_type', // The ID which will be used to get the value of this option
        'type' => 'editor', // Type of option we are creating
        'name' => 'My Editor Option', // Name of the option which will be displayed in the admin panel
        'desc' => 'This is our option' // Description of the option which will be displayed in the admin panel

    ) );
I created an editor type option inside an admin panel $aa_panel. This is a custom admin panel in Titan Framework; if you don't know how to make one, refer to previous tutorials of this series. This option is created via the createOption() function which takes an array of several parameters. Look at the code and see how I've defined the values of id, type, name and desc.
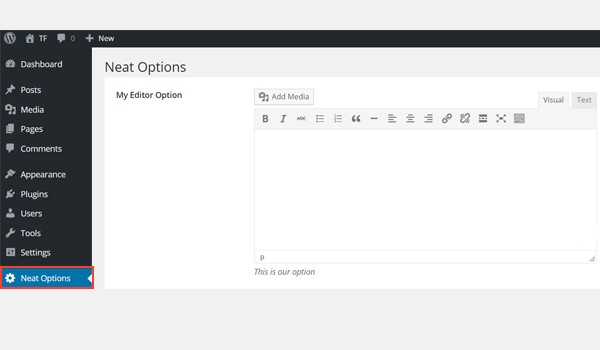
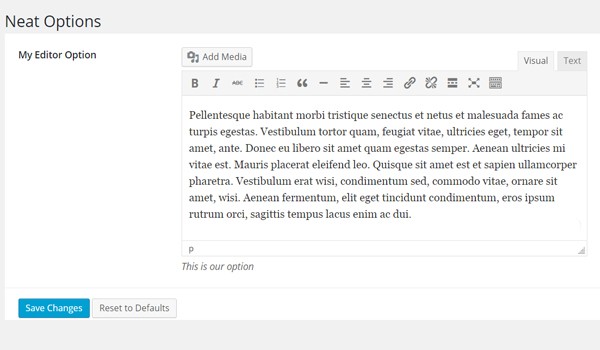
In the above screenshot, you can find an editor type option named My Editor Option inside admin panel Neat Options.
Example Usage
Now I'll retrieve the saved options values.
<?php
// 1. Get the titan framework instance and save it to a variable
$titan = TitanFramework::getInstance( 'neat' ); // we will initialize $titan only once for every file where we use it.

// 2. Get the value via ID using getOption function
$aa_editor_type_val = $titan->getOption( 'aa_editor_type' );

/**
 * Print the option value
 */
?>
<div>
    <h2> Value of editor type option in admin panel is : </h2> <br> <?php echo $aa_editor_type_val;; ?>
</div>
To get the values, first get an instance via the getInstance() function. Next, using the getOption() function, retrieve the values by entering a unique ID (i.e.aa_editor_type) as a parameter of this function. In the end, I printed the result via anecho command inside a div.
Displaying the Result at the Front-End
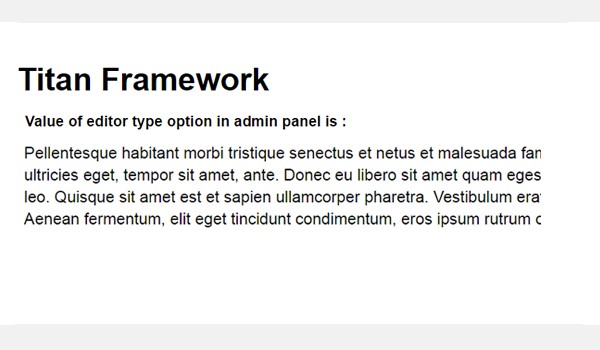
Suppose I entered dummy text as my demo setting and saved it.
The front-end appears like this:
Creating an Editor Type Option Inside an Admin Tab
Example Declaration
Let's write the code for an admin tab.
<?php
    // Create editor type option
    $aa_tab1->createOption( array(

        'id'   => 'aa_editor_in_tab1_panel2', // IDs should always be unique. The ID which will be used to get the value of this option
        'type' => 'editor', // Type of option we are creating
        'name' => 'My Editor Option', // Name of the option which will be displayed
        'desc' => 'This is our option' // Description of the option which will be displayed
    ) );
The createOption() function adds an editor in an admin tab $aa_tab1. The unique ID of this option is aa_editor_in_tab1_panel2.
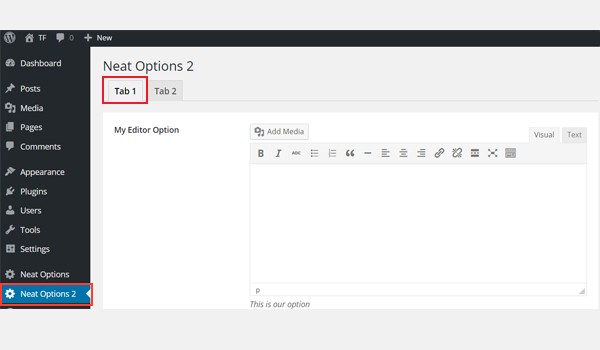
You can find My Editor Option inside Tab 1 of the Neat Options 2 panel. If you want to learn about the creation of an admin tab in Titan Framework then check my previous articles.
Example Usage
Now I'll get the value using the following code:
<?php
// 1. Get the titan framework instance and save it to a variable
$titan = TitanFramework::getInstance( 'neat' ); // we will initialize $titan only once for every file where we use it.
// Value of admin tab.
$aa_editor_in_tab1_panel2_val = $titan->getOption( 'aa_editor_in_tab1_panel2' );

/**
 * Print Admin tab values
 */
?>

 <div>
    <h2> Value of editor type option in an admin tab is : </h2> <br> <?php echo $aa_editor_in_tab1_panel2_val; ?>
 </div>
According to the above code, after getting a unique instance I retrieved the option value via the getOption() function. Then I saved its value to a new variable $aa_editor_in_tab1_panel2_val (line #6). Finally, I echoed the value in a div tag.
Displaying the Result at the Front-End
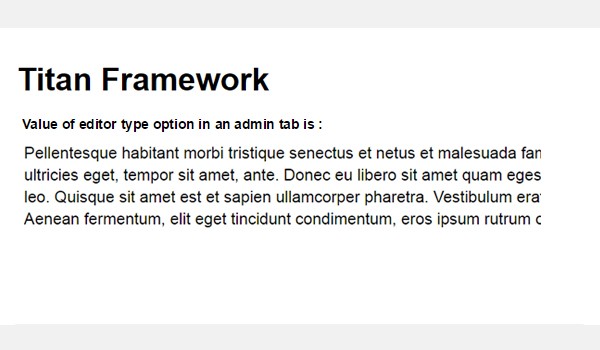
I again entered the same dummy text and saved it. Let's take a look at its result:
Creating an Editor Type Option Inside a Metabox
Example Declaration
Finally, let's add this option inside a metabox.
<?php
    /**
     * Create editor type option
     */
    $aa_metbox->createOption( array(

        'id'   => 'aa_mb_editor', // The ID which will be used to get the value of this option
        'type' => 'editor', // Type of option we are creating
        'name' => 'My Editor Option', // Name of the option which will be displayed
        'desc' => 'This is our option' // Description of the option which will be displayed

    ) );
This time I created an editor type option inside a metabox $aa_metbox. The unique ID is aa_mb_editor which later gets the saved values.
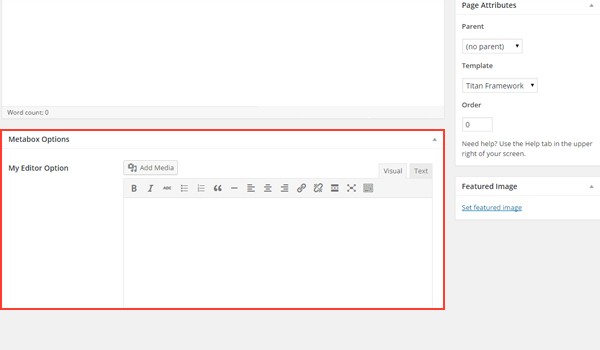
In the above screenshot, you can find this option named My Editor Option inside a metabox called Metabox Options. This appears on all post and page editing screens. You can refer to my previous articles to learn about the making of a metabox with Titan Framework.
Example Usage
Now I'll get the value and print it.
<?php
// 1. Get the titan framework instance and save it to a variable
$titan = TitanFramework::getInstance( 'neat' ); // we will initialize $titan only once for every file where we use it.

// 2. Get the value via ID using getOption function
$aa_mb_editor_val = $titan->getOption( 'aa_mb_editor', get_the_ID() );

/**
 * Print the option value
 */
?>
 <div>
     <h2> The value of editor type option for a metabox is: </h2>
     <br/> <?php echo $aa_mb_editor_val; ?>
 </div>
The process of getting the saved values is the same except that inside the getOption() function I've used an additional parameter of get_the_ID(), which is a function used to retrieve the ID of the current post_type.
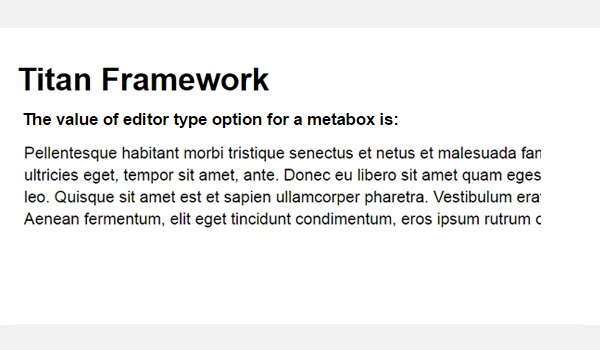
Displaying the Result at the Front-End
Let's take a final look at its result:
That's about it. One important thing you should know is that you can add this option type in a theme customizer section, but there is not enough space for it to fit in. So this option will revert back to a text type option in the customizer, which was already discussed in a previous article.
This is all there is to the editor type option in Titan Framework. Try to integrate it in your web development project and let me know if you have any questions.
Conclusion
Just a few lines of code and we get both a cool number range option in admin panels, meta boxes and customizer sections, and the same for our editor type option.
Nowadays, I am working on a premium WordPress plugin, and while developing it, I ended up using the number option in a creative manner. I used a number option to control the padding and margin of particular div wrapper. Think about it for a moment: an end user being able to change the size of a subscription box by sliding the range. That's a really good example of a better user experience.
Tell me how you plan to use this option. If you have any questions, use the comment section below, or reach out on Twitter.

Comments