WooCommerce is one of the most popular eCommerce add-ons for WordPress: At the time of writing it's been downloaded no less than 3.6 million times. The core WooCommerce plugin is free and you can augment it with premium add-ons; however for many online stores, the free plugin is all you need to start selling.
In this series of tutorials, I'll show you how to install and configure WooCommerce and add both physical and virtual products to it. In this first part you'll install the plugin and work with the general settings and those for products and taxes.
What You'll Need
To complete this tutorial you'll need a working installation of WordPress, with administrator access so you can install and administer plugins.
Installing WooCommerce
The first step is to install the plugin. The simplest way to do this is via the Plugins screen in the WordPress dashboard, although you can also download the plugin files from the WordPress plugin repository.
The plugin's page on the repository provides detailed information about what WooCommerce does:
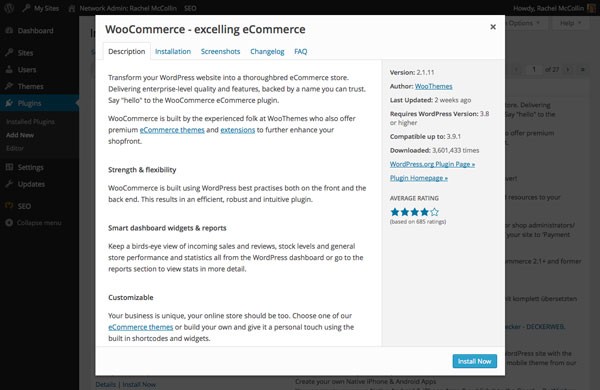
Once you've installed WooCommerce on your site and activated it via the Plugins screen, you'll need to complete one more activation step, which is to install the store pages created by WooCommerce. When you activate the plugin, you'll see the message in the screenshot:
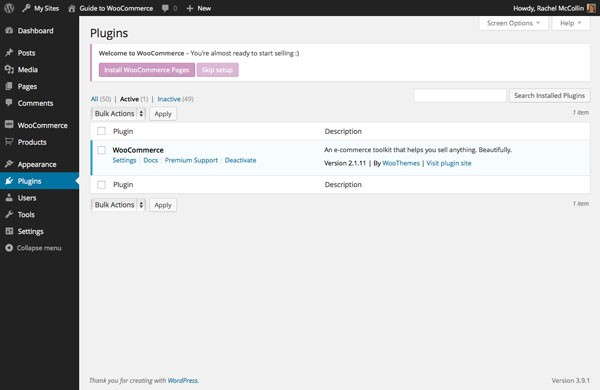
This adds a number of pages to your site which WooCommerce will use to manage your store, including a main Shop page, a Cart page and more. Click on the Install WooCommerce Pages button to continue.
Having done this, you'll be redirected to the Welcome screen:
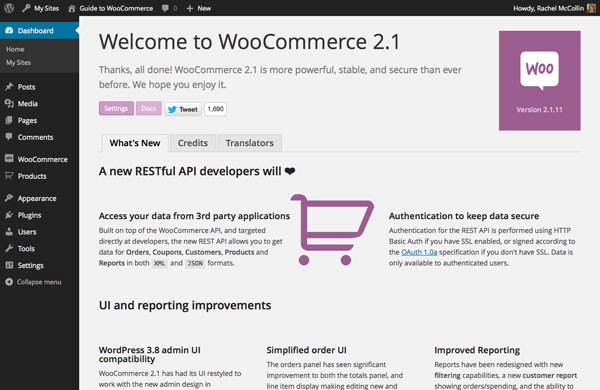
You'll have noticed that you have two new items in the admin menu on the left: WooCommerce and Products. In this tutorial you'll be working on the pages in the WooCommerce menu.
WooCommerce is now installed and ready to go!
Adding WooCommerce Pages to Your Navigation
Before delving into the WooCommerce settings, I like to make sure that my Shop and other relevant pages can be found in my main site navigation.
Open the Appearance->Menus screen in the WordPress dashboard and add the new pages WooCommerce has added to your site's navigation. It's up to you which ones you add, I've chosen the Shop, Checkout, Cart and My Account pages as well as a link to the home page:
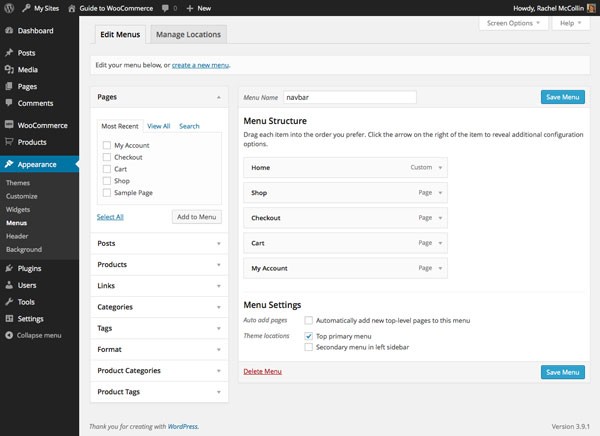
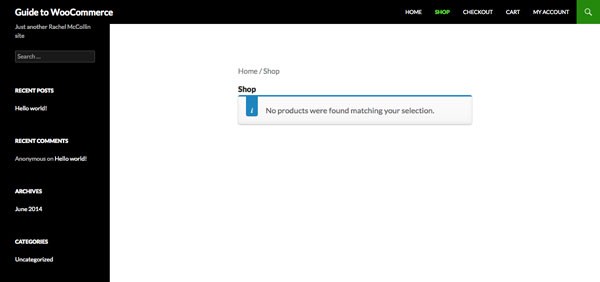
You can see the changes in my live site, which now has an empty Shop page which I can access via the main navigation:
Configuring the WooCommerce Settings
Before you can add any products to your store you need to set WooCommerce up. WooCommerce comes with an array of settings: In this tutorial I'll demonstrate the general settings and the settings for products and tax, and in the next tutorial I'll work through the settings for checkout, shipping, accounts and emails.
General Settings
Start with the General settings screen, which you access via WooCommerce->Settings and then by selecting the General tab.
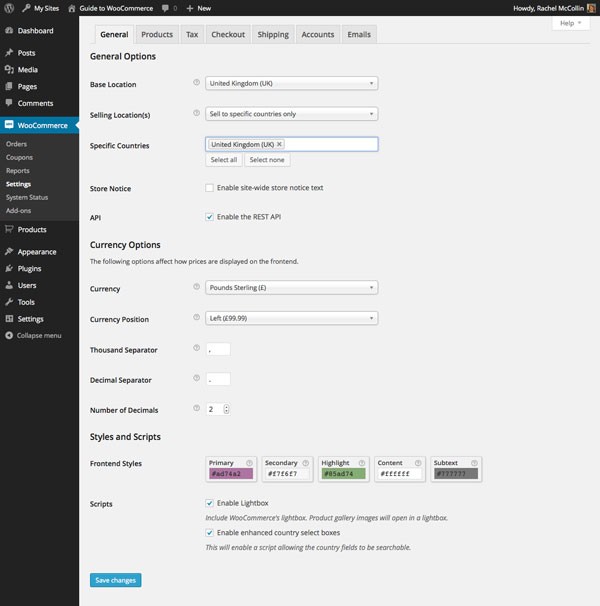
Here I've added a base location and selling location of the United Kingdom, which is where I'm based: you would add your own location. You can choose which countries you will sell to or you can opt to sell worldwide.
I've also added the currency I'll be using for my products: again, you would use your own currency here.
Finally click on Save Changes to save your settings.
Products Settings - Product Options
The next tab is the Products tab, which you use to create the settings for your product pages.
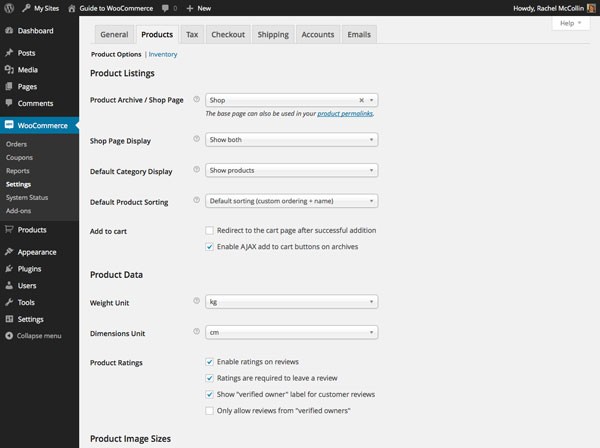
The first set of fields in this screen relate to how your store will be structured and what will be displayed on each page:
- The Product Archive / Shop Page is your main store page: the default is Shop, which has been created by WooCommerce and which automatically displays your products. If you want to use a different page you can, but you'll need to create it first.
- The Shop Page Display drop down gives you the option of displaying products, product categories or both. I've chosen Show both as this gives my visitors more to see.
- In Default Category Display, select whether you want to show products, subcategories or both on your category pages. I've chosen Show products as I won't be using subcategories.
- In Default Product Sorting, choose how you want your products to be displayed. I'm sticking with the default option for now but may review this after adding some products at a later stage: other options relate to popularity, rating, recency and price, although users can choose the sort order themselves too.
- The Add to cart options let you specify whether AJAX will be used and whether users will automatically be redirected to the cart when they add an item to it. I'm sticking with the default setting here as I want my users to carry on shopping before going to the cart.
- In the Product Data section, make any changes to how your products will be measured and how ratings will work: again, I'm using the default settings.
Further down this screen are the product image settings:
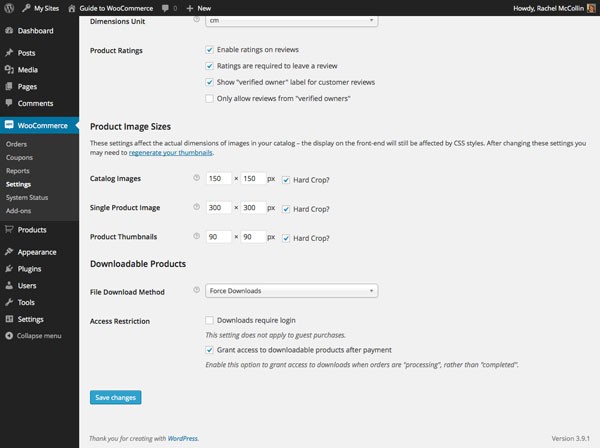
Here you can specify the size of product images on their individual product pages and the thumbnails on the product listing screens. As WordPress will save physical images for you with these dimensions, it's important to make any changes here before you start uploading product images.
If you do make changes after uploading some images, you'll need to regenerate your thumbnails in the same way as you would if you changed the media settings for your site.
The final option on this screen, that is Access Restriction, relates to downloads: if you are adding downloadable products to your site, you can force users to be logged in before making a download, and you can also give buyers access to their downloads while their payment is being processed.
Finally, click Save Changes to save your product settings.
Products Settings - Inventory
Also in the products settings section is the Inventory Options screen, which you access by clicking the link at the top of the product options screen:
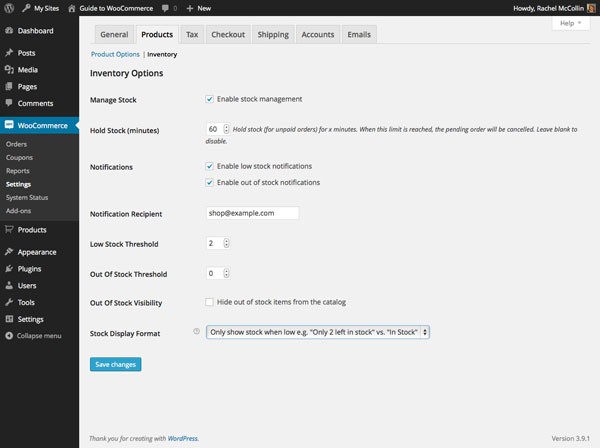
If you are planning to manage stock levels on your website, you can amend the settings here to suit the way your shop will work. This means your WooCommerce site can manage your stock control and email you when stocks of a product are running low. You can also choose to hide items which are out of stock, or display them with a note telling visitors that they are out of stock.
I've chosen to enable stock management and to display items which are out of stock in the hope that buyers will come back at a later date to check. I've also chosen not to display stock levels unless an item is low in stock.
Make the changes which correspond to the way you want to manage your store and click Save Changes.
Tax Settings
The next tab is the Tax tab, where you can specify sales and shipping taxes. There are a number of screens within this section, relating to the different tax rates you specify. Let's start with the Tax Options screen:
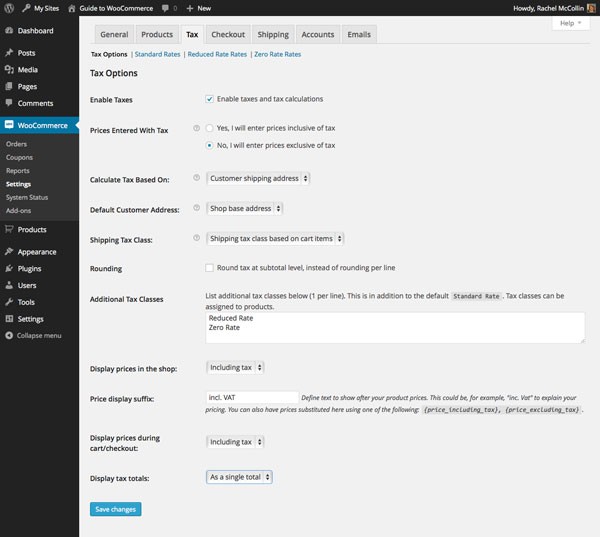
Here you have a number of options. I won't go through all of them as some are self-explanatory, but others need some consideration:
-
Prices Entered With Tax: select whether you will enter process inclusive or exclusive of tax. If you're selling to countries or states with different tax rates, you'll need to enter prices exclusive of tax and have WooCommerce calculate the tax for you. If you're selling in one tax area and your buyers will not be able to reclaim sales tax, it may be simpler to enter them inclusive of tax, as this is the price visitors will see.
- Calculate Tax Based On: you can specify whether the tax is based on your address or your customers' billing or shipping address. Which you choose will depend on the tax system you're working under.
- Shipping Tax Class: If shipping tax applies to your products, you'll need to specify how this is calculated, You can base this on the products being shipped, choose a flat rate or zero rate, or create a new class for shipping (which you do via the Additional Tax Classes field).
- Additional Tax Classes: use this field to add extra tax classes if those provided by WooCommerce aren't enough for your needs. WooCommerce will create a new settings screen for each class you add.
- Display tax totals: you can specify whether to show tax for each individual item or as a total.
Having made the changes to your tax options, click Save Changes.
Tax Settings - Flat Rate
As well as the general tax options screen, you have a screen relating to each class of tax in your shop. I'm going to be using a flat rate of tax so let's take a look at that screen:
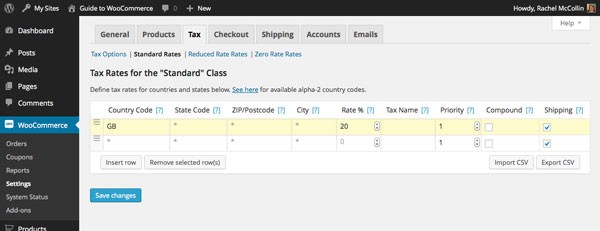
On this screen you add each country and/or state you will be selling to, so that WooCommerce can calculate tax for each of them. Click on the onscreen link to fetch the code for each country or state and then add it to the Country Code field. I'm just selling to the United Kingdom so I've added the GB country code.
Next, enter the tax rate for that country or state in the Rate % field: in the UK, Value Added Tax (VAT) is charged at 20% so I've added that.
In the Shipping field, tick the checkbox if this rate of tax will apply to shipping as well.
Finally when you've added all of your codes and rates, click on Save Changes.
Tax Settings - Zero Rate
Some of my products will also have a zero rate of tax applied to them so I need to add my country code to the Zero Rate Rates screen, with 0% entered in the Rate % field:
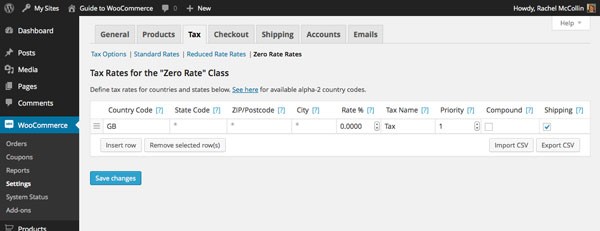
If you are working with additional tax rates, such as rates for shipping or for different product types, you will need to add these as classes in the Additional Tax Classes field in the Tax Options screen, and then add your country codes and rates to the settings screen for each one.
Summary
I've now installed WooCommerce on my site, configured the general settings, and added settings for my products and tax rates.
In the next tutorial, I'll show you the remaining settings screen: checkout, shipping, accounts and emails.


Comments