Although making a website completely based on Flash is not such a good idea for a variety of reasons, that doesn't mean you must not use Flash at all. I like to think about Flash as a spice. Putting some spices here and there could improve the taste of your website making it more pleasant and interactive for your visitors. Of course, as we all know, putting too many spices in our dish can bring problems. So, Flash should be used in moderation. Let's see how this can be done.
Introduction
The goal of every website is content that people can read and enjoy, and which is also understood by search engines and robots. So, some Flash is almost always fine. But too much Flash is less useful to search engines, relative to HTML. Flash media can be included anywhere in a WordPress theme: in the header, in a post or a page, in a sidebar, or in the footer. It's totally up to you and your personal preferences and needs. The really important thing here is not where you will use it rather than how you will use it. And this is the aim of this tutorial. To show you various ways of embedding Flash media in your WordPress powered websites and how to perform these methods properly. Let's begin with the most essential one, which is a base for the others.
Step 1 SWFObject Overview
SWFObject is a JavaScript library which offers two optimized methods to embed SWF files into web pages – a markup based approach and a method that relies on JavaScript. It uses unobtrusive JavaScript to detect Flash Player and avoid broken SWF content, and is designed to make embedding SWF files as easy as possible. It supports the use of alternative content to display content to people that browse the web without plugins, to help search engines index your content, or to point visitors to the Flash Player download page. All of this is powered by one small JavaScript file.
SWFObject is the most popular and efficient Flash embedding method available today. It is widely used by high-profile websites such as YouTube, Microsoft Windows, and Skype.
Step 2 Downloading SWFObject and SWFObject Generator
Because having to figure out which markup and JavaScript code to use can be a tedious job, the SWFObject provides you with an additional SWFObject Generator to do this work for you. You can find the latest versions of SWFObject and SWFObject Generator on Google Code. Download the SWFObject and the HTML version of the SWFObject Generator. The main difference between HTML and AIR version is that the last one has copy-to-clipboard functionality and can save your HTML page onto your hard drive.
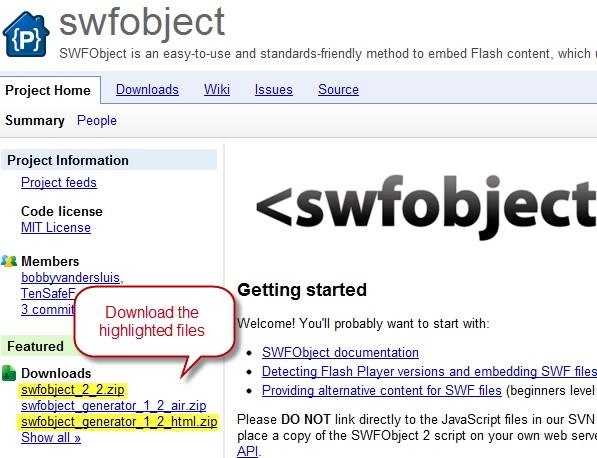
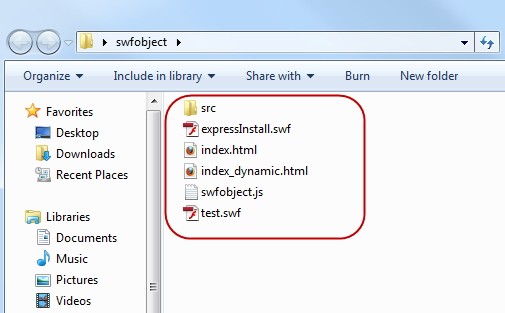
When you extract the content of swfobject_2_2.zip you will get a folder called swfobject which contains the following files:
- expressInstall.swf – this contains the default functionality of SWFObject for Adobe Express Install.
- swfobject.js – this is the minified SWFObject 2 JavaScript library that should be used in production.
- index.html, index_dynamic.html, and test.swf – these are included as a reference test implementation.
- src folder – here you can find swfobject.js (unminified and fully documented SWFObject 2 JavaScript file), expressInstall.fla and expressInstall.as (source files of the expressInstall.swf file). These are provided solely so developers can study SWFObject's source code or create a customized version to fit their own needs.
Also you can download the SWF file that we are going to use throughout the rest of the tutorial at Free Flash Animations. Rename it to nosmoke.swf for short.
OK. Everything is ready. Let's move on.
Step 3 Using SWFObject and SWFObject Generator
Now you need to upload all needed files on your server. These are swfobject.js, expressInstall.swf and nosmoke.swf. Place them inside your active theme folder. In this case this is the twentyeleven theme folder. If you have many .swf files you can put them inside a sub folder.
In order to create and insert the needed code into WordPress follow these steps:
- Extract and open the index.htm file placed inside swfobject_generator_1_2_html.zip
- For the SWFObject configuration area leave the default settings for SWFObject (.js) as swfobject.js and for Publishing method as Static publishing. Change Detect Flash Version to the version of the Flash Player appropriate for your animation. Check the box for Adobe Express Install and leave the file name as it is.
- For the SWF definition section, change the name of the Flash (.swf) to the name of your .swf file. You must use an absolute path to reference your SWF, not a relative one. You don't need to include your site' URL. Only the path to your file beginning with /, like this one - (/wordpress/wp-content/themes/twentyeleven/nosmoke.swf). Dimensions need to be changed to the width and height of your .swf file. Flash content id can stay as the default.
- For the HTML definition section, do not change anything. We will talk about the alternative content later. In the last step you we will explore what you can include in the Alternative content area

- Click the Generate button to generate the necessary Flash detection code. You then have to copy/paste the code from the Generated output area to the appropriate location in your chosen template in WordPress. Your code should look like the following:
<!DOCTYPE html PUBLIC "-//W3C//DTD XHTML 1.0 Strict//EN" "http://www.w3.org/TR/xhtml1/DTD/xhtml1-strict.dtd"> <html xmlns="http://www.w3.org/1999/xhtml" lang="en" xml:lang="en"> <head> <title></title> <meta http-equiv="Content-Type" content="text/html; charset=iso-8859-1" /> <script type="text/javascript" src="swfobject.js"></script> <script type="text/javascript"> swfobject.registerObject("myFlashContent", "9.0.0", "expressInstall.swf"); </script> </head> <body> <div> <object classid="clsid:D27CDB6E-AE6D-11cf-96B8-444553540000" width="350" height="350" id="myFlashContent"> <param name="movie" value="/wordpress/wp-content/themes/twentyeleven/nosmoke.swf" /> <!--[if !IE]>--> <object type="application/x-shockwave-flash" data="/wordpress/wp-content/themes/twentyeleven/nosmoke.swf" width="350" height="350"> <!--<![endif]--> <a href="http://www.adobe.com/go/getflashplayer"> <img src="http://www.adobe.com/images/shared/download_buttons/get_flash_player.gif" alt="Get Adobe Flash player" /> </a> <!--[if !IE]>--> </object> <!--<![endif]--> </object> </div> </body> </html> - Select the
<div>tag in the body section of the code. Everything from<div>to</div>gets selected. Copy it.<div> <object classid="clsid:D27CDB6E-AE6D-11cf-96B8-444553540000" width="350" height="350" id="myFlashContent"> <param name="movie" value="/wordpress/wp-content/themes/twentyeleven/nosmoke.swf" /> <!--[if !IE]>--> <object type="application/x-shockwave-flash" data="/wordpress/wp-content/themes/twentyeleven/nosmoke.swf" width="350" height="350"> <!--<![endif]--> <a href="http://www.adobe.com/go/getflashplayer"> <img src="http://www.adobe.com/images/shared/download_buttons/get_flash_player.gif" alt="Get Adobe Flash player" /> </a> <!--[if !IE]>--> </object> <!--<![endif]--> </object> </div>
- In the sidebar of your WordPress Dashboard, click on the arrow to the right of Appearance. Then, click on Editor.
- On the right side of the screen, you now have a list of all the templates that are in the root directory of the theme folder. Click on the title of the desired .php file (in this case footer.php). This loads it in the Theme Editor.
- Paste the code you copied from the code generator into the appropriate template file. In this example right above the
</footer>tag inside the footer.php template. - For the head content, select and copy the following:
<script type="text/javascript" src="swfobject.js"></script> <script type="text/javascript"> swfobject.registerObject("myFlashContent", "9.0.0", "expressInstall.swf"); </script> - Back in WordPress, open up header.php by clicking on Appearance > Editor > header.php. Paste the selected text in the head section above the
</head>tag.
The code generator creates the code for you based on the choices you make. It generates the code within the basic structure of an HTML page. The code generated is web standards compliant and supports the incorporation of alternative content. The JavaScript elements in the <head> section of the .html generated HTML output accesses the swfobject.js file. This is a library of JavaScript necessary for the Flash Player version detection process to take place. The JavaScript elements also register your .swf file with the library and tell it which version of the Flash Player is needed. In the body section of the document, a <div> tag is created that holds the object and nested object information/method that delineates which .swf is to be played, the width and height of it, and what alternative content to display if the appropriate Flash Player version is not found. Notice that special coding is used to account for the needs of Internet Explorer, for example: <!--[ if !IE]>-->.
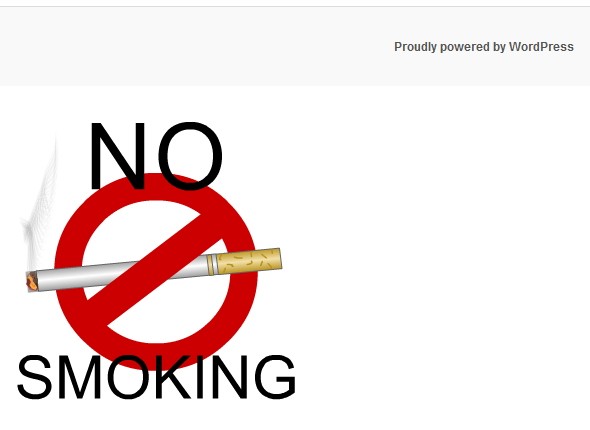
Now nosmoke.swf animation will appear on every page bellow the footer. Of course, this is a dummy example but I'm using it for presentational purpose only because it can be done faster and easier. Obviously you will need to add some style rules in order to get better appearance. You will see how shortly.
Step 4 SWFObject Configuration Explained
Static vs. Dynamic Publishing
Static publishing uses markup to embed both SWF content and alternative content, and utilizes unobtrusive JavaScript to resolve a series of issues that cannot be solved with markup alone. It promotes the actual authoring of standards compliant markup and will therefore especially appeal to web standards developers. This mechanism of embedding Flash content does not rely on a scripting language, so your Flash content can reach a significantly bigger audience. If you have the Flash plug-in installed, but have JavaScript disabled or use a browser that doesn't support JavaScript, you will still be able to see your Flash content.
Dynamic publishing uses markup to define alternative content only and utilizes unobtrusive JavaScript to replace this with the SWF if the minimal Flash Player version is installed and sufficient JavaScript support is available. Dynamic publishing is less verbose than static publishing and integrates very well with scripted applications. If you have the Flash plug-in installed, but have JavaScript disabled or use a browser that doesn't support JavaScript, you will see the alternative content instead of your embedded Flash content.
You need to decide what is the better solution for you depending on your goals and needs.
Using Adobe Express Install
Adobe Express Install is a mechanism built into Flash Player that enables you to download the latest version of the Flash plug-in directly without having to browse to the Adobe website. Express Install is an optional feature for web authors and displays a standardized download dialog box when a visitor has already installed Flash Player 6.0.65 or higher on Win or Mac platforms, but a later plug-in version is required. Express Install uses a pop-up confirmation window and is therefore an optional feature that can be activated by web authors. If you click Yes, Express Install will open a download dialog box with the request to close all browser windows. After installing Flash Player, it will reopen your browser window and redirect you to the page where Express Install was initiated. If you click No, SWFObject will revert to the alternative content.
You can activate Express Install by checking the Adobe Express Install checkbox and by adjusting the path to the expressInstall.swf file, if needed. In order to test whether this feature works and see it in action just do this little trick – change the required Flash version to something bigger than the latest Flash Player version (for example, 14.0.0). And you will get this result:
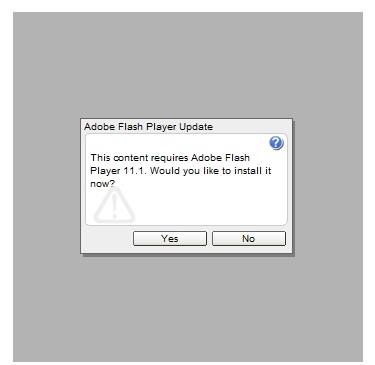
The message tells you that that the content requires Adobe Flash Player 11.1, because this is actually the latest version of the plugin (at the moment) and version 14.0 does not exist yet.
Step 5 SWFObject Definition Explained
In SWFObject Generator you can find a bunch of additional attributes and parameters available to you. They are hidden by default. So, to get access to them just click " more" at the bottom of the SWF definition area. After that you should see the following:

Depending on your choices made here your Flash content will behave and look different. For a description about what a particular attribute or parameter does, just hover over its name.
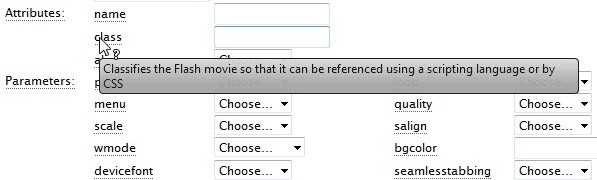
The name attribute is useful when you need to reference your Flash movie using scripting language. As I said before you may need to add additional styling to your Flash content. To do this just add a value for the class attribute such as "flashmovie". This class will be added to the object tag element in your generated code. So, now you just need to add the following style rule into your theme stylesheet:
object.flashmovie {
	//your css code here
}
Step 6 Using Embed SWF Online Generator
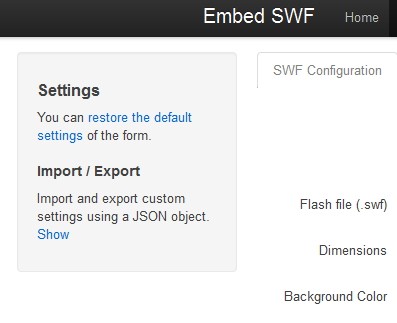
There is another easy way to get the needed detection code – by using an online generator. A good one can be found at embed-swf.org. It's based on SWFObject HTML and JavaScript Generator. To process follow these steps:
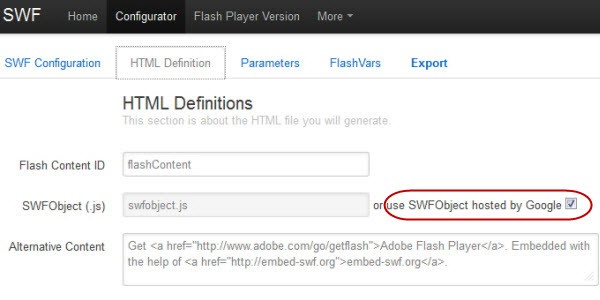
- Open the Configurator. The interface is divided into five tabs.

- Type the desired parameters in each tab
- Click the Export tab. Here you can choose an export template. If you want to use your own HTML template choose Custom. To learn how to create one, check the documentation.

- Now click on Show HTML Code. Your HTML code appears. Click Download to save the file onto your hard drive.
If you need you can restore the default settings at any time by clicking on the link in the upper-left corner. Also you have an option to export/import saved settings for easy reusing.
You don't need to worry about the swfobject.js file. Just leave the default option for the SWFObject which will use the swfobject.js file hosted by Google.
Step 7 Using Kimili Flash Embed
According to its website Kimili Flash Embed is:
...a plugin for popular open source blogging systems that allows you to easily place Flash movies on your site. Built upon the SWFObject JavaScript code, it is standards compliant, search engine friendly, highly flexible and full featured, as well as easy to use.
Installing the plugin is easy:
- In your Dashboard expand the Plugins menu and click Add New
- In the Search bar type "flash embed"
- When you see Kimili Flash Embed click Install
- After installation go to Plugins and activate it or just click Activate Now
Now in order to add flash content in your posts or pages do the following:
- Create new post/page or open existing one
- Switch to HTML view
- Now in order to add a Flash animation, use the following shortcode, replacing path, y and x parameters with the respective path, height, and width of your swf:
[kml_flashembed movie="/path/to/your/movie.swf" height="y" width="x" /]

- The movie parameter is the only one required – height and width are optional. Though it is most efficient to size your .swf during export, the height and width parameters will resize a .swf file. If you do so, be sure to keep the numbers in scale proportion to avoid distortion.
Kimili Flash Embed Tag Generator is a modified version of the SWFObject 2 HTML and JavaScript Generator and is integrated tightly into WordPress, making it very easy to build KFE tags with the proper formatting.
Adding Flash via KFE Tag Generator:
- To launch the Tag Generator, a wizard-like interface that will assist you in creating the necessary KFE tag, click the button with the Flash Player icon. (you need to switch to Visual mode in order to see it)

- A window similar to SWFObject Generator will show up

- All you need to do is to populate required parameters and then click Generate
You can setup default settings in the Admin menu. Choose Settings > Kimili Flash Embed.
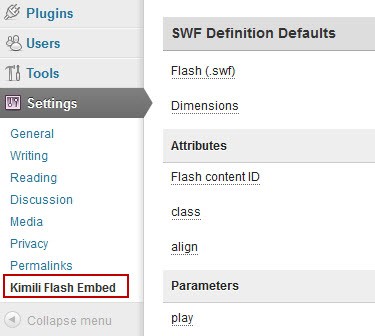
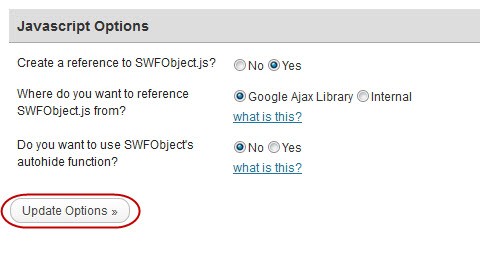
The options here are pretty much the same, except these for JavaScript at the bottom. You can change the first option to "No", if you already have swfobject.js being referenced elsewhere in your code. If you choose to use Kimili Flash Embed to create a reference to swfobject.js by checking "Yes", you then have two options from where to reference the file – Google Ajax Library or Internal. Click on "what is this?" to see what the differences are. When you are ready click Update Options.
Step 8 Providing Alternate Content
These days the leading search engine vendors like Google and Yahoo! can index textual content and links inside SWF files while browsing through an application's states, as if they were real visitors. So why then do you still need to use alternative content in order to help search engines index your content? This is for a couple of reasons.
- First, not every search engines is capable to index Flash content.
- Second, because a SWF file is usually full of multimedia content, there will still be much content that will stay invisible to search engines. You still need to use alternative content to display descriptive material to people with lesser technology support and to help visitors find the Flash Player download page.
- And lastly, search engines are likely to index both Flash content and alternative content. Although, from a web author's point of view, duplicate content is regarded as a best practice because it enables you to create web content that is accessible to the widest target audience possible, to search engine vendors it offers a few tricky challenges, such as how to decide which results to show in their search engine listings. When creating search engine-friendly content, you should always keep this duality in mind. Make sure that your HTML content is a true reflection of your Flash content, and let a search engine decide which content can be shown best as a search result.
For example, you could do the following, in order to create better alternative content:
- Use the exact same copy and links as in your Flash content
- Add images and textual description to the Flash content
- Add copy to explain where Flash Player can be downloaded
- Add CSS to style and position your HTML in order to preserve the web page's visual identity.
By default, SWFObject 2 Generator publishes the following alternative content:
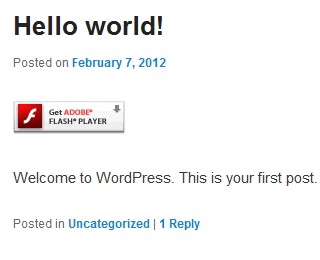
	<a href="http://www.adobe.com/go/getflashplayer">
		<img src="http://www.adobe.com/images/shared/download_buttons/get_flash_player.gif" alt="Get Adobe Flash player" />
	</a>
This results in a "Get Adobe Flash Player" button to point visitors to where they can download the plugin. To test this you need to disable your Flash Player plugin. In Firefox go to Add-ons > Plugins. Find Shockwave Flash and click "Disable" button. Now when you reload the page you should see the following:
You can replace the default code with this one:
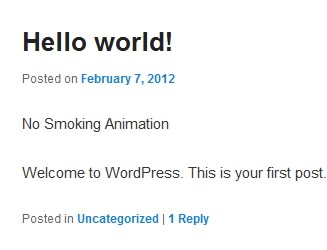
<img src="nosmoke.jpg" alt="No Smoking Animation" />
Now if visitors browse the page without Flash plugins they will see an image instead of actual animation:

Search engines and visitors that browse the web in a text browser or with images disabled will see the content as in this screenshot:
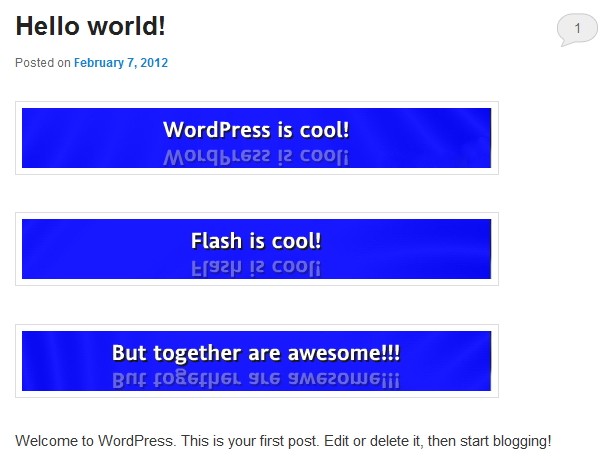
If you have a banner with several states you can capture an image for each one of them, and then insert these images as alternative content. It may look like this:
For an animation or video content you can use the same principle. You can capture several key images and use them to describe the content of your animation/video. Here is the base scheme:
	<ol>
		<li><img src="frame1.jpg" alt="" />Descrition of frame 1</li>
		<li><img src="frame2.jpg" alt="" />Descrition of frame 2</li>
		<li><img src="frame3.jpg" alt="" />Descrition of frame 3</li>
	</ol>
People without the Flash plug-in will see an image sequence with descriptions, and people that browse the web in a text browser or with images disabled will see a numbered set of descriptions.
Another way to do this is to include a video thumbnail image plus textual description of the movie.
Also, you could add a few lines of copy to your alternative content explaining that the intended interactive or audiovisual user experience requires the latest version of Flash Player, with a link to the download page.
You may also want to create additional style rules to ensure that the visual identity or layout of a web page remains intact. Just think of alternative content as an opportunity to communicate with your target audience, although they might not have the targeted technology support.
Conclusion
That's it. Now you you know how to embed Flash content in your WordPress powered website easily and properly. The content can be anything – animation, application, movie, game and whatever you want and need to. With a little imagination you can make your website really cool, on the one hand, and still useful, on the other.

Comments