In the previous tutorial, we began talking about namespaces and autoloading with PHP in the context of WordPress development. And although we never actually introduced either of those two topics, we did define them and begin laying the foundation for how we'll introduce them in an upcoming tutorial.
Before we do that, though, there's some functionality that we need to complete to round out our plugin. The goal is to finish the plugin and its functionality so that we have a basic, object-oriented plugin that's documented and works well with one caveat; it doesn't use namespaces or autoloading.
This, in turn, will give us the chance to see what a plugin looks like before and after introducing these topics.
Before proceeding, I recommend reading the previous tutorial. This way, you'll have the understanding of what namespaces and autoloading are, you'll have the working version of the plugin up to this point (since we're going to be building on it), and then you will be ready to proceed from that point forward.
Once you've read it, feel free to come back to this tutorial and resume your work.
Before We Begin
As with all of my tutorials, I assume you have a working development environment on your machine. This includes the following:
- A local development environment that includes PHP 5.6.20, the Apache web server, and a MySQL database server.
- A directory out of which WordPress 4.6 is being hosted.
- A text editor or IDE of your choice that you're comfortable using for writing a plugin.
- A working knowledge of the WordPress Plugin API.
If you're this far into the series (or have read any of my previous work), then I assume you already have something like the above already in place.
And when you do, we're ready to get started.
What We're Building
Recall from the previous tutorial:
We'll be building a plugin that makes it easy to load stylesheets and JavaScript styles in our plugin, and that displays a meta box that prompts the user with a question to help them brainstorm something about which to blog.
Yes, it's simple and it's not likely something that anyone will use outside of studying the concepts we're covering in this blog. But the means by which we're teaching the concepts that we're using are what's important.
This plugin gives us the ability to do exactly that.
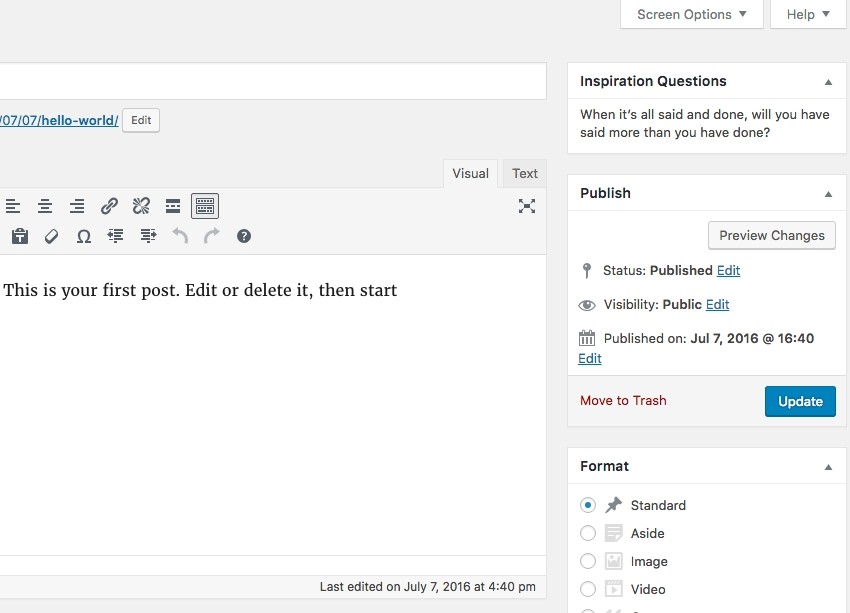
At the end of the last tutorial, we left with a plugin that displays a random question to the writer at the top of the sidebar in the WordPress post creation screen.

Each time you refresh the page, a new question is loaded. As it stands, it's not bad, but there are some improvements we can make in terms of the style of the content in the meta box.
That is, we can introduce stylesheets that will help us create a slightly more visually appealing presentation. Additionally, it will give us a chance to explore a few more object-oriented techniques that we can use when working with assets like stylesheets.
So let's begin.
Introducing Stylesheets
For the purposes of this tutorial, I'm not going to be using any type of preprocessor. I'm just going to be using vanilla CSS. But the way in which we enqueue assets will be a bit more object-oriented than what many WordPress developers are used to seeing.
This will all contribute to the goal of using namespaces and autoloading in this series. But first, let's start with introducing these stylesheets, creating the necessary class interfaces, classes, and communication with the WordPress API.
Add the CSS File
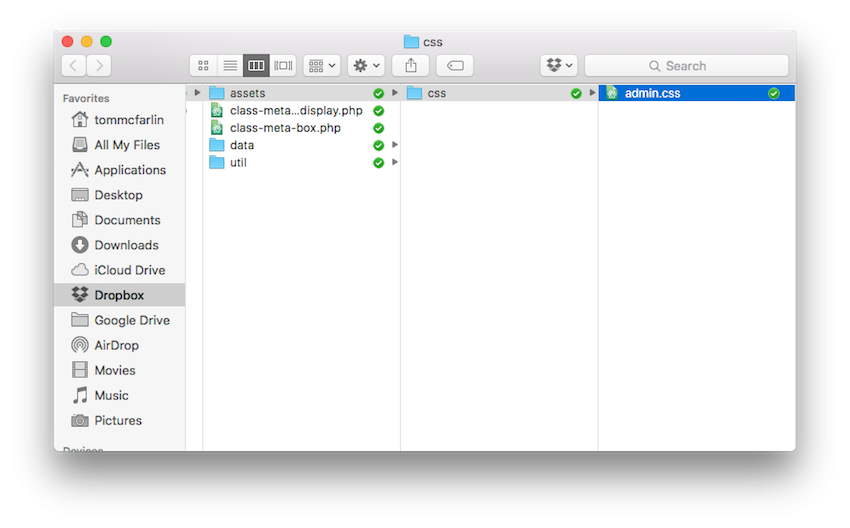
In the admin directory, create a subdirectory called assets. Within the assets directory, create a subdirectory called css and then add the file admin.css.
The final directory structure should look something like this:

We're not ready to provide any type of styles just yet. Instead, we need to turn our attention to the server-side code responsible for enqueuing this stylesheet.
Enqueue the Stylesheet
When it comes to registering and enqueuing both stylesheets and JavaScript, most WordPress plugin developers are familiar with the hooks necessary to do just that. Specifically, I'm referring to admin_enqueue_scripts and wp_enqueue_style.
And though we are going to using these hooks, we're going to be setting it up in a simple, object-oriented manner. No, this series isn't meant to take a deep dive into object-oriented principles but, when applicable, I'm happy to try to show them to you.
The Assets Interface
In object-oriented programming, an interface is defined as such:
An interface is a programming structure/syntax that allows the computer to enforce certain properties on a class.
Another way to think of it is this:
If you have a class that implements an interface, the class must define functionality that the interface dictates.
So if the interface has two method signatures with a specific visibility and name, then the class implementing the interface must have two methods with the same visibility and name as well as an actual method implementation.
And that's what we're going to do. First, we need to define our interface. So in the util directory, create interface-assets.php and then add the following code:
<?php
/**
 * Defines a common set of functions that any class responsible for loading
 * stylesheets, JavaScript, or other assets should implement.
 */
interface Assets_Interface {

    public function init();
    public function enqueue();

}
Notice, the interface doesn't actually define functionality. Instead, it specifies what the classes that implement this interface should define.
As you may surmise, the classes that will implement this interface will have two methods above along with an actual implementation for each function. And we'll see how this works momentarily.
Next, make sure to include this file in the main plugin file:
<?php

// Include the files for loading the assets
include_once( 'admin/util/interface-assets.php' );
Next, we need to create a file that implements this interface. Since we're working with CSS files, we'll create a CSS loader.
The CSS Loader
This is the class that is responsible for implementing the interface and doing the actual work of registering the function with the necessary WordPress hook (and actually giving the implementation to said function).
If you take a look at the code below, it should look very similar to something you've seen or perhaps worked on in a previous project:
<?php
/**
 * Provides a consistent way to enqueue all administrative-related stylesheets.
 */

/**
 * Provides a consistent way to enqueue all administrative-related stylesheets.
 *
 * Implements the Assets_Interface by defining the init function and the
 * enqueue function.
 *
 * The first is responsible for hooking up the enqueue
 * callback to the proper WordPress hook. The second is responsible for
 * actually registering and enqueuing the file.
 *
 * @implements Assets_Interface
 * @since      0.2.0
 */
class CSS_Loader implements Assets_Interface {

    /**
     * Registers the 'enqueue' function with the proper WordPress hook for
     * registering stylesheets.
     */
	public function init() {

        add_action(
            'admin_enqueue_scripts',
            array( $this, 'enqueue' )
        );

    }

    /**
     * Defines the functionality responsible for loading the file.
     */
    public function enqueue() {

        wp_enqueue_style(
            'tutsplus-namespace-demo',
            plugins_url( 'assets/css/admin.css', dirname( __FILE__ ) ),
            array(),
            filemtime( plugin_dir_path( dirname( __FILE__ ) ) . 'assets/css/admin.css' )
        );

    }
}
The code above should be relatively easy to follow given the code comments, but I'll outline what's happening:
-
initandenqueueare both functions required as the class implements theAssets_Interface. - When
initis called, it registers theenqueuefunction with the hook responsible for registering a stylesheet. - The
enqueuemethod registers theadmin.cssfile and usesfilemtimeas a way to know if the file has changed or not (which allows us to bust any cached version of the file when serving).
In this implementation, the actual admin.css file is added on every page. Adding a conditional to check which page is currently active and then determining if the stylesheet should be added or not can be added as a post-tutorial exercise. For a hint, check out get_current_screen().
Next, we need to include this file in the main plugin file:
<?php

// Include the files for loading the assets
include_once( 'admin/util/interface-assets.php' );
include_once( 'admin/util/class-css-loader.php' );
Next, we need to instantiate the CSS loader and call its init method in the main tutsplus_namespace_demo function:
<?php

$css_loader = new CSS_Loader();
$css_loader->init();
Assuming you've done everything right, you should be able to refresh the Add New Post page, view the source, and see admin.css listed as an available stylesheet.
We've one more thing to do before we're ready to wrap up this part of the tutorial. We need to actually write some CSS.
Style the Meta Box
Since the majority of the tutorial has focused on some object-oriented techniques and we still have some new topics to explore in this series, we'll make this part relatively easy.
Rather than just using some default styles as provided by WordPress, let's enhance the meta box just a little bit.
First, locate the render function in the Meta_Box_Display class. Let's modify it so that it outputs the contents of the file in a paragraph element with the ID attribute of "tutsplus-author-prompt".
To do this, we're going to introduce a new method that will use a WordPress API method for sanitizing HTML.
<?php

/**
 * Sanitizes the incoming markup to the user so that
 *
 * @access private
 * @param  string $html The markup to render in the meta box.
 * @return string       Sanitized markup to display to the user.
 */
private function sanitized_html( $html ) {

    $allowed_html = array(
		'p' => array(
			'id' => array(),
		),
	);

	return wp_kses( $html, $allowed_html );
}
We'll then call this function from within the render method to display the content in the meta box.
<?php

/**
 * Renders a single string in the context of the meta box to which this
 * Display belongs.
 */
public function render() {

    $file     = dirname( __FILE__ ) . '/data/questions.txt';
    $question = $this->question_reader->get_question_from_file( $file );

    $html = "<p id='tutsplus-author-prompt'>$question</p>";

    echo $this->sanitized_html( $html );

}
Now we can open admin.css and make some small changes to update the look and feel of the meta box in the Add New Post screen. Let's add the following CSS:
#tutsplus-author-prompt {

    font-style: italic;
    text-align: center;
    color:      #333;

}
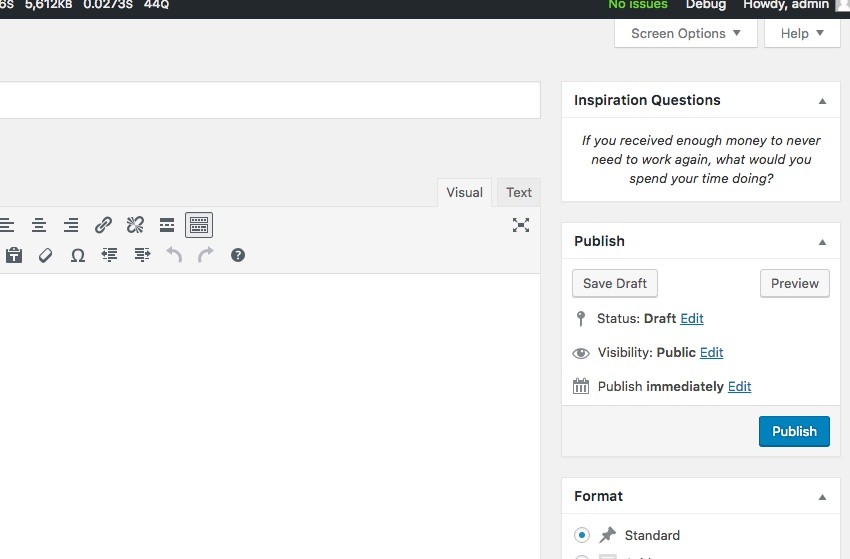
And at this point, your meta box should now look something like the following:

As mentioned at the beginning, it's nothing major, but it's something that enhances the look and feel of the question just a little bit.
What's Next?
At this point, we've introduced a number of different classes, interfaces, and other object-oriented features. We have a plugin that uses data from a text file, that communicates with the WordPress API, and that sanitizes information before rendering it to the homepage.
We've got a good foundation from which to begin talking about namespaces. So in the next tutorial, we're going to do exactly that. If you've yet to catch up on the rest of the series, then I recommend it as we're only going to continue building on what we've learned.
If, in the meantime, you're looking for other WordPress-related material, you can find all of my previous tutorials on my profile page and you can follow me on my blog or on Twitter.
Until then, don't forget to download the working version of the plugin (version 0.2.0) attached to this post. The link is available in the sidebar under a button titled Download Attachment. And, as usual, don't hesitate to ask any questions in the comments!


Comments