If you want to try an easy and full-featured popular web shop, OpenCart is the is a great option.
This second part of our OpenCart tutorial will show you some advanced Setting options such as setting up multiple languages, currencies, tax classes, user roles, shipping and payment methods, and so on.
This is a must read for OpenCart beginners.
I hope you are familiar with installing your own OpenCart which I explained in the first part of this series. In this article, you will learn more about the settings options, localization of OpenCart, user roles, basic layout logic, and default payment and shipping options.
Settings Walktrough
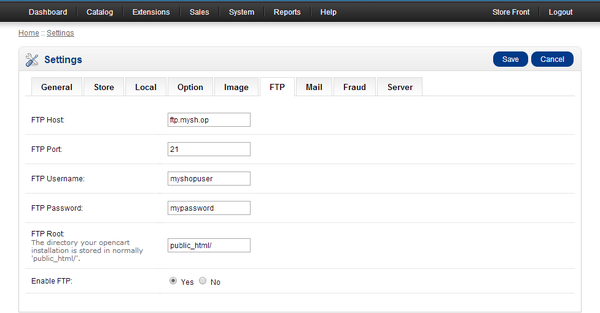
The main points of the Settings menu are covered in the third chapter of this series. Besides basic store info, image and basic localization settings, you can set up an FTP account for your web shop for faster image uploads under the FTP tab.
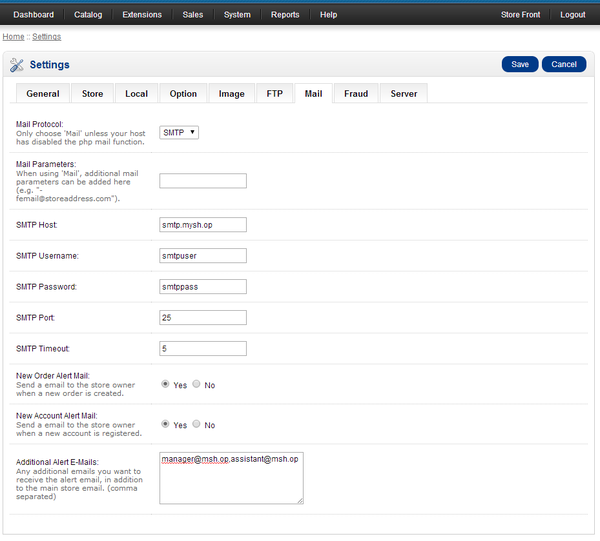
The Mail tab lets you add your own SMTP service account info. This can be useful if you plan to send newsletter e-mails. You can also add additional email addresses for order or new customer account alert messages.
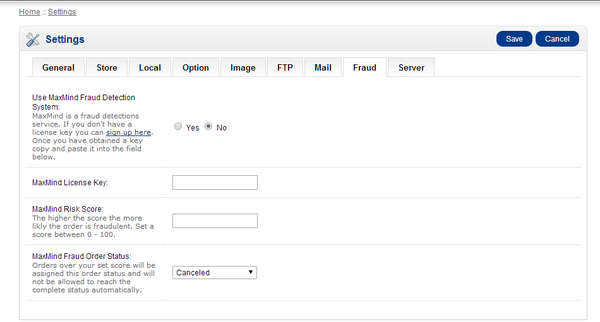
The Fraud tab holds the option for adding MayMind's fraud detection service to your web shop.
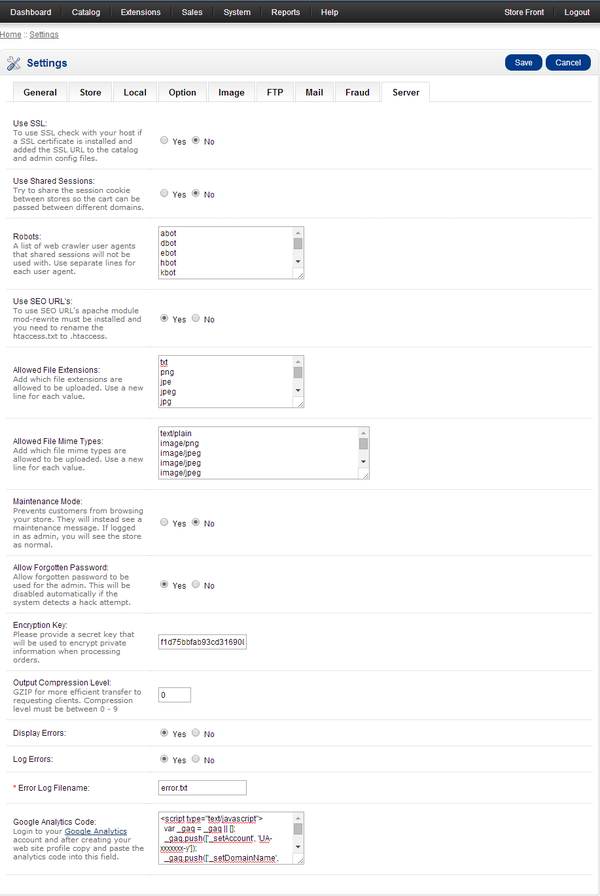
The Server options should be checked with your system admin to see if you are using SSL, shared sessions and just to make sure your setting matches the real server settings.
You can also edit the following options: ability for using SEO URLs, putting your store in maintenance mode, allow password recovery for admins, error display and logging, and a filed for pasting your Google Analytics code.
Localization Settings
OpenCart allows you to use multiple languages, multiple currencies, multiple shipping zones, tax rates, and set up your own unit of measure.
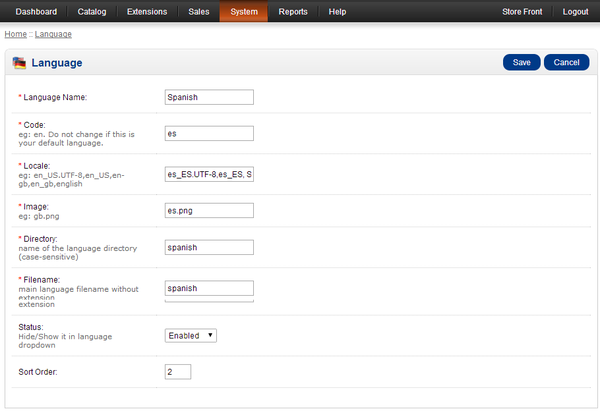
If you wish to use more than one language, for example Spanish, first you need to download a Spanish language pack from the OpenCart plugins repository, FTP the content of the archive to your OpenCart directory and than go to System > Localiation > Languages > Insert to add this language as seen below.
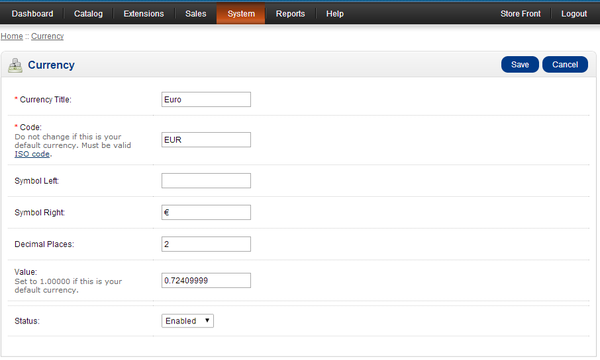
You can add or change currency at System > Localization > Currencies. When adding the new currency, you need to calculate the ratio of this and the default currency so the system can automatically calculate the price.
If you want to change to which countries to allow delivery, first create a geographical zone at System > Localization > Geo Zones. Here you can choose to which countries or predefined (regional) zones to pick as seen below.

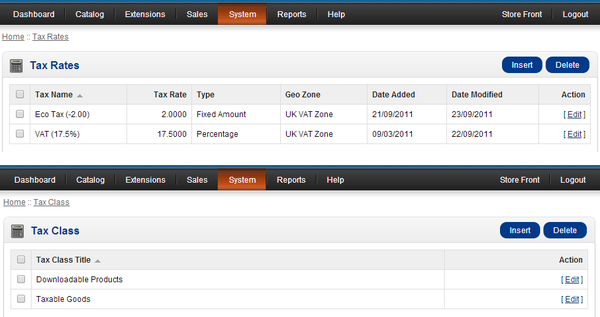
Changing tax classes and tax rates can be done if you go to System > Localization > Taxes. Tax Classes can be defined for example different types of product. Tax Rates can be defined according to your local taxation system.
Measurement units can be added or changed under System > Localization > Length Classes and System > Localization > Weight Classes.

Admin User Roles
If you have your own organization behind your web shop, you might want to set up an account for each colleague with different settings editing ability.
Let's say you would like to create an user role and an user account for your assistant. First, you need to create an "assistant user role" at System > Users > User Groups > Insert. Add the name of the group and select the permissions for accessing or modifying each module.

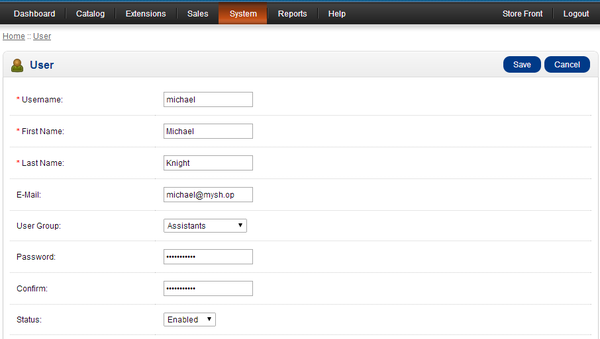
Second, you need to create a user account for your assistant colleague at System > Users > Users > Insert. Don't forget to send your colleague her/his credentials, since OpenCart won't send his or her login info when adding new user.
Layouts in OpenCart
Layouts in OpenCart hold settings like how many columns to display or what kind of modules (this is similar to widgets in Wordpress) can a column hold. An OpenCart default store comes with the following page layouts:
- Account
- Affiliate
- Category
- Checkout
- Contact
- Default
- Home
- Information
- Manufacturer
- Product
- Sitemap
You might have a wider list depending on your plugins or theme and you check it at System > Design > Layouts
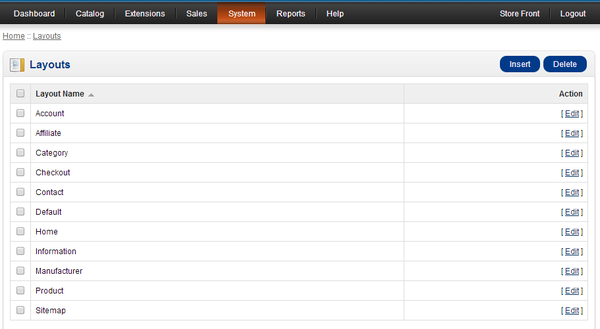
In order to see how they look, you need to check these kinds of pages, since layouts don't have descriptions or illustrations at hand. To make it simple, you should consider only these layouts: Home, Default, Information, Category, Product (since these ar the page types your visitors will see 90% of the time).
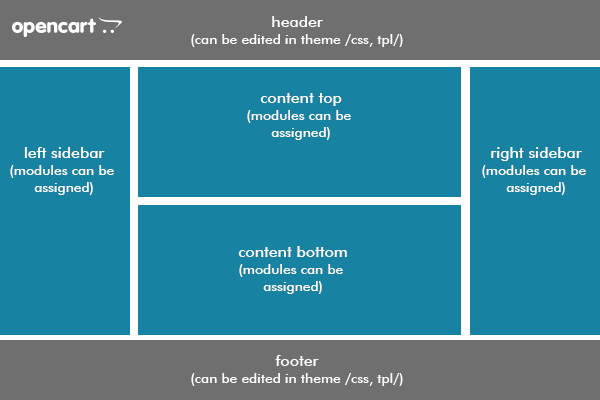
For example the Home layout in the default theme consists of a top part below the header and navigation, this is where you see the carousel and the main column's bottom part, where you can see the featured products. This layout allows to use a left and a right sidebar as part of the layout, but if no modules are assigned to it, they won't be seen.
To grasp the idea, see the illustration below. If you need to change the look and feel of these layouts, you have to check your themes settings or edit your theme's style sheet or template file.
Default Shipping and Payment Options
Setting up the basic shipping methods are easy in OpenCart. Go to Extensions > Shipping. Let's look at the most popular options: Flat Rate, Free Shipping and Weight Based Shipping.
Flat Rate let's you add a certain amount to the total for each sale. You can choose to which geo zone and which tax class to apply.

You can apply Free Shipping option if you wish to ship your products free above a certain amount of total price. You can apply zone and tax classes here, too.

Weight Based Shipping speaks for itself and can be used if you already assigned a weight to your products. You have to enter the price for the minimal weight.
This has its unique format and here's a simple example: if you want to assign £6 shipping rate for 10 or more lbs of weight, you insert: 10:6.00 If you want to rate £10 for the total weight of 20 lbs or above, you enter: 20:10.00.

Payment Options for OpenCart depends on which payment service provider you choose. In this tutorial there's not enough space for the description of each method, so I choose a very popular one, the PayPal Payments Standard.
To set up this standard PayPal payment for OpenCart, go to Extensions > Payments > PayPal Payments Standard. Insert your e-mail address that you use for your PayPal account. Select No for sandbox, for Transaction method, use Sale for PayPal's following reasoning:
"Sale" means that a customer’s account will be charged as soon as they make their purchase and is simpler to use than authorization.
Authorization" means that the bank will verify that the customer has enough funds to make the purchase, and guarantees that those funds will be available for the next three (3) days. However you will still need to actually charge them, in a process known as "payment capture", later. This is useful if you do not want to charge customers until their item has shipped, for example."
Choose Disabled for debug mode if your store is live, for Total, enter an amount or leave it empty, associate PayPal status with your store's order status, assign a geo zone and enable it.

Where Are We Headed Next?
Now that you've learned some advanced setting options to bring OpenCart closer to your business needs, you are ready to learn much more about products, categories and content pages.
We'll be doing exactly that in the next article in the series.

Comments