In the previous article we added an External/Affiliate type product. Let's talk about adding the fourth type, i.e. variable product. If you categorize any product as variable it means that this single product will have many variations, which may be in terms of color, price, stock status, etc. This explains the complexity of this product type, as each variation of a single product may have different values for color, SKU, price, stock status, shipping, etc. In today's article I will teach you how to create a Variable product in WooCommerce.
Adding a Variable Product
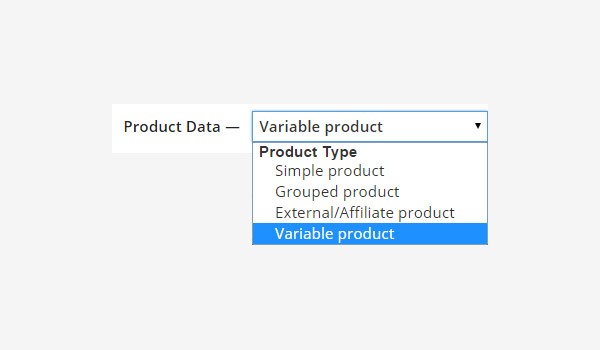
To create a Variable product, choose the fourth option from Product Data.
Let's look at the setting tabs for Variable products in WooCommerce.
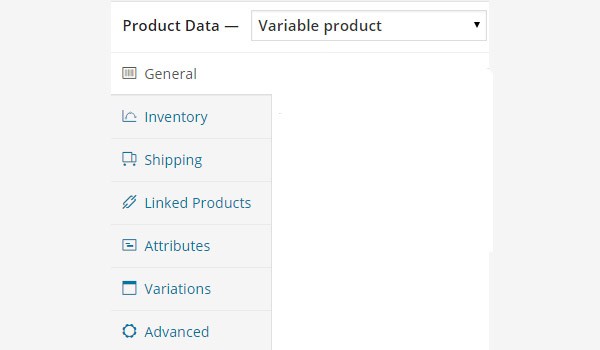
Here we see an additional tab named Variations. You can also find some changes in the Attributes tab.
Attributes
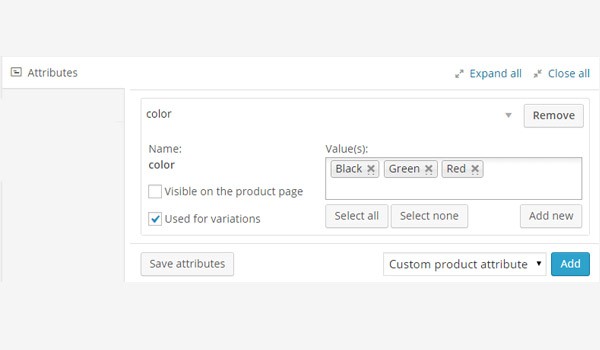
In the Attributes tab if you select color and click Add button then you will find a new checkbox of Used for variations. Assign all the values for your attributes and enable this checkbox. After this, click Save attributes and save your product by clicking the Save Draft button displayed in the top right window.
Now let's come to the Variations tab.
Variations

After saving the attributes you will see different options in the Variations tab. To add any new variation click the Add Variation button.

When you click add, certain new options appear, which can be seen in the above figure.
SKU
Starting from the left, the first field is for the SKU (Stock Keeping Unit) which is basically a code that will give your variation a unique identity. You can leave it blank if you prefer.
Image
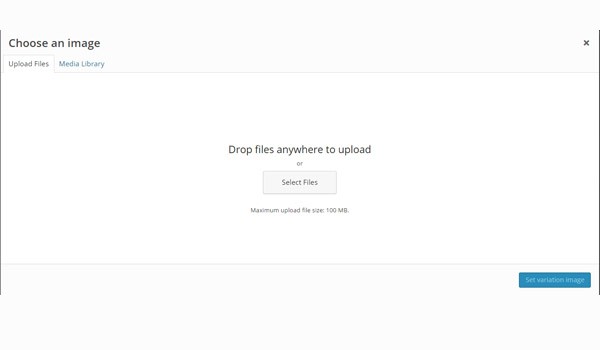
Below the option of SKU is the image window, which you can click to add the icon for the variation. Once you click it, an image uploader will appear, where you can either add a new image file or select one from the existing media library.
Stock Qty
If you want to enable the functionality of stock management then you may fill out this field, which will specify the in-stock status of the variation. If you leave this field blank then it makes use of the parent product's stock setting.
Regular Price
Edit this field to enter the price for this variation.
Sale Price
Edit this field for the sale price which will apply in case of any discount that you are offering on a variation.
Weight
Enter the weight for the variation in this field. If you leave this field blank, the parent product's weight will apply on this variation.
Dimensions
Like weight, you can enter the dimensions for your variation or leave it blank to apply the parent product's dimensions.
Shipping class
Select the Shipping class for your variation. As a default it will belong to the parent's shipping class. However, if you choose some other class then it will definitely affect your variation.
Tax class
The next option allows you to choose the relevant tax class for the variation. You can choose same as parent, Standard, Reduced Rate or Zero Rate as your Tax class.
Enabled, Downloadable, Virtual
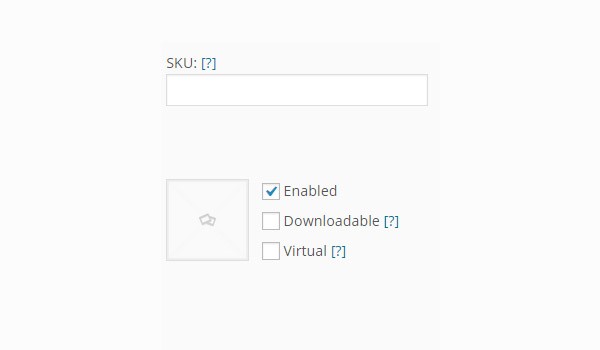
Next to the image icon, you can see three different checkboxes which show the options of Enabled, Downloadable and Virtual.
Enabled
The checkbox for Enabled controls the entire status of any variation. If you disable this option then the variation becomes inactive and is not available to the customers.
Downloadable
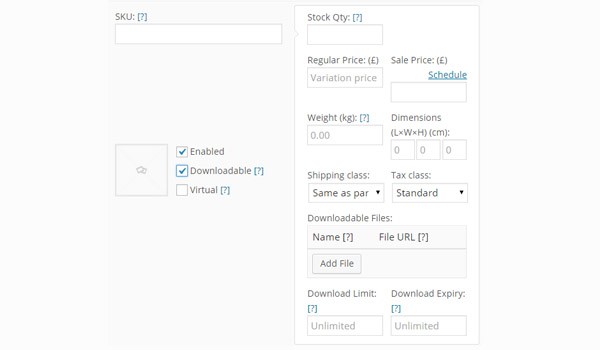
With the option of Downloadable you can offer a downloadable variation to your customers. This means that when they purchase any product it will appear as a downloadable link. Here you will notice one more thing!
Once you enable this option you will see some options being added in the section of variations (see figure above). These options are:
- Downloadable Files: With this field you can click the Add File button to add any new downloadable variation. Fill out the fields for Name and File URL for the file which will be shown to the customers on the front-end.
- Download Limit: This option decides the limit to which any customer can re-download the file. Leave blank to allow unlimited re-downloads.
- Download Expiry: You can enter the number of days after which the downloadable link expires and will no longer be available to the customer. Again you may leave it blank to allow unlimited validity time.
Virtual
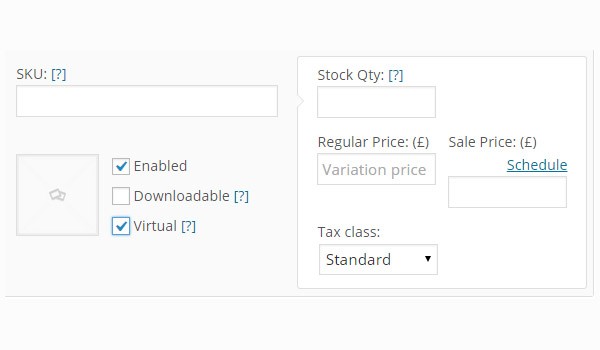
If your product is virtual then check the Virtual checkbox. As soon as you enable it, certain options like weight and dimensions disappear.
Defaults
Towards the end is the option for Defaults, which will decide which attributes this variation will apply to. You can select No default Color... to represent the general application of the variation. However, you can choose a particular color as well.
Bulk Edit
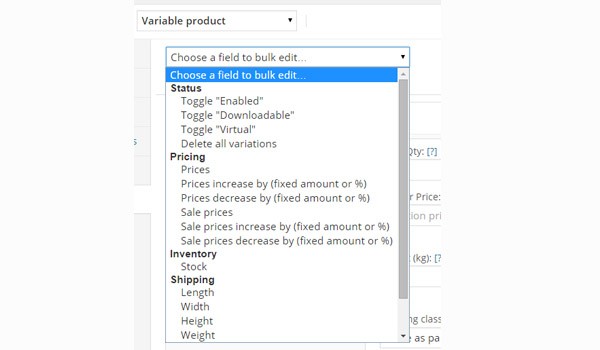
The option for Bulk Edit will allow you to apply bulk actions on a particular group of settings. Here you will find a large number of options in a dropdown menu. For example, if you select Prices then whatever change you make will apply on all the prices in that particular variation, all in a single click.
Link all variations
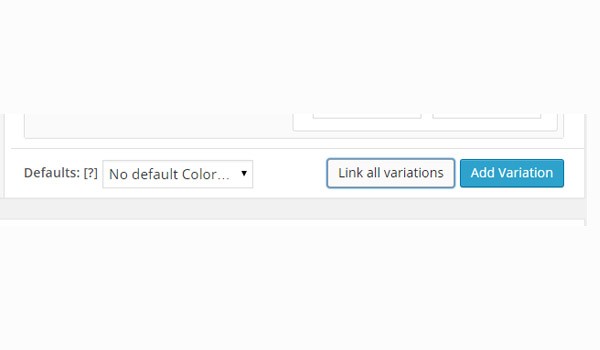
You may click the Link all variations button to avoid adding each single variation every time. For every varying attribute, this button will create a new variation. For example, if two attributes are for height (tall and short) and shape (round and pear-shaped) then the possible new variations will be:
- round tall
- round short
- pear-shaped tall
- pear-shaped short
This completes the configuration of options which are necessary to create a Variable product in WooCommerce. In other options, for example in the Advanced tab, all the settings are similar to what we saw in earlier articles.
This is how we add a variable product. If you have any questions, use the comments section to ask.

Comments