Introduction
If you haven't heard of it before, Sympli is a tool designed to simplify the process of taking an interface designed in Photoshop or Sketch and implementing it for the web or as a functional iOS or Android application. The workflow works like this: first, a designer creates a project for web, iOS or Android which can contain any number of designs. These designs represent the different screens that should be available in the application which you are developing. Next, the developer can use these designs to easily create an interface for a website or new app.
In this article, I will show you some of the many features that Sympli offers for developers to create apps for iOS or Android easily, building on the work done by designers.
If you want to see what Sympli has to offer for designers, then check out this article by Kezz Bracey:
1. IDE Plugins
Using Sympli as a developer begins with downloading and installing a plugin for either Android Studio or Xcode. Installing these plugins is very easy, and the video tutorials shown on the linked download pages will help you out if you have any problems.
2. Inspecting Design Mockups
Sympli plugin for Android and Xcode provides access to interactive design specifications (some teams use the term "red lines documents"). Open a mockup and click on the design elements to get all the necessary information required to implement the design in your app.
As shown in the following screenshot, Sympli gives you all the information you could possibly need about any particular view so you can implement a pixel-perfect design manually in code or in Interface Builder or Layout Editor.
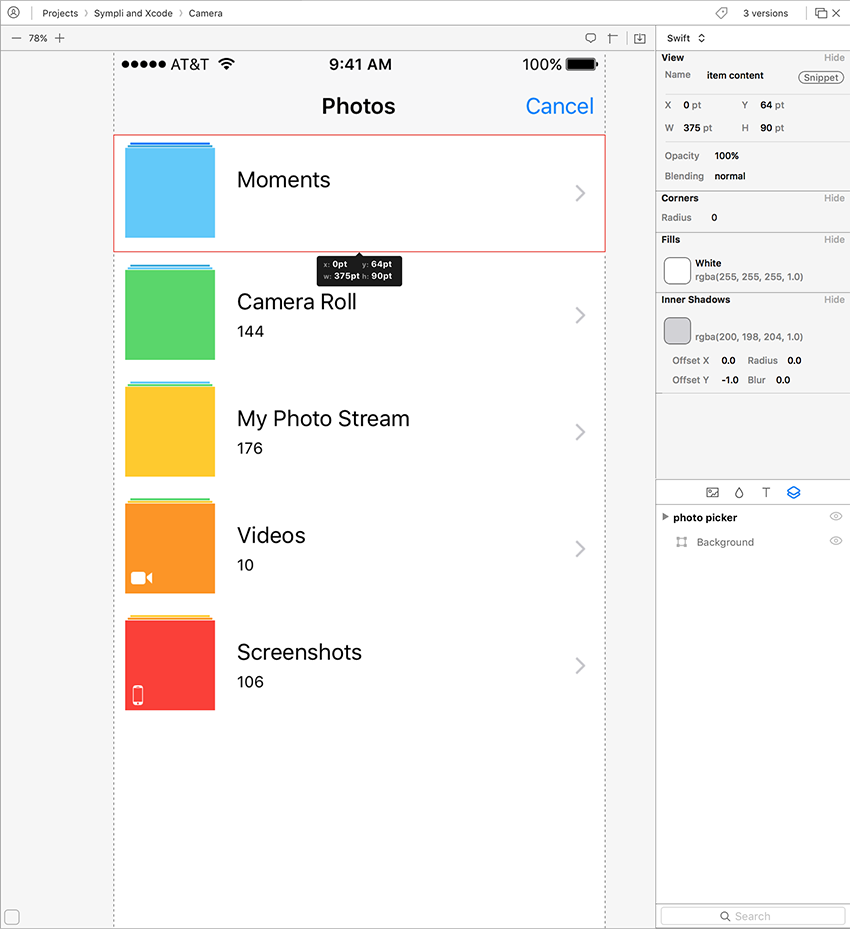
Please note that Sympli automatically converts pixels in design mockups to points, as well as other parameters like fills, shadows, and borders to Android or iOS-specific terms and units.
Also, in case the mockup was created in Sketch, Sympli plugin will display the resizing rules applied to widgets in Sketch, which helps developers set proper constraint values.
Drag & Drop Views
One of Sympli's main features for developers is the ability to just drag and drop views from a design into an Android XML or iOS Storyboard file. Sympli takes care of a lot of the hassle when creating interfaces by positioning and sizing your views exactly as they appear in the original design. In addition to this, Sympli can also configure many other attributes such as background colour and custom fonts for text views.
To apply styling to the existing view in Interface Builder in Xcode, press the "Shift" button than drag and drop the design element into view.
To generate a styling code for the views created programmatically, do a drag and drop into your controller’s code with the right mouse button pressed.
From here, all you have to do is modify the constraints of your views so that they can adapt how you would expect on devices with different screen sizes. For iOS this would mean adding Auto-layout constraints, and for Android it would mean configuring the views in the right sort of layout for your design.
Building Custom Views With Sympli
In addition to the generation of styling code for standard views, Sympli’s plugin for Xcode helps developers build custom controls based on the vector data from design mockup.
Select a vector shape on the mockup and press the "Snippet" button next to a layer’s name in the details panel. This will bring up a popup window with Swift code that draws in the same way it was designed programmatically. There is also a handy option to copy a Xcode Playground-ready code to continue building a custom view with a live preview of playground right away.
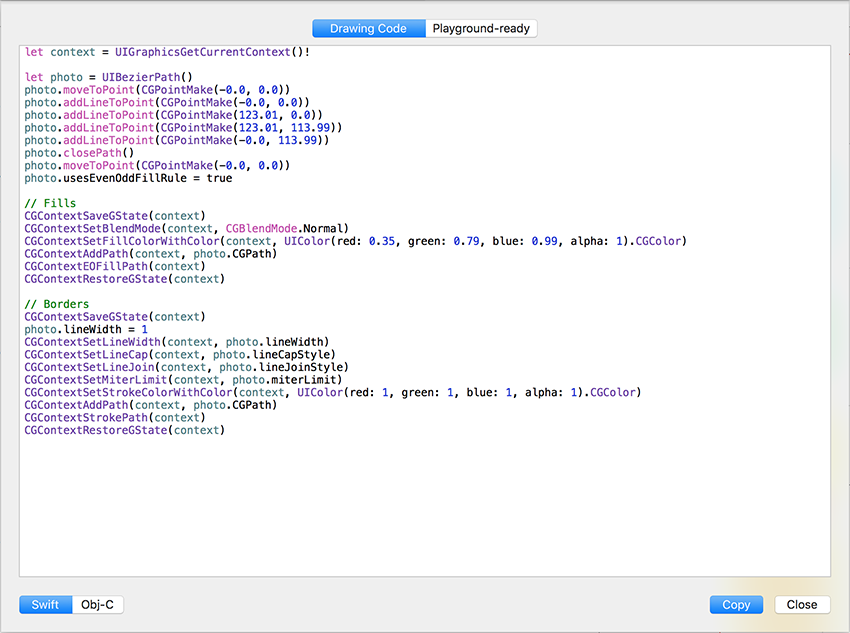
This is extremely useful for any applications which require some manual drawing of views on the screen.
3. Assets Import
As long as everything has been configured and uploaded correctly by the designer, Sympli can take care of importing images and custom fonts used in the design. Upon import, Sympli prompts the designer to name the image or font according to the platform best practices. For example, if an image called Image 1 is being uploaded to an Android project, Sympli will prompt the designer to rename it image_1. This ensures that you don't have to waste development time renaming files so that they can be loaded easily. In addition, developers can create renaming rules so that they will be applied every time the mockup is updated.
In both the Xcode and Android Studio plugins, clicking on the button shown below when viewing the images or fonts in a design will import them into your project.
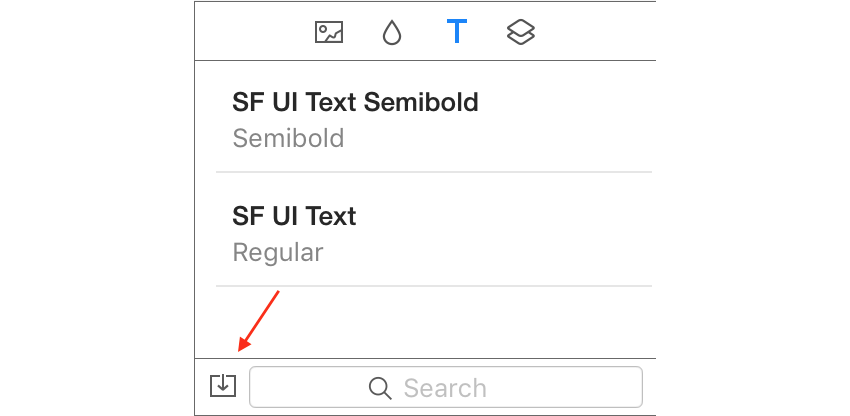
Sympli is very intelligent about importing assets. It will put images into your asset catalogs on iOS and in your project's resources folder on Android; it will even create scaled versions for different devices automatically.
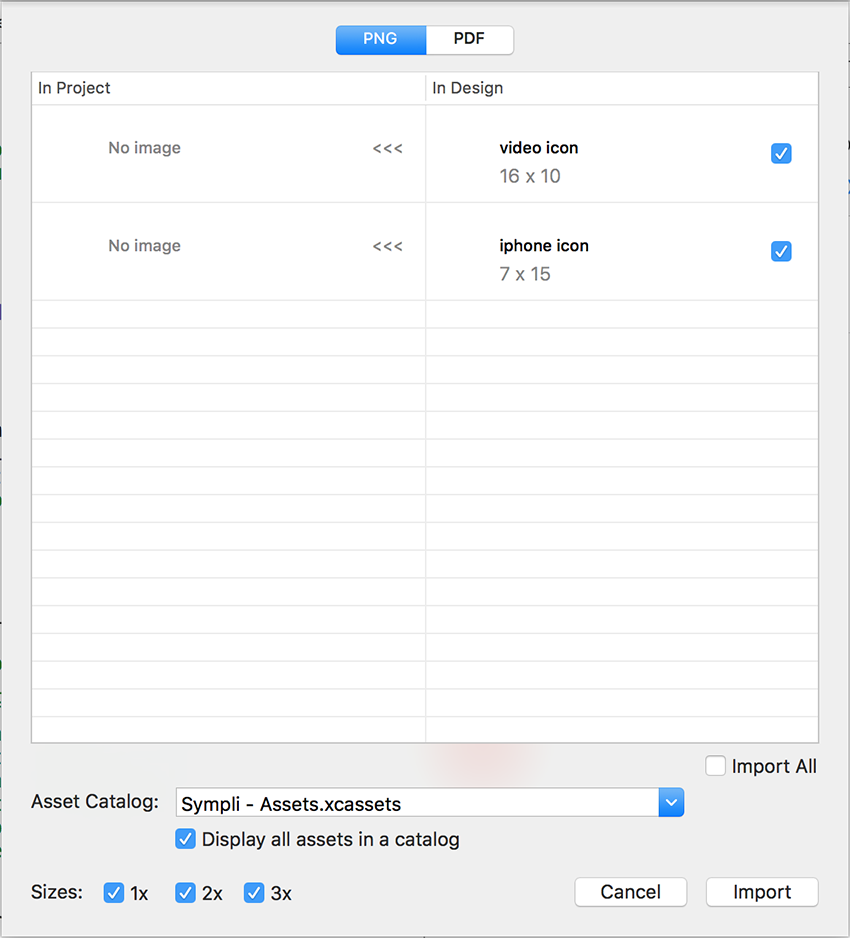
Note: The Sympli has announced that they will soon add an option for both the Android Studio and Xcode plugins to export vector assets (PDF for iOS and VectorDrawable) from any vector layer in the mockup.
4. Automatic Syncing of Design Mockups
By default, Sympli enables automatic syncing for your project's design in both the Xcode and Android Studio plugins. This means that, even as you are working, if the designer makes some changes and uploads them to Sympli, the new design will immediately be available in Xcode and Android Studio.
When changes are made to a design, Sympli will automatically download the latest version of the design and notify you of the update. This ensures that you never have to manually check that you're working with the latest designs and also eliminates the need for the designer to notify you when they've made changes.
5. Design Versions
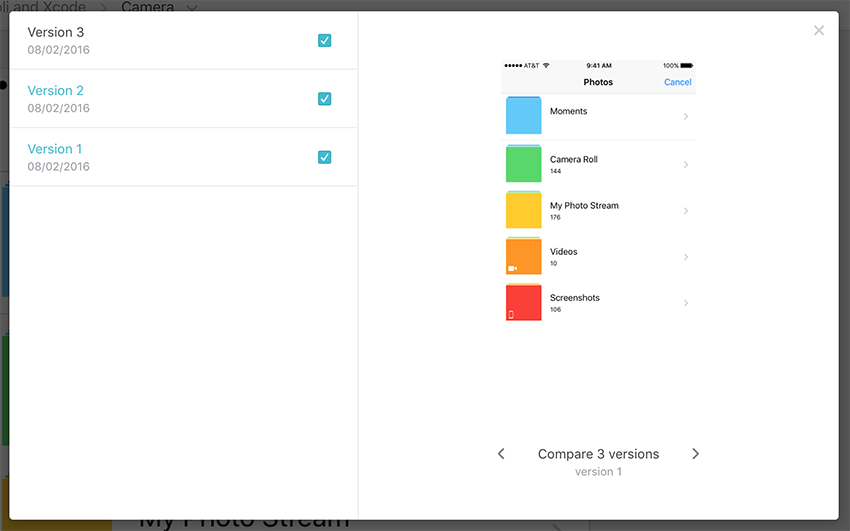
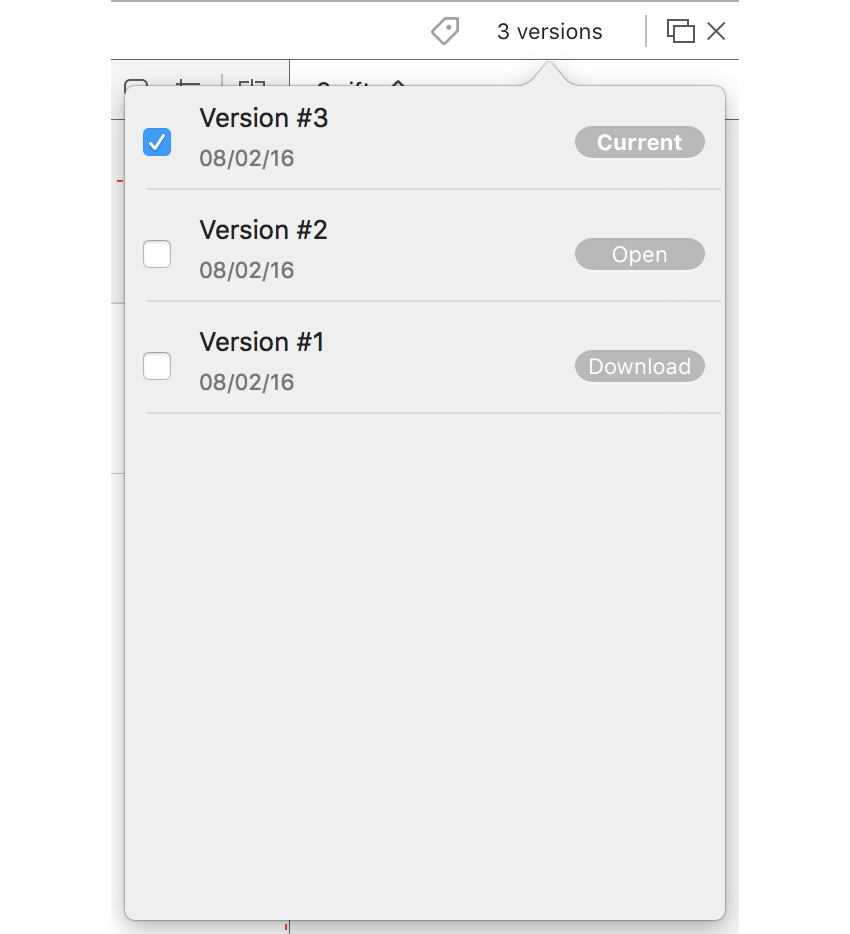
In addition to just automatically downloading the most recent copies of designs for your project, Sympli also makes it very easy to view previous versions of any design. Both in the IDE plugins and in Sympli's web app, you can very easily go and look at previous versions of any design.
This can be particularly useful if you aren't sure what changes have been made in the latest version of a specific design. In Sympli's web app, you can easily flick between different versions of the same design to see what changes have been made:
Lastly, this backlog of previous versions can also be very useful if a revision of your app requires an older design to be used. Avoiding the hassle of trying to find an old file in your downloads in an email, with Sympli you can just select a version from a simple drop-down list in the IDE plugin:
Sympli Webapp provides a change browser where you can visually compare any two versions of the design mockup and see the changes side-by-side. This makes additions, deletions, and other updates immediately obvious to the eye, increasing the teams’ productivity as a result. Not only that, developers can also see the changes on a property level—for example if a color changes slightly or a border becomes 1px thicker.
For any mockup uploaded to Sympli more than once, there will be a "Browse Changes" button in a top bar that opens a side-by-side change browser. Select mockup versions you want to compare and click on the highlighted regions to see the actual changes.
6. Project Summary
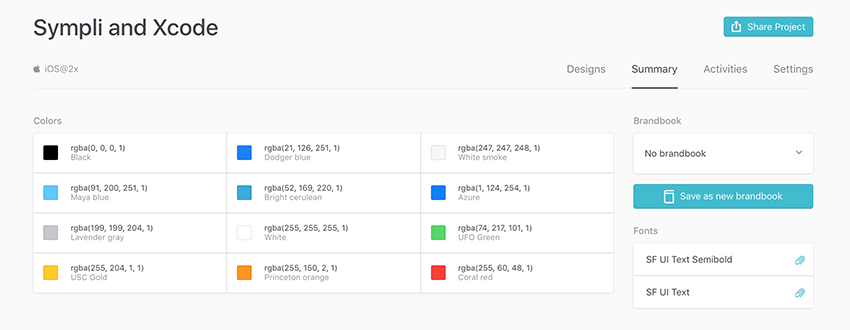
Both the Sympli web app and IDE plugins can show you a Summary for any project. This summary screen shows you all the colours and fonts used throughout the entire project. This can be very useful if you need to get the details of a specific colour or font and aren't entirely sure of which design that resource is used in. It can also be used as an always-available reference when developing your app if you need to use an exact colour or font someplace where a design hasn't been provided to you.
Conclusion
As you can see, Sympli makes it much easier to develop an app from interface designs created by someone else. Sympli takes care of a lot of the manual work involved in converting PSDs or Sketch files into a Storyboard for iOS or an XML for Android. This time saved because of Sympli can be used more productively—for example, you can spend your time on actual functionality rather than tediously copying colour codes and images!
If you want to find out more about Sympli or would like to try it yourself, then head over to their website and check out some of their great video tutorials on how to install and use the Xcode and Android Studio plugins.
As always, please be sure to leave your comments and feedback in the comments below.



Comments