This article shows you how to set up deep linking in your Flex application that can be seen by end users as well as search engines.
It's a tutorial mainly for all of the other cut-and-pasters out there who don't have the time or energy to truly learn how to create a proxy class for use with SWFAddress, and most likely aren't programmers by trade.
Final Result Preview
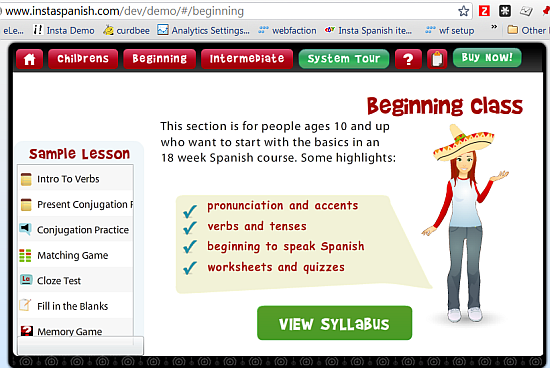
Let's take a look at the final result we will be working towards, notice how the browser bar reflects the title of the page, Beginning:
Download the Source files and use them as a reference while you read this tutorial.
Background
This is my first Flex tutorial, and one I can only write after stating the following caveat: I am really just a cut-and-paste coder, albeit one with nearly 10 years of AS1, AS2, and now AS3 experience, which has given me a pretty good comfort level with it. I do write a few functions, if-statements, vars, and things like that -- but I'm more of a hackmeister than anything, which sometimes leads to creative coding, while other times leads to wasted time on things I haven't read enough about before experimenting with!
Deep linking is about a lot more than just SEO; it's about usability. I think a lot more about usability after having built an e-learning app. Now I notice when a Flex or Flash app backs you completely out of the app when you hit the back button, and think how I don't want my users to experience that annoyance. Who wants to scroll through all of your lessons looking for the one activity they want to do again, or email to their friend?
Deep linking is about a lot more than just SEO; it's about usability.
This is a tutorial mainly for all of the other cut-and-pasters out there who don't have the time or energy to truly learn how to create a proxy class for use with SWFAddress, and most likely aren't programmers by trade. While I can appreciate some of the tutorials from the SWFAddress site that give a lot of technical minutiae about why you have to do things properly, and how bad practices will break your app, etc -- sometimes a person just needs a way to make things work in a way they can understand. Some of those articles make you think that you can't possibly get deep linking working unless you can write oodles of code yourself.
The reason I'm going to share my coding experience on this is because I googled the heck out of SWFAddress, datagrid, and Flex, to no avail. I didn't find any direct examples of somebody using SWFAddress to create dynamic URLs from their datagrid within their Flex app. My husband joked that it must be because it's so obvious that nobody has bothered to blog about it, but as you can find Flex examples, tutorials, and code for nearly every basic coding issue, I highly doubt that. So here you go!
Step 1: Gather your Tools
You will need the following items in order to complete this tutorial:
- Your Flex/Flash building IDE (for example: Flex Builder, Flash, FlashDevelop).
- SWFAddress 2.4 and SWFObject 2.2
- GAforFlash (Google Analytics Tracking For Adobe Flash).
- A good spreadsheet app.
- An Apache or PHP setup you can test with, or website you can upload and test to.
- A good search and replace editor like Notepad ++ to clean up the text you take out of the spreadsheets.
- The free Vigos Gsitemap creator.
You can also download the file package for this tutorial, which includes a key file containing the actionscript examples from below: RoutingEvents.as.
Step 2: Import SWFAddress; Create URL Views
Since I focus on the datagrid and SEO for this tutorial; I assume that you already know how to create the URL views for SWFAddress. If you don't, you can look at the code for creating the URL views in the RoutingEvents.as file included for this tutorial to see how I did it.
Step 3: Create your Datagrid Variable
I knew off the bat that I needed to tie my page URLs to a variable present in the XML that populates my datagrid. Getting that variable to write to the URL is easy. I created a var from the attribute I wanted to use from the XML for my page URLs:
[Bindable]private var slug:String
So great, I was able to quickly set the URLs for my datagrid items, which instantly resulted in the pleasant experience of seeing my datagrid clicks actually change the URL in my browser.
But of course deep linking consists of two things: telling your browser what you want it to see, and your browser telling your app what IT wants to see. The second part proved to be much harder.
What I finally got my brain around after days of tinkering, was that when you navigate to a URL within your app directly from your browser - your app has no idea what data you want it to display. Your app only knows what you communicate through the URL, and what you've set up as the rules to follow if certain values are found in that URL. So if you have more than one data source or xml file, as most fairly complicated apps do - you are going to have to set up conditions for presenting the exact data the URL demands be present in order to successfully serve up the view that URL is requesting.
At first I naively thought that by just using that slug var I could tell SWFAddress to look for that value, then go to the corresponding entry's index number in the datagrid. But setting that up, and getting the variable correctly passed at the right time - only happened after extensive trial and error; tons of Alert.show (slug) and other Alerts to see what was actually being passed at what time, and some great code I found online to match up a datagrid row with a particular value, then scroll to the index in order to show the value.
I do agree with one of the more complicated articles/tutorials found on the SWFAddress website: you have to choose your variables very carefully when using them with SWFAddress. Make sure they contain some good information - information you can parse into things like page Titles and unique identifiers for a datagrid or list item. My activityId variable from my XML turned out to be the perfect var, because all of the activityIds for a given lesson are:
- unique
- contain the lesson name
- contain the activity type
Some example activityIds:
- present_verbsvocab
- present_verbsquiz
- weather_worksheet
This information is now what SWFAddress is using to navigate to the right lesson as well as individual activity.
Step 4: Create a Section Variable if Necessary
For other things like sections, you can set those up using SWFAddress as your setter/getter (I'm using this term loosely as frankly I am not sure if this meets the technical definition of a setter/getter! [Ed: you can find out with this tutorial ;)]) - in my case I set the variable called section when a user clicks on a datagrid entry in that section, or navigates to a new section, then I get that value back out of the URL if somebody navigates to that section. In my case my main sections are:
- childrens
- begining
- intermediate
- newsletter
These sections are set in my handleSWFAddress() function:
private function handleSWFAddress(event:SWFAddressEvent):void
{
	case "/childrens":
	section='childrens'
	break;
}
Step 5: Pass the Variables via your Datagrid Click Event
Then in my click event for the datagrid, I pass the section and slug variables on as the URL:
selectedRow=Row(myD
slug = selectedRow.activityId;
SWFAddress.setValue("/" + section + "/" + slug);
Step 6: Pass your Title to the Browser via the Datagrid Click Event
Setting the title was slightly trickier, because I wanted to use the lesson title which isn't in fact part of the stripped down XML I'm using for this demo app - so I added an attribute that only needs to be present in the first row of my XML in order to set the lesson title.
Here is the code from my datagrid click event that makes this happen:
SWFAddress.setTitle(myDG.dataProvider.getItemAt(0).title + " Spanish Lesson - " + selectedRow.lessonTitle);
The getItemAt(0) is a nice little function that allowed me to put a title for the browser in just the first row of each XML file, which gives the pages a better description. Now instead of my lesson activity pages reading:
Vocabulary Activity
They read:
Present Verbs Spanish Lesson - Vocabulary Activity
This works because getItemAt(0) retrieves the first node from the XML file.
Step 7: Parse your Datagrid Variable Strings in your SWFAddress Handler
To use your slug value effectively, you have to extract it from your URL. So I finally figured out that I needed a new variable, which I call slugAdd. I use this in my SWFAddress handler:
private function handleSWFAddress(event:SWFAddressEvent):void
{
	var path:String = SWFAddress.getPath();
	var slugAdd:String = SWFAddress.getPath();
	slugAdd = slugAdd.replace(/\/childrens\//g, "");
	slugAdd = slugAdd.replace(/\/beginning\//g, "");
	slugAdd = slugAdd.replace(/\/intermediate\//g, "");
	slugAdd = slugAdd.replace(/\/newsletter\//g, "");
	//Alert.show (slugAdd)
This String parsing is so simple here - but it has to be exact in order to work! Your slugAdd must be identical to your slug value, so that your datagrid match up function will work, and your URLs will take you to the correct row. So looking a bit closer - we are doing a simple String replace. You take a URL like:
http://www.myapp.com/main.html#/childrens/present_verbsvocab
And after you do
slugAdd = slugAdd.replace(/\/childrens\//g, "")
If you run the Alert.show (slugAdd) - you will get
present_verbsvocab
(I'm aware that my use of the underscore in my slug value is not best practices for naming conventions for URLs, which demand that I use the dash instead - but we have over 1000 lessons in our main app which use this, so I'm sticking with it).
The thing to remember about the replace() function in AS3 is that your String value needs to be contained between forward slashes -
slugAdd.replace(/childrens/g, "myReplacementText");
...and if you want to also replace a forward slash itself, you have to escape those characters by using a backward slash before it. That is how you end up with
slugAdd = slugAdd.replace(/\/childrens\//g, "")
The g part tells it to do the replace on all characters and not just the first one, and the "" is for your replacement, which in my case was no value at all. For more info, check out the LiveDocs on String.replace() and RegExp.
This seems so simple now, but it took a lot of google searching for me to figure out that I didn't have to use some big long complicated function just to strip out some values from a String. Caramba I wish I had found a tutorial like this before I started :) Alrighty so now we have our slug, or the URL we are getting from the datagrid's XML file, passed on as a new var called slugAdd. But we still need to do something with this variable.
Step 8: Get your Datagrid to Display the Correct Row and Fire Any Events
There are basically three essential functions that make my SWFAddress deep linking work (I'm not going to cover the SWFAddress.setValue() because it's so easy and obvious I think a cave man could use it :)
Function One: handleSWFAddress()
handleSWFAddress(event:SWFAddressEvent):void
Your workhorse for all navigation stuff. Having it as an event appears to be important, as at first I used another example online that didn't use that distinction, and this definitely works better.
Function Two: getSelectedItem()
getSelectedItem():void
This must be called after the data is already populated, or in your result handler for your data call. Timing is very important here, or your items will fail to load when people type the URL directly in the browser rather than clicking through your app! This function matches an incoming URL with a specific item from a datagrid.
Function Three: itemfromAddress()
itemfromAddress():void
This is what actually does something with the datagrid entry - replicating my datagrid click handler in a non event function, since you cannot call an event based function from another function.
Let's take these in order of how they will be used if somebody types in a URL into the browser, looking for data from your app. Since this tutorial is focused on navigating your datagrid - I'll post this example from my handleSWFAddress() even though you can see the rest if you look at the RoutingEvents.as file included with the download for this tutorial.
case "/childrens/" + slugAdd:
This code below is the Google Analytics code that is easy to add right alongside SWFAddress.
tracker.trackPageview( "/childrens/" + slugAdd);
This if-statement checks whether the myURL variable which feeds my HTTPService data call is what we need for this section, and if this variable is not already set, it's most likely because the user is navigating via URL and the app has not been loaded yet, so we have to tell the app which data this URL is expecting to see. We wouldn't want remove that dataProvider's data if the user is already in the app and navigating through the datagrid, which is why we need the if statement. Also, just in case they have been someplace else in our app with other data, and navigate via URL to this view - we need to chuck that data, refresh the datagrid, and resend the HTTPService data call - otherwise we'll end up with extra data in our datagrid which will mess up our matching up of slug variables with slugAdd variables.
if (myUrl != 'data/childrens_updown.xml'){
	myUrl = 'data/childrens_updown.xml'
	invalidateDisplayList();

	lessonsDataProvider.removeAll()
	lessonsDataProvider.refresh()
	httpService.send();
	myDG.dataProvider = lessonsDataProvider;
	myDG.validateNow()
	//Alert.show("I've changed data to " + myUrl)
}
If the user is entering via URL - they already executed the getSelectedItem() function at the end of their data call. But if that data is already loaded and they are still trying to navigate via the browser instead of clicking on the datagrid, they will need to match up that browser URL with the activity the browser is expecting to see, so we need to call this function in that case:
getSelectedItem()
currentState="class1State"
We are setting our section variable here to insure that as a user clicks through the app, the correct section will be added to the URL,
section='childrens'
break;
So let's look at the code again all together:
case "/childrens/" + slugAdd:
tracker.trackPageview( "/childrens/" + slugAdd);
if (myUrl != 'data/childrens_updown.xml'){
	myUrl = 'data/childrens_updown.xml'
	invalidateDisplayList();
	lessonsDataProvider.removeAll()
	lessonsDataProvider.refresh()
	httpService.send();
	myDG.dataProvider = lessonsDataProvider;
	myDG.validateNow()
}
getSelectedItem()
currentState="class1State"
section='childrens'
break;
Now let's look at the piece of beauty that really made the whole thing work. I modified this from a piece of code written by Anuj Gakhar on his blog entry Flex : How to pre-select an Item in DataGrid:
private function getSelectedItem():void {
	//Alert.show ("I'm doing a getSelectedItem")
	var slugAdd:String = SWFAddress.getPath();
	slugAdd = slugAdd.replace(/\/childrens\//g, "");
	slugAdd = slugAdd.replace(/\/beginning\//g, "");
	slugAdd = slugAdd.replace(/\/intermediate\//g, "");
	slugAdd = slugAdd.replace(/\/newsletter\//g, "");
	//Alert.show (slugAdd)
	//Alert.show (myDG.dataProvider.length + " dataProvider length" )
	var gData:Object = myDG.dataProvider;
	if (slugAdd) {
		for (var i:int = 0; i < myDG.dataProvider.length; i++) {
			if (myDG.dataProvider[i].activityId == slugAdd) {
				myDG.selectedItem = myDG.dataProvider[i];
				//Alert.show (myDG.selectedItem.activityId + " " + slugAdd  + " index = " + myDG.selectedIndex)
				myDG.validateNow();
				myDG.scrollToIndex(i);
				itemfromAddress()
			}
		}
	}
}
These Alerts really helped me, as originally I had this code at the top of my handleSWFAddress() function, which didn't work. This function needed to be called at the end of my dataProvider's result handler, which in turn had to be called by my switches containing the slugAdd variable captured by SWFAddress. Otherwise the data isn't there yet, and your getSelectedItem() won't find any items to match up to the URL value that has been captured.
And finally, the function that ties my SWFAddress handling all together with events that change out what the user sees: itemfromAddress(). This changes the lesson SWF displayed in my SWFLoader, just like it would if a user clicked on a different row in the datagrid.
private function itemfromAddress():void
{
	swfLoader.unloadAndStop();
	SoundMixer.stopAll();
	selectedRow=Row(myDG.selectedItem);
	swfLoader.source = selectedRow.fileName;
}
Step 9: Make Sure dataProvider is Correct and Data is Only Listed Once
I ran into another problem: in my case, I found that loading data into my main datagrid upon the app's init would cause problems when trying to switch that data when people try accessing different data directly via URL. The same data that would load just fine when they clicked through the app, became inaccessible if they tried using the same URL directly on a fresh page where the app had not yet been loaded. This caused me an entire day of grief while I added yet another bunch of Alerts to my code, and tried to figure out what the problem was with the data loading.
In the end, for my dataProvider that is dynamic, I had to leave this blank on the init of the app. This meant changing my home screen from one with data to one without. The other solution could be to use another dataProvider, but I decided I didn't need to do that, as a static screen works better the app's home screen anyway.
I also figured out that I needed to use those if statements to check whether the correct dataProvider was already loaded or not.
While getting my brain around SWFAddress, I had to remind myself again that the browser has no idea what data you are trying to load unless you tell it what data should be there. By itself, your variable slugAdd means nothing. But once you capture that value, and put the variable in play in your handleSWFAddress() function, you can easily match it up with your datagrid index and perform something like your click function for your datagrid.
Another thing I had to do was keep my data from being listed twice in the datagrid, which can be a problem when you are sending the same HTTPService request in different parts of your app. I found that this works nicely to keep datagrids from failing to remove the XML from the previous data request.
lessonsDataProvider.removeAll()
lessonsDataProvider.refresh()
httpService.send();
myDG.dataProvider = lessonsDataProvider;
myDG.validateNow()
Doing the remove.All() on the lessonsDataProvider (the name of my HTTPService request variable) was the key to getting rid of duplicate XML entries. While I'm not sure you have to keep doing the httpService.send() every time you want to load a specific data set directly from a URL instead of just in the init() of the app, doing it like this works, so that's what I stuck with. I have two data requests in different parts of the app though (lessonsDataProvider and lessonsDataProvider6, left over from my ridiculous SIX HTTPService requests that I started out with :) - so if you only have one data request, maybe this is not necessary (in the other part of my app, httpService6.send() is necessary).
Step 10: Preparing for SEO Implementation
Now for the rather aggravating additional work I had to do in order to make my app SEO friendly. By itself, SWFAddress offers exactly zero SEO advantage. Your pages will not get into Google, Yahoo, or any other search engine. No ands, ifs, or buts. Why is that? Because the entire deep linking scheme of SWFAddress depends on these "hash" fragment things - the pound sign # which is used in every page created by SWFAddress. And Google ignores everything after that symbol, so the robot will never see anything other than your main page. No matter how many urls you have.
And the SEO example provided by the SWFAddress folks does not exactly make it an intuitive thing to replicate it using your own data. The idea that you would need to recreate your site in HTML to hide underneath your other site - is really only an option for people who have a Flash website or something. For anybody with a serious Flex app rather than a puff website of some kind, that's a bit of a joke. How exactly are you supposed to build an alternate site when everything is based on SWF activities fed by XML?
But I figured out that I really didn't have to build anything other than a link, a title, and a description which is just another version of the same title, and by using a spreadsheet which is what I use to build all of my lesson units anyway, I could easily cut and paste the values corresponding with my Flex app URLs.
Step 11: Download Alternate SEO PHP Package; Follow Short Tutorial
The files I used for my own implementation of SEO for SWFAddress were modified from the package found at pokd.org. The tutorial for using these files is short, straightforward, and easy to follow. You can find the tutorial here. The SEO version from Asual.com did not work for me at all, and I've found other people complain of the same thing. Don't waste your time: download the version from pokd.org, or use the files found in the download package for this tutorial. I truncated my own files a bit to show just my first two sections: childrens and beginning, in order to make the files easier to read.
Step 12: Turn Off Javascript in your Browser for Testing
You have to turn off javascript in your browser in order to test the non Flex/Flash version of your site! That and make the overflow of the main division visible. Unless you have some 5 or 10 page site, having the overflow hidden makes testing impossible. The extra SEO files you will be using consist of 2 PHP files, 1 .htaccess file, and 1 extra Javascript file that must be placed in your /swfaddress folder inside your flex /bin-release folder).
Step 13: Create your SEO URLs and Page Titles via Spreadsheet
Open your spreadsheet application and open the file titled swfaddress_seo_index.ods or .xls that you'll find in the download package for this tutorial. Modify them to suit your own needs. This is the spreadsheet where I pulled in the values for my application URL, the sections, and the slug addresses to create all of the swf_link [a hrefs] needed for the index.php file (You'll need your full "cleaned" url to each link without the main.html# as well as your page title). Cut and paste from your spreadsheet app into Notepad++ or whatever text code editor you use, and make sure you don't have any unnecessary tabs or spaces, and that everything looks correct for pasting into your PHP file.
My new full urls look like this in the browser, note that the hash symbol (#) is now gone:
http://www.instaspanish.com/dev/demo/childrens/up_downvocab
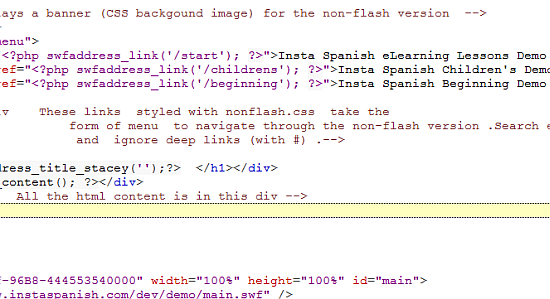
Step 14: Add your Links and Titles to the Index.php File
Since I have over 70 pages, I chose only to put the sections on the index.php page. The other demos I have seen all include all of the site pages, but these are small sites. Including a link to every page on your index.php means that every time the Google bot visits an individual page, it will see all of those links. That is a bad idea. So only put your main pages into the index.php page, and let the datasource.php take care of the rest.
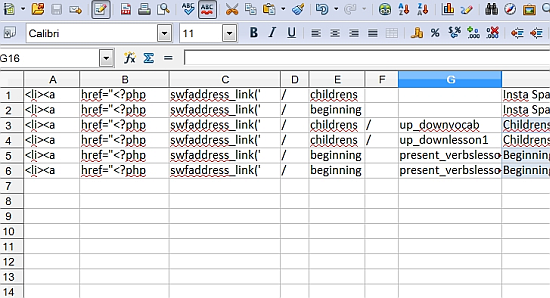
Step 15: Create your Switch Statements via Spreadsheet
Take a look at the spreadsheet titled swfaddress_seo_datasource.ods or .xls in the files for this project. This example shows how I cut and pasted values from my database in order to populate the switch statements. Once you have filled in this spreadsheet with your own values, use a code editor such as Notepad++ to remove any extra tabs and to check correct formatting before pasting into your PHP file.
Step 16: Add Switch Statements to your Datasource.php File
The switch statements are pretty straightforward, although in my case I wanted to also include the content of each XML file that feeds my educational activities, in order to use those keywords in each file seen by the search engines. The examples I've seen have all assumed that somebody would sit down and create unique page descriptions for each file in represented in the datasource.php file, but that is a terribly time-consuming option for somebody with dozens or hundreds of datagrid entries in their Flex site. So I created a new content.php page which uses a different page description depending on which activity is found in the URL. Also, I append the printout from the XML for any page that also has an XML file associated with it.
case '/beginning':
echo('<p>This section is for people ages 10 and up who want to start with the basics in an
18 week Spanish course. Some highlights:
pronunciation and accents
verbs and tenses
beginning to speak Spanish
worksheets and quizzes
Insta Spanish eLearning Demo Beginning Spanish Lesson.</p>'
);
break;

case '/childrens/up_downvocab':  echo('<p>Childrens Spanish Lesson - Up and Down - Lesson Vocabulary List</p>');
$xml_file = 'http://www.instaspanish.com/dev/activities/assets/lessons/up_down/xml/hover_word_list.xml';
givemeText();
outputXML();
break;
Step 17: Edit your .htaccess File
The .htaccess file needs to be adjusted based on the base folder for your particular server setup. For example, my XAMPP test folder inside of /htdocs is called instademo, so my .htaccess has this line for the RewriteBase:
RewriteBase /instademo
The Flex application on my live server is also contained in a subfolder and not my home folder, so the line above in that case points to this folder. Note that it begins with a forward slash but does not have a trailing slash.
Step 18: Test your SEO PHP Site Locally
Fire up XAMPP or whatever you use for your local Apache/PHP setup, and put your PHP, .htaccess, javascript, and Flex deployment files into a subfolder of the /htdocs folder or whatever your setup uses as the folder for web files. If you want to test the SEO site, you'll have to turn javascript off. That is the version search engine bots will see, as well as any web visitor who does not have javascript or Flash enabled. Check to make sure you don't see any PHP errors, and that your links work correctly.
Step 19: Create your Sitemap
The Sitemap is the easiest thing to create. Take the swfaddress_link values from your swfaddress_seo_index.ods or .xls spreadsheet. Paste them all into Notepad++ or your code editor, and run a search and replace to remove any spaces or tabs, then add your full URL. In my case, I took values such as:
/childrens/up_downvocab
/childrens/up_downlesson1
/beginningpresent_verbslesson1
/beginningpresent_verbslesson2
And changed them to:
http://www.instaspanish.com/dev/demo/childrens/up_downvocab
http://www.instaspanish.com/dev/demo/childrens/up_downlesson1
http://www.instaspanish.com/dev/demo/beginningpresent_verbslesson1
http://www.instaspanish.com/dev/demo/beginningpresent_verbslesson2
Save this file as a .txt file, and then open your Vigos Gsitemaps program and import these URLs to create your Google Sitemap.
Step 20: Submit your Sitemap to Google
Your SEO pages have a better chance of being found by Google quickly if you submit a sitemap. If you don't already have one, create a Webmaster Tools account at Google.com. From there you can easily add your website and submit the XML sitemap you have already created in the Gsitemap program.
Conclusion
I hope this tutorial has helped offer some samples and a road map for anybody struggling with SWFAddress and a Flex datagrid. If you are following the tutorial and want a closer look at the code from the examples, make sure to get a look at the main file in the Source download package that us used throughout the code samples: RoutingEvents.as.
While it takes some time to implement, the rewards of having a fully deep linked and search engine indexed application are enormous and well worth the effort. Thanks very much for taking the time to read this tutorial, and I enthusiastically look forward to any questions, criticisms, or comments that you may have.

Comments