In part one of this series, I went over how to configure the great new boilerplate, untitled-element, that the Polymer team created to make creating and sharing Polymer components substantially easier.
In the following tutorial, I'll dig deeper into what untitled-element includes, like its auto-generating documentation feature and how to setup your component to be distributed via Bower. We'll continue using the Reddit component code that I created in my first Polymer tutorial as well.
A Look Inside untitled-element
Within the boilerplate project, there are a couple of key files that you'll be using:
-
bower.json- Allows you to specify settings and dependencies for your component -
untitled-element-master.html- the template for the new component -
untitled-element-master.css- the stylesheet template to style your new component -
index.html- the HTML file which includes Polymer core for documentation generation -
demo.html- the HTML file which will allow users to test your component
These are the base files that are provided when you first download the boilerplate from the PolymerLabs GitHub repo and serve as the foundation for your new component. In part one, we renamed untitled-element-master.html to reddit-element.html and untitled-element-master.css to reddit-element.css, since they need to be named the same as our component. We also updated references to untitled-element throughout the files, to ensure the code referenced the proper component name.
Let's take a look at the code inside of reddit-element.html:
<link rel="import" href="../polymer/polymer.html">

<!--
Element providing solution to no problem in particular.

##### Example

    <reddit-element></reddit-element>

@element reddit-element
@blurb Element providing solution to no problem in particular.
@status alpha
@url github.io
-->
<polymer-element name="reddit-element" attributes="notitle">

  <template>

    <link href="reddit-element.css" rel="stylesheet" />

    <content></content>

  </template>

  <script>

    Polymer({
      /**
       * The 'noevent' event is not actually fired from here,
       * we document it as an example of documenting events.
       *
       * @event noevent
       */

      /**
       * The 'notitle' attribute does not yet have a purpose.
       *
       * @attribute notitle
       * @type string
       */
      notitle: '',

      ready: function() {
      },

      /**
       * The 'task' method does no work at this time.
       *
       * @method task
       * @return {Object} Returns undefined.
       * @param {String} dummy Serves no purpose today.
       */
      task: function(dummy) {
      }

    });

  </script>

</polymer-element>
Apart from the standard stuff like linking in Polymer core, defining attributes and adding a placeholder for including JavaScript into your component, the key thing to note is that external resource references are using the canonical path I mentioned before. This is why the Bower setup step, in part one, was so important. It ensures that all of the dependencies are mimicked in your development environment, just like they would be if you actually were sharing your component.
Also, check out the amount of meta data documentation that is being included within the component. There's an important reason for this. The boilerplate leverages the core-component-page element to parse out documentation from your element in order to create a JSDoc-like documentation page! If you open index.html you can see the reference inside:
<core-component-page></core-component-page>
Right off the bat, without adding any new code and simply running index.html, I get a full API documentation page like this:
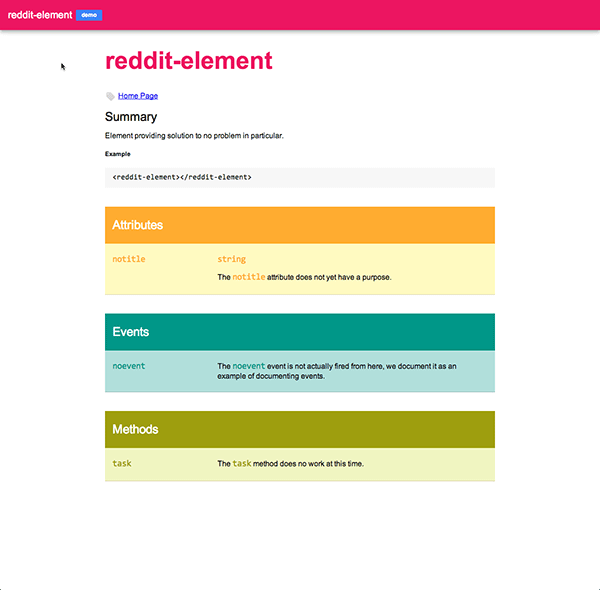
So by ensuring that you properly comment your component, the boilerplate offers the facilities necessary to generate incredibly useful API documentation.
Also, if you look in the upper left-hand corner of the documentation page, you'll notice that right next to the element name is a demo button:

Clicking it will make a call to demo.html. This is another important feature because it means that when you publish your component, others can not only have great documentation to reference but they'll also be able to test your component immediately, to see if it meets their needs. We'll touch on that in a bit.
Here's what the Reddit component looks like, once I shifted the code over to the boilerplate:
<link rel="import" href="../polymer/polymer.html">
<link rel="import" href="../core-ajax/core-ajax.html">

<!--
Element that returns the public descript of a subreddit

##### Example

    <reddit-element subreddit="cute"></reddit-element>

@element reddit-element
@blurb Element that returns the public descript of a subreddit
@status alpha
@url github.io
-->
<polymer-element name="reddit-element" attributes="subreddit">

  <template>

    <link href="reddit-element.css" rel="stylesheet" />

    <core-ajax url="http://www.reddit.com//r/{{subreddit}}/about.json" auto response="{{resp}}"></core-ajax>

    <div class="myreddit">{{resp.data.public_description}}</div>

  </template>

  <script>

    Polymer({
      /**
       * The 'subreddit' attribute takes in the name of a subreddit.
       * It defaults to the 'aww' subreddit if no value is passed
       *
       * @attribute subreddit
       * @type string
       */
      subreddit: "aww"

    });

  </script>

</polymer-element>
The main differences are that it now takes advantage of JSDoc-like commenting and also using the canonical paths to access the sibling components it needs. I also added some minor styling in reddit-element.css to prettify things a little:
.myreddit {
    width: 300px;
    height: 300px;
    font-size: 16px;
    font-family: Tahoma;
}
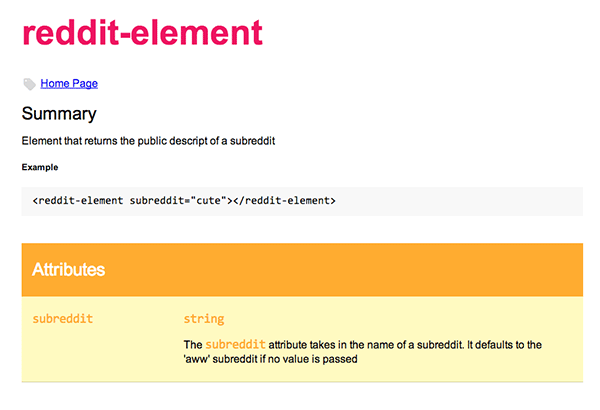
And of course, I get the benefit of a nice documentation page for my component:
Putting It on GitHub
In order for you to distribute your component via Bower, it needs to be available at a Git endpoint and have a Git tag with a corresponding version number so that users know which version they'll be installing. For the purposes of this tutorial, I'll use GitHub.
The initial steps are relatively easy and common for those familiar with Git, as it's simply creating a new local repository, adding and committing your current project files and then pushing it up to GitHub. The steps are really simple. I'll assume you're using Terminal when doing this, that you have Git installed and that you have a GitHub account:
- Make sure you're in your component's directory (e.g.:
reddit-element) - Type
git initto initialize a new local repository in that directory - Type
git add .to add all of your files - Type
git commit -am ‘My first commit'to commit your files to the repository - Create a new repo in GitHub, with your component's name (e.g.:
reddit-element) - Type
git remote add originhttps://github.com//reddit-element.gitto set up a remote to your new GitHub repo. - Type
git push -u origin masterto push the files to GitHub.
If you refresh the page for your GitHub repo, you should now see all of the files for your component.
Now once you're done making changes to your component and you feel it's ready to go, you'll need to tag a release. This is done by creating a Git tag that marks a specific point of history in your repository. You can do this via the command line, but the easiest way is to do it directly through GitHub by clicking on the "releases" link:

This walks you through the process of creating a release for your component:
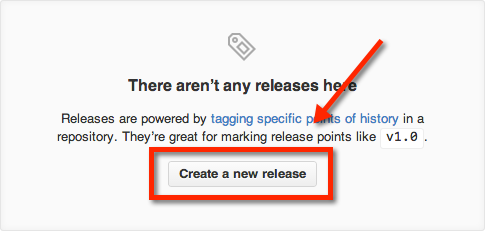
Clicking on the "Create a new release" button will take you to a form that allows you to define information about this specific release, including the version number, the target branch and general information about this release. Bower follows the semantic versioning model and you should remain consistent with that. For example, in bower.json, I listed the component's version number as "0.0.1", so I'll follow that same technique for my release.
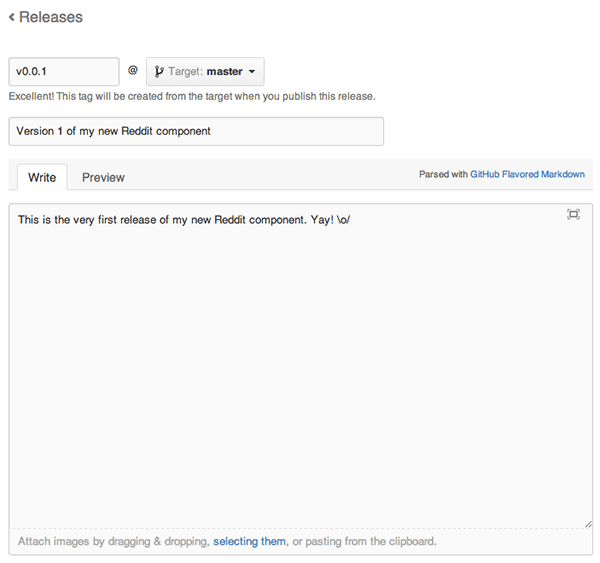
From there, it's a simple matter of hitting the publishing button and, boom, I have a new release:
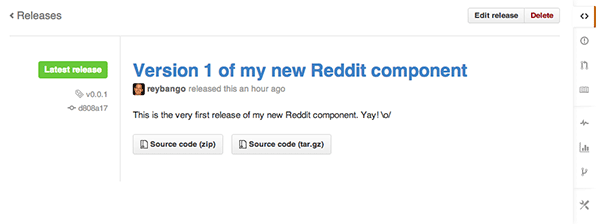
Again, this is an important step since it'll help users find a version history of your component.
The last thing we need to do on GitHub is publish a landing page for the component. The landing page will consist of the documentation page that is generated automatically by the boilerplate, making the documentation and demo readily available for you to easily share. To do this, the Polymer team has created a simple script that handles the creation of a GitHub page's branch ,for the repo. You'll need to pull down the script from the Polymer Github repo and run it within the parent directory. I'm emphasizing this so that you clone it in the correct place. Here are the steps:
- Change back into the parent directory
- Type
git clone git://github.com/Polymer/tools.gitto pull down the script - Type
mkdir temp && cd tempto create a temp directory and switch into it - Type
../tools/bin/gp.sh test-elementreplacing with your GitHub username - Change back to the parent directory and remove the temp folder (e.g.:
rm -rf temp)
The page's branch is now created:

This now allows me to share my component via the following link:
http://reybango.github.io/reddit-element/components/reddit-element/
Very slick indeed!
Making It Installable via Bower
The final step to making your component available to the world is to register it with the Bower registry. A lot of the steps we've taken so far have been explicitly meant to help get to this point.
Bower uses a manifest file to know what information corresponds to the package it's installing. This is where the bower.json comes in. It's the manifest file Bower will use. Here's the current contents:
{
  "name": "reddit-element",
  "version": "0.0.1",
  "dependencies": {
    "polymer": "Polymer/polymer#~0.2.3",
    "core-elements": "Polymer/core-elements#~0.2.3"
  }
}
This will need to be updated with additional information that the Bower registry needs to provide proper information to users looking at your component's entry. This includes:
- The author's name
- A description of the component
- Keywords that describe the component
- The license type the component is being released under
- The homepage (e.g.: the GitHub page we just created)
With these changes in place, bower.json now looks like this:
{
  "name": "reddit-element",
  "version": "0.0.1",
  "authors": [
        "Rey Bango"
  ],
  "description": "A demo component that pulls back a subreddits public description",
  "keywords": [
    "'Polymer",
    "web-components",
    "Reddit"
  ],
  "license": "MIT",
  "homepage": "https://github.com/reybango/reddit-element",
  "dependencies": {
    "polymer": "Polymer/polymer#~0.2.3",
    "core-elements": "Polymer/core-elements#~0.2.3"
  }
}
The keywords are important for discoverability, so give some real thought to that.
Finally, we're at the last step to getting listed. We'll use the bower register via our Terminal to register the component. It'll require the name of the component and the GitHub endpoint:
bower register polymer-demo git://github.com/johnsmith/polymer-demo.git
This makes the component available and searchable via the Bower registry as well as the bower search command:

So now I can install my new component and all of its dependencies via the following command:
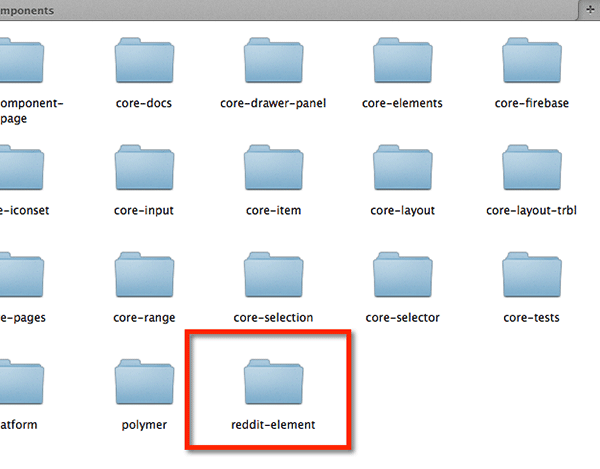
bower install reddit-element --save
This installs it into the bower_components directory which is exactly where it needs to go:
The New Boilerplate Rocks
I'm very grateful to the Polymer team for creating this new boilerplate to build from. It's turned a somewhat tedious task of managing pathing issues into a non-issue. And by including the core-component-page element, creating documentation and providing a demo is now incredibly easy to do.
I hope this tutorial has demonstrated how easy it is to document, package, register and distribute your component. Bower is definitely what you should be leveraging to make this process easy for other users and yourself.


Comments