You've undoubtedly seen the "Cover Flow" view in effect. It's all over the place on Apple's stuff. And you've also probably seen a number of implementations of Cover Flow in Flash. In this tutorial, you'll get one more. We'll leverage the built-in 3D capabilities of Flash Player 10 (that's pre-Stage3D) and build our own XML-driven version of Cover Flow.
Note: This tutorial was originally published in April 2011 - before Stage3D was released - as a freebie for our newsletter subscribers. Since Activetuts+ has now shut down, we're making it free to all readers.
Final Result Preview
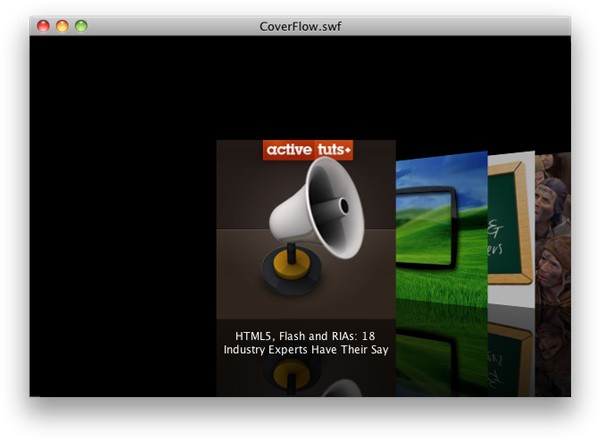
Check out the demo to see what we're working towards.
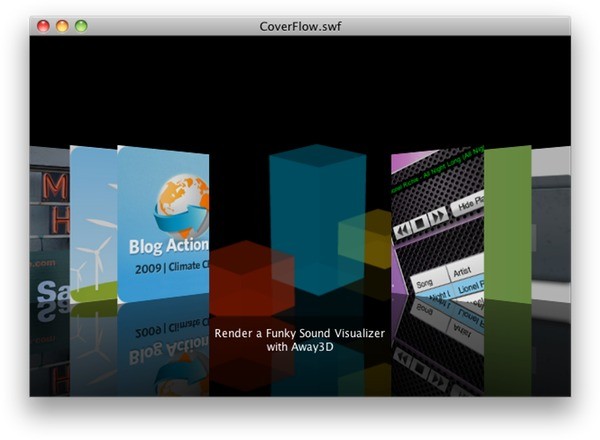
Click to view the demo.
Step 1: Create an ActionScript 3 Flash File
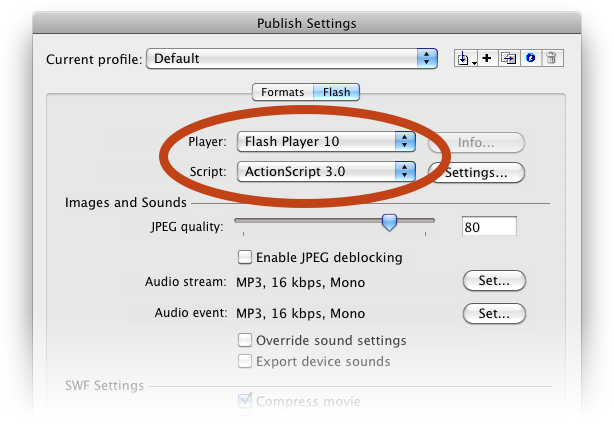
The very first thing to do is create a Flash file in which we'll work. Open up Flash CS4 or CS5 and choose File > New, and select Flash File (ActionScript 3.0), and press OK. Save this file into a folder that will be dedicated to this project.
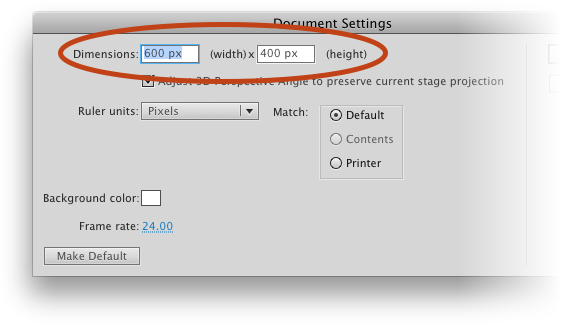
I will be setting the stage size to 600 x 400. Feel free to use whatever size you want, but I would recommend 600 x 400 as a minimum, considering that the Coverflow effect is best when it has ample room for displaying itself. Also, choose a fairly high frame rate, such as the default 24. This will make for smoother animations.
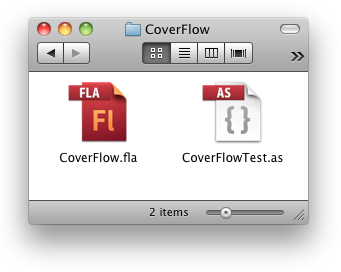
Save this file as CoverFlow.fla in a folder you can dedicate to this project.
Step 2: Create the Test Document Class
Our goal will be to create a reusable CoverFlow class, but to develop it we need a place for it to live. We'll use the Flash file we just created to act as a testing ground for the CoverFlow class as we develop it, and so we'll need a document class to go with the Flash file. This class will function to provide a place to instantiate and test the CoverFlow class. It will, as such, provide an example for how to use the CoverFlow class once it is complete.
In the text editor of your choice, create a new file and save it as CoverFlowTest.as in the same folder as your Flash file.
Stub out a simple class:
package {

    import flash.display.*;
    import flash.events.*;
    import flash.net.*;
    import flash.utils.*;

    public class CoverFlowTest extends Sprite {

        public function CoverFlowTest() {
            trace("CoverFlowTest");
        }


    }

}
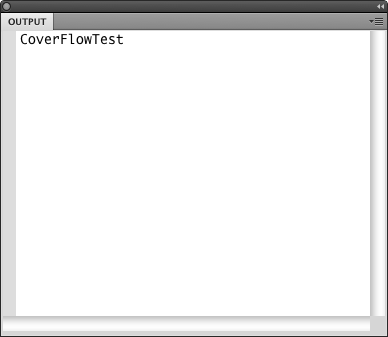
This doesn't do much, but will trace out a message if it's hooked up correctly, which we'll do next.
Step 3: Wire the Document Class to the FLA
In the Flash file, click somewhere on the empty stage, and open the Properties panel (Command/Control-F3, or Window > Properties). In the Class field, type in CoverFlowTest to assign the document class.
Test your movie now, and you should see the aforementioned trace.
Step 4: Create the CoverFlow Class
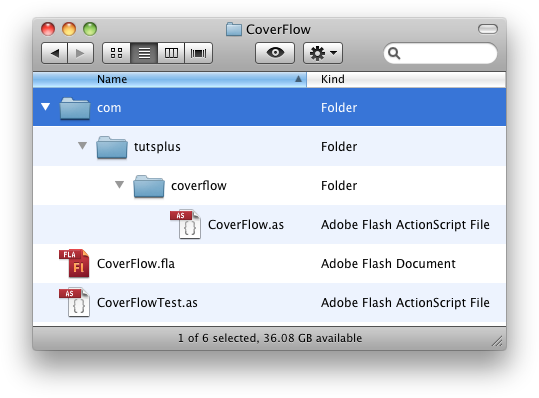
Next we'll create the file for the CoverFlow class. This will live in a package, so first create the folder structure. Starting in the project folder (at the same level as your FLA), create a folder called com. Inside of that, create another folder called tutsplus. Inside of this, create one more folder called coverflow.
Now create another text file called CoverFlow.as inside of the coverflow folder.
Add the following boilerplate:
package com.tutsplus.coverflow {

    import flash.display.*;
    import flash.geom.*;
    import flash.events.*;
    import flash.net.*;
    import flash.text.*;
    import flash.utils.*;

    public class CoverFlow extends Sprite {

        public function CoverFlow() {
            trace("CoverFlow");
        }

    }

}
This is very similar to the document class, only we're anticipating the need for more classes, so there are more import statements. This class will also extend Sprite, so that we can treat CoverFlow as a display object.
Step 5: Create a CoverFlow Instance
Now to make sure we can create and work with CoverFlow in our document class. Back in CoverFlowTest.as, import the CoverFlow class. After the other imports:
import com.tutsplus.coverflow.CoverFlow;
Now we need a property to store the CoverFlow instance. Before the constructor:
private var coverFlow:CoverFlow;
And now to create the instance and add it to the display list. In the constructor, remove the trace and replace it with:
coverFlow = new CoverFlow();
addChild(coverFlow);
Test it now, and you should now see "CoverFlow" trace in the Output panel. If so, all is good. We can now start building CoverFlow.
Here is the whole document class code, for reference:
package {

    import flash.display.*;
    import flash.events.*;
    import flash.net.*;
    import flash.utils.*;

    import com.tutsplus.coverflow.CoverFlow;

    public class CoverFlowTest extends Sprite {

        private var coverFlow:CoverFlow;

        public function CoverFlowTest() {
            coverFlow = new CoverFlow();
            addChild(coverFlow);
        }

    }

}
Step 6: Create a Cover Class
A Cover class will be a single item in the entire "flow." We'll start by perfecting the class on a single item, then worry about loading data and building the "flow" after that is taken care of.
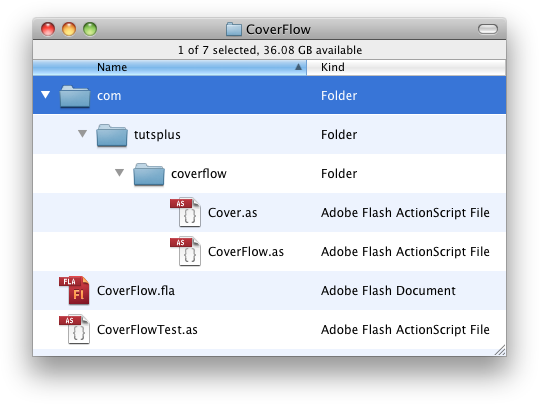
Again, in your text editor, create a new class file. Save it as Cover.as in the same com/tutsplus/coverflow folder as the CoverFlow class (as opposed to the CoverFlowTest class…yes, we have some potentially confusing names. I'll try to help you keep things straight throughout this tutorial).
Add the following boilerplate (see a pattern yet?):
package com.tutsplus.coverflow {

    import flash.display.*;
    import flash.geom.*;
    import flash.events.*;
    import flash.net.*;
    import flash.utils.*;

    public class Cover extends Sprite {

        public function Cover() {
            trace("Cover");
        }

    }

}
This is actually identical to the CoverFlow boilerplate, except for the usage of the word "Cover" instead of "CoverFlow." These will end up being quite different, don't worry, I'm just making sure we have files in place before going too far down the coding rabbit hole.
Step 7: Create a Cover Instance
So, we'll have the CoverFlow object create and use a Cover object. In the end, CoverFlow will be responsible for creating and managing several Cover objects, but for now, as we build the Cover class, we'll just have it create and display a single Cover object.
In CoverFlow, instead of tracing "CoverFlow," let's have it do this object creation.
public function CoverFlow() {
    var test:Cover = new Cover();
    addChild(test);
}
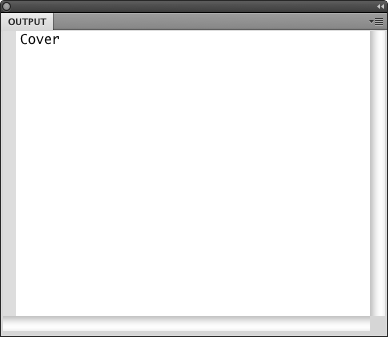
If you test it now, you should see "Cover" being traced (remember, that's a single Cover object, not the previous test traces we've been using).
However, let's go a step further and try to display something onscreen. In the Cover file, remove the trace and add this:
public function Cover() {
    graphics.beginFill(0xff0000);
    graphics.drawRect(0, 0, 200, 200);
}
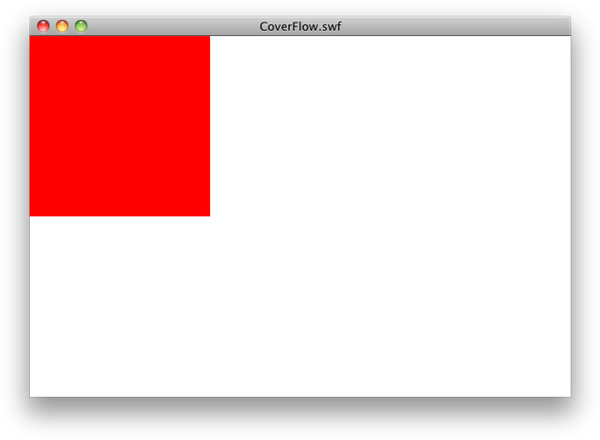
Now, instead of tracing to the Output panel, you should see a red square appear in the upper left corner of your movie. If that happens, we're pretty much set to continue working. What this means is that not only is the code executing all the way down to the individual Cover object, but we've successfully added elements to the stage so that we can create visual objects.
Step 8: Put Covers in a Container
We just added our Cover object directly to the CoverFlow's display list. For reasons that may not be clear at the moment, we're going to eventually need them in an extra container; that is, CoverFlow will contain a Sprite, which will contain all Cover instances. As we progress through this tutorial, we'll add other, non-Cover display objects, and it will be very convenient to make sure all Covers are easily managed.
First, in CoverFlow, declare a Sprite property that will reference our container.
private var _coversContainer:Sprite;
And in the constructor, create that Sprite and add it to the display list. Also, instead of adding the test Cover object to the CoverFlow's display list, add it to the _coversContainer Sprite:
public function CoverFlow() {
    _coversContainer = new Sprite();
    addChild(_coversContainer);
    var test:Cover = new Cover();
    _coversContainer.addChild(test);
}
If you test now, you should see exactly the same thing as before, which is good. We don't want it to look any different, but we want a different functionality under the hood.
Step 9: Set the CoverFlow Size
There are a few things that we should take care of now. The size of the container that holds the CoverFlow display is one of them, as the the width and height will be used elsewhere. This will be as simple as a few properties and matching setters and getters.
First, in CoverFlow.as, add two properties at the beginning of the class:
private var _width:Number;
private var _height:Number;
And after the constructor, add the following setters and getters:
override public function set width(num:Number):void {
    _width = num;
}
override public function get width():Number {
    return _width;
}
override public function set height(num:Number):void {
    _height = num;
}
override public function get height():Number {
    return _height;
}
Since CoverFlow is a subclass of Sprite, there already are width and height setters and getters. So we need to be sure to override them. We don't want the default behavior of stretching, so we'll want to control that on our own. We'll come back to these setters in a few steps.
However, having a size for the CoverFlow object is important enough to require these parameters in the constructor. The width and height determine much of the final layout, so we'll add some parameters to the constructor and then immediately set our properties with them:
public function CoverFlow(w:Number, h:Number) {
    _width = w;
    _height = h;

    _coversContainer = new Sprite();
    addChild(_coversContainer);
    var test:Cover = new Cover();
    _coversContainer.addChild(test);
}
And of course we need to supply some arguments to this from CoverFlowTest. In that file, update the line that creates a new CoverFlow to this:
coverFlow = new CoverFlow(stage.stageWidth, stage.stageHeight);
There isn't much to test right now, but if you like you can publish the movie and see if any compiler errors pop up. If there are any errors, take care of them now. You'll know that the errors somehow relate to the code you just typed, so start there.
Step 10: Set the Background Color
Another property that will get used later will be the background color of the entire "flow." Apple makes theirs black, but there's no reason to stick with that, as it will be rather simple to change it. To make it happen, though, we'll need a Shape object that sits at the bottom of the CoverFlow object's display stack, and we'll need to programmatically draw a rectangle of the chosen color into that Shape.
First, add two properties to CoverFlow, one to hold the Shape instance and one to store the background color:
private var _backgroundColor:uint = 0;
private var _background:Shape;
Notice that we're giving _backgroundColor a default value, so that if it's never set by the user of this class, we'll have a black background anyway. The number 0 is the color code for black.
Next, write in the setter and getter for backgroundColor (we don't need the Shape to be accessible outside of this class, just the color):
public function set backgroundColor(val:uint):void {
    _backgroundColor = val;
    drawBackground();
}
public function get backgroundColor():uint {
    return _backgroundColor;
}
You'll notice that we're calling an as-of-yet nonexistent method called drawBackground. This will do what it says on the label. Let's write it now:
private function drawBackground():void {
    _background.graphics.clear();
    _background.graphics.beginFill(_backgroundColor, 1);
    _background.graphics.drawRect(0, 0, _width, _height);
}
This just clears out any previous graphics drawing in the background shape, sets the fill color to the current value of the property, and then draws a rectangle.
Finally, we need to set up the Shape initially. In the constructor, add this at the end:
_background = new Shape();
addChildAt(_background, 0);
drawBackground();
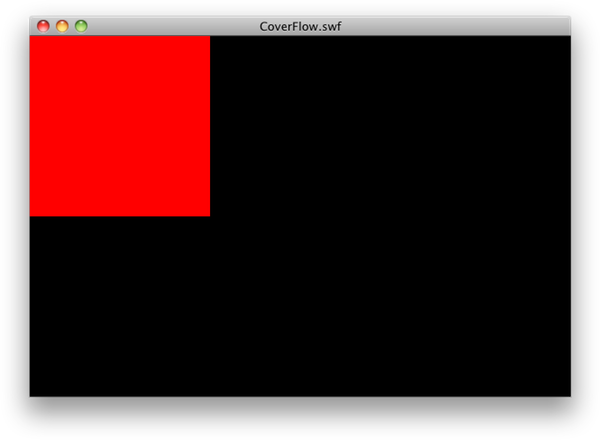
And go ahead and test it! You should see a black background behind our red square.
If you like, you can resize the player window, and you'll see that we do indeed have a black rectangle sitting on top of the white base of the movie.
For reference, here is the complete CoverFlow class at this point. Changes made in this step are highlighted.
package com.tutsplus.coverflow {

    import flash.display.*;
    import flash.geom.*;
    import flash.events.*;
    import flash.net.*;
    import flash.text.*;
    import flash.utils.*;

    public class CoverFlow extends Sprite {

        private var _coversContainer:Sprite;
        private var _width:Number;
        private var _height:Number;
        private var _backgroundColor:uint = 0;
        private var _background:Shape;

        public function CoverFlow(w:Number, h:Number) {
            _width = w;
            _height = h;

            _coversContainer = new Sprite();
            addChild(_coversContainer);
            var test:Cover = new Cover();
            _coversContainer.addChild(test);

            _background = new Shape();
            addChildAt(_background, 0);
            drawBackground();
        }

        override public function set width(num:Number):void {
            _width = num;
        }
        override public function get width():Number {
            return _width;
        }
        override public function set height(num:Number):void {
            _height = num;
        }
        override public function get height():Number {
            return _height;
        }

        public function set backgroundColor(val:uint):void {
            _backgroundColor = val;
            drawBackground();
        }
        public function get backgroundColor():uint {
            return _backgroundColor;
        }

        private function drawBackground():void {
            _background.graphics.clear();
            _background.graphics.beginFill(_backgroundColor, 1);
            _background.graphics.drawRect(0, 0, _width, _height);
        }

    }

}
Step 11: Create the Mask
We may have created a background shape that responds to the size of the CoverFlow, but anything else we add to the object – like individual Covers – may not respect the intended size. What we need is a mask for the entire CoverFlow display object that gets set to the same size.
We could use a regular ol' mask for this task, but because we are expecting a rectangular mask, we have an even easier approach. The scrollRect property of DisplayObjects provides functionality similar to that of masks, although there are differences. One advantage we have with scrollRect is a performance optimization. I don't know specifics, but utilizing scrollRect tells Flash to render only the pixels contained within the rectangle, as opposed to regular masks, which still renders all pixels involved in the masked content.
Setting it up is as simple as this, in the CoverFlow constructor:
public function CoverFlow(w:Number, h:Number) {
    // ...

    drawBackground();

    scrollRect = new Rectangle(0, 0, _width, _height);

    // ...
There's not much to test right now, but you can compile to make sure you didn't make any typos.
Step 12: Adjust the Width and Height
Now, we need to implement our own sizing logic. In the width and height setters of CoverFlow, add these lines:
override public function set width(num:Number):void {
    _width = num;
    _background.width = _width;
    scrollRect = new Rectangle(0, 0, _width, _height);
}
override public function get width():Number {
    return _width;
}
override public function set height(num:Number):void {
    _height = num;
    _background.height = _height;
    scrollRect = new Rectangle(0, 0, _width, _height);
}
override public function get height():Number {
    return _height;
}
We can test this to a degree by adding a size change to the coverFlow object in CoverFlowTest:
public function CoverFlowTest() {
    coverFlow = new CoverFlow(stage.stageWidth, stage.stageHeight);
    addChild(coverFlow);
    coverFlow.width = stage.stageWidth / 2;
    coverFlow.height = stage.stageHeight / 3;
}
You should see what you've been seeing, only masked.
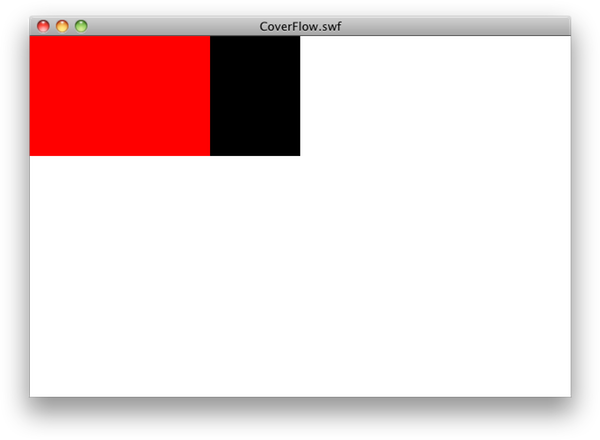
It's hard to tell that the scrollRect is working at the moment, but at least you have expected results for now. Remove the two lines you just added; we'll want a full-size CoverFlow in order to continue development.
Step 13: Add Properties to Cover
We'll come back to CoverFlow.as in the near future, but for now we're going to focus on getting an individual Cover instance up to speed.
Let's think about what the Cover will need to do. It will need to load and display an image. It will need to display a caption. It will need to be positioned. It will also need to display a reflection beneath the image. When we get to XML data, we'll have each Cover store the XML node related to that instance, so that we can store extra related information with the associated Cover. And it will need to dispatch a few events, for load progress, load complete, select (for when the cover comes into the center position), and click. The Cover could certainly do more, but for now, these capabilities pretty closely match what iTunes implementation of Cover Flow does, and will help keep our tutorial to a reasonable scope. For the code, this feature set means:
Load Image We'll need a Loader to load the image, along with specifying the URL of the image to load.
Display Image We'll need to add the Loader to the display list.
Display Caption We'll need to be able to set the caption, put it into a TextField, and display the TextField. Note that this opens up the can of worms that is text styling, and the question of how much control of the style to open up outside of the class. For our purposes, we'll stick with a standard styling. If you'd like an implementation that allows user-definable styles, that's an exercise for later.
However, note that in the reference implementation of Cover Flow, the caption is not attached to the cover image, it's a fixed area in the center bottom of the whole display area. What we'll need is not a TextField for each Cover object, but a single TextField for the entire CoverFlow system. All the Cover object needs to do is store its caption. We'll have CoverFlow then pull that information out of each Cover as it's focused and handle its display. So all we really need right now is a storage mechanism for a caption.
Display Image Reflection This will require a Bitmap object and some BitmapData fanciness, but it's not hard. However, it does require that we know the general background color of the entire Cover Flow display, because the easiest way to handle the transparency of the reflections is to not actually be transparent (if they were, we'd have overlaying reflections show through each other). So, we'll require that the background color be passed in to our constructor from CoverFlow.
Also, we'll want to hang onto the Bitmap, but the BitmapData can be a one-time object used to create the reflection in the first place.
Positioning Since we're subclassing Sprite, anything we display within that Sprite is automatically positioned as a unit by the positional properties of Sprite. We won't have to do anything to gain this functionality, other than make sure that we add the appropriate display objects as children of the Cover instance itself.
XML Data We'll just need a property to store an arbitrary XML node and a way to get that back out of the object.
Events Again, since we're a subclass of Sprite, we also automatically have the capability to dispatch events. In fact, the click event is already defined by the Sprite. Load progress and complete will really just be forwarded events from the LoaderInfo of the Loader we use to load the image. And select will actually be handled by CoverFlow, since it knows how to manage a collection of Covers. So, we're done with this one, too!
Let's add the properties we need, along with setters and getters where appropriate. We'll follow the convention of making actual properties private, and providing public access through setters and getters.
In Cover.as, add some properties to the class file. I like to keep them grouped together, at the very top of the class definition:
private var _src:String;
private var _caption:String;
private var _data:XML;
private var _loader:Loader;
private var _reflection:Bitmap;
private var _backgroundColor:uint;
Write the setters and getters:
public function get caption():String {
    return _caption;
}

public function get data():XML {
    return _data;
}

public function set backgroundColor(num:Number):void {
    _backgroundColor = num;
}
public function get backgroundColor():Number {
    return _backgroundColor;
}
Why only have these? Well, other objects won't really need access to the Bitmap or the Loader, and for the caption and data, we'll operate on the assumption that once those values are set, they won't need to change. We'll deal with that in the next step.
Go ahead and test this out. There won't be any changes to take note of; you should still just see a red square. But by testing the movie we run things through the compiler, which helps us find errors should any be introduced. If all went well, the movie will run and you'll see the red square. Here is the complete Cover class as of now:
package com.tutsplus.coverflow {

    import flash.display.*;
    import flash.geom.*;
    import flash.events.*;
    import flash.net.*;
    import flash.utils.*;

    public class Cover extends Sprite {

        private var _src:String;
        private var _caption:String;
        private var _data:XML;
        private var _loader:Loader;
        private var _reflection:Bitmap;
        private var _backgroundColor:uint;

        public function Cover() {
            graphics.beginFill(0xff0000);
            graphics.drawRect(0, 0, 200, 200);
        }

        public function get caption():String {
            return _caption;
        }

        public function get data():XML {
            return _data;
        }

        public function set backgroundColor(num:Number):void {
            _backgroundColor = num;
        }
        public function get backgroundColor():Number {
            return _backgroundColor;
        }

    }

}
Step 14: Set the Properties
As mentioned, we'll set the properties like caption, data, and background color through the constructor. Modify the constructor of Cover.as so it takes those three values, and then transfers those values to the appropriate properties. Changes to the constructor below are highlighted:
public function Cover(caption:String, data:XML, backgroundColor:Number) {
    _caption = caption;
    _data = data;
    _backgroundColor = backgroundColor;

    graphics.beginFill(0xff0000);
    graphics.drawRect(0, 0, 200, 200);
}
Now, back in CoverFlow.as, we need to supply values when we create our test Cover or else we'll get errors. In the constructor:
public function CoverFlow(w:Number, h:Number) {
    _width = w;
    _height = h;

    _coversContainer = new Sprite();
    addChild(_coversContainer);
    var test:Cover = new Cover("I am a caption", <data />, _backgroundColor);
    _coversContainer.addChild(test);

    _background = new Shape();
    addChildAt(_background, 0);
    drawBackground();

    scrollRect = new Rectangle(0, 0, _width, _height);
}
We're obviously using dummy data right now, but this should safely compile. Again, we won't see any changes, but test the movie to make sure you haven't introduced errors. However, we can write a quick test of what we wrote by tracing the values of the getters. Still in the CoverFlow constructor:
public function CoverFlow(w:Number, h:Number) {
    _width = w;
    _height = h;

    _coversContainer = new Sprite();
    addChild(_coversContainer);
    var test:Cover = new Cover("I am a caption", <data />, _backgroundColor);
    _coversContainer.addChild(test);

    _background = new Shape();
    addChildAt(_background, 0);
    drawBackground();

    scrollRect = new Rectangle(0, 0, _width, _height);

    trace(test.caption);
    trace(test.data.toXMLString());
    trace(test.backgroundColor);
}
You should see the following in your Output panel:

This verifies that we are properly setting and getting at least the caption, data XML, and backgroundColor properties.
Step 15: Load an Image
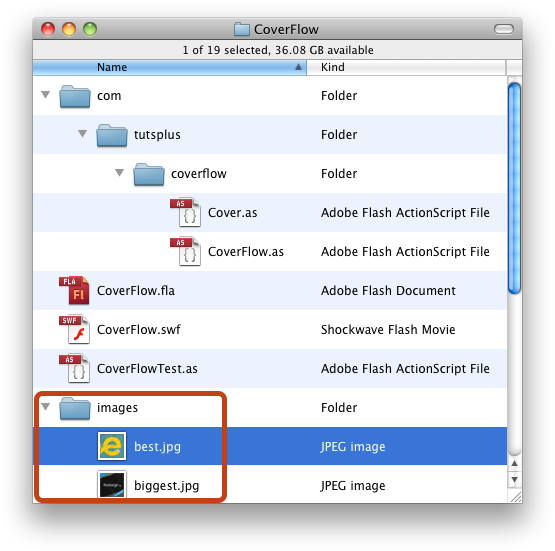
For this step, we'll need an image to load. There are several in the download package for this tutorial, already cropped and sized as squares. Let's just pick one to load. I'll use "best.jpg."
First, put the images folder in the same project folder you've been using. It should be at the same location as your CoverFlowTest.swf. Either drop the images folder from the download here, or create your own images folder here and put the images you want to load into that folder.
Next, in the constructor of Cover.as, remove the lines that draw the red square.
public function Cover(caption:String, data:XML, backgroundColor:Number) {
    _caption = caption;
    _data = data;
    _backgroundColor = backgroundColor;

    //graphics.beginFill(0xff0000);
    //graphics.drawRect(0, 0, 200, 200);
}
Now, create a public method called load. This will receive a string URL as a parameter, store it in the _src property, and then load the image from that URL.
public function load(src:String):void {
    _src = src;
    _loader = new Loader();
    _loader.contentLoaderInfo.addEventListener(ProgressEvent.PROGRESS, onLoadProgress);
    _loader.contentLoaderInfo.addEventListener(Event.COMPLETE, onLoadComplete);
    _loader.contentLoaderInfo.addEventListener(IOErrorEvent.IO_ERROR, onLoadError);
    addChild(_loader);
    _loader.load(new URLRequest(_src));
}
This is standard Loader stuff. It will ultimately be up to another object (such as CoverFlow) to feed this value to the Cover.
We've added three event listeners, all standard fare for loading. Let's write out some stub listener functions so we can test. Add this code to you class. These are new methods, not code within another method:
private function onLoadProgress(e:ProgressEvent):void {
    trace("progress: " + e.bytesLoaded + " of " + e.bytesTotal);
}

private function onLoadComplete(e:Event):void {
    trace("loaded");
}

private function onLoadError(e:IOErrorEvent):void {
    trace("error: " + e.text)
}
We'll end up doing something more useful with these, but for now we'll fire off a trace just to make sure the functions get called in response to events. For reference, the entire class should look something like this (additions from this step are highlighted):
package com.tutsplus.coverflow {

    import flash.display.*;
    import flash.geom.*;
    import flash.events.*;
    import flash.net.*;
    import flash.utils.*;

    public class Cover extends Sprite {

        private var _src:String;
        private var _caption:String;
        private var _data:XML;
        private var _loader:Loader;
        private var _reflection:Bitmap;
        private var _backgroundColor:uint;

        public function Cover(caption:String, data:XML, backgroundColor:Number) {
            _caption = caption;
            _data = data;
            _backgroundColor = backgroundColor;
        }

        public function get caption():String {
            return _caption;
        }

        public function get data():XML {
            return _data;
        }

        public function set backgroundColor(num:Number):void {
            _backgroundColor = num;
        }
        public function get backgroundColor():Number {
            return _backgroundColor;
        }

        public function load(src:String):void {
            _src = src;
            _loader = new Loader();
            _loader.contentLoaderInfo.addEventListener(ProgressEvent.PROGRESS, onLoadProgress);
            _loader.contentLoaderInfo.addEventListener(Event.COMPLETE, onLoadComplete);
            _loader.contentLoaderInfo.addEventListener(IOErrorEvent.IO_ERROR, onLoadError);
            addChild(_loader);
            _loader.load(new URLRequest(_src));
        }

        private function onLoadProgress(e:ProgressEvent):void {
            trace("progress: " + e.bytesLoaded + " of " + e.bytesTotal);
        }

        private function onLoadComplete(e:Event):void {
            trace("loaded");
        }

        private function onLoadError(e:IOErrorEvent):void {
            trace("error: " + e.text)
        }

    }

}
Now, to test this, we need to hop back over to CoverFlow.as and at some point in the constructor, call the load method and pass in a valid path to an image:
public function CoverFlow(w:Number, h:Number) {
    _width = w;
    _height = h;

    _coversContainer = new Sprite();
    addChild(_coversContainer);
    var test:Cover = new Cover("I am a caption", <data />, _backgroundColor);
    _coversContainer.addChild(test);

    _background = new Shape();
    addChildAt(_background, 0);
    drawBackground();

    scrollRect = new Rectangle(0, 0, _width, _height);

    trace(test.caption);
    trace(test.data.toXMLString());
    trace(test.backgroundColor);

    test.load("images/best.jpg");
}
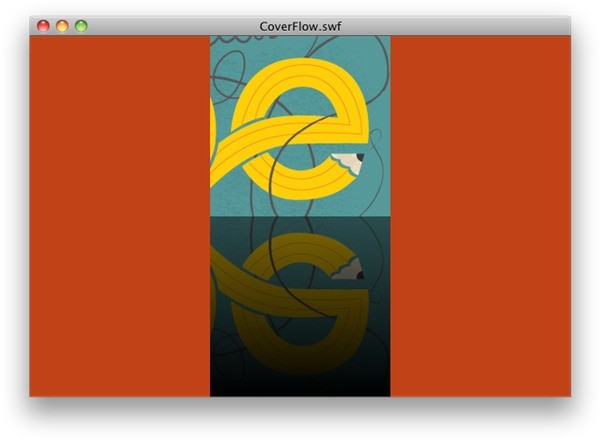
If you test the movie now, not only should you see an image show up in place of the red square:
...but you should also see some traces in the Output panel confirming that the progress and complete events were firing (your actual progress events may vary):

Obviously, the load completed because the image appeared, but it's good to make sure we hooked up the event correctly. If you want to test the error event, just change the path value passed into the Cover constructor to something that won't work, and you should see a different trace.
Step 16: Center the Image
Movement within the "flow" has two requirements. First, items need to rotate about a vertical axis that is centered horizontally on the image. Second, the bottom of the image needs to be aligned to a "ground" so that images of varying heights are all "sitting" on the same plane.
To make the vertical rotation easy, we can center the image horizontally in relation to the containing Sprite. Similarly, to make the bottom alignment easy, we can position the image so that its bottom edge is at the x-axis of the containing Sprite. To pull this off, we need know the size of the image that we just loaded. In order to determine that, we need to make sure the image is loaded before attempting to work with its size. So, all of our centering code needs to be in the complete handler.
Add this to the onLoadComplete method of Cover.as (and remove the trace that is currently there):
private function onLoadComplete(e:Event):void {
    _loader.x = -Math.round(_loader.width / 2);
    _loader.y = -_loader.height;
}
If you test this now, you probably won't see an image at all, because the Cover sprite is being positioned at (0, 0) on the stage, but all of its visible content is above the registration point of the Cover sprite. So, before testing, add a few lines of code to position the Cover object in CoverFlow.as, just after creating the test Cover object:
test.x = _width / 2;
test.y = _height / 2;
Test it now, and you should see the image somewhere in the middle of the stage.
If you like, you can go back and re-test the setting of the width and height of the CoverFlow (see Step 12) to see if the scrollRect works to mask out the contents of CoverFlow. You should see a partial Cover object.
Step 17: Reflect the Image
Now we get into some more challenging stuff. We're going to take the image we just loaded and create a copy of it that is flipped vertically (that is, it was rotated around the bottom edge). We'll use BitmapData to clone the appearance of the image. Like before, because we need the actual image before we can do this, we'll initiate the drawing of the reflection in the onLoadComplete method:
private function onLoadComplete(e:Event):void {
    _loader.x = -Math.round(_loader.width / 2);
    _loader.y = -_loader.height;
    drawReflection();
}

private function drawReflection():void {
    var clone:BitmapData = new BitmapData(_loader.width, _loader.height, false, 0x000000);
    var flip:Matrix = new Matrix();
    flip.scale(1, -1);
    flip.translate(0, _loader.height);
    clone.draw(_loader, flip);
    _reflection = new Bitmap(clone);
    addChild(_reflection);
    _reflection.x = _loader.x;
}
That's a lot of code that may be unfamiliar to you, depending on how much you've worked with BitmapData.
BitmapData, first of all, is a class that lets you work with the pixels of a bitmap. The first line creates one, specifying a width and height, transparency, and a default fill color.
The next thing we'll do is usually a straight forward operation, where we draw the graphics of another display object into a rendered bitmap representation. However, we don't want a straight clone, we want to flip the image. We can do that by passing in a Matrix object into the second parameter of the draw method. A Matrix object represents a geometric, two-dimensional transformation, including scale, rotation, and translation (or position). So, before we do the draw operation, we create a new Matrix object. Then we use the scale method on the Matrix to flip it vertically (the two arguments are horizontal scale and vertical scale; 1 being no change and -1 being an inversion). Next, because the scale operation performs similarly to how display objects work, we actually scaled the image so it's "pointing" the other direction. So we need to reposition it to get it back onto the bitmap canvas. The translate method does this, repositioning the scaled image by the image's height.
With the flipped image represented in a BitmapData object, we need to actually display it in a Bitmap object. BitmapData is a pure data representation and is not, itself, displayable. However, the Bitmap object is displayable, and handily enough takes a BitmapData object as the parameter to its constructor, so we create a Bitmap, add it to the display list, and finally position it horizontally to it's aligned with the original image.
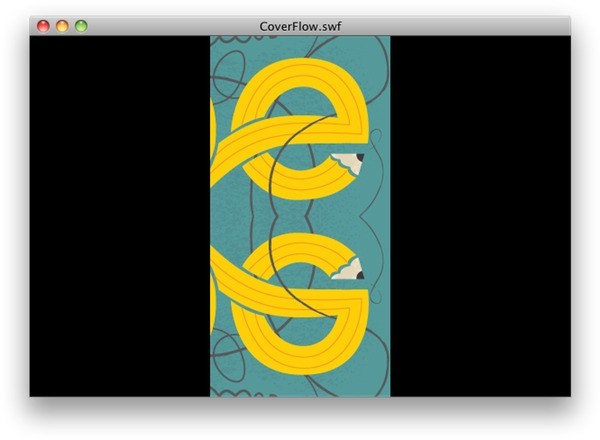
Try this out, and you should be seeing double.
The BitmapData operations can be confusing, so if they're not clear to you at this point I encourage you to pursue further information on it. BitmapData opens up some very interesting possibilities, so it's worth learning more about.
Step 18: Fade the Reflection
Now, to make the reflection fade, we need to fade to that background color, and keep the reflection opaque. It will give the appearance of being transparent, but if we keep it opaque, one reflection can be layered on top of another without the lower one showing through. Go ahead and look at the preview again if you need to visualize this:
We'll add a bunch of drawing code to drawReflection (in Cover.as). Here's the whole method, with the changes highlighted:
private function drawReflection():void {
    var clone:BitmapData = new BitmapData(_loader.width, _loader.height, false, 0x000000);
    var flip:Matrix = new Matrix();
    flip.scale(1, -1);
    flip.translate(0, _loader.height);
    clone.draw(_loader, flip);
    _reflection = new Bitmap(clone);
    addChild(_reflection);
    _reflection.x = _loader.x;

    var gradient:Shape = new Shape();
    var gradientMatrix:Matrix = new Matrix();
    gradientMatrix.createGradientBox(_reflection.width, _reflection.height, Math.PI / 2);
    var gradientFill:GraphicsGradientFill = new GraphicsGradientFill(GradientType.LINEAR, [_backgroundColor, _backgroundColor], [.5, 1], [0, 255], gradientMatrix);
    var gradientRect:GraphicsPath = new GraphicsPath();
    gradientRect.moveTo(0, 0);
    gradientRect.lineTo(_reflection.width, 0);
    gradientRect.lineTo(_reflection.width, _reflection.height);
    gradientRect.lineTo(0, _reflection.height);
    gradientRect.lineTo(0, 0);
    var graphicsData:Vector.<IGraphicsData> = new Vector.<IGraphicsData>();
    graphicsData.push(gradientFill, gradientRect);
    gradient.graphics.drawGraphicsData(graphicsData);

    _reflection.bitmapData.draw(gradient);
}
Yup, that's quite a lot of code to chew on. In summary, it creates another Shape object, in which we draw a linear gradient. The gradient is set to be same color as the main background, with alpha changes going from half transparent to fully opaque, top to bottom. This gradient then gets merged into the BitmapData already containing the flipped reflection of the image, so that the final effect is a reflection that fades out to the background color.
Go ahead and try this out, you should feel good about obtaining these results:
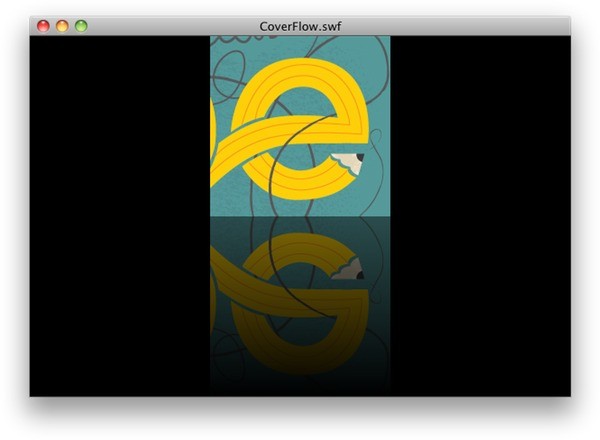
However, if you test this further and try setting up the coverFlow instance in CoverFlowTest with a background color other than black, you'll see some unpredictable results:
We'll address this next.
Step 19: Keep Track of the Cover Instances
We are currently using the CoverFlow instance as a place to test a single Cover instance. And even though we'll eventually get rid of that test instance, we now need to store it in an official list of all instances. We'll create an Array of Cover instances, and every one that gets creates will get stashed in the Array. Actually, since we're targeting Flash 10, we can make it a Vector, which will offer a small performance increase.
First, in CoverFlow.as, declare the Vector, alongside the rest of the properties:
private var _covers:Vector.<Cover>;
Then, instantiate that Vector almost immediately. In the constructor, put this line right after you set the _width and _height:
_covers = new Vector.<Cover>();
And after the "test" Cover object has been created (still in the constructor), add it to the Vector:
_covers.push(test);
The top part of your CoverFlow class should look like this (additions highlighted):
public class CoverFlow extends Sprite {

    private var _coversContainer:Sprite;
    private var _width:Number;
    private var _height:Number;
    private var _backgroundColor:uint = 0;
    private var _background:Shape;
    private var _covers:Vector.<Cover>;

    public function CoverFlow(w:Number, h:Number) {
        _width = w;
        _height = h;
        _covers = new Vector.<Cover>();

        _coversContainer = new Sprite();
        addChild(_coversContainer);
        var test:Cover = new Cover("I am a caption", <data />, _backgroundColor);
        _coversContainer.addChild(test);
        test.x = _width / 2;
        test.y = _height / 2;
        _covers.push(test);

        trace(test.caption);
        trace(test.data.toXMLString());
        trace(test.backgroundColor);

        test.load("images/best.jpg");

        _background = new Shape();
        addChildAt(_background, 0);
        drawBackground();
    }
// ...
Step 20: Set the Background Color of the Covers
Now, in the backgroundColor setter, we not only need to draw the main background, but we need to inform all of our Cover instances that the background color has changed. The entire method will look like this (new code is highlighted):
public function set backgroundColor(val:uint):void {
    _backgroundColor = val;
    drawBackground();
    for each (var cover:Cover in _covers) {
        cover.backgroundColor = val;
    }
}
Then, in the Cover class, update its backgroundColor setter so that it redraws the reflection:
public function set backgroundColor(num:Number):void {
    _backgroundColor = num;
    drawReflection();
}
Lastly, we need to do some error checking. In the test case that we have set up right now, the backgroundColor gets set before the image loads (and this is a reasonable action; typically you'll set up the CoverFlow and give it a backgroundColor right away, as the images load). Because of this, the Loader has a width and height of 0, which makes the first line of drawReflection produce an Error. If you set the backgroundColor of the CoverFlow object right now and test the movie, you'll see this:
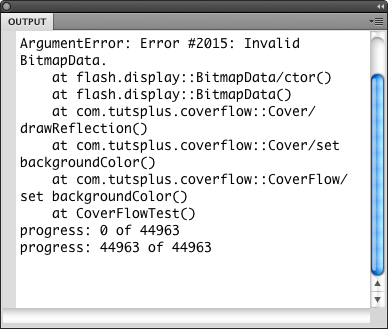
This is easy enough to handle. If the Loader has a width and/or height of 0, we can safely assume that the loader hasn't finished loading yet. So, the very first lines of drawReflection can check for this:
private function drawReflection():void {
    if (_loader.width == 0 || _loader.height == 0) {
        return;
    }
    var clone:BitmapData = new BitmapData(_loader.width, _loader.height, false, 0x000000);
    var flip:Matrix = new Matrix();
    // ...
Simply exit the method, and everything will be fine. Don't worry, we also call drawReflection from onLoadComplete, so at that point, the _backgroundColor property will be set with the correct value, and the Loader will be loaded, so we can draw. In the event that we want to change the background color after the images have loaded, this still works, because the Loader will have non-zero dimensions, and drawReflection will run from the backgroundColor setter.
Try it out: go back to CoverFlowTest and set the CoverFlow instance's background color:
public function CoverFlowTest() {
    coverFlow = new CoverFlow(stage.stageWidth, stage.stageHeight);
    addChild(coverFlow);
    coverFlow.backgroundColor = 0xC14216;
}
And you'll have a glorious orange thing going on:
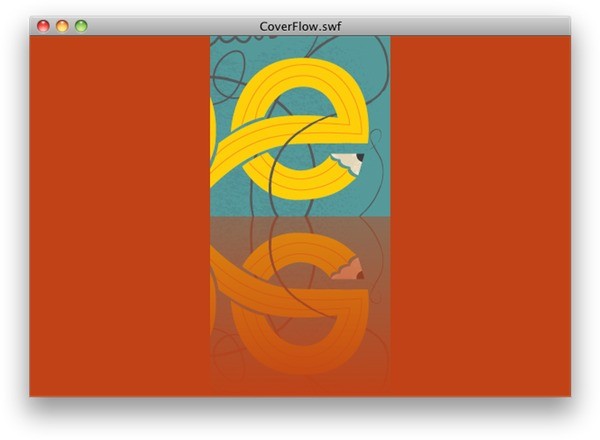
Feel free to remove that line after you're satisfied that the background color and the reflection works (what, you don't like orange?).
Step 21: Write an XML Data Source
We'll move on to providing a real set of data to drive this piece. Our test image can go away, and we'll start displaying a set of images.
We'll assume that in order to provide data to the CoverFlow object, it will most likely be provided as an external XML file. This makes for easier changes to live content, but also allows us to load more than one XML file to reuse the same CoverFlow module with different content in the same movie.
Before we write the ActionScript to handle the XML, let's write our XML file. Create a new text file called coverFlowImages.xml in the same folder as your CoverFlow.fla file. There will be a root node, of course, and inside of that will simply be a list of image nodes, one for each item to appear in the flow. The general format for an image node will look like this:
<image src="path/to/image.jpg" title="A Titillating Title">
    whatever data we want to associate with the image
</image>
It's assumed that the image will have an image path, and probably a title. However, we may want to associate more data with each image, which might just be simple text, or we could even provide a nested XML structure with complex data within, for example:
<image src="people/DruKepple.jpg" title="Dru Kepple, ActionScript Implementor">
    <name>
        <first>Dru</first>
        <last>Kepple</last>
    </name>
    <employment>
        <company name="Summit Projects" url="http://www.summitprojects.com" />
        <company name="Art Institute of Portland" url="http://www.aidepartments.com" />
    </employment>
    <websites>
        <site url="summitprojectsflashblog.wordpress.com" />
        <site url="www.thekeppleeffect.com" />
        <site url="active.tutsplus.com/author/dru-kepple" />
        <site url="www.linkedin.com/drukepple" />
    </websites>
</image>
The point here is that inside of the image node, we can put whatever we want (from lengthy and complex XML data to nothing at all). This data will be available through the CoverFlow class, as the XML node that it is.
Here's our final full document (I used other images and links during the build), a list of images and data culled from active.tutsplus.com:
<coverflow>
	<image src="images/megaphone.jpg" title="HTML5, Flash and RIAs: 18 Industry Experts Have Their Say">
		<link>http://active.tutsplus.com/articles/roundups/html5-and-flash-17-industry-experts-have-their-say/</link>
	</image>
	<image src="images/magnifyer.jpg" title="Create an Impressive Magnifying Effect with ActionScript 3.0">
		<link>http://active.tutsplus.com/tutorials/effects/create-an-impressive-magnifying-effect-with-actionscript-30/</link>
	</image>
	<image src="images/as3101.jpg" title="AS3 101: Five Reasons to use Setters and Getters">
		<link>http://active.tutsplus.com/tutorials/actionscript/as3-101-five-reasons-to-use-setters-and-getters/</link>
	</image>
	<image src="images/montypython.jpg" title="10 Flash Things You Can’t Do With HTML5">
		<link>http://active.tutsplus.com/articles/roundups/10-flash-things-you-can’t-do-with-html5/</link>
	</image>
	<image src="images/bad.jpg" title="Blog Action Day: Clean up With a Beautiful Watery Game">
		<link>http://active.tutsplus.com/tutorials/games/blog-action-day-clean-up-with-a-beautiful-watery-game/</link>
	</image>
	<image src="images/hype.jpg" title="Create a Mesmeric Music Visualizer with HYPE">
		<link>http://active.tutsplus.com/tutorials/effects/create-a-mesmeric-music-visualizer-with-hype/</link>
	</image>
	<image src="images/max.jpg" title="Smart AS3 Video Loading with GreenSock LoaderMax – Free Active Premium!">
		<link>http://active.tutsplus.com/tutorials/actionscript/smart-as3-video-loading-with-greensock-loadermax-free-active-premium/</link>
	</image>
	<image src="images/50twitterers.jpg" title="50 More Flash Twitterers Worth Following">
		<link>http://active.tutsplus.com/articles/roundups/50-more-flash-twitterers-worth-following/</link>
	</image>
	<image src="images/open_mic_prefixes.jpg" title="Open Mike: Prefixes">
		<link>http://active.tutsplus.com/articles/open-mike/open-mike-prefixes/</link>
	</image>
	<image src="images/fullscreen_website.jpg" title="Create a Full Screen, Scalable Flash Website: Part 1">
		<link>http://active.tutsplus.com/tutorials/web-design/create-a-full-screen-scalable-flash-website-part-1/</link>
	</image>
</coverflow>
It looks like a lot, but it's really just a list of image nodes with two attributes each, the src and title, and a <link> node nested inside of the <image> node, which houses the URL of the article associated with the image.
Step 22: Load an XML File
To load XML, we'll need a property to store the XML, and a property for a URLLoader to load the XML. We'll need a public method to initiate a load with a String URL, some internal event handlers for the URLLoader to handle the XML load events. The elements of this step are pretty standard fare for loading XML, so I'll just pile it all in to one step and not spend too much time explaining things.
Start by adding two properties, one for the urlLoader and one for the xml, at the top of the CoverFlow class, with the rest of the properties.
private var _urlLoader:URLLoader;
private var _xml:XML;
In CoverFlow's constructor, create and set up the URLLoader (it doesn't really matter where in the constructor, but I'm opting for at the end):
_urlLoader = new URLLoader();
_urlLoader.addEventListener(Event.COMPLETE, onXMLLoad);
_urlLoader.addEventListener(IOErrorEvent.IO_ERROR, onXMLLoadError);
Write the URLLoader event handling functions, somewhere in the main body of your class:
private function onXMLLoad(e:Event):void {
    _xml = new XML(_urlLoader.data);
    trace("XML Loaded:\n" + _xml);
}

private function onXMLLoadError(e:IOErrorEvent):void {
    trace("There was an error loading the XML document: " + e.text);
}
Right now we're just tracing things; we're making sure we convert the URLLoader's data to XML, then spitting it out as-is. We're also handling an error in case we get a bad URL to load. We could do something fancier here, but for now we're really just preventing the error from stopping everything else, while still tracing a message.
We need a public load method, to initiate the XML load. We can assume that if there is already something loaded, we should clear it out first, then start the new load. To that end, we'll not only start the load on the URLLoader, but also call a method called clearContents to remove anything previously created in the CoverFlow. We'll fill that in later, but we'll plan for it and call it, and create an empty method to house it.
public function load(url:String):void {
    clearContents();
    _urlLoader.load(new URLRequest(url));
}

private function clearContents():void {

}
Lastly, we need to upgrade our tests. We need to remove the lines that create a test Cover from CoverFlow's constructor (I've commented them out here so you can identify them, but go ahead and remove them. The next code snippet of this function will have them removed):
public function CoverFlow(w:Number, h:Number) {
    _width = w;
    _height = h;
    _covers = new Vector.<Cover>();

    _coversContainer = new Sprite();
    addChild(_coversContainer);

    //var test:Cover = new Cover("I am a caption", <data />, _backgroundColor);
    //_coversContainer.addChild(test);
    //test.x = _width / 2;
    //test.y = _height / 2;
    //_covers.push(test);

    //trace(test.caption);
    //trace(test.data.toXMLString());
    //trace(test.backgroundColor);

    //test.load("images/best.jpg");

    _background = new Shape();
    addChildAt(_background, 0);
    drawBackground();

    scrollRect = new Rectangle(0, 0, _width, _height);

    _urlLoader = new URLLoader();
    _urlLoader.addEventListener(Event.COMPLETE, onXMLLoad);
    _urlLoader.addEventListener(IOErrorEvent.IO_ERROR, onXMLLoadError);
}
And then we need to go back to CoverFlowTest.as and add a call to load. Pass in the coverFlowImages.xml file we created in the last step.
public function CoverFlowTest() {
    coverFlow = new CoverFlow(stage.stageWidth, stage.stageHeight);
    addChild(coverFlow);
    coverFlow.backgroundColor = 0x000000;
    coverFlow.load("coverFlowImages.xml");
}
You should see our XML document traced to the Output panel.
Step 23: Parse the XML
Next we need to parse the XML and eventually do something with the data. We'll parse it in this step, and start doing something with it in the next step.
In the onXMLLoad method of CoverFlow, remove the trace and replace it with some basic XML looping. For now, we'll trace out values to make sure we're parsing them correctly.
private function onXMLLoad(e:Event):void {
    _xml = new XML(_urlLoader.data);

    var imageList:XMLList = _xml.image;
    var iLen:uint = imageList.length();
    var imageNode:XML;
    for (var i:uint = 0; i < iLen; i++) {
        imageNode = imageList[i];
        var src:String = imageNode.@src;
        var title:String = imageNode.@title;
        trace(src);
        trace(title);
        trace("");
    }
}
There isn't anything too special going on. We're just selecting all image nodes, loop over them, and then extracting the attributes from them. Now, we'll do something with them.
Step 24: Creating Cover Objects
We will have the potential to load quite a few images. It will be better to control the load by loading one at a time. This will maximize bandwidth for each image, letting the first image show up as soon as possible, so that there is something to see on screen before too long. Also, most browsers tend to throttle the number of simultaneous requests anyway, so rather than letting the browser control that, we may as well control it in Flash.
To work on this, we'll need to actually load some images into multiple Cover objects, so we'll start by creating the Cover objects and starting the load. We'll finesse the process over the next few steps.
In CoverFlow's onXMLLoad method, we'll remove the traces and instead create Cover objects:
private function onXMLLoad(e:Event):void {
    _xml = new XML(_urlLoader.data);

    var imageList:XMLList = _xml.image;
    var iLen:uint = imageList.length();
    var imageNode:XML;
    var cover:Cover;
    for (var i:uint = 0; i < iLen; i++) {
        imageNode = imageList[i];
        var src:String = imageNode.@src;
        var title:String = imageNode.@title;
        cover = new Cover(title, imageNode, _backgroundColor);
        _coversContainer.addChild(cover);
        cover.x = i * 200 + 100;
        cover.y = 250;
        cover.load(src);
        _covers.push(cover);
    }
}
You'll notice that we're doing probably what you'd expect: first, we create a new Cover object, passing in the data culled from the XML. Then we add it to the display list. Next we position it; this is temporary, but will allow us to see results for now. The x value is based on the number of iterations, so that we get a left-to-right placement. Again, we'll revisit the layout logic, this is just to see something right now.
Then we tell the Cover to load with the image source found in the XML, and finally store the Cover object in our _covers Vector.
This call to load is also temporary; right now we're just making sure that we're successfully creating Cover objects from the XML data. We'll move on to loading images sequentially next.
If you publish now, you should see something at least a little interesting:

No 3D yet, but that's coming. Be patient!
Step 25: Loading Images in Sequence
We're going to switch the logic from loading every Cover right away to loading them progressively. This will involve keeping track of a counter that points to the Cover that is currently loading, and a function that loads the next Cover. We have a few stops along the way, so follow along.
First, in Cover, we want to make sure we re-dispatch the COMPLETE event once the image loads. In onLoadComplete, add this line at the very end:
private function onLoadComplete(e:Event):void {
    _loader.x = -Math.round(_loader.width / 2);
    _loader.y = -_loader.height;
    drawReflection();
    dispatchEvent(e);
}
The rest of our changes will happen in CoverFlow. First, add a property to track the currently loading Cover by index:
private var _loadCounter:uint;
Then, in onXMLLoad, we'll remove the var src:String =… and cover.load(src) lines, and set the _loadCounter property to 0, as well as call a method that we haven't written yet:
private function onXMLLoad(e:Event):void {
    _xml = new XML(_urlLoader.data);

    var imageList:XMLList = _xml.image;
    var iLen:uint = imageList.length();
    var imageNode:XML;
    var cover:Cover;
    for (var i:uint = 0; i < iLen; i++) {
        imageNode = imageList[i];
        //var src:String = imageNode.@src;
        var title:String = imageNode.@title;
        cover = new Cover(title, imageNode, _backgroundColor);
        _coversContainer.addChild(cover);
        cover.x = i * 200 + 100;
        cover.y = 250;
        //cover.load(src);
        _covers.push(cover);
    }
    _loadCounter = 0;
    loadNextCover();
}
Now let's write that loadNextCover method. The idea is to take the current value of _loadCounter and use it to target a Cover and a source image.
private function loadNextCover():void {
    var cover:Cover = _covers[_loadCounter];
    var src:String = _xml.image[_loadCounter].@src;
    cover.load(src);
    cover.addEventListener(Event.COMPLETE, onCoverLoad);
}
First, we get the previously created Cover object from the _covers Vector. Then we get the matching image URL by going back to the XML data and finding the image node using the same value of _loadCounter. Then we simply ask the Cover to load that URL. Finally, we add a COMPLETE listener, which we need to write next:
private function onCoverLoad(e:Event):void {
    e.target.removeEventListener(Event.COMPLETE, onCoverLoad);
    _loadCounter++;
    if (_loadCounter < _covers.length) {
        loadNextCover();
    } else {
        dispatchEvent(new Event(Event.COMPLETE));
    }
}
Each time a Cover finishes loading, let's first clean up after ourselves and remove the COMPLETE event listener. Then it will increment the _loadCounter and then check to see if we can still have Covers left in the _covers Vector. If we do, then we call loadNextCover() again, which starts the process over again with a different Cover and image. If not, then we must be at the end, so we can dispatch a COMPLETE event.
To test this event, hop back over to CoverFlowTest and add the following code:
public function CoverFlowTest() {
    coverFlow = new CoverFlow(stage.stageWidth, stage.stageHeight);
    addChild(coverFlow);
    coverFlow.backgroundColor = 0x000000;
    coverFlow.load("coverFlowImages.xml");
    coverFlow.addEventListener(Event.COMPLETE, onCoverFlowLoaded);
}

private function onCoverFlowLoaded(e:Event):void {
    trace("Coverflow loaded and ready to go.");
}
This should be straightforward: we're just adding a listener to that COMPLETE event that just traces. Go ahead and run the movie now. You should see the images appear sequentially, and, once the images are all loaded, you should see the "Coverflow loaded and ready to go." message in the Output panel.
Step 26: Determining Progress
To be able to dispatch PROGRESS events as the images load, we're going to fake things a bit. We're going to assume that the first image to load is, on average, representative of all of the images. There will certainly be cases where this is not true, but for for most applications we'll be dealing with images of similar dimension, quality, and content, and therefore most images will fall around a similar file size.
First, we need to change the onLoadProgress method in Cover so that we get rid of the trace and redispatch the PROGRESS event:
private function onLoadProgress(e:ProgressEvent):void {
    dispatchEvent(e);
}
Then we'll need two more properties in CoverFlow to help track the overall progress:
private var _bytesPerImage:int;
private var _bytesTotal:int;
Now, the next thing to do is get the size of the first image once it starts loading. We need to make sure we're adding a PROGRESS event listener when we start the load. In CoverFlow's loadNextCover method:
private function loadNextCover():void {
    var cover:Cover = _covers[_loadCounter];
    var src:String = _xml.image[_loadCounter].@src;
    cover.load(src);
    cover.addEventListener(Event.COMPLETE, onCoverLoad);
    cover.addEventListener(ProgressEvent.PROGRESS, onCoverProgress);
}
And add the onCoverProgress method:
private function onCoverProgress(e:ProgressEvent):void {
    if (_bytesPerImage == 0) {
        _bytesPerImage = e.bytesTotal;
        _bytesTotal = _bytesPerImage * _covers.length;
    }
    var adjustedBytesLoaded:uint = e.bytesLoaded * (_bytesPerImage / e.bytesTotal);
    var cumulativeBytesLoaded:uint = (_loadCounter * _bytesPerImage) + adjustedBytesLoaded;
    dispatchEvent(new ProgressEvent(ProgressEvent.PROGRESS, false, false, cumulativeBytesLoaded, _bytesTotal));
}
Now, to test it, go back to CoverFlowTest and add a listener for the PROGRESS event:
public function CoverFlowTest() {
    coverFlow = new CoverFlow(stage.stageWidth, stage.stageHeight);
    addChild(coverFlow);
    coverFlow.backgroundColor = 0x000000;
    coverFlow.load("coverFlowImages.xml");
    coverFlow.addEventListener(Event.COMPLETE, onCoverFlowLoaded);
    coverFlow.addEventListener(ProgressEvent.PROGRESS, onCoverFlowProgress);
}

private function onCoverFlowProgress(e:ProgressEvent):void {
    trace("Coverflow progress: " + e.bytesLoaded + " / " + e.bytesTotal);
}
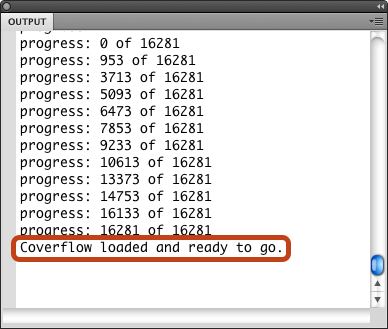
And test the movie. You should see a long string of progress traces, terminating in the "loaded" message, something like the following:
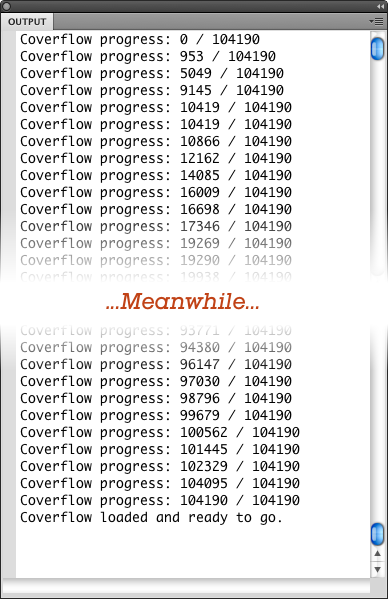
Of course, you'll want to display something informative on the stage, not trace out numbers. This particular task, however, isn't really up to CoverFlow; it's enough that it's dispatching the appropriate events. I won't belabor the creation of a progress bar, and instead, I'll turn to the more interesting work of displaying Covers in 3D.
Step 27: Refactor the Logic
We'll look at that loop that parses the XML, creates the Cover objects, and lays them out. Let's offload the layout logic to another method. Remove the lines in the loop that position the Cover object (you might want to copy them), and add a call to a yet-to-be-written method after the loop.
private function onXMLLoad(e:Event):void {
    _xml = new XML(_urlLoader.data);

    var imageList:XMLList = _xml.image;
    var iLen:uint = imageList.length();
    var imageNode:XML;
    var cover:Cover;
    for (var i:uint = 0; i < iLen; i++) {
        imageNode = imageList[i];
        var src:String = imageNode.@src;
        var title:String = imageNode.@title;
        cover = new Cover(title, imageNode, _backgroundColor);
        _coversContainer.addChild(cover);
        //cover.x = i * 200 + 100;
        //cover.y = 250;
        _covers.push(cover);
    }
    layout();
    _loadCounter = 0;
    loadNextCover();
}
Next, write that layout method. It's another loop, this one over the _covers Vector, and internally it does the same positioning logic:
private function layout():void {
    var len:uint = _covers.length;
    var cover:Cover;
    for (var i:uint = 0; i < len; i++) {
        cover = _covers[i];
        cover.x = i * 200 + 100;
        cover.y = 250;
    }
}
Go ahead and test it now; you should see absolutely no change. The only difference is purely behind-the-scenes logic. The advantage we've added is that we'll be able to call layout() at any time, independent of onXMLLoad().
Step 28: Initial Layout
Let's go for a big pay off right now. We'll rewrite the layout logic so that thing start to happen in 3D. Remove the cover.x = … line and add the highlighted lines below (still in CoverFlow):
private function layout():void {
    var len:uint = _covers.length;
    var cover:Cover;
    for (var i:uint = 0; i < len; i++) {
        cover = _covers[i];
        if (i == 0) {
            cover.rotationY = 0;
            cover.x = _background.width / 2;
            cover.z = 0;
        } else {
            cover.rotationY = 45;
            cover.x = ((_background.width / 2) + 60) + (i * 30);
            cover.z = 150;
        }
        cover.y = 250;
    }
}
This logic needs a lot of love, but go ahead and run it now, and you should see…something not quite right.
You should see the potential there, but obviously we need to manage depth. This is a drawback to using Flash's built-in 3D capabilities: it renders each DisplayObject properly, but not a "scene" of multiple DisplayObjects. Normal 2D depth stacking rules apply, even if the "z" of a given object should place it otherwise.
This bit of logic, though, gives you a glimpse of what we're going to do: First, determine where in the "flow" a given Cover is – centered, on the right or (eventually) on the left. Then set up the Cover's x, z, and rotationY properties appropriately. The math involved in the right-side x position is a mouthful, but can be read like this:
Start at the center (_background.width / 2), move 60 pixels to the right to give some space around the centered item ( … + 60), then, depending on where we are in the loop, move the Cover further to the right (… + (i + 30)).
Step 29: Managing Depth
Let's next address the depth problem. Here's what needs to happen: the centered item needs to be front most. After that, items on either side need to be decrease in depth index the further they are from the center. This is, fortunately, relatively simple to accomplish. Adjust the logic in CoverFlow's layout method:
private function layout():void {
    var len:uint = _covers.length;
    var cover:Cover;
    for (var i:uint = 0; i < len; i++) {
        cover = _covers[i];
        if (i == 0) {
            cover.rotationY = 0;
            cover.x = _background.width / 2;
            cover.z = 0;
            _coversContainer.setChildIndex(cover, _coversContainer.numChildren-1);
        } else {
            cover.rotationY = 45;
            cover.x = ((_background.width / 2) + 60) + (i * 30);
            cover.z = 150;
            _coversContainer.setChildIndex(cover, _coversContainer.numChildren - (i + 1));
        }
        cover.y = 250;
    }
}
In the first if block, we're on the centered cover, so we set the index of the Cover to the highest index available. In the else block, the higher i is, the lower the index number we get. That works relative to other Covers on the right side, but we need to take the index down by one more to accommodate the center (highest) Cover.
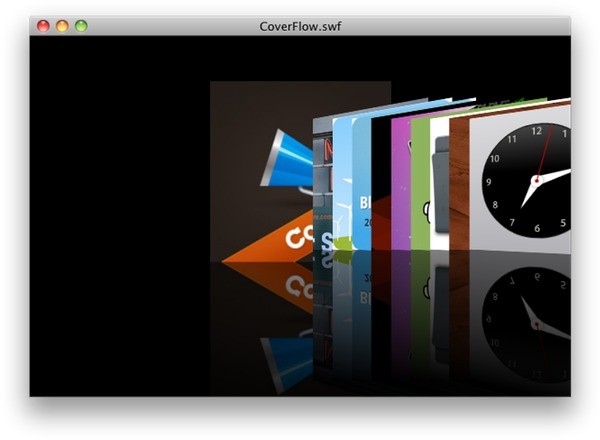
Try it out now…you should see some promising visuals!
Step 30: The Left Side
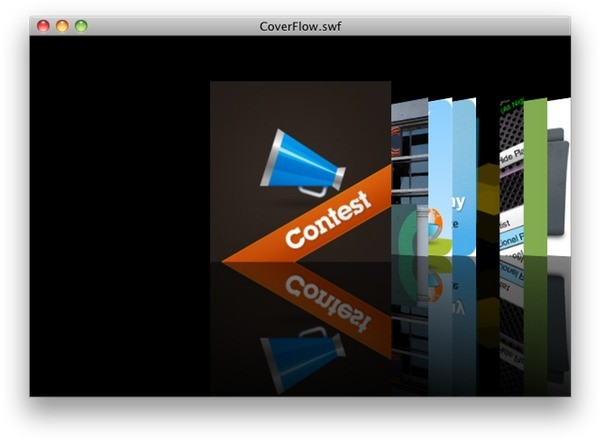
OK, so far we've been making assumptions that make it very hard to lay things out for real. The big assumption is that we're centering the first Cover (index 0). If you tried to center, say, the fourth Cover, you'd get results that aren't quite expected:

It doesn't look bad at first glance, but think about it. If we're centering the fourth Cover, we'd expect to see three Covers on the left, the fourth one in the center, and the rest on the right. Let's make that happen.
First, let's create a new property (still in CoverFlow) that will hold our current index value. Let's call it _selectedIndex.
private var _selectedIndex:uint;
And, for testing purposes only, we'll set that value to 4 at the top of the layout method. This will get removed in the next step. Then, we'll rework the logic within the loop of layout to be a little more dynamic.
private function layout():void {
    _selectedIndex = 4;
    var len:uint = _covers.length;
    var cover:Cover;
    var distanceFromCenter:uint;
    for (var i:uint = 0; i < len; i++) {
        cover = _covers[i];
        if (i == _selectedIndex) {
            cover.rotationY = 0;
            cover.x = _background.width / 2;
            cover.z = 0;
            _coversContainer.setChildIndex(cover, _coversContainer.numChildren-1);
        } else if (i < _selectedIndex) {
            distanceFromCenter = _selectedIndex - i;
            cover.rotationY = -45;
            cover.x = ((_background.width / 2) - 60) - (distanceFromCenter * 30);
            cover.z = 150;
            _coversContainer.setChildIndex(cover, _coversContainer.numChildren - (distanceFromCenter + 1));
        } else if (i > _selectedIndex) {
            distanceFromCenter = i - _selectedIndex;
            cover.rotationY = 45;
            cover.x = ((_background.width / 2) + 60) + (distanceFromCenter * 30);
            cover.z = 150;
            _coversContainer.setChildIndex(cover, _coversContainer.numChildren - (distanceFromCenter + 1));
        }
        cover.y = 250;
    }
}
That's a lot of logic and math, but it's actually rather repetitive. The new block is in the middle, but it's nearly identical to the other else if block, only a few things are reversed. But go ahead and test the movie, it should look something like this:
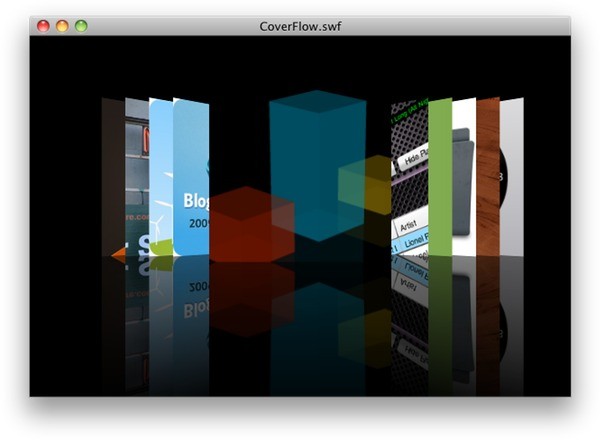
The big change was the move away from i as a direct factor in the placement of Covers, but instead determining the distance that i is from the current index. The further away it is, the the further away the x has to be from the center, and also the further back in depth it has to be. The math is just a translation from what we were doing before to a more dynamic approach. If you like, go ahead and try setting _selectedIndex to other values, and ensure that you get the results you expect.
Step 31: Customizing the Appearance
You may feel that the distribution of Covers is a little cramped (I know I do, but I have to work within the 600 pixel wide limit that Activetuts+ places on me). In fact, there are quite a few positioning parameters that could be tweaked to adjust the overall look. We'll go ahead and create a bunch of properties, along with associated setters and getters, to handle this customization. And we'll of course use those properties instead of hard-coded Numbers in our layout method.
This will be a lengthy step, but fear not, it's fairly basic.
First, the properties:
private var _centerMargin:Number;
private var _horizontalSpacing:Number;
private var _backRowDepth:Number;
private var _backRowAngle:Number;
private var _verticalOffset:Number;
These properties will control the following:
- centerMargin controls the amount of space on either side of the center Cover and the first Covers to the side. It should be a positive value.
- horizontalSpacing controls the amount of space between Covers in the "back." That is, all of the Cover on the left and right (but not counting the center) will have the same amount of space in between adjacent Covers. It should be a positive value.
- backRowDepth controls how far back the back row is. This will be in the form of an offset, so as to prevent the back row from being in front of the center Cover. It should be a positive value.
- backRowAngle controls the angle at which Covers in the back row will turn. This is sort of an absolute value, and the value is "mirrored" for the other side. It should be constrained between 0 and 90.
- verticalOffset controls the amount by which to move the whole set of Covers up or down, offset from the automatically determined y value. This can be any Number. We'll come back to this bit of logic, but we may as well write the property, setter, and getter while we're doing the other four.
We'll set up constants to contain the default values of each of these properties. These can go with the rest of your properties:
private static const DEFAULT_CENTER_MARGIN:Number      = 60;
private static const DEFAULT_HORIZONTAL_SPACING:Number = 30;
private static const DEFAULT_BACK_ROW_DEPTH:Number     = 150;
private static const DEFAULT_BACK_ROW_ANGLE:Number     = 45;
private static const DEFAULT_VERTICAL_OFFSET:Number    = 0;
In the constructor, set each of the properties to these default values (if you don't like the default values, you can change them, that's part of the reason for putting them together in an easy to find spot). This way we'll be sure that each of these variables is set with a suitable value even if the user never specified one.
public function CoverFlow(w:Number, h:Number) {
    _width = w;
    _height = h;
    _covers = new Vector.<Cover>();

    _centerMargin      = DEFAULT_CENTER_MARGIN;
    _horizontalSpacing = DEFAULT_HORIZONTAL_SPACING;
    _backRowDepth      = DEFAULT_BACK_ROW_DEPTH;
    _backRowAngle      = DEFAULT_BACK_ROW_ANGLE;
    _verticalOffset    = DEFAULT_VERTICAL_OFFSET;

    _coversContainer = new Sprite();
    addChild(_coversContainer);

    _background = new Shape();
    addChildAt(_background, 0);
    drawBackground();

    scrollRect = new Rectangle(0, 0, _width, _height);

    _urlLoader = new URLLoader();
    _urlLoader.addEventListener(Event.COMPLETE, onXMLLoad);
    _urlLoader.addEventListener(IOErrorEvent.IO_ERROR, onXMLLoadError);
}
And, with the valid values in mind, write the setters and getters (I'm going to put these right after our current setters and getters, around line 89):
public function set centerMargin(num:Number):void {
    if (isNaN(num)) num = DEFAULT_CENTER_MARGIN;
    _centerMargin = Math.max(0, num);
}
public function get centerMargin():Number {
    return _centerMargin;
}

public function set horizontalSpacing(num:Number):void {
    if (isNaN(num)) num = DEFAULT_HORIZONTAL_SPACING;
    _horizontalSpacing = Math.max(0, num);
}
public function get horizontalSpacing():Number {
    return _horizontalSpacing;
}

public function set backRowDepth(num:Number):void {
    if (isNaN(num)) num = DEFAULT_BACK_ROW_DEPTH;
    _backRowDepth = Math.max(0, num);
}
public function get backRowDepth():Number {
    return _backRowDepth;
}

public function set backRowAngle(num:Number):void {
    if (isNaN(num)) num = DEFAULT_BACK_ROW_ANGLE;
    _backRowAngle = Math.min(90, Math.abs(num));
}
public function get backRowAngle():Number {
    return _backRowAngle;
}

public function set verticalOffset(num:Number):void {
    if (isNaN(num)) num = DEFAULT_VERTICAL_OFFSET;
    _verticalOffset = num;
}
public function get verticalOffset():Number {
    return _verticalOffset;
}
And lastly we need to replace numbers embedded in our layout logic with these properties. In layout:
for (var i:uint = 0; i < len; i++) {
    cover = _covers[i];
    if (i == _selectedIndex) {
        cover.rotationY = 0;
        cover.x = _background.width / 2;
        cover.z = 0;
        _coversContainer.setChildIndex(cover, _coversContainer.numChildren-1);
    } else if (i < _selectedIndex) {
        distanceFromCenter = _selectedIndex - i;
        cover.rotationY = -_backRowAngle;
        cover.x = ((_background.width / 2) - _centerMargin) - (distanceFromCenter * _horizontalSpacing);
        cover.z = _backRowDepth;
        _coversContainer.setChildIndex(cover, _coversContainer.numChildren - (distanceFromCenter + 1));
    } else if (i > _selectedIndex) {
        distanceFromCenter = i - _selectedIndex;
        cover.rotationY = _backRowAngle;
        cover.x = ((_background.width / 2) + _centerMargin) + (distanceFromCenter * _horizontalSpacing);
        cover.z = _backRowDepth;
        _coversContainer.setChildIndex(cover, _coversContainer.numChildren - (distanceFromCenter + 1));
    }
    cover.y = 250;
}
You can test the movie as is, and things should function exactly as they have before. However, you can also test these properties by setting them from CoverFlowTest. Set them however you like (in fact, be sure to test the illegal values, like -200 for the centerMargin), for example:
public function CoverFlowTest() {
    coverFlow = new CoverFlow(stage.stageWidth, stage.stageHeight);
    addChild(coverFlow);
    coverFlow.backgroundColor = 0x000000;
    coverFlow.horizontalSpacing = 60;
    coverFlow.centerMargin = 100;
    coverFlow.load("coverFlowImages.xml");
    coverFlow.addEventListener(Event.COMPLETE, onCoverFlowLoaded);
    coverFlow.addEventListener(ProgressEvent.PROGRESS, onCoverFlowProgress);
}

Step 32: Efficient Layout
Right now, our CoverFlow works and is somewhat customizable, but only if we set the values before the XML file loads. As it is now, setting the properties at any point after that will result in no change.
This could be as easy as simply calling layout() from each of the setters. However, this is prone to inefficient use of CPU cycles. If you needed to set all five properties in one fell swoop, you'd end up executing the layout logic 5 times in row, the first 4 being pointless since you weren't done setting the values to what you needed to.
Because Flash operates on frame model of rendering, wherein code executes in between each frame, and then the display is updated, we need a way to only run that layout method when the stage is about to be rendered for the next frame. This could let us set properties as much as we like, but still only redraw the CoverFlow once per frame.
There's an easy way to do this, fortunately, but it does take some wherewithal. We need to utilize the RENDER event. The RENDER event will get dispatched by a DisplayObject when the stage is about to get rendered, but before the render happens. As a bonus, the event doesn't dispatch when the Flash Player is minimized, meaning we shouldn't be wasting cycles if you can't even see the movie.
Implementing this is a three step process: first, we need to listen for the event. In the constructor of CoverFlow, add this line:
this.addEventListener(Event.RENDER, onRender);
Next, add the listener method:
private function onRender(e:Event):void {
    layout();
}
Yup, that's it…we'll just call layout each time we get the event.
Lastly, we need to call invalidate on the stage each time we want the RENDER event come our way. This means that in each of the setters, we need to add this line at the very end:
if (stage) stage.invalidate();
If there is no stage, we don't want to call a method and cause a null object reference error. Anyway, if there is no stage, then the CoverFlow object isn't on the display list anyway, so there's not point in asking for the render event.
The call to invalidate, however, is how we get the RENDER event to fire. Without that call, we won't get the event, even with an event listener. So, we need this in each setter:
public function set centerMargin(num:Number):void {
    if (isNaN(num)) num = DEFAULT_CENTER_MARGIN;
    _centerMargin = Math.max(0, num);
    if (stage) stage.invalidate();
}
public function get centerMargin():Number {
    return _centerMargin;
}

public function set horizontalSpacing(num:Number):void {
    if (isNaN(num)) num = DEFAULT_HORIZONTAL_SPACING;
    _horizontalSpacing = Math.max(0, num);
    if (stage) stage.invalidate();
}
public function get horizontalSpacing():Number {
    return _horizontalSpacing;
}

public function set backRowDepth(num:Number):void {
    if (isNaN(num)) num = DEFAULT_BACK_ROW_DEPTH;
    _backRowDepth = Math.max(0, num);
    if (stage) stage.invalidate();
}
public function get backRowDepth():Number {
    return _backRowDepth;
}

public function set backRowAngle(num:Number):void {
    if (isNaN(num)) num = DEFAULT_BACK_ROW_ANGLE;
    _backRowAngle = Math.min(90, Math.abs(num));
    if (stage) stage.invalidate();
}
public function get backRowAngle():Number {
    return _backRowAngle;
}

public function set verticalOffset(num:Number):void {
    if (isNaN(num)) num = DEFAULT_VERTICAL_OFFSET;
    _verticalOffset = num;
    if (stage) stage.invalidate();
}
public function get verticalOffset():Number {
    return _verticalOffset;
}
So now, if we set all 5 properties at the same time, we may call invalidate on the stage more than once, but that's fine, that's not going to cause problems. We should get a single RENDER event as a result, meaning we lay out the CoverFlow only once per frame.
To test this, we can put some traces into our methods, and then set these properties after the XML has loaded. First, add a trace message to onRender:
private function onRender(e:Event):void {
    trace("render")
    layout();
}
Then, in CoverFlowTest, set all 5 properties in onCoverFlowLoaded:
private function onCoverFlowLoaded(e:Event):void {
    trace("Coverflow loaded and ready to go.");
    coverFlow.horizontalSpacing = 100;
    coverFlow.centerMargin = 75;
    coverFlow.backRowDepth = 300;
    coverFlow.backRowAngle = 75;
    coverFlow.verticalOffset = 50;
}
You should see the movie load images as before, however, this time, the images should jump to a slightly different layout once all of the images have loaded. This proves that things work visually, but more importantly, check the Output panel. You should see a single "render" message. We called stage.invalidate from the 5 setters, but that resulted in only a single RENDER event, which is what we're after.
Feel free to remove the trace and the layout code we just added.
Step 33: Regroup
It's been a while since I've listed the full class code. Our work has been mainly in CoverFlow. Here is the current state of things with that class:
package com.tutsplus.coverflow {

    import flash.display.*;
    import flash.geom.*;
    import flash.events.*;
    import flash.net.*;
    import flash.text.*;
    import flash.utils.*;

    public class CoverFlow extends Sprite {

        private var _coversContainer:Sprite;
        private var _width:Number;
        private var _height:Number;
        private var _backgroundColor:uint = 0;
        private var _background:Shape;
        private var _covers:Vector.<Cover>;
        private var _urlLoader:URLLoader;
        private var _xml:XML;
        private var _loadCounter:uint;
        private var _bytesPerImage:int;
        private var _bytesTotal:int;
        private var _selectedIndex:uint;
        private var _centerMargin:Number;
        private var _horizontalSpacing:Number;
        private var _backRowDepth:Number;
        private var _backRowAngle:Number;
        private var _verticalOffset:Number;

        private static const DEFAULT_CENTER_MARGIN:Number      = 60;
        private static const DEFAULT_HORIZONTAL_SPACING:Number = 30;
        private static const DEFAULT_BACK_ROW_DEPTH:Number     = 150;
        private static const DEFAULT_BACK_ROW_ANGLE:Number     = 45;
        private static const DEFAULT_VERTICAL_OFFSET:Number    = 0;

        public function CoverFlow(w:Number, h:Number) {
            _width = w;
            _height = h;
            _covers = new Vector.<Cover>();

            _centerMargin      = DEFAULT_CENTER_MARGIN;
            _horizontalSpacing = DEFAULT_HORIZONTAL_SPACING;
            _backRowDepth      = DEFAULT_BACK_ROW_DEPTH;
            _backRowAngle      = DEFAULT_BACK_ROW_ANGLE;
            _verticalOffset    = DEFAULT_VERTICAL_OFFSET;

            _coversContainer = new Sprite();
            addChild(_coversContainer);

            _background = new Shape();
            addChildAt(_background, 0);
            drawBackground();

            scrollRect = new Rectangle(0, 0, _width, _height);

            _urlLoader = new URLLoader();
            _urlLoader.addEventListener(Event.COMPLETE, onXMLLoad);
            _urlLoader.addEventListener(IOErrorEvent.IO_ERROR, onXMLLoadError);

            this.addEventListener(Event.RENDER, onRender);
        }

        override public function set width(num:Number):void {
            _width = num;
            _background.width = _width;
            scrollRect = new Rectangle(0, 0, _width, _height);
        }
        override public function get width():Number {
            return _width;
        }
        override public function set height(num:Number):void {
            _height = num;
            _background.height = _height;
            scrollRect = new Rectangle(0, 0, _width, _height);
        }
        override public function get height():Number {
            return _height;
        }

        public function set backgroundColor(val:uint):void {
            _backgroundColor = val;
            drawBackground();
            for each (var cover:Cover in _covers) {
                cover.backgroundColor = val;
            }
        }
        public function get backgroundColor():uint {
            return _backgroundColor;
        }

        public function set centerMargin(num:Number):void {
            if (isNaN(num)) num = DEFAULT_CENTER_MARGIN;
            _centerMargin = Math.max(0, num);
            if (stage) stage.invalidate();
        }
        public function get centerMargin():Number {
            return _centerMargin;
        }

        public function set horizontalSpacing(num:Number):void {
            if (isNaN(num)) num = DEFAULT_HORIZONTAL_SPACING;
            _horizontalSpacing = Math.max(0, num);
            if (stage) stage.invalidate();
        }
        public function get horizontalSpacing():Number {
            return _horizontalSpacing;
        }

        public function set backRowDepth(num:Number):void {
            if (isNaN(num)) num = DEFAULT_BACK_ROW_DEPTH;
            _backRowDepth = Math.max(0, num);
            if (stage) stage.invalidate();
        }
        public function get backRowDepth():Number {
            return _backRowDepth;
        }

        public function set backRowAngle(num:Number):void {
            if (isNaN(num)) num = DEFAULT_BACK_ROW_ANGLE;
            _backRowAngle = Math.min(90, Math.abs(num));
            if (stage) stage.invalidate();
        }
        public function get backRowAngle():Number {
            return _backRowAngle;
        }

        public function set verticalOffset(num:Number):void {
            if (isNaN(num)) num = DEFAULT_VERTICAL_OFFSET;
            _verticalOffset = num;
            if (stage) stage.invalidate();
        }
        public function get verticalOffset():Number {
            return _verticalOffset;
        }

        private function drawBackground():void {
            _background.graphics.clear();
            _background.graphics.beginFill(_backgroundColor, 1);
            _background.graphics.drawRect(0, 0, _width, _height);
        }

        private function layout():void {
            _selectedIndex = 4;
            var len:uint = _covers.length;
            var cover:Cover;
            var distanceFromCenter:uint;
            for (var i:uint = 0; i < len; i++) {
                cover = _covers[i];
                if (i == _selectedIndex) {
                    cover.rotationY = 0;
                    cover.x = _background.width / 2;
                    cover.z = 0;
                    _coversContainer.setChildIndex(cover, _coversContainer.numChildren-1);
                } else if (i < _selectedIndex) {
                    distanceFromCenter = _selectedIndex - i;
                    cover.rotationY = -_backRowAngle;
                    cover.x = ((_background.width / 2) - _centerMargin) - (distanceFromCenter * _horizontalSpacing);
                    cover.z = _backRowDepth;
                    _coversContainer.setChildIndex(cover, _coversContainer.numChildren - (distanceFromCenter + 1));
                } else if (i > _selectedIndex) {
                    distanceFromCenter = i - _selectedIndex;
                    cover.rotationY = _backRowAngle;
                    cover.x = ((_background.width / 2) + _centerMargin) + (distanceFromCenter * _horizontalSpacing);
                    cover.z = _backRowDepth;
                    _coversContainer.setChildIndex(cover, _coversContainer.numChildren - (distanceFromCenter + 1));
                }
                cover.y = 250;
            }
        }

        private function onXMLLoad(e:Event):void {
            _xml = new XML(_urlLoader.data);

            var imageList:XMLList = _xml.image;
            var iLen:uint = imageList.length();
            var imageNode:XML;
            var cover:Cover;
            for (var i:uint = 0; i < iLen; i++) {
                imageNode = imageList[i];
                var title:String = imageNode.@title;
                cover = new Cover(title, imageNode, _backgroundColor);
                _coversContainer.addChild(cover);
                _covers.push(cover);
            }
            layout();
            _loadCounter = 0;
            loadNextCover();
        }

        private function onXMLLoadError(e:IOErrorEvent):void {
            trace("There was an error loading the XML document: " + e.text);
        }

        public function load(url:String):void {
            clearContents();
            _urlLoader.load(new URLRequest(url));
        }

        private function clearContents():void {

        }

        private function loadNextCover():void {
            var cover:Cover = _covers[_loadCounter];
            var src:String = _xml.image[_loadCounter].@src;
            cover.load(src);
            cover.addEventListener(Event.COMPLETE, onCoverLoad);
            cover.addEventListener(ProgressEvent.PROGRESS, onCoverProgress);
        }

        private function onCoverLoad(e:Event):void {
            e.target.removeEventListener(Event.COMPLETE, onCoverLoad);
            _loadCounter++;
            if (_loadCounter < _covers.length) {
                loadNextCover();
            } else {
                dispatchEvent(new Event(Event.COMPLETE));
            }
        }

        private function onCoverProgress(e:ProgressEvent):void {
            if (_bytesPerImage == 0) {
                _bytesPerImage = e.bytesTotal;
                _bytesTotal = _bytesPerImage * _covers.length;
            }
            var adjustedBytesLoaded:uint = e.bytesLoaded * (_bytesPerImage / e.bytesTotal);
            var cumulativeBytesLoaded:uint = (_loadCounter * _bytesPerImage) + adjustedBytesLoaded;
            dispatchEvent(new ProgressEvent(ProgressEvent.PROGRESS, false, false, cumulativeBytesLoaded, _bytesTotal));
        }

        private function onRender(e:Event):void {
            layout();
        }

    }

}
Step 34: Caption
We have a few more things to tidy up before we get to animation and fun interactivity. We'll take on the label. To get this rolling, we just need a text field. We'll set up some default styling, and open the styles up for customization in the next step.
First, create a TextField, and add it to the CoverFlow. In CoverFlow, alongside the rest of your properties, create a TextField property:
private var _captionField:TextField;
Then set it up in the constructor (anywhere is fine, but I'm putting it after everything else in the constructor):
_captionField = new TextField;
addChild(_captionField);
_captionField.width = 200;
_captionField.height = 50;
_captionField.x = (_width - _captionField.width) / 2;
_captionField.y = _height - 80;
_captionField.multiline = true;
_captionField.wordWrap = true;
var fontName:String;
var fonts:Array = Font.enumerateFonts(true);
for each (var font:Font in fonts) {
    trace(font.fontName);
    if (font.fontName.search(/lucida.*grande/i) > -1) {
        fontName = font.fontName;
        break;
    }
}
if (!fontName) fontName = "Verdana";
var format:TextFormat = new TextFormat(fontName, 12, 0xFFFFFF);
format.align = TextFormatAlign.CENTER;
_captionField.defaultTextFormat = format;
Finally, in layout, add in a line to set the text of the TextField:
private function layout():void {
    _selectedIndex = 4;
    var len:uint = _covers.length;
    var cover:Cover;
    var distanceFromCenter:uint
    for (var i:uint = 0; i < len; i++) {
        cover = _covers[i];
        if (i == _selectedIndex) {
            cover.rotationY = 0;
            cover.x = _background.width / 2;
            cover.z = 0;
            _coversContainer.setChildIndex(cover, _coversContainer.numChildren-1);
            _captionField.text = cover.caption;
        // ...
The TextField creation in the constructor is possibly a bit daunting. For the most part, though, it's fairly standard TextField setup, all done through code. If you've never done that before, you may be surprised at the number of lines necessary to set up a TextField. This is typical; the default TextField in pretty bland, and we need to make sure that the size is set, that it's a multiline textfield, and that it has a basic format.
Even if you've written programmatic TextFields before, the "fontName" business might still be a surprise. The general idea is that we're setting up a default style, based on Apple's use of the font Lucida Grande as their system font. But we can't be confident that users will have that font (most, if not all, Macs running OS X should, but we can't be 100% sure and PC's are another story). So we get an Array of system fonts, using Font.enumerateFont(true). The "true" tells enumerateFont to enumerate the system fonts; otherwise, it enumerates the fonts emebedded into the SWF. This returns an Array of Font objects. We loop over that Array, looking for a font with a name similar to "Lucida Grande." That's a regular expression in the "search" call, which just gives us some flexibility in case the font name is slightly different on one system as opposed to another. If we find a match, grab the font name and break the loop. If we make it through the loop without a match, just use "Verdana." This gives us Lucida Grande if the user has it, and a fallback sans serif font if they don't.
Go ahead and try it out; you should see your label show up below the centered item.

Also, you may notice a bunch of extra traces showing up in the Output panel. This is from the font loop in the constructor. We don't need this long term, but I thought it would be useful to see these fonts being enumerated. Your output will be different, naturally, depending on the fonts installed on your system.
After you've had your fill of examining the font names, you can delete the trace(font.fontName); line from the constructor (line 74 in the listing above).
Step 35: Enable Text Styling
Now, what if you want to customize the caption field a bit? That's a reasonable request, and we have a few options. One is that we could write setters and getters for the kinds of things we want to expose for external control. This might include things like enabling multiline, adjust the width, setting the text color, setting the align type, setting the font, and setting the font size. The good part of this approach is that it keeps things encapsulated and will probably make things easier for the programmer who is using this CoverFlow object. If all you need to do is write "coverFlow.fontSize = 16" to make that one minor adjustment, then that's about as easy as it gets. The downside is that we need to pick and choose what is exposed, and the more control we offer the more code we have to write in CoverFlow to accommodate that.
Another approach is to simply expose the TextField as a (read-only) property of CoverFlow. This has basically the opposite pro/con thing as the first option. It's easy for us to implement right now, and affords total control to the end user; if you can do it to a TextField, you can do it the CoverFlow caption. However, relinquishing too much control might have disastrous effects. Most people wouldn't bother really touching it, but accidents happen. Worse, though (in my opinion) is that in order to set the font size of the caption, you end up with a rather verbose (and entirely hypothetical, mind you):
var format:TextFormat = coverFlow.captionField.defaultTextFormat;
format.fontSize = 16;
coverFlow.captionField.defaultTextFormat = format;
Not to mention that there's a difference between defaultTextFormat at setTextFormat(), and you'd better be familiar with which one to use in this scenario.
So which one is better? In an ideal world, I'd have to vote for the encapsulation method where pretty much every possible option is accounted for. However, for the purposes of this tutorial, that's a lot of repetitive code. So, in the interest of trying to demonstrate this technique, yet still allow extensive customization, I'll implement three properties for text styling, along with simply exposing the TextField for more detailed styling, which, as it happens, is option number three.
If you like the idea of encapsulation and want to eschew the revealing of the TextField to external objects, then the following will act as a guide for how to write more setters.
We will add properties to set and get the font name, the font size, and the font color. Also, we'll add a getter (no setter) for the captionField. The styling properties will require a rendering deferment like the layout properties did, as well as attention paid to how to apply TextFormat objects. To start things off, declare a property to hold the TextFormat object:
private var _captionFormat:TextFormat;
Next, we'll create that object in the constructor when we set up the TextField:
    [first-line: 73; highlight: [81,82,83]">
    // ...
    for each (var font:Font in fonts) {
        trace(font.fontName);
        if (font.fontName.search(/lucida.*grande/i) > -1) {
            fontName = font.fontName;
            break;
        }
    }
    if (!fontName) fontName = "Verdana";
    _captionFormat = new TextFormat(fontName, 12, 0xFFFFFF);
    _captionFormat.align = TextFormatAlign.CENTER;
    _captionField.defaultTextFormat = _captionFormat;
    // ...
The above simply replaces the temporary "format" variable from before with this property.
Next we can add the setters and getters (I will put these after all of the other setters and getters we've added so far):
public function set fontName(name:String):void {
    _captionFormat.font = name;
    _captionField.defaultTextFormat = _captionFormat;
    if (stage) stage.invalidate();
}
public function get fontName():String {
    return _captionFormat.font;
}

public function set fontSize(size:Number):void {
    _captionFormat.size = size;
    _captionField.defaultTextFormat = _captionFormat;
    if (stage) stage.invalidate();
}
public function get fontSize():Number {
    return _captionFormat.size as Number;
}

public function set fontColor(color:uint):void {
    _captionFormat.color = color;
    _captionField.defaultTextFormat = _captionFormat;
    if (stage) stage.invalidate();
}
public function get fontColor():uint {
    return _captionFormat.color as uint;
}
They are all similar to each other, the only difference being the data types and the actual TextFormat properties we affect. Notice that we set the value on the TextFormat object, then reapply that object as the default format for the caption TextField. We do this because setting the defaultTextFormat makes a copy of the format object, so even though we're changing our reference to this object, we lose the reference to the one that actually sets the styles. Long story short, we need to reset the defaultTextFormat whenever that changes.
However, this only sets the style for new text coming into the text field. To update the styles on the text already present in the field, we need to use setTextFormat(). This, though, presents a similar rendering issue as before. If we were to set all three of the styling properties at once, we don't necessarily want to reapply the format three times in a row. So, instead, we call stage.invalidate(), which, as you recall, will ultimately fire off the RENDER event so we can change the display.
Now, here's why we wanted a separate onRender method hooked up to the RENDER event, instead of just hooking up the layout method directly to it. The layout method will update the caption, however, since we've set a default text format, there's no need to apply a text format each time layout is called. We only want to apply a text format to existing text, so we can keep it out of layout and put it in onRender:
private function onRender(e:Event):void {
    layout();
    _captionField.setTextFormat(_captionFormat);
}
Lastly, we need to expose the text field itself. Write one last getter:
public function get captionField():TextField {
    return _captionField;
}
And to test all of this, we can update CoverFlowTest's onCoverFlowLoaded method:
private function onCoverFlowLoaded(e:Event):void {
    trace("Coverflow loaded and ready to go.");
    coverFlow.horizontalSpacing = 100;
    coverFlow.centerMargin = 75;
    coverFlow.backRowDepth = 300;
    coverFlow.backRowAngle = 75;
    coverFlow.verticalOffset = 50;

    coverFlow.fontName = "Courier";
    coverFlow.fontSize = 24;
    coverFlow.fontColor = 0xff0000;
}
Run it, and once the images all load and the layout changes, you'll see the caption style change, as well. Feel free to remove these lines at this point.
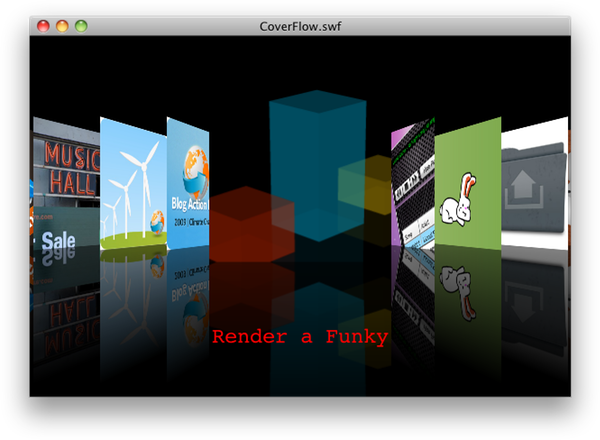
Step 36: Vertical Position
You'll have noticed that the caption doesn't move with the Covers when they adjust their vertical offset.
As you know, we added a verticalOffset property a few steps back, and we added it to the default value of 250 when positioning our Cover objects. Where does that 250 come from? I pulled that number out of the air as something that works for now.
We can now apply a little logic the vertical positioning of the row. We can just lock it to the bottom with a predefined margin. So, in layout, take out the line that reads cover.y = 250; and replace it with:
cover.y = _background.height - 90 + _verticalOffset;
In the Apple CoverFlow, the bottom of the row of Covers is similarly locked to the bottom edge of the view, but they also resize the covers based on how tall the view is. We'll skip that bit of logic, but it would be an interesting exercise if you have a fever that can only be cured by more CoverFlow once this tutorial is over.
However, we're still not done with our logic. We'll apply a text pixel margin between the bottom edge of the flow and the caption. So it stands to reason that we'll want to move the caption field when running layout, in case the height has changed. Add this line after the loop in layout:
_captionField.y = _background.height - 80 + _verticalOffset;
For reference the whole method should look like this:
private function layout():void {
    _selectedIndex = 4;
    var len:uint = _covers.length;
    var cover:Cover;
    var distanceFromCenter:uint
    for (var i:uint = 0; i < len; i++) {
        cover = _covers[i];
        if (i == _selectedIndex) {
            cover.rotationY = 0;
            cover.x = _background.width / 2;
            cover.z = 0;
            _coversContainer.setChildIndex(cover, _coversContainer.numChildren-1);
            _captionField.text = cover.caption;
        } else if (i < _selectedIndex) {
            distanceFromCenter = _selectedIndex - i;
            cover.rotationY = -_backRowAngle;
            cover.x = ((_background.width / 2) - _centerMargin) - (distanceFromCenter * _horizontalSpacing);
            cover.z = _backRowDepth;
            _coversContainer.setChildIndex(cover, _coversContainer.numChildren - (distanceFromCenter + 1));
        } else if (i > _selectedIndex) {
            distanceFromCenter = i - _selectedIndex;
            cover.rotationY = _backRowAngle;
            cover.x = ((_background.width / 2) + _centerMargin) + (distanceFromCenter * _horizontalSpacing);
            cover.z = _backRowDepth;
            _coversContainer.setChildIndex(cover, _coversContainer.numChildren - (distanceFromCenter + 1));
        }
        cover.y = _background.height - 90 + _verticalOffset;
    }
    _captionField.y = _background.height - 80 + _verticalOffset;
}
But there is one remaining task. If the width or height get changed, we should call layout again. This will be as simple as making another call to stage.invalidate in the width and height setters.
override public function set width(num:Number):void {
    _width = num;
    _background.width = _width;
    scrollRect = new Rectangle(0, 0, _width, _height);
    if (stage) stage.invalidate();
}
override public function get width():Number {
    return _width;
}
override public function set height(num:Number):void {
    _height = num;
    _background.height = _height;
    scrollRect = new Rectangle(0, 0, _width, _height);
    if (stage) stage.invalidate();
}
override public function get height():Number {
    return _height;
}
To test this, go ahead and remove any other test code in onCoverFlowLoaded and add this line instead, in CoverFlowTest:
coverFlow.height -= 50;
This is important: if you don't remove at least the coverFlow.verticalOffset = 50 line, you'll actually negate the effects of the height change. To more easily see the height change, I'd suggest just removing the previous layout properties and caption styling, if you haven't done so already.
Test the movie, and you should see the covers and caption draw as before, and in addition the entire view becomes shorter, whilst preserving the relative layout.
Step 37: Add Drop Off
For a more authentic CoverFlow look, we'll add a bit of zazz to Cover to make it "drop off" the further it is from the center. It has the effect of an opacity change, but, as with the reflections, we can't actually adjust the alpha, even though that's easier. We'll achieve the effect through a fairly simple technique, though: we'll just use a color transform to "tint" the item to the background color.
Tinting with pure ActionScript involves a bit of math trickery. It's a bit much to fully explain here, but here's the code. Add a set dropOff method in Cover:
public function set dropOff(value:Number):void {
    value = Math.max(0, Math.min(1, value));

    var r:uint = _backgroundColor >> 16;
    var g:uint = _backgroundColor >> 8 & 0xFF;
    var b:uint = _backgroundColor & 0xFF;

    var multiplier:Number = 1 - value;

    var color:ColorTransform = new ColorTransform(multiplier, multiplier, multiplier, 1, r * value, g * value, b * value, 0);
    this.transform.colorTransform = color;
}
In a nutshell, this code takes a numeric value from 0 to 1, and will turn that into an amount by which to apply the tint: 0 means no tint at all, 1 means a full solid color tint.
To do that, we'll take the background color and break it into component values of red, green and blue. This uses bitwise operators, and if they're foreign to you, then it's your assignment to go read up about them. You can start with Wikipedia for a general overview, and move on to Colin Moock's site and Adobe's devnet article for ActionScript-specific discussions.
Creating the ColorTransform is another moderately complex topic that I will leave as a research project if you need it. These are the values required to create a tint effect to the chosen color at the desired strength. A nice discussion of this technique can be found at flashandmath.com. It's worth noting that another option (also discussed in the flashandmath article) is to import the fl.motion.Color class, which extends ColorTransform, and use that instead of a ColorTransform object. The Color class affords a tinting convenience with a setTint method, which basically does for us the math we're doing longhand here. I opted to show the nuts and bolts version, which therefore doesn't require the components classes, which I consider a bonus (you won't have fl.motion.Color available in a Flex project).
To test this, add a few lines (highlighted) to our layout method in CoverFlow:
private function layout():void {
    _selectedIndex = 4;
    var len:uint = _covers.length;
    var cover:Cover;
    var distanceFromCenter:uint
    for (var i:uint = 0; i < len; i++) {
        cover = _covers[i];
        if (i == _selectedIndex) {
            cover.rotationY = 0;
            cover.x = _background.width / 2;
            cover.z = 0;
            _coversContainer.setChildIndex(cover, _coversContainer.numChildren-1);
            _captionField.text = cover.caption;
        } else if (i < _selectedIndex) {
            distanceFromCenter = _selectedIndex - i;
            cover.rotationY = -_backRowAngle;
            cover.x = ((_background.width / 2) - _centerMargin) - (distanceFromCenter * _horizontalSpacing);
            cover.z = _backRowDepth;
            _coversContainer.setChildIndex(cover, _coversContainer.numChildren - (distanceFromCenter + 1));
            cover.dropOff = distanceFromCenter / 10;
        } else if (i > _selectedIndex) {
            distanceFromCenter = i - _selectedIndex;
            cover.rotationY = _backRowAngle;
            cover.x = ((_background.width / 2) + _centerMargin) + (distanceFromCenter * _horizontalSpacing);
            cover.z = _backRowDepth;
            _coversContainer.setChildIndex(cover, _coversContainer.numChildren - (distanceFromCenter + 1));
            cover.dropOff = distanceFromCenter / 10;
        }
        cover.y = _background.height - 90 + _verticalOffset;
    }
    _captionField.y = _background.height - 80 + _verticalOffset;
}
These two additional lines are same, and make sure that if a Cover is not the centered one, then it gets a tint applied. The further away from the center, the fuller the tint. Over the course of 10 Covers, they get progressively more tinted (darker, in the case of a black background), until the 10th one away is invisible, being fully tinted to the color of the background.
Go ahead and test, and you should see something like this:
Compare that to this image from before dropOff was applied:
I won't go into details here, as I believe you should be able to work them out yourself by now, but the number 10 in the above drop off equation would be a good candidate for a property for customization. Treat it like the distanceFromCenter property and you'll be set.
Step 38: Set the Current Index
We'll start working towards an interactive piece that animates. To get that to work, we'll need the ability to set the current index. This should be a public method, as another representation of the list might be present, and the two can work together to have synchronized selection. Think of how iTunes works, where selecting a song in the list below also focuses the appropriate item in the CoverFlow above.
First, in layout (of CoverFlow), remove the line that set the _selectedIndex for us. If you recall, that was just a temporary test.
private function layout():void {
    //_selectedIndex = 4;
    var len:uint = _covers.length;
    var cover:Cover;
    var distanceFromCenter:uint
    for (var i:uint = 0; i < len; i++) {
        // ...
While we already have a private property for _selectedIndex, we should add a setter and getter. Add the following to CoverFlow:
public function set selectedIndex(index:uint):void {
    if (_covers.length == 0) {
        _selectedIndex = index;
        return;
    }
    _selectedIndex = Math.max(0, Math.min(index, _covers.length - 1));
    if (stage) stage.invalidate();
}
public function get selectedIndex():uint {
    return _selectedIndex;
}
The getter is typical, but the setter has some extra input-cleansing logic. First, if there is nothing in the _covers Vector, then we probably haven't loaded our XML document yet, so just stash the value and stop here. Otherwise, we can make sure that the value isn't out of range before storing it in _selectedIndex. And then we can ask the display to redraw with a stage.invalidate().
We can test by going to CoverFlowTest and setting the property after coverFlow is created.
public function CoverFlowTest() {
    coverFlow = new CoverFlow(stage.stageWidth, stage.stageHeight);
    addChild(coverFlow);
    coverFlow.backgroundColor = 0x000000;
    coverFlow.horizontalSpacing = 60;
    coverFlow.centerMargin = 100;
    coverFlow.load("coverFlowImages.xml");
    coverFlow.addEventListener(Event.COMPLETE, onCoverFlowLoaded);
    coverFlow.addEventListener(ProgressEvent.PROGRESS, onCoverFlowProgress);
    coverFlow.selectedIndex = 8;
}
And you'll see that we select that Cover.
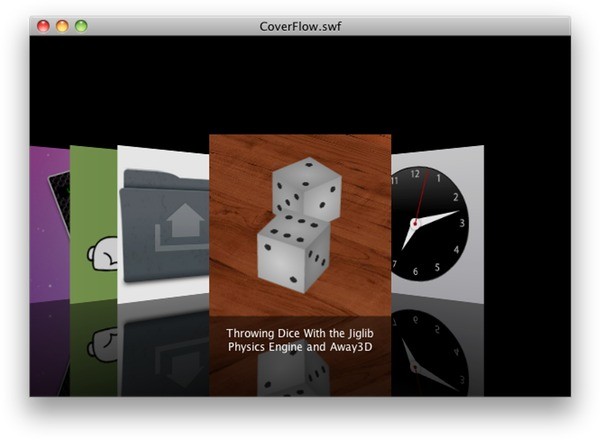
Step 39: Click to Select
With the ability to select an Cover in place, we can easily add the expected click functionality. If you click on a Cover that's on the side, it becomes the focused Cover.
We need to add an event listener to each Cover as we create them. Still in CoverFlow, add this line to the loop in onXMLLoad:
private function onXMLLoad(e:Event):void {
    _xml = new XML(_urlLoader.data);

    var imageList:XMLList = _xml.image;
    var iLen:uint = imageList.length();
    var imageNode:XML;
    var cover:Cover;
    for (var i:uint = 0; i < iLen; i++) {
        imageNode = imageList[i];
        var src:String = imageNode.@src;
        var title:String = imageNode.@title;
        cover = new Cover(title, imageNode, _backgroundColor);
        cover.addEventListener(MouseEvent.CLICK, onCoverClick);
        _coversContainer.addChild(cover);
        _covers.push(cover);
    }
    layout();
    _loadCounter = 0;
    loadNextCover();
}
And then add the onCoverClick method.
private function onCoverClick(e:MouseEvent):void {
    this.selectedIndex = _covers.indexOf(e.currentTarget);
}
It's that simple. We know the index we want to select because we know the Cover that was clicked (through currentTarget). Vectors (and Arrays) provide the handy indexOf method so we can get the index of a given object in the Vector. We just need to feed that to our selectedIndex property, and now we have some rudimentary interactivity going.
Interact with this milestone SWF to test it out.
Click to view the milestone demo.
Step 40: Add a Tween: The CoverFlow Object
But to make the CoverFlow really, well, flow, we need to tween the Covers from one position to another. This is, of course, the pièce de résistance and possibly why you're here in the first place. Getting this together will mean some significant updates to our code, but they'll be worth it.
You might think we'll be best off using a third-party tweening package. And while it would be easier in some respects, we have a lot of custom things to update as our Covers animate. We'll actually roll our own tweens, which isn't as bad as you probably think it is.
This is, however, going to be a marathon of a step, so hang in there.
First, in CoverFlow, we need to add a few more properties. At the top of the class, along with the rest of the properties, declare the following:
private var _tweenDuration:int = 1200;
private var _startTime:int;
private var _elapsed:int;
private var _coversLength:uint;
private var _iteration:uint
private var _iterationCover:Cover;
private var _sortedCovers:Vector.<Cover>;
private var _unitsFromCenter:uint;
private var _distanceA:Number;
private var _distanceB:Number;
Yes, that's quite a few. Here's a quick description of what they'll do:
-
_tweenDuration: How long, in milliseconds, the animation should last. -
_startTime: Each time the animation starts, we'll store the result ofgetTimer()in this property. -
_elapsed: Each time we update the animation, we'll store the time that has elapsed since the start of the tween here. -
_coversLength: The number of items in the_coversVector. -
_iteration: The "i" variable in our loops. -
_iterationCover: A property to store an individual Cover object as we iterate over_covers. -
_sortedCovers: A duplicated and then sorted version of the_coversVector. We'll use it to sort depths. -
_unitsFromCenter: How far, in number-of-covers, a given Cover object is from the center position. -
_distanceAand_distanceB: Used in the depth sorting function, holds the distance from center (in pixels) of any two given Cover objects.
Note that in most cases, we're only declaring a property for optimization purposes. We're about to write a bunch of methods that get called repeatedly, several times a frame, so we're trying to minimize the overhead of variable declaration by declaring them once for the object, then reusing the slot each time we need the variable.
Next, we'll modify the set selectedIndex method to remove the stage.invalidate() line, and add in the following lines that kick off the animation:
public function set selectedIndex(index:uint):void {
    if (_covers.length == 0) {
        _selectedIndex = index;
        return;
    }
    _selectedIndex = Math.max(0, Math.min(index, _covers.length - 1));

    // if (stage) stage.invalidate();

    _startTime = getTimer();
    determineLayout(_selectedIndex);
    removeEventListener(Event.ENTER_FRAME, animate);
    addEventListener(Event.ENTER_FRAME, animate);
}
Here we set the _startTime property using getTimer(), which returns the number of milliseconds since the Flash movie started playing. We call a new layout function, using the _selectedIndex, and finally set up an ENTER_FRAME listener. Notice we also remove the event listener before adding it, in case an animation is still in effect when another one needs to start.
We'll write that determineLayout method next; it can go anywhere in the class that makes sense.
private function determineLayout(destinationIndex:uint):void {
    _coversLength = _covers.length;
    for (var i:uint = 0; i < _coversLength; i++) {
        _iterationCover = _covers[i];
        if (i == destinationIndex) {
            _iterationCover.endRotationY = 0;
            _iterationCover.endX = _background.width / 2;
            _iterationCover.endZ = 0;
            _captionField.text = _iterationCover.caption;
        } else if (i < destinationIndex) {
            _unitsFromCenter = destinationIndex - i;
            _iterationCover.endRotationY = -_backRowAngle;
            _iterationCover.endX = ((_background.width / 2) - _centerMargin) - (_unitsFromCenter * _horizontalSpacing);
            _iterationCover.endZ = _backRowDepth;
        } else if (i > destinationIndex) {
            _unitsFromCenter = i - destinationIndex;
            _iterationCover.endRotationY = _backRowAngle;
            _iterationCover.endX = ((_background.width / 2) + _centerMargin) + (_unitsFromCenter * _horizontalSpacing);
            _iterationCover.endZ = _backRowDepth;
        }
    }
}
Notice that this is very similar to our layout() method, only we seem to be setting properties on the Cover objects that don't exist…yet. What we're trying to do is figure out our destination values based on the new selection. We'll then use that to interpolate our position as the tween progresses. Other than that, and the fact that we've stripped out a few things like dropOff and _captionField positioning, it's the same logic as layout().
Now let's write the animate method, the ENTER_FRAME listener.
private function animate(e:Event):void {
    _elapsed = getTimer() - _startTime;
    if (_elapsed > _tweenDuration) {
        removeEventListener(Event.ENTER_FRAME, animate);
        return;
    }

    for (_iteration = 0; _iteration < _coversLength; _iteration++) {
        _iterationCover = _covers[_iteration];
        _iterationCover.updateTween(_elapsed, _tweenDuration);
    }

    _sortedCovers = _covers.concat();
    _sortedCovers = _sortedCovers.sort(depthSort);
    for (_iteration = 0; _iteration < _coversLength; _iteration++) {
        _iterationCover = _sortedCovers[_iteration];
        _coversContainer.setChildIndex(_iterationCover, _coversContainer.numChildren-(_iteration+1));
    }

}
Here we get into some of the nuts and bolts of programmatic tweens. First, we find the time that has elapsed since the tween began. If that's longer than the tween duration, then we need to stop the tween (by removing the event listener). Otherwise, we continue on, and loop over the Cover objects. On each one, we call a (as of yet to be written) method that will actually perform the visual updates based on our progression through the tween.
The second half of the method is given to depth sorting. This gets a bit trickier than it does in plain old layout(), as we can't rely on covers being in any position at any time. Instead, we'll sort the Vector of Covers, using the sort method provided by Vectors (and Arrays). The parameter passed into this method is a function reference, so depthSort is something we need to write yet. Note also that we need to copy the Vector, otherwise we end up messing with the order of Covers from left to right, and that's not good.
Once the Vector is sorted, though, we can loop over it and set the depths of the Covers rather easily.
Next, we'll write the depthSort sorting function:
private function depthSort(a:Cover, b:Cover):Number {
    var _distanceA:Number = Math.abs(a.x - _background.width/2);
    var _distanceB:Number = Math.abs(b.x - _background.width/2);
    if (_distanceA < _distanceB) { return -1;}
    if (_distanceA > _distanceB) { return 1; }

    return 0;
}
The idea behind sorting methods is that they receive two objects from the Vector being sorted, and need to return a value that tells the Vector how to sort those two items. If the return value is negative, then the object passed into the first parameter goes first. If the return is positive, then the second parameter goes first. If the return is 0, then no change is made.
Our sorting logic involves comparing the absolute distance from the center. Basically, the further away from the center, the further back we want it to set.
That's it for changes to CoverFlow, but we have some work to do in Cover now. As such, don't bother testing the movie now as you will get compiler errors.
Step 41: Add a Tween: The Cover Objects
In the Cover class, lets start by declaring a bunch of properties.
private var _startX:Number;
private var _endX:Number;
private var _startRotationY:Number;
private var _endRotationY:Number;
private var _startZ:Number;
private var _endZ:Number;
private var _coverFlowParent:CoverFlow;
private var _centerMargin:Number;
private var _distanceFromCenter:Number;
Here's what these will do:
-
_startX,_startRotationY,_startZ: Stores the current values ofx,rotationY, andzat the time a tween starts. -
_endX,_endRotationY,_endZ: Stores the calculated ending values ofx,rotationY, andzwhen the tween ends. -
_coverFlowParent: Stores a reference to the CoverFlow that contains this Cover. -
_centerMargin: Stores the value ofCoverFlow.centerMargin. -
_distanceFromCenter: The calculated distance from the center of the CoverFlow.
Next, we'll write the setters for endX, endRotationY, and endZ.
internal function set endX(n:Number):void {
    _startX = this.x;
    _endX = n;
}
internal function set endRotationY(n:Number):void {
    _startRotationY = this.rotationY;
    _endRotationY = n;
}
internal function set endZ(n:Number):void {
    _startZ = this.z;
    _endZ = n;
}
These are typical setters, except that they also store the current value of the related property. We'll need that value to update the property as we tween, so we may as well store it whenever we get an instruction also store our calculated ending value. They are also unusual in that they aren't public, they're internal. This just restricts access to objects from the same package, so it's a little more protected than public, but still let's the CoverFlow object set them. I also didn't bother writing corresponding getters. We don't need them, but there is no harm in doing so if you like.
We need to write that updateTween method next. This will be where we actually update the position and rotation:
internal function updateTween(elapsedTime:Number, duration:Number):void {
    this.x         = ExponentialEaseOut(elapsedTime, _startX, _endX - _startX, duration);
    this.rotationY = ExponentialEaseOut(elapsedTime, _startRotationY, _endRotationY - _startRotationY, duration);
    this.z         = ExponentialEaseOut(elapsedTime, _startZ, _endZ - _startZ, duration);

    if (!_coverFlowParent) _coverFlowParent = this.parent.parent as CoverFlow;

    _distanceFromCenter = Math.abs(this.x - (_coverFlowParent.width / 2));
    _centerMargin = _coverFlowParent.centerMargin;
    if (_distanceFromCenter < _centerMargin) {
        this.dropOff = .1 * _distanceFromCenter / _centerMargin;
    } else {
        this.dropOff = .1 + ((_distanceFromCenter - _centerMargin) / _coverFlowParent.horizontalSpacing) * .1;
    }

}
The first three lines rely on a the easing equation we still need to write. Let's pop that in now:
private static function ExponentialEaseOut(t:Number, b:Number, c:Number, d:Number):Number {
    return (t==d) ? b+c : c * (-Math.pow(2, -10 * t/d) + 1) + b;
}
I got this from Penner's easing equations, which are released under a BSD license. As such, we need to make sure to also include the copyright notice:
/*
TERMS OF USE - EASING EQUATIONS

Open source under the BSD License.

Copyright © 2001 Robert Penner
All rights reserved.

Redistribution and use in source and binary forms, with or without modification, are permitted provided that the following conditions are met:

Redistributions of source code must retain the above copyright notice, this list of conditions and the following disclaimer.
Redistributions in binary form must reproduce the above copyright notice, this list of conditions and the following disclaimer in the documentation and/or other materials provided with the distribution.
Neither the name of the author nor the names of contributors may be used to endorse or promote products derived from this software without specific prior written permission.
THIS SOFTWARE IS PROVIDED BY THE COPYRIGHT HOLDERS AND CONTRIBUTORS "AS IS" AND ANY EXPRESS OR IMPLIED WARRANTIES, INCLUDING, BUT NOT LIMITED TO, THE IMPLIED WARRANTIES OF MERCHANTABILITY AND FITNESS FOR A PARTICULAR PURPOSE ARE DISCLAIMED. IN NO EVENT SHALL THE COPYRIGHT OWNER OR CONTRIBUTORS BE LIABLE FOR ANY DIRECT, INDIRECT, INCIDENTAL, SPECIAL, EXEMPLARY, OR CONSEQUENTIAL DAMAGES (INCLUDING, BUT NOT LIMITED TO, PROCUREMENT OF SUBSTITUTE GOODS OR SERVICES; LOSS OF USE, DATA, OR PROFITS; OR BUSINESS INTERRUPTION) HOWEVER CAUSED AND ON ANY THEORY OF LIABILITY, WHETHER IN CONTRACT, STRICT LIABILITY, OR TORT (INCLUDING NEGLIGENCE OR OTHERWISE) ARISING IN ANY WAY OUT OF THE USE OF THIS SOFTWARE, EVEN IF ADVISED OF THE POSSIBILITY OF SUCH DAMAGE.
*/
You can find out more about these equations on Robert Penner's site.
So, in combination, what does this do? The easing equations are all set up to take four arguments: the elapsed time of the tween, the start value of the property being tweened, the distance to be traveled over the course of the entire tween, and finally the duration of the entire tween. They return a number: the interpolated value of based on the input values and the underlying equation. Beyond that, I'd be hard pressed to tell you how they work. Just be thankful Penner released these equations as open source.
Why not use the easing classes as they are? Well, this way, we don't have to worry about distributing a third-party class with the CoverFlow package. Everything is self contained. It'll be that much tidier.
To sum up, we set the current x, rotationY, and z based on the time through the tween and this equation.
After that, it's all about setting the drop off. We first make sure we have a reference to the CoverFlow parent. Then we figure out how far we are from the center. Then we figure out what the dropOff should be based on that value. This math gets a little hairy, but essentially we're interpolating the value based on the fact that if a Cover is at a final destination, it's going to have a drop off of 10% or 30% or 80%, or some multiple of 10 percent. The idea is to figure out how close we are to one of those positions.
Step 42: Resizing on the Fly
We have something we need to, but the need for it isn't quite apparent. By adding a fullscreen type of resizing, we can both test the ability to resize the CoverFlow on the fly, and reveal a bit of strange behavior that needs addressed.
This all happens in CoverFlowTest.as. In the constructor, add these lines at the end:
stage.scaleMode = StageScaleMode.NO_SCALE;
stage.align = StageAlign.TOP_LEFT;
stage.addEventListener(Event.RESIZE, onResize)
And then add the onResize event listener:
private function onResize(e:Event):void {
    coverFlow.width = stage.stageWidth;
    coverFlow.height = stage.stageHeight;
}
These few lines are pretty standard fare for creating a SWF that resizes fluidly with the resizing of the Player. Within Apple's products, we see a CoverFlow view within a larger window, but it can be resized, e.g. by resizing the window or by dragging the bottom edge of the CoverFlow to resize it within the window. Basically, we're simulating this ability.
You'll probably notice that Apple's CoverFlow resizes the images as you resize the CoverFlow view. This is something that we won't be recreating, but feel free to have a go yourself.
Step 43: Correcting the Perspective
As you resize the window and move the covers around, you may notice something else rather strange that definitely needs to be taken care of. If you stretch the window rather wide, you should see that the images line up correctly, but they appear to be skewed rather stangely. This is that "not quite apparent" thing we needed to take care of.
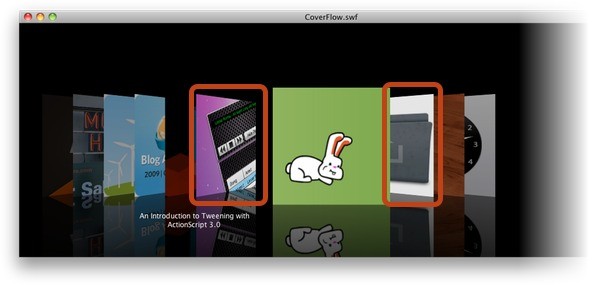
Why does this happen? Well, by default, Flash 10's 3D rendering happens through a single "camera," and that camera is in a fixed location, at the center of the stage. However, that camera doesn't move if you resize the stage. So while you expect the vanishing point to remain in the center of your CoverFlow rectangle, no matter how big, Flash set up the vanishing point to a certain point based on the original rectangle of the stage, and then leaves it there.
Fortunately we can work it out. There is something call a PerspectiveProjection object on the root display object of any Flash Movie. You can think of this as the virtual camera through which we view the 3D rendering. And naturally, we can move it around (If you're coming from a Papervision3D or Away3D mode of thinking, this isn't a camera is the sense you have cameras in those packages. Don't get too excited; it's rather limited).
But if we start moving it around, we may be affecting the 3D projection of other 3D elements in the Flash Movie, not just our CoverFlow. Well, fortunately, every DisplayObject has a PerspectiveProjection object, which is off by default. But if we turn it on, then that DisplayObject's child objects will render according to that PerspectiveProjection, not the root one. Thus, we can set up an independent vanishing point for our CoverFlow without worrying about how it will affect other 3D rendering in the movie.
To do this, go back to CoverFlow and find a spot in the constructor to set it up. I've added some lines right after setting up the scrollRect:
// ...
_background = new Shape();
addChildAt(_background, 0);
drawBackground();

scrollRect = new Rectangle(0, 0, _width, _height);
this.transform.perspectiveProjection = new PerspectiveProjection()
this.transform.perspectiveProjection.projectionCenter = new Point(_width/2, _height-190);

_urlLoader = new URLLoader();
_urlLoader.addEventListener(Event.COMPLETE, onXMLLoad);
// ...
First we have to create the PerspectiveProjection object on the CoverFlow display object. Then we set up the projectionCenter property to a new Point. The key is that the we set this property to a Point. We can't set the x and y of the Point directly, for some reason. So we create a Point and the x is set to half of the width of our CoverFlow.
So that sets it up correctly the first time (which, by the way, would help if the CoverFlow weren't as wide as the stage to begin with). Next, we need to revisit the width and height setters and update the projectionCenter with new values:
override public function set width(num:Number):void {
    _width = num;
    _background.width = _width;
    scrollRect = new Rectangle(0, 0, _width, _height);
    this.transform.perspectiveProjection.projectionCenter = new Point(_width/2, _height-190);
    stage.invalidate();
}
override public function set height(num:Number):void {
    _height = num;
    _background.height = _height;
    scrollRect = new Rectangle(0, 0, _width, _height);
    this.transform.perspectiveProjection.projectionCenter = new Point(_width/2, _height-190);
    stage.invalidate();
}
Now, whenever the dimensions of the CoverFlow instance are changed, so is the vanishing point. Go ahead and try it; if you run the movie and resize the stage, you should see good behavior from the 3D rendering, no matter how you size it.
Step 44: Center the Caption
Things are looking pretty sweet, but you'll probably have noticed that – as you resize the stage – the caption moves vertically with the covers, but not horizontally. This is, fortunately, a rather easy fix. In CoverFlow's layout method, we need to update the _captionField's x property.
private function layout():void {
    var len:uint = _covers.length;
    var cover:Cover;
    var distanceFromCenter:uint
    for (var i:uint = 0; i < len; i++) {
        // ...
    }
    _captionField.x = (_background.width - _captionField.width) / 2;
    _captionField.y = _background.height - 80 + _verticalOffset;
}
This just makes sure the TextField is centered within the CoverFlow object.
Step 45: Enable Double Clicks on the Cover
Almost done. We now would like to enable the ability to click on the frontmost cover and dispatch an event. Also, we'd like to be able to retrieve a given Cover's data XML, as supplied by the original XML document.
We'll start with the cover. First, we enable double-click action in Cover, in the constructor:
public function Cover(caption:String, data:XML, backgroundColor:Number) {
    _caption = caption;
    _data = data;
    _backgroundColor = backgroundColor;
    this.doubleClickEnabled = true;
    this.mouseChildren = false;
}
These two new lines simply enable the ability to receive double-clicks from the user. The mouseChildren line doesn't necessarily enable double-clicks, but it is necessary in our case, otherwise the Loader will sort of intercept the double-clicks.
Step 46: Do Something With Double Clicks in the Test Class
To listen for double-clicks, head back to CoverFlowTest and listen for the DOUBLE_CLICK event. Due to event bubbling, an event dispatched by a Cover object will be listenable from CoverFlowTest:
public function CoverFlowTest() {
    coverFlow = new CoverFlow(stage.stageWidth, stage.stageHeight);
    addChild(coverFlow);
    coverFlow.backgroundColor = 0x000000;
    coverFlow.horizontalSpacing = 60;
    coverFlow.centerMargin = 100;
    coverFlow.load("coverFlowImages.xml");
    coverFlow.addEventListener(Event.COMPLETE, onCoverFlowLoaded);
    coverFlow.addEventListener(ProgressEvent.PROGRESS, onCoverFlowProgress);
    coverFlow.addEventListener(MouseEvent.DOUBLE_CLICK, onCoverFlowDoubleClick);
    coverFlow.selectedIndex = 8;
    stage.scaleMode = StageScaleMode.NO_SCALE;
    stage.align = StageAlign.TOP_LEFT;
    stage.addEventListener(Event.RESIZE, onResize)
}
After adding the event listener, we need to write it:
private function onCoverFlowDoubleClick(e:MouseEvent):void {
    trace("onCoverFlowDoubleClick: " + e.target.data);
}
Note that e.target will be the Cover object that was double-clicked. This gives us easy access to the data that is stored within the Cover object in question. In this particular case, we have a nested <link> node (remember, data is just the XML node for that Cover object – and we can put anything we want inside that node). So if you run the movie as it stands now, you'll see the entire XML node in the Output panel. If we want to do something more meaningful, we can do this:
private function onCoverFlowDoubleClick(e:MouseEvent):void {
    navigateToURL(new URLRequest(e.target.data.link));
}
Remember that you can store any information you want in the XML, and access it on a node-by-node basis through the data property of the individual Cover. There's more information on that in my XML tutorial.
Step 47: One Last Thing…
You may have forgotten, but I haven't. We stubbed in a clearContents() method a while back, but never filled it in. Well, now that we're all but done, we can fill it in. The purpose of this method is just to preserve the CoverFlow instance and its layout and style settings, and to remove the Covers and any associated data. This would also be a place to ensure that we've cleaned up any stray event listeners. Then the CoverFlow object could load a different XML file and start again with new data. Locate that empty clearContents() method in CoverFlow and add the following:
private function clearContents():void {
    for each (var cover:Cover in _covers) {
        cover.removeEventListener(Event.COMPLETE, onCoverLoad);
        cover.removeEventListener(ProgressEvent.PROGRESS, onCoverProgress);
        cover.addEventListener(MouseEvent.CLICK, onCoverClick);
        this.removeChild(cover);
    }
    _covers = new Vector.<Cover>();
    this.removeEventListener(Event.ENTER_FRAME, animate);
}
I'm being a bit overly cautious, but I just want to make sure that any event that was ever hooked up is cleared away. At the end of the function, though, individual Cover objects are cleaned up, removed from the display, and ultimately deleted, along with the ENTER_FRAME handler, in case we happened to call this in the middle of an animation. Let's test it out, by adding some code to CoverFlowTest:
private function onCoverFlowLoaded(e:Event):void {
    trace("Coverflow loaded and ready to go.");
    setTimeout(coverFlow.load, 1000, "coverFlowImages.xml");
}
This is a rather pointless test, but an easy one to execute. It just waits one second after the CoverFlow loads, then loads the XML file again. This actually enters an endless sequence, but it should show that the clearContents() method does the trick.
Quittin' Time
This was not a small project. Depending on your experience with Flash and ActionScript, you probably learned a thing or two, aside from how to recreate the CoverFlow view in Flash. Some of the more advanced topics included BitmapData, manual tweening, 3D depth sorting and 3D perspective management.
Thanks for sticking with me until the end. I hope I've shown you that with a little elbow grease, you can create compelling 3D content in Flash 10 without the need for a 3rd party package to handle the 3D rendering. Flash 10 native 3D isn't suitable for everything, but for certain projects, it's often much easier to work with, not to mention much smaller in terms of file size of the SWF.

Comments