Have you ever needed to resize your embedded SWF based on the user interaction/input, like how Newgrounds allows you to resize certain Flash games to fit the screen? This can be done using JavaScript and the ExternalInterface class in ActionScript. But what if you don't know JavaScript at all?
Well, lucky for you there's this little class out there called BrowserCanvas which does all the ugly work for you and in this quick tip I'll be showing you how to use it.
Prerequisites
First of all we need a code editor. I will be using FlashDevelop for this tutorial because we'll be writing both ActionScript and HTML and this is a good code editor for both. This is not something mandatory so you can use whatever software you like. If you'd like to use it, but don't know how, check out this beginner's guide to FlashDevelop.
Next you need the BrowserCanvas class so go here and download it and read a more detailed overview of it.
Also you'll need an image which will represent the content (I've used the Activetuts+ logo) and an image which represents the resize handler. I've included both in the download source so you should be fine.
Now that we're prepared let's start!
Note: In the first six steps I've explained how the preparations are made and how to make the UI without referring to the actual BrowserCanvas class. If you don't want to follow them you can skip directly to Step 7 and continue using the project I've provided in the download package. You can find it in the source folder and under the SWFResize - milestone folder.
Step 1: Create a New Project
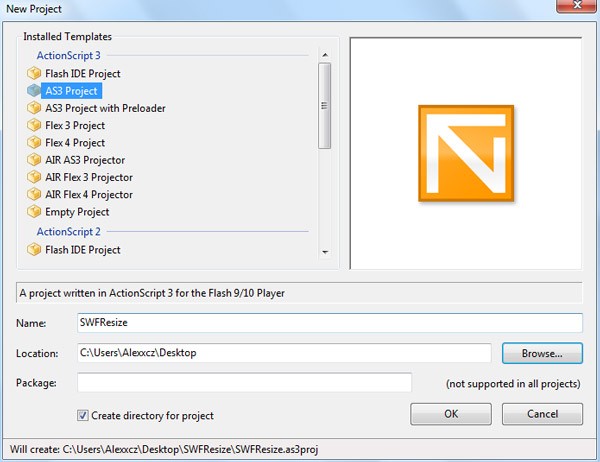
Open FlashDevelop and create a new project by going to Project > New Project... . Give it a name and press OK.
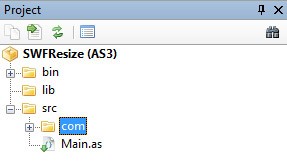
Also copy the com folder from the downloaded file into the source directory of your project.
Step 2: Adding and Embedding the Assets
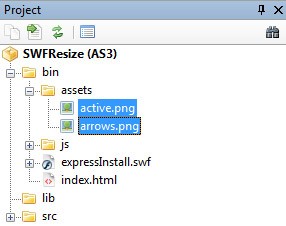
Place the active.png and arrows.png images from the downloaded package in an assets folder inside the bin directory from your project.
Next open the Main.as file and place the four highlighted lines in it (the rest will already have been created automatically by FlashDevelop):
package
{
	import flash.display.Sprite;
	import flash.events.Event;

	public class Main extends Sprite
	{
		[Embed(source = '../bin/assets/active.png')]
		public var logo:Class;
		[Embed(source = '../bin/assets/arrows.png')]
		public var arrows:Class;

		public function Main():void
		{
			if (stage) init();
			else addEventListener(Event.ADDED_TO_STAGE, init);
		}

		private function init(e:Event = null):void
		{
			removeEventListener(Event.ADDED_TO_STAGE, init);
		}

	}

}
This will embed the two assets so that we can use them at runtime.
Step 3: Setting the Stage
Right now the stage has its default settings: it will have a white background color, a 24fps frame rate and a size of 800px by 600px -- which is too large to let us demonstrate this effect.
Add the highlighted line just before the class declaration:
[SWF(width = "400", height = "300", backgroundColor = "0x313131", frameRate="60")]
public class Main extends Sprite
We will also want to set the stage's scale mode and alignment. For this we'll add the setStage() method to our class and call it from inside the init() method.
private function setStage():void
{
	stage.align = "TL";
	stage.scaleMode = "noScale";
	stage.addEventListener(Event.RESIZE, onStageResize);
}

private function onStageResize(e:Event):void
{

}
As you can see I've also added an event listener to the stage for the Event.RESIZE event, along with its appropriate handler function onStageResize().
Step 4: Adding the Content
Okay. We now have our stage set up and we'll continue by adding some content.
First add these two variables to our class:
private var _logo:Bitmap;
private var _arrows:Sprite;
Now add the createObjects() method and call it from inside the init() method:
private function init(e:Event = null):void
{
	removeEventListener(Event.ADDED_TO_STAGE, init);
	setStage();
	createObjects();
}

private function createObjects():void
{
	_logo = new logo() as Bitmap;
	addChild(_logo);

	_arrows = new Sprite();
	_arrows.buttonMode = true;
	_arrows.addChild(new arrows() as Bitmap);
	addChild(_arrows);
}
This will instantiate our objects and adds them to the display list.
If you compile the code now you will see that these two overlap so let's position them.
Step 5: Positioning
Let's consider that we would need our content to always remain in the center of the stage and the resize handler to be in the bottom right corner of the stage. We we'll use the following two methods to do just that.
The positionLogo() will center the content on the stage...
private function positionLogo():void
{
	_logo.x = stage.stageWidth * 0.5 - _logo.width * 0.5;
	_logo.y = stage.stageHeight * 0.5 - _logo.height * 0.5;
}
... and the positionArrows() will set the resize handler to the bottom right corner of the stage:
private function positionArrows():void
{
	_arrows.x = stage.stageWidth - _arrows.width - 30;
	_arrows.y = stage.stageHeight - _arrows.height - 30;
}
Lastly let's call them from inside the init() method to do the actual positioning.
private function init(e:Event = null):void
{
	removeEventListener(Event.ADDED_TO_STAGE, init);
	setStage();
	createObjects();
	positionLogo();
	positionArrows();
}
Also, now it's time to modify the onStageResize() handler to position the logo every time the stage is resized.
private function onStageResize(e:Event):void
{
	positionLogo();
}
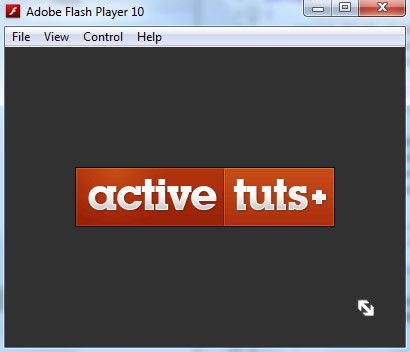
Compile the code and check out the result. Looks nice, doesn't it? :)
Step 6: Finishing the UI
Last thing we need to do for our UI to be complete is to add some interactivity to it.
Add these two MouseEvent listeners after the last line in the createObjects() method
_arrows.addEventListener(MouseEvent.MOUSE_DOWN, onMouseDown);
_arrows.addEventListener(MouseEvent.MOUSE_UP, onMouseUp);
Also add their corresponding handler functions:
private function onMouseDown(e:MouseEvent):void
{
	_arrows.startDrag();
	addEventListener(Event.ENTER_FRAME, onEnterFrame);
}

private function onMouseUp(e:MouseEvent):void
{
	_arrows.stopDrag();
	_arrows.x = stage.stageWidth - _arrows.width - 30;
	_arrows.y = stage.stageHeight - _arrows.height - 30;
	removeEventListener(Event.ENTER_FRAME, onEnterFrame);
}


private function onEnterFrame(e:Event):void
{

}
As you can see the MOUSE_DOWN and the MOUSE_UP event handlers are used for the resize handler and an ENTER_FRAME event listener is used to run the code for the resize. We'll add the corresponding code in the onEnterFrame() handler in the later steps.
Step 7: Using the BrowserCanvas Class
Up until now we've only done basic AS3 programming without discussing the actual idea of this tutorial: resizing the area the SWF takes up in the web page. These were not necessary steps but I've made them to simulate a simplified real scenario.
To begin with we'll first add a new variable called _canvas of type BrowserCanvas:
private var _canvas:BrowserCanvas;
Note: If you're not using a code editor which automatically imports the used classes, don't forget to do it yourself.
After creating the variable instantiate it in the createObjects() method.
private function createObjects():void
{
	_canvas = new BrowserCanvas(stage);

	_logo = new logo() as Bitmap;
	addChild(_logo);

	_arrows = new Sprite();
	_arrows.buttonMode = true;
	_arrows.addChild(new arrows() as Bitmap);
	addChild(_arrows);
	_arrows.addEventListener(MouseEvent.MOUSE_DOWN, onMouseDown);
	_arrows.addEventListener(MouseEvent.MOUSE_UP, onMouseUp);
}
As you can see the BrowserCanvas class takes the following three parameters:
-
stage-- this is a reference to the stage. This will be used to ensure the right Flash movie is targeted -
containerId-- this is a reference to the div or object tag which holds the movie and which we want to resize. This is not really necessary unless you have multiple instances of the same SWF embedded in the same page -
browserHacks-- a list of hacks to be applied. You don't actually need to pass this as it defaults to applying all hacks
Note: If you compile the code now you should get the following error:
Error #2067: The ExternalInterface is not available in this container. ExternalInterface requires Internet Explorer ActiveX, Firefox, Mozilla 1.7.5 and greater, or other browsers that support NPRuntime.
This is because the SWF isn't yet embedded into an HTML container. The movie will compile successfully anyway but if you don't want to get this error you could add an if-statement to check if the movie is in the right container. This can be easily done by checking the ExternalInterface.available property before instantiating the BrowserCanvas object.
if (ExternalInterface.available) _canvas = new BrowserCanvas(stage);
Step 8: Resizing the SWF
Last thing we need to do in Flash is add the actual code which does the resizing. This code will be run from inside the onEnterFrame() event handler:
private function onEnterFrame(e:Event):void
{
if (_canvas)
	{
		var w:Number = _arrows.x + _arrows.width + 30;
		var h:Number = _arrows.y + _arrows.height + 30;
		_canvas.width = w.toString();
		_canvas.height = h.toString();
	}
}
The w and h variables are used to calculate the appropriate stage width and height after which we set the width and height properties of the _canvas object to the corresponding width and height. These two properties must be set as strings.
Note: The if-statement is there to check if the _canvas object has been instantiated because if we compile the code and use the resize handler we will receive an error. That is happening due to the inappropriate container again. Because the movie plays in the standalone player there is no HTML container so the _canvas object was not instantiated (look at the previous step).
Compile the project and move onto the next step.
Step 9: Into HTML
Now that the Flash part is done we need to work in HTML a little, as there are some steps needed to be taken for this to work properly.
If you are using FlashDevelop you should have a HTML file called index.html generated automatically in the bin directory; if not, create it. It should look like this:
<!DOCTYPE html PUBLIC "-//W3C//DTD XHTML 1.0 Transitional//EN" "http://www.w3.org/TR/xhtml1/DTD/xhtml1-transitional.dtd">
<html>
<head>
	<title>SWFResize</title>
	<meta http-equiv="Content-Type" content="text/html; charset=utf-8" />
	<script src="https://activetuts.s3.amazonaws.com/tuts/286_resizingSWF/tutorial/js/swfobject.js" type="text/javascript"></script>
	<script type="text/javascript">
		var flashvars = {
		};
		var params = {
			menu: "false",
			scale: "noScale",
			allowScriptAccess: "always",
			wmode: "opaque"
		};
		var attributes = {
			id:"SWFResize"
		};
		swfobject.embedSWF("SWFResize.swf", "altContent", "400", "300", "9.0.0", "expressInstall.swf", flashvars, params, attributes);
	</script>
</head>
<body>
	<div id="altContent">
		<p><a href="http://www.adobe.com/go/getflashplayer"><img
			src="https://activetuts.s3.amazonaws.com/tuts/286_resizingSWF/tutorial/http://www.adobe.com/images/shared/download_buttons/get_flash_player.gif"
			alt="Get Adobe Flash player" /></a></p>
	</div>
</body>
</html>
This is a plain HTML file with the SWF embedded using SWFObject.
Note: If you don't have SWFObject you can get if from here and place the SWFObject.js file in a folder called js placed in the same folder as your index.html and SWF files.
This will also work with basic embedding using the <object> and <embed> tags.
Save the HTML file and open it. Use the double arrow handler to resize the stage.
Step 10: Important!
When embedding the SWF file using either method you must have the allowScriptAccess set to always. This is strictly necessary as it allows the SWF file to make JavaScript calls.
Also if you want the SWF stage color to be visible you must set the wmode parameter to opaque.
The last thing you might want to look after are the width and height settings of the embedded object. You might want to set them to the original size of the SWFs stage but this is not necessary as the resize will work either way.
swfobject.embedSWF("SWFResize.swf", "altContent", "400", "300", "9.0.0", "expressInstall.swf", flashvars, params, attributes);
Step 11: Other Settings
You have probably noticed that the stage resizes to any width and height. This is awesome but there might be cases when you don't want this to happen as it could screw the layout of you page or something worse.
To fix this, the BrowserCanvas class comes with four useful properties which help you constrain the size of the SWF.
-
minWidth-- determines the minimum with that the stage can have -
minHeight-- determines the minimum height that the stage can have -
maxWidth-- determines the maximum width that the stage can have -
maxHeight-- determines the maximum height that the stage can have
To see how this works add the setMinMax() method to the AS class that we worked on.
private function setMinMax():void
{
	_canvas.minHeight = _canvas.minWidth = "300";
	_canvas.maxHeight = "500";
	_canvas.maxWidth = "800";
}
And modify the createObjects() method like so:
private function createObjects():void
{
	if (ExternalInterface.available) {
		_canvas = new BrowserCanvas(stage);
		setMinMax();
	}


	_logo = new logo() as Bitmap;
	addChild(_logo);

	_arrows = new Sprite();
	_arrows.buttonMode = true;
	_arrows.addChild(new arrows() as Bitmap);
	addChild(_arrows);
	_arrows.addEventListener(MouseEvent.MOUSE_DOWN, onMouseDown);
	_arrows.addEventListener(MouseEvent.MOUSE_UP, onMouseUp);
}
What this basically does is constrains the size of the SWF file to a minimum of 300px by 300px and a maximum of 800px by 500px.
To see the result compile the code and reload the HTML file. Now you shouldn't be able to resize the SWF outside the boundaries.
Conclusion
I hope you find this little class as useful as I do. Note that it might not work in all browsers as they all have different ways to interpret JavaScript.
Feel free to leave a comment if some steps are unclear.
Note: I have not added the complete HTML code that you see in the demo because I wanted to keep it simple and it was outside the scope of this tutorial. The HTML file from the demo is included in the download package so you can check the source code there.

Comments