Android users today no longer have to open a browser and perform a search to learn about things they stumble upon while using an app. They can instead use an assistant. If you own a device that runs Android 6.0 or higher, you might already be familiar with its default assistant, which was initially called Google Now on Tap. Lately, its name has been changed to screen search.
Assistants, although context-sensitive, are usually not very accurate. To improve accuracy, app developers must use the Assist API. In this quick tip, I'll introduce the basics of the API, and I'll help you get started with creating your very own custom assistant.
1. Enabling the Default Assistant
If you've never used the assistant on your device or emulator, it's probably not enabled yet. To enable it, press and hold the home button. In the dialog that pops up, press the Yes, I'm in button.
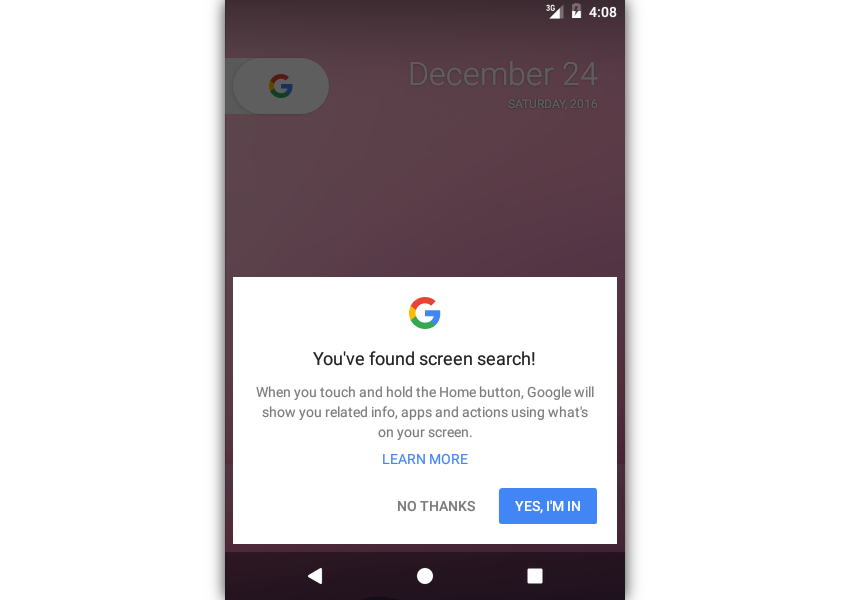
You'll now be able to access the default assistant from any app by simply long-pressing the home button. It's worth noting that the default assistant is a part of the Google app, and works best only after you've signed in to your Google account.
2. Sending Information to the Assistant
The default assistant is very powerful. It can automatically provide context-sensitive information based on the current contents of the screen. It does so by analyzing the view hierarchy of the active activity.
To see it in action, create a new activity in your Android Studio project and add the following TextView widget, which has the name of a popular novel, to its layout:
<TextView
    android:layout_width="wrap_content"
    android:layout_height="wrap_content"
    android:text="Alice's Adventures in Wonderland"
    android:id="@+id/my_text"
    />
If you run your app now and long-press the home button, the default assistant will display cards that are somewhat related to the contents of the TextView widget.
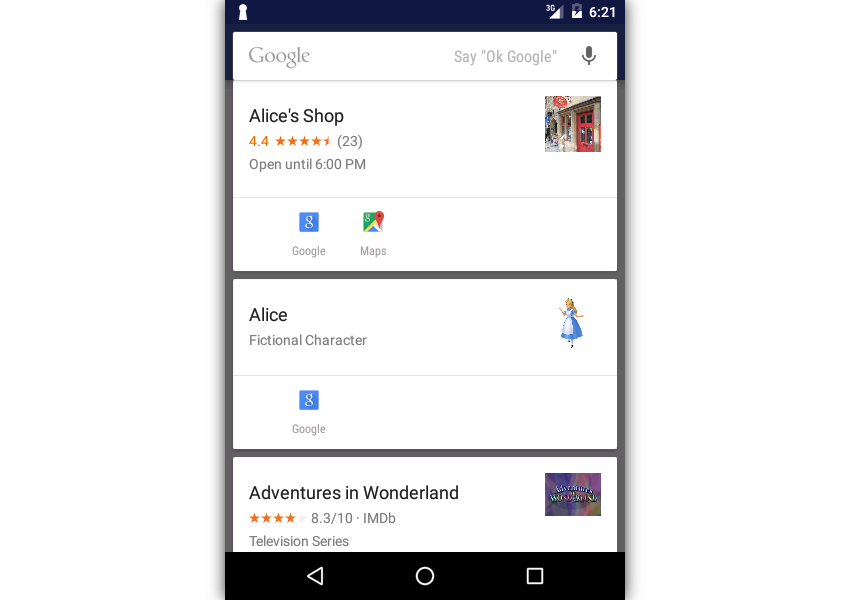
By sending additional information to the assistant, you can improve its accuracy. To do so, you must first override the onProvideAssistContent() method of your Activity class.
@Override
public void onProvideAssistContent(AssistContent outContent) {
    super.onProvideAssistContent(outContent);
}
You can now use the AssistContent object to send information to the assistant. For example, if you want the assistant to display a card that lets the user read about the novel on Goodreads, you can use the setWebUri() method.
outContent.setWebUri(
    Uri.parse(
      "http://www.goodreads.com/book/show/13023.Alice_in_Wonderland"
    )
);
Here's what the new card looks like:
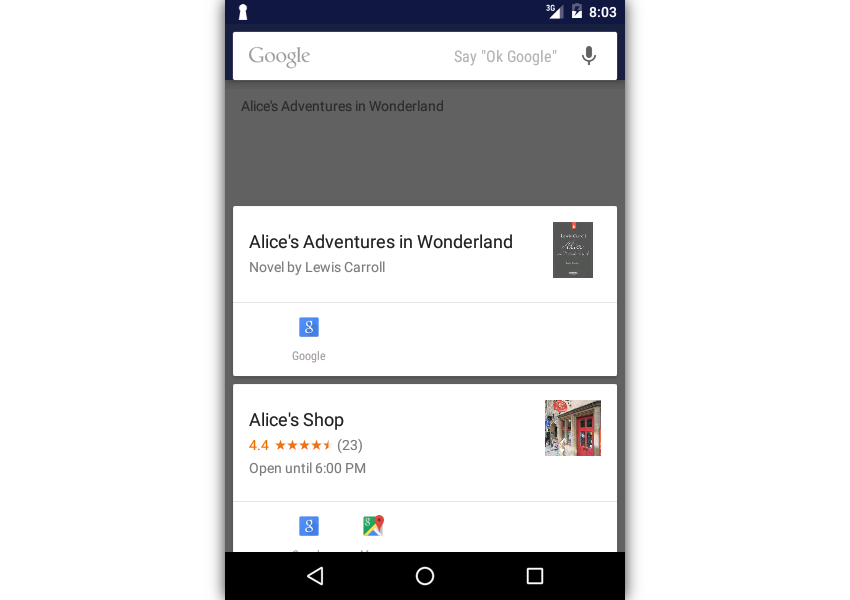
The Assist API also lets you pass structured data to the assistant using the setStructuredData() method, which expects a JSON-LD string. The easiest way to generate the JSON-LD string is to use the JSONObject class and its put() method.
The following sample code shows you how to generate and send structured data about the novel:
outContent.setStructuredData(
    new JSONObject()
        .put("@type", "Book")
        .put("author", "Lewis Carroll")
        .put("name", "Alice in Wonderland")
        .put("description",
            "This is an 1865 novel about a girl named Alice, " +
            "who falls through a rabbit hole and " +
            "enters a fantasy world."
        ).toString()
);
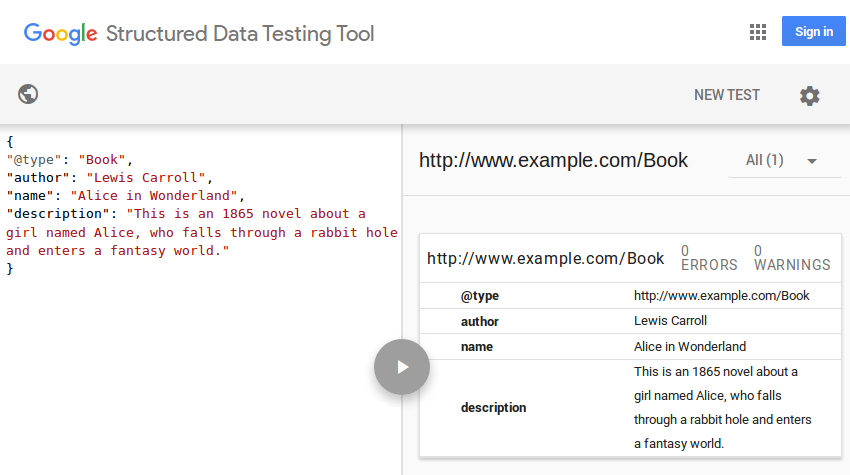
If you choose to hand-code your JSON-LD string, I suggest you make sure that it is valid using Google's Structured Data Testing Tool.
3. Creating a Custom Assistant
If you are not satisfied with the way the Google app's assistant handles your data, you should consider creating your own assistant. Doing so doesn't take much effort.
All custom assistants must have the following:
- a
VoiceInteractionServiceobject
- a
VoiceInteractionSessionobject
- a
VoiceInteractionSessionServiceobject
- an XML meta-data file describing the custom assistant
First, create a new Java class called MyAssistantSession and make it a subclass of the VoiceInteractionSession class. At this point, Android Studio should automatically generate a constructor for it.
public class MyAssistantSession extends VoiceInteractionSession {
    public MyAssistantSession(Context context) {
        super(context);
    }
}
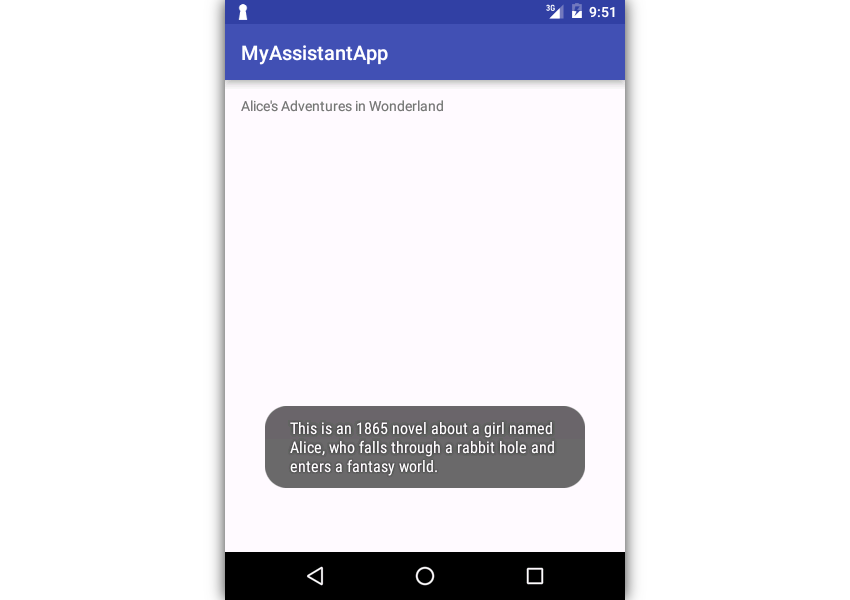
By overriding the onHandleAssist() method of the class, you can define the behavior of your assistant. For now, let's just make it parse the JSON-LD string we generated in the previous step and display its contents as a Toast message. As you might have guessed, to retrieve the JSON-LD string, you must use the getStructuredData() method of the AssistContent object.
The following code shows you how to display the value of the JSON-LD string's description key as a Toast message.
@Override
public void onHandleAssist(Bundle data,
              AssistStructure structure, AssistContent content) {
    super.onHandleAssist(data, structure, content);

    try {
        // Fetch structured data
        JSONObject structuredData =
            new JSONObject(content.getStructuredData());

        // Display description as Toast
        Toast.makeText(
            getContext(),
            structuredData.optString("description"),
            Toast.LENGTH_LONG
        ).show();
    } catch (JSONException e) {
        e.printStackTrace();
    }

}
A VoiceInteractionSession object must be instantiated inside a VoiceInteractionSessionService object. Therefore, create a new Java class called MyAssistantSessionService and make it a subclass of VoiceInteractionSessionService. Inside its onNewSession() method, call the constructor of MyAssistantSession.
public class MyAssistantSessionService
                extends VoiceInteractionSessionService {
    @Override
    public VoiceInteractionSession onNewSession(Bundle bundle) {
        return new MyAssistantSession(this);
    }
}
Our assistant also needs a VoiceInteractionService object. Therefore, create one called MyAssistantService. You don't have to write any code inside it.
public class MyAssistantService extends VoiceInteractionService {

}
To specify the configuration details of the assistant, you must create an XML metadata file and place it in the res/xml folder of your project. The file's root element must be a <voice-interaction-service> tag specifying the fully qualified names of both the VoiceInteractionService and the VoiceInteractionSessionService subclasses.
Here's a sample metadata file:
<?xml version="1.0" encoding="utf-8"?>
<voice-interaction-service
    xmlns:android="http://schemas.android.com/apk/res/android"
    android:sessionService="com.tutsplus.myassistantapp.MyAssistantSessionService"
    android:recognitionService="com.tutsplus.myassistantapp.MyAssistantService"
    android:supportsAssist="true"
/>
Lastly, while declaring the services in your project's AndroidManifest.xml file, make sure that they require the BIND_VOICE_INTERACTION permission.
<service android:name=".MyAssistantService"
    android:permission="android.permission.BIND_VOICE_INTERACTION">
  <meta-data android:name="android.voice_interaction"
    android:resource="@xml/assist_metadata" />
  <intent-filter>
    <action android:name="android.service.voice.VoiceInteractionService"/>
  </intent-filter>
</service>

<service android:name=".MyAssistantSessionService"
    android:permission="android.permission.BIND_VOICE_INTERACTION">
</service>
Your custom assistant is now ready.
4. Using the Custom Assistant
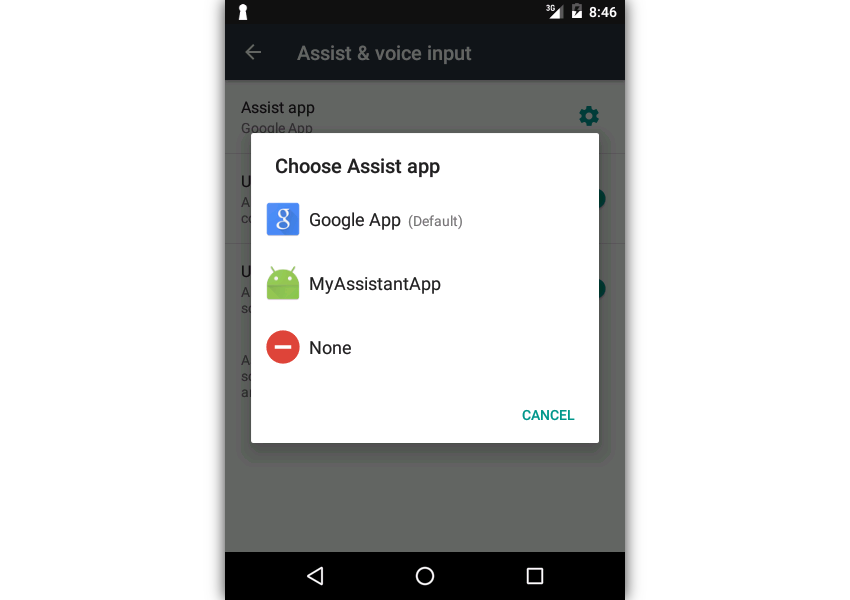
To be able to use your custom assistant, you must set it as your Android device's default assistant. Therefore, open the Settings app and navigate to Apps > Default Apps > Assist & voice input. Next, click on the Assist app option to select your assistant.
At this point, if you run your app and long-press the home button, you should be able to see your custom assistant's Toast message.
Conclusion
In this quick tip, you learned how to use the Assist API to interact with assistants on the Android platform. You also learned how to create a rudimentary custom assistant. But a word of caution: because assistants can read almost all the text that is present on a user's screen, you must make sure that your custom assistant handles sensitive data in a secure manner.
To learn more about the Assist API, refer to its official documentation. And to learn more about cutting-edge coding and APIs for the Android platform, check out some of our other courses and tutorials here on Envato Tuts+!
 AndroidMigrate an Android App to Material Design
 Android SDKHow to Dissect an Android Application
 Android SDKUnderstanding Concurrency on Android Using HaMeR
 Android SDKBackground Audio in Android With MediaSessionCompat
 Android StudioCoding Functional Android Apps in Kotlin: Getting Started


Comments