In this tutorial we will use timeline animation to create a custom class. We will then use the class on two different and distinct MovieClips, effectively duplicating the animation to these symbols.
Brief Overview
One of the new features that came along in Flash CS3, along with ActionScript 3, was the ability to copy timeline animation as AS3 code. In this tutorial we will be creating a custom class that can be used on any movie clip you choose. The resulting class is mostly XML based and is not something you would want to write by hand -- well, not unless you are up for a lot of hard work and frustration!
In the example SWF above we are just growing and fading the MovieClips, but you could have a very complex animation and it would copy over to ActionScript just as well.The best thing about copying timeline animation into a class is reusability. You can see that the two symbols are following the exact same pattern of animation.
Step 1: Setting Up The Document
Open a new Flash Document and set the following properties
- Document Size: 400x200px
- Background Color: #FFFFFF
Step 2: Setting up the MovieClip
From the Tools Panel select the Oval Tool and draw a green circle on the stage. You can hold down the Shift key as you drag the circle out to the shape conform to a circle and not an extended ellipse.
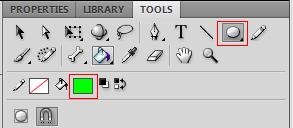
In the Properties panel give the circle the following dimensions
- W: 27.00
- H: 27.00

Right-click on the circle you just created and choose "Convert To Symbol". Enter circle as the name and make sure the Type is set to Movie Clip.

Step 3: Adding the Animation to the MovieClip
On the timeline, right-click at frame 60 and choose "Insert KeyFrame".

Make sure you are still on frame 60 and in the Tools Panel use the Free Transform tool to drag the circle to approximately twice its original size.
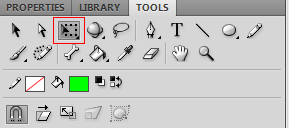
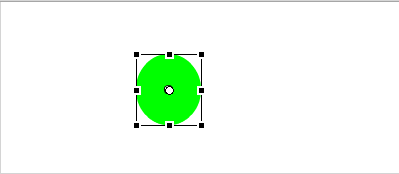
Make sure you are still on frame 60 on the circle MovieClip. In the Properties panel choose "Color Effect". In the Style pulldown choose "Alpha" and set it to 0%.

Click on the layer that the circle is on to make sure all the frames are highlighted. Alternatively, you can click on the first frame then Shift-click on the last frame to make sure all frames are highlighted. Then right-click anywhere between the highlighted frames and choose "Create Classic Tween".
You can now test your animation by going to Menu > Control > Play. You should have a growing and fading MovieClip.
Step 4: Copying the Animation
Now we are ready to copy our timeline animation and code our class.
Make sure all the frames are highlighted using the technique above. Then, right-click the tween in the timeline and choose "Copy Motion As ActionScript 3.0". In the prompt that comes up, give it the instance name of "GrowFade"
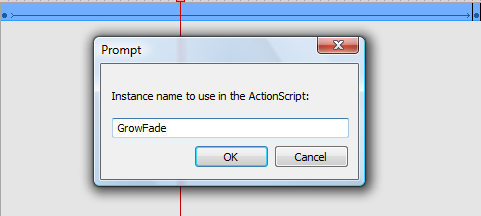
Copy the code that appears on your clipboard.
Step 5: Coding the Class
Create a new ActionScript file by going to Menu > File > New and then choosing ActionScript File.
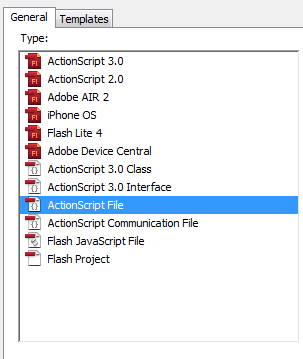
Add the following code to the new AS file:
package  {
    import flash.display.MovieClip;
    import fl.motion.Animator;

    public class GrowFade extends MovieClip {
		var GrowFade_animator:Animator;
		public function GrowFade() {
				// constructor code
		}
		public function growAndFade():void {

		}
    }
}
Here we open our package and do some imports. The Animator class is what is used to do the animating in our class. The function growAndFade() is where we will paste the copied ActionScript from the step above. We do this next.
Inside the growAndFade() function paste the ActionScript. If you need to copy it again just follow the steps above and make sure you give it the instance name "GrowFade".
The growAndFade function should now look something like this
package  {
public function growAndFade():void{
import fl.motion.Animator;
var GrowFade_xml:XML = <Motion duration="60" xmlns="fl.motion.*" xmlns:geom="flash.geom.*" xmlns:filters="flash.filters.*">
<source>
    <Source frameRate="24" x="167.5" y="116.5" scaleX="1" scaleY="1" rotation="0" elementType="movie clip" symbolName="circle">
        <dimensions>
                <geom:Rectangle left="0" top="0" width="27" height="27"/>
        </dimensions>
        <transformationPoint>
                <geom:Point x="0.5" y="0.5"/>
        </transformationPoint>
    </Source>
</source>

<Keyframe index="0" tweenSnap="true">
    <tweens>
            <SimpleEase ease="0"/>
    </tweens>
</Keyframe>

<Keyframe index="59" tweenSnap="true" scaleX="2.407" scaleY="2.63">
    <color>
            <Color alphaMultiplier="0"/>
    </color>
    <tweens>
            <SimpleEase ease="0"/>
    </tweens>
</Keyframe>
</Motion>;

var GrowFade_animator:Animator = new Animator(GrowFade_xml, GrowFade);
GrowFade_animator.play();

}
We need to perform some cleanup work on this.
First we need to remove the import statement since we've already done this at the beginning of the class.
Next we'll want to declare the GrowFade_animator as a local variable to the class, so we move that to the top and instantiate it within the growAndFade function like so: GrowFade_animator = new Animator(GrowFade_xml, this)
You may have noticed we also changed the second parameter to this. The reason we did this is so we can use this class on any MovieClip; if we had not changed it to this then only classes with the instance name "GrowFade" would be able to use this class.
Here is the complete class with the new changes and one small addition. We will discuss this addition next.
package  {
import flash.display.MovieClip;
import fl.motion.Animator;
public class GrowFade extends MovieClip {
var GrowFade_animator:Animator
    public function GrowFade() {
            // constructor code
    }
    public function growAndFade():void{
            import fl.motion.Animator;
var GrowFade_xml:XML = <Motion duration="60" xmlns="fl.motion.*" xmlns:geom="flash.geom.*" xmlns:filters="flash.filters.*">
    <source>
    <Source frameRate="24" x="167.5" y="116.5" scaleX="1" scaleY="1" rotation="0" elementType="movie clip" symbolName="circle">
        <dimensions>
                <geom:Rectangle left="0" top="0" width="27" height="27"/>
        </dimensions>
        <transformationPoint>
                <geom:Point x="0.5" y="0.5"/>
        </transformationPoint>
    </Source>
    </source>

    <Keyframe index="0" tweenSnap="true">
        <tweens>
                <SimpleEase ease="0"/>
        </tweens>
    </Keyframe>

    <Keyframe index="59" tweenSnap="true" scaleX="2.407" scaleY="2.63">
        <color>
                <Color alphaMultiplier="0"/>
        </color>
        <tweens>
                <SimpleEase ease="0"/>
        </tweens>
    </Keyframe>
</Motion>;

GrowFade_animator = new Animator(GrowFade_xml,this);
GrowFade_animator.play();
//How many times to repeat the animation 0= forever
GrowFade_animator.repeatCount =0;

	}

    }

}
You will notice we added the repeatCount property. Setting this specifies how many times to repeat the animation. Setting it to zero means it will repeat forever.
Step 6: Setting Up the MovieClips
Back in the FLA, delete the circle from the stage and remove all the frames from the timeline.
In the Library, right-click on the circle movie clip and choose "Properties".
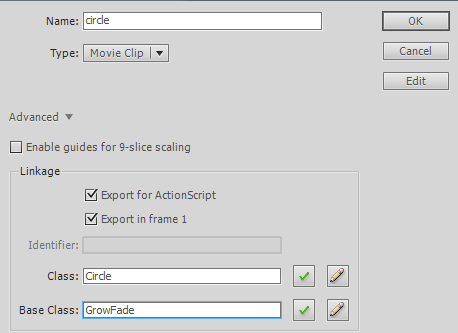
Give the circle the Class Name "Circle" and set the Base Class to "GrowFade"; because the GrowFade class extends MovieClip we can use it as the Base Class of the Circle. We've not created a Circle class, but because we entered GrowFade as the Base Class, Flash will automatically create a class for the Circle that extends GrowFade, when the SWF is created. This is how we are able to use as many Movie Clips as we want, all sharing the GrowFade class.
Next, draw a blue rectangle on the stage.
In the Properties panel give this rectangle the following properties:
- W: 83.00
- H: 30:00

Right-click on the rectangle and choose "Convert To Symbol"; give it the name square.
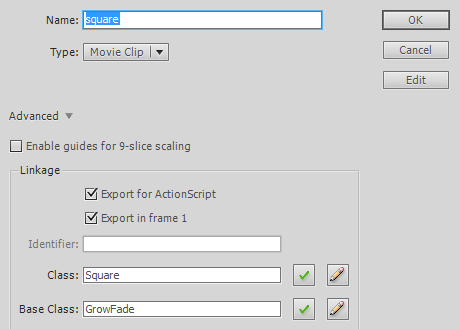
Delete the rectangle from the stage. In the Library, right-click on the square MovieClip. Choose "Properties" and give it the Class Name "Square" and set the Base Class to "GrowFade" like we did with the circle above.
Step 6: Applying the Class to the Movie Clips
Create a new ActionScript File, and add the following code to it:
package  {
import flash.display.MovieClip;
public class Main extends MovieClip {


    var circle:Circle;
    var square:Square;
    public function Main() {
    circle = new Circle();
    circle.x = 50
    circle.y = 50;
    addChild(circle);
    circle.growAndFade();

    square = new Square;
    square.x = 200;
    square.y = 50;
    addChild(square);
    square.growAndFade();


    }

    }

}
Because we set the base class of the circle and square to GrowFade, we can call the growAndFade() method on them.
Set the movie's document class to Main and test the movie. You should have two separate movie clips using the same GrowAndFade animation.
Conclusion
Being able to copy timeline animation is a great addition to Flash. No matter how complex an animation you come up with, Flash can handle it for you, and being able to share the same animation across many different movie clips is a huge time saver.
I hope you have enjoyed this tutorial, thanks for reading!


Comments