Want to learn how to use PhoneGap, but don't know where to get started? Join us as we put together “Sculder”, not only a tribute to an excellent science fiction TV series, but a fully-fledged native mobile application for the believer in you!
Where We Left Off
In the last part of this series, we got our web app up and running with some basic structure and transitions between pages. In this part, we are going to continue working on filling out the parts of the app that can run without PhoneGap and set up our PhoneGap project, ready for the integration.
Before we get started, I wanted to cover a question that I always get asked. This is a question that I once asked, and no doubt you might have asked too. Namely: How do I debug a web app on a mobile device?
Debugging on a Device
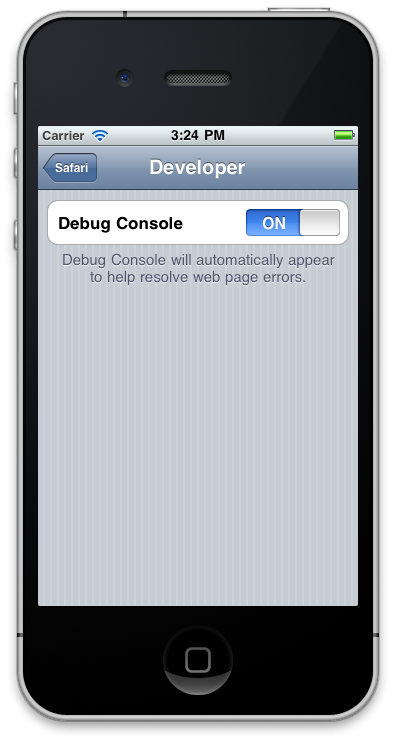
There are a number of ways of debugging in a device. You could go old-school and use alert(something);, but having alerts all over the place is both inefficient and could end up in the production code (so annoying!). You could use the debug console in Safari on an iOS device, located in Settings -> Safari -> Developer, but not all devices use Safari or have a debug console. Also, this console outputs minimal information.
If I just need to use a JavaScript console to catch a console.log(), or maybe execute some JS on the device to check something, I like to use jsconsole.com. It's one of the easiest methods of using a console on your device and there is even an iOS app available. To start a session on jsconsole.com, just type :listen and you will then get a script tag output to include in your page. Start up you app and you will see the connection happen in the console. You can now execute JS in the console and see it reflected on the device or log to the console in your code and see it here. See the video below for a demonstration of this:
For more help on jsconsole, see here.
Another alternative is WeInRe (Web Inspector Remote). First started off as an independent project, WeInRe is now part of the PhoneGap family and can be found at debug.phonegap.com. The set-up is very similar to jsconsole, but what you actually get is a a WebKit inspector, much like Chrome or Safari. See the video below for an example:
Another alternative is Socketbug, which is great, but requires Node and socket.io to be installed and set up, which is unfortunately outside of the scope for this tutorial. If, however, you are feeling adventurous and want to give Socketbug a try - it's worth it.
Those are the debugging tools that I use. Now we can start adding some features!
Twitter Feed
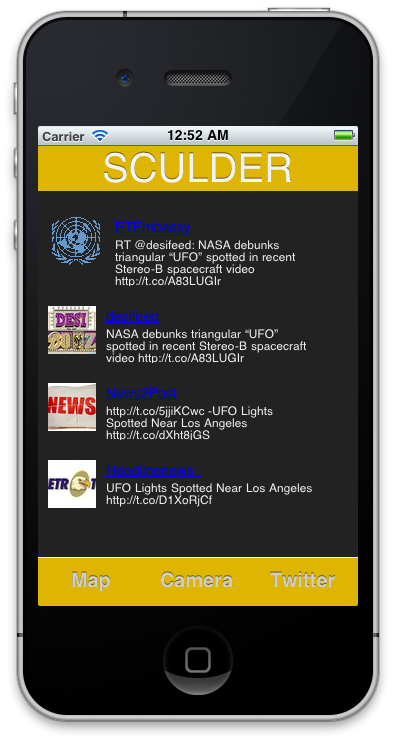
One of the features that we are able to implement without a PhoneGap API is the Twitter feed. This feature will simply list a feed of tweets that match a particular search term. Thankfully, Twitter can return data in JSON format when we run a query on search.twitter.com. If you use the following URL http://search.twitter.com/search.json?q=ufo+spotted&rpp=4, you will get a JSON response filled with enough data to fill a list.
In order to get our data onto the page and display it in a nice way, we are going to use templating. There are a bunch of template engines out there and they are all worth looking at, Mustache is a very popular one and very powerful. jQuery also has one which I think is perfect for what we want to achieve.
In the tweet page, I am going to have an empty ul and a div container that is hidden on the page. Within the container will be the code that I want to use as a template. In this case, it is a simple li element with some basic markup that will hold the twitter information we want to display. It will be in a script block that has a unique ID and a type of type="text/x-jquery-tmpl", this is so the browser does not execute it as JavaScript. The Twitter templating engine uses ${} as a placeholder for the data that we will get from our JSON data. The tweets page now looks something like this:
<div id="twitter" class="current">
	<ul id="tweets">

	</ul>

	<script id="tmpl-tweets" type="text/x-jquery-tmpl">
    	<li>
			<a class="avatar" href="#"><img src="${profile_image_url}" alt="${from_user}"></a>
			<a href="http://twitter.com/${from_user}"><h2>${from_user}</h2></a>
			<span class="details">${text} </span>
		</li>
	</script>

</div>
Now we need to write our function that will get called anytime we load this page. This function will go out to Twitter and get our feed:
function getTweets() {
	var q = "ufo+spotted"
		rpp = 5,
		twurl = "http://search.twitter.com/search.json?q=";

	$.getJSON(twurl + q + "&rpp=" + rpp + "&callback=?", function(data){
		$("#tmpl-tweets").tmpl(data.results).appendTo("#tweets");
	});
}
I'm going to have this page load first, so I have set the page's class to current. Now, we just need to add some style to the tweets, so they are displayed a bit nicer.
/** Tweets Styling **/

#tweets {
    list-style:none;
    padding:10px;
}

#tweets li{
    font-size:12px;
    overflow: hidden;
    margin-bottom:20px;
}

#tweets li h2{
    font-size:14px;
    margin:0;
}
.avatar{
    margin-right:10px;
}

#tweets li a, #tweets li span {
    float:left;
}

#tweets li span {
    width:70%;
}
The next time we start up the app we should get the following.
Map Basics
The other feature that we can implement before we do the phonegap integration is the map feature. We are going to use the Google Maps API to generate a simple map and then use some map data to drop markers. Each marker will indicate UFO sightings.
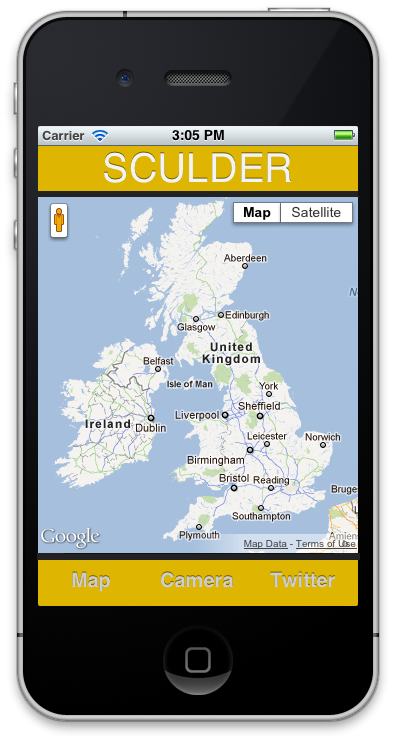
For this we are going to use the JavaScript API, currently at version 3. A full introduction to the maps API is out of scope for this tutorial, but you can find all the documentation can be found here, as well as implementation samples. If you follow the tutorial found here, you will see how to implement a basic map. We can use the same code to implement a basic map and end up with the following:
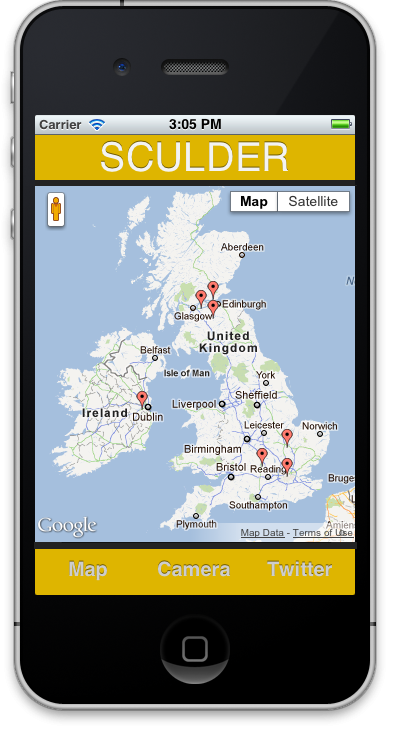
Now we can go to the documentation that covers the markers, found here. Now we can drop some basic markers on our map upon load. The markers would represent locations of sightings with the data from the photographs that have been taken and uploaded by users of the application. We would have a service running on a server that can return data via Ajax, probably in the JSON format. Again, setting up this service is an entire tutorial in itself, but for each entry we would create a marker for the map using the code provided in the demo.
var marker = new Google.maps.Marker({
      position: newLatlng,
      map: map,
      title:"New Sighting"
});
After the map loads, the markers would be added. If you read through the Google API documentation, you will find other options for the markers - such as displaying them with images and notes. It is worth exploring the other options and coming up with different implementations.
That's about as much as we can do before we get to PhoneGap. Our last function requires the use of the camera, so let's go ahead and begin setting up our PhoneGap project. Check out the introduction to PhoneGap here if you haven't already.
Icons, Icons, Icons
Icons are a very important part of the application. It's the image that represents your application everywhere, and there are certain guidelines you will want to follow to ensure that it looks good everywhere it will be seen. There is a great blog post here about icon sizes and the guidelines to follow when creating an icon. I usually take a 512x512 icon and scale it down from there to all the sizes needed.
You will also need to create a Launch image / splash screen for your app.
Xcode Project Setup
Once we have the default PhoneGap application running on our simulator and/or test device. We can go through the main summary page on the Xcode template for PhoneGap. The first thing I want to make sure is that the devices menu is set to iPhone. We could deploy to iPad too, if we wanted too, but there might be some CSS changes that we'd like to make first. For now I am sticking to iPhone only. Check all the device orientations as jQuery Mobile sorts out our layout depending on orientation. You are able to drag-and-drop the image files into their allocated slots on the summary page.
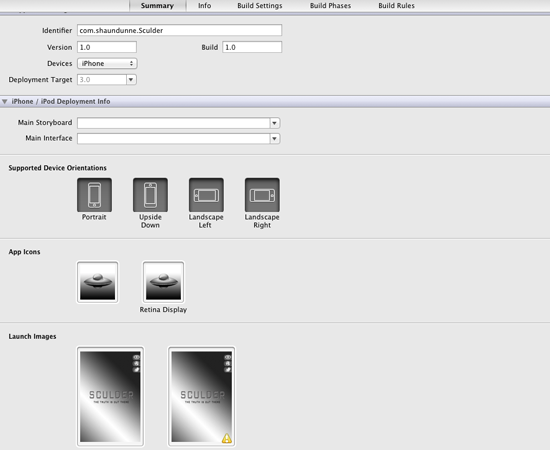
Now, when you start up your application you will be greeted with your new app icon and launch page. Now copy over the files you have been working from in the www folder. Start up the app and check that everything is working OK.
Eclipse Project Setup
After you've set up your project in Eclipse (in the same way as we did our test project in the first part here) you need to have three icon sizes prepared for your application. High Density (72x72), Medium Density (48x48), and Low Density (36x36). These icons replace the default icons that can be found in the res folder. The appropriate acronyms are hdpi, mdpi, and ldpi standing for High, Medium and Low respectively. The images you want to use as your splash screen should go in these folders too.
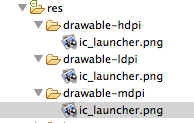
In order to have the splash screen work for Android, we need to add and modify our DroidGap class to include the splash image on load. Add:
super.setIntergerProperty("splashscreen", R.drawable.splash)
Next, the loadUrl needs a timeout added to it.
super.loadUrl("file:///android_asset/www/index.html", 5000);
Your file should now look like the following:
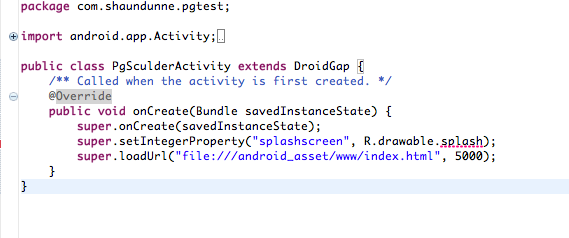
Run the application and ensure that everything is working OK.
Conclusion
We are now at the point where we are ready to implement our last two features: the device camera and local storage options. Doing so will be covered in future tutorials in this series. This series will also go through submitting our app to the various app stores, so be sure to follow along!


Comments