This tutorial gives an overview of the new features of the SpriteKit framework that were introduced in iOS 8. The new features are designed to make it easier to support advanced game effects and include support for custom OpenGL ES fragment shaders, lighting, shadows, advanced new physics effects and animations, and integration with SceneKit. In this tutorial, you'll learn how to implement these new features.
Before starting the tutorial, I would like to thank Mélodie Deschans (Wicked Cat) for providing us with the game art used in this series.
Prerequisites
This tutorial assumes that you are familiar with both SpriteKit and Objective-C. To interact with the shader and the scene editor without input lag, I recommend that you download and install Xcode 6.1 or later. Download the Xcode project from GitHub, if you'd like to follow along.
Series Format
This series is split up into two tutorials and covers the most important new features of the SpriteKit framework. In the first part, we take a look at shaders, lighting, and shadows. In the second part, I'll talk about physics and SceneKit integration.
While each part of this series stands on its own, I recommend following along step-by-step to properly understand the new features of the SpriteKit framework. After reading both parts, you'll be able to create both simple and more advanced games using the new features of the SpriteKit framework.
1. Introduction
SpriteKit provides a rendering pipeline that can be used to animate sprites. The rendering pipeline contains a rendering loop that alternates between determining the contents and rendering frames. The developer determines the contents of each frame and how it changes. SpriteKit uses the GPU of the device to efficiently render each frame.
The SpriteKit framework is available on both iOS and OS X, and it supports many different kinds of content, including sprites, text, shapes, and video.
The new SpriteKit features introduced in iOS 8 are:
-
Shaders: Shaders customize how things are drawn to the screen. They are useful to add or modify effects. The shaders are based on the OpenGL ES fragment shader. Each effect is applied on a per-pixel basis. You use a C-like programming language to program the shader and it can be deployed to both iOS and OS X. A shader can be applied to a scene or to supported classes,
SKSpriteNode,SKShapeNode,SKEmitterNode,SKEffectNode, andSKScene.
- Lighting & Shadows: Lighting is used to illuminate a scene or sprite. Each light supports color, shadows, and fall-off configurations. You can have up to eight different lights per sprite.
- Physics: Physics are used to add realism to games. SpriteKit introduces four new types of physical properties, per-pixel physics, constraints, inverse kinematics, and physics fields. The per-pixel properties provide an accurate representation of the interaction of an object. Thanks to a variety of predefined constraints, boilerplate code can be removed in scene updates. Inverse kinematics are used to represent joints using sprites (anchor points, parent-child relationships, maximum and minimum rotation, and others). Finally, you can create physics fields to simulate gravity, drag, and electromagnetic forces. These new physics features make complex simulations much easier to implement.
-
SceneKit Integration: Through SceneKit, you can include 3D content in SpriteKit applications and control them like regular
SKNodeinstances. It renders 3D content directly inside the SpriteKit rendering pipeline. You can import existing .dae or .abc files toSKScene.
2. Project Overview
I've created an Xcode project to get us started. It allows us to immediately start using the new SpriteKit features. However, there are a few things to be aware of.
- The project uses Objective-C, targeting only iPhone devices running iOS 8.1. However, you can change the target device if you like.
- Under Resources > Editor, you'll find three SpriteKit scene (.sks) files. In this series, you'll add a fourth SpriteKit scene file. Each scene file is responsible for a specific tutorial section.
- A shader can be initialized one of two ways. The first uses the traditional method while the second uses the new SpriteKit scene method. The objective is that you learn the differences and, in future projects, choose the one that fits your needs.
- If you instantiate an
SKSceneobject using a SpriteKit scene file, you'll always use theunarchiveFromFile:method. However, it is mandatory that you add for each SpriteKit scene file the correspondingSKSceneclass.
- If you instantiate an
SKSceneobject without using a SpriteKit scene file, you should use theinitWithSize:method like you used to do in earlier versions of iOS. - The
GameViewControllerandGameSceneclasses contain a method namedunarchiveFromFile:. This method transforms graphical objects defined in a SpriteKit scene and turn them into anSKSceneobject. The method uses theinstancetypekeyword, since it returns an instance of the class it calls, in this case theSKSceneclass.
Download the project and take a moment to browse its folders, classes, and resources. Build and run the project on a physical device or in the iOS Simulator. If the application is running without problems, then it's time to start exploring the new iOS 8 SpriteKit features.
3. Shaders
Step 1: Create SpriteKit Scene
In the Xcode project, add a new SpriteKit Scene file. Choose File > New > File... and, from the Resource section, choose SpriteKit Scene. Name it ShaderSceneEditor and click Create. A grey interface should appear.
Step 2: SpriteKit Scene Configuration
In the SKNode Inspector on the right, you should see two properties, Size and Gravity. Set the Size property taking into account your device screen resolution and set Gravity to 0.0.
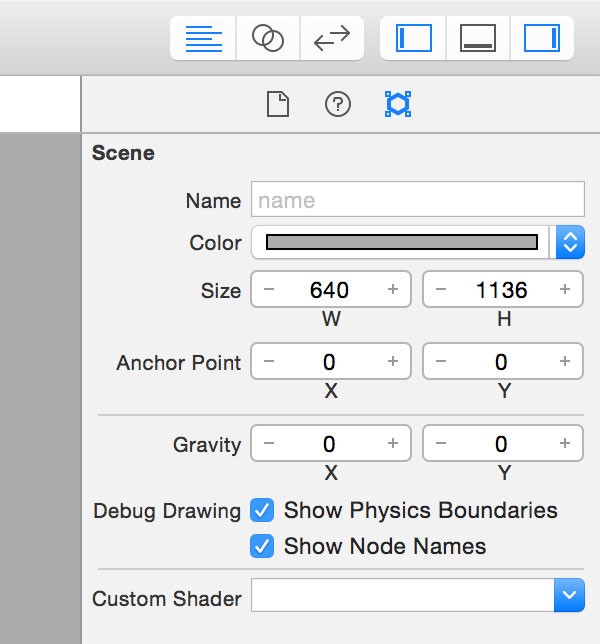
You'll notice that the size of the yellow rectangle changes to reflect the changes you've made. The yellow rectangle is your virtual device interface. It shows you how objects are displayed on your device.
Step 3: Add a Color Sprite
Inside the Object Library on the right, select the Color Sprite and drag it into the yellow rectangle.
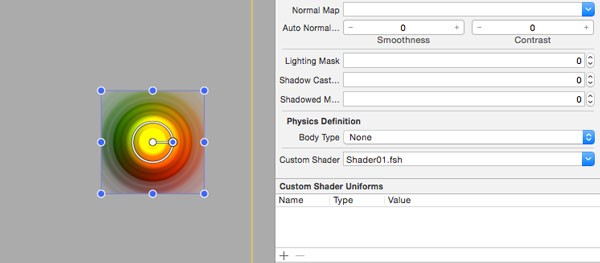
Select the color sprite and open the SKNode Inspector on the right to see its properties.
You can interact with the object in real time. Any changes you make are displayed in the editor. You can play with Position, Size, Color, or Scale, but what you really want is the Custom Shader option. However, you'll notice that there's no shader available yet.
Step 4: Add a Custom Shader: Method 1
Add a new empty source file (File > New > File...), choose Other > Empty from the iOS section, and name it Shader01.fsh. Add the following code to the file you've just created.
void main()
{
    float currTime = u_time;

    vec2 uv = v_tex_coord;
    vec2 circleCenter = vec2(0.5, 0.5);
    vec3 circleColor = vec3(0.8, 0.5, 0.7);
    vec3 posColor = vec3(uv, 0.5 + 0.5 * sin(currTime)) * circleColor;

    float illu = pow(1. - distance(uv, circleCenter), 4.) * 1.2;
    illu *= (2. + abs(0.4 + cos(currTime * -20. + 50. * distance(uv, circleCenter)) / 1.5));

    gl_FragColor = vec4(posColor * illu * 2., illu * 2.) * v_color_mix.a;
}
The above code block generates a fusion of colors taking into consideration the center of a circle and its edge. Apple showed this shader in their SpriteKit session during WWDC 2014.
Return to the editor, select the color sprite object, and in the Custom Shader select the shader you've just created. You should now see the shader in action.
Step 5: Real Time Feedback
Programming shaders using Xcode and SpriteKit is easy, because you receive real time feedback. Open the Assistant Editor and configure it to show both the SpriteKit scene as well as the shader you've just created.
Let's see how this works. Introduce a runtime error in the shader, for example, by changing a variable's name and save the changes to see the result.
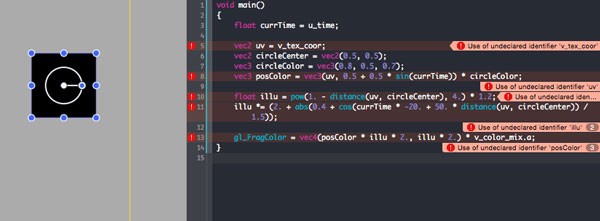
As you can see, Xcode provides a quick and easy way to alert the developer about possible shader errors. The advantage is that you don't need to build or deploy your application to your device or the iOS Simulator to see if everything is running fine.
It's now time to add another shader and manually program it.
Step 6: Add a Custom Shader: Method 2
In this step, you'll learn how to:
- call a shader manually
- assign a shader to a SpriteKit object
- create and send properties to a shader
In this step, you'll add a custom SKSpriteNode at the position of the user's tap and then you'll use a shader to modify the texture color of the SKSpriteNode.
The first step is to add another shader. Name the new shader shader02.fsh and add the following code block to the shader's file:
void main()
{
    gl_FragColor = texture2D(myTexture,v_tex_coord) * vec4(1, 0.2, 0.2, 1);
}
Open the implementation file of the ShaderScene class. The first step is to detect whether the user has tapped the screen and find the location of the tap. For that, we need to implement the touchesBegan:withEvent: method. Inside this method, add a SKSpriteNode instance at the location of the tap. You can use any sprite you like. I've used Spaceship.png, which is already included in the project.
- (void)touchesBegan:(NSSet *)touches withEvent:(UIEvent *)event {
    for (UITouch *touch in touches){
        CGPoint location = [touch locationInNode:self];

        // Create the node
        SKSpriteNode *space = [SKSpriteNode spriteNodeWithImageNamed:@"Spaceship.png"];
        space.position = CGPointMake(location.x, location.y);
        [self addChild:space];
    }
}
We then create a SKShader object and initialize it using the shader02.fsh file:
SKShader *shader = [SKShader shaderWithFileNamed:@"shader02.fsh"];
You may have noticed that the shader's source file references a myTexture object. This isn't a predefined shader property, but a reference your application needs to pass to the shader. The following code snippet illustrates how to do this.
shader.uniforms = @[ [SKUniform uniformWithName:@"myTexture" texture:[SKTexture textureWithImageNamed:@"Spaceship.png"]] ];
We then add the shader to the SKSpriteNode object.
space.shader = shader;
This is what the touchesBegan:withEvent: method should look like:
- (void)touchesBegan:(NSSet *)touches withEvent:(UIEvent *)event {
    for (UITouch *touch in touches){
        CGPoint location = [touch locationInNode:self];

        // Create the node
        SKSpriteNode *space = [SKSpriteNode spriteNodeWithImageNamed:@"Spaceship.png"];
        space.position = CGPointMake(location.x, location.y);
        [self addChild:space];

        SKShader *shader = [SKShader shaderWithFileNamed:@"shader02.fsh"];

        shader.uniforms = @[ [SKUniform uniformWithName:@"myTexture" texture:[SKTexture textureWithImageNamed:@"Spaceship.png"]] ];

        space.shader = shader;
    }
}
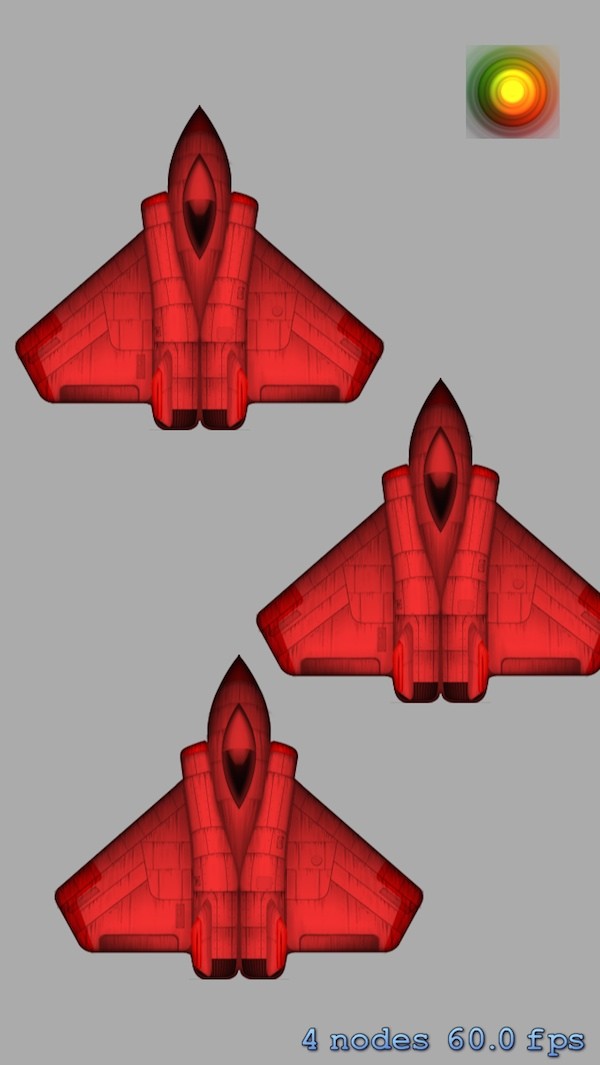
Build and run your project. Tap the Shaders (initWithSize) button and tap the screen. Every time you tap the screen, a spaceship sprite is added with a modified texture.
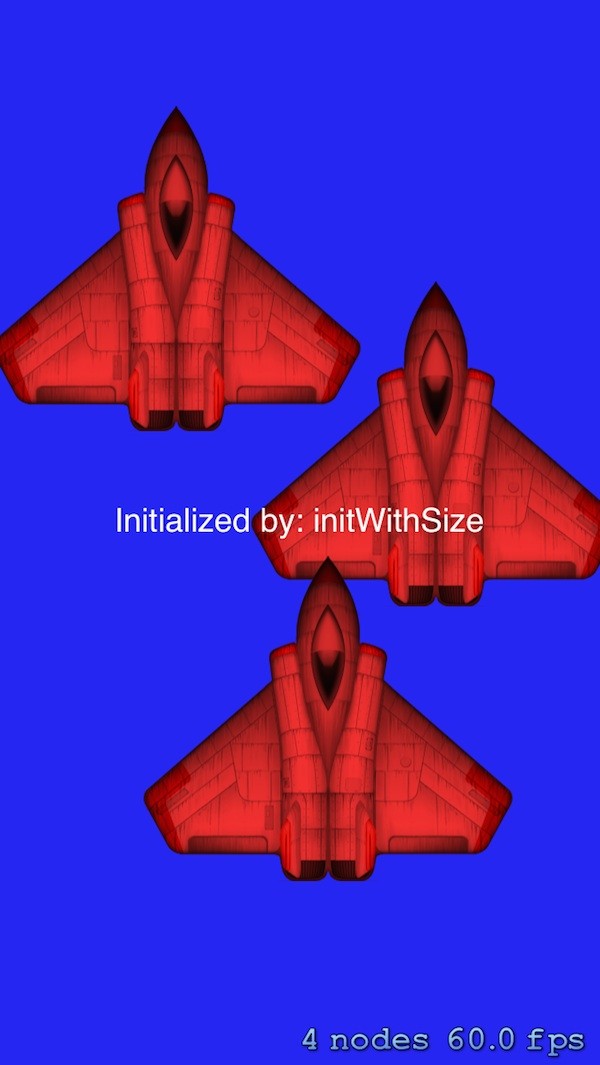
Using this option, you see that the first shader is not presented on screen. This happens because that shader was created and configured inside the SpriteKit Scene editor. To see it, you need to initialize the ShaderScene class using the unarchiveFromFile: method.
In GameScene.m, you should see a section that detects and parses the user's taps in touchesBegan:withEvent:. In the second if clause, we initialize a ShaderScene instance as shown below.
if ([node.name isEqualToString:@"buttonShaderCoder"]) {
    ShaderScene *scene = [ShaderScene unarchiveFromFile:@"ShaderSceneEditor"];
    [self.scene.view presentScene:scene];
}
Build and run your project again, tap the Shaders (initWithCoder) button, and tap the screen. Both shaders are now active in a single SpriteKit scene.
4. Lighting and Shadows
Lighting and shadows are two properties that play together. The aim of this section is to add several light nodes and sprites, and play with their properties.
Step 1: Add a Light
Open LightingSceneEditor.sks and browse the objects inside the Media Library on the right. In the Media Library, you can see the resources included in the project.
Select and drag background.jpg to the yellow rectangle. If you haven't changed the default scene resolution, the image should fit inside the rectangle.
When you select the sprite, you'll notice that it has several properties like Position, Size, Z Position, Lighting Mask, Shadow Casting Mask, Physics Definition, and many others.
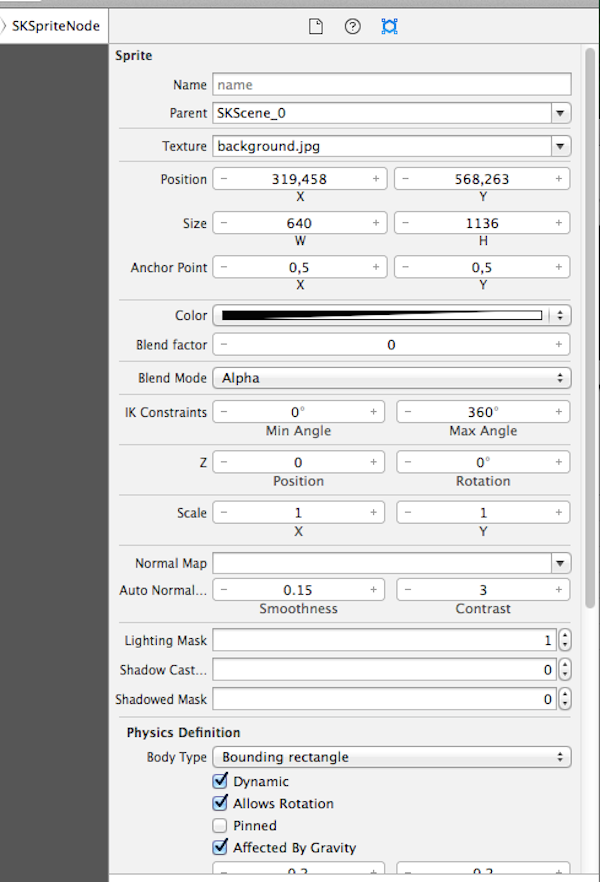
Feel free to play with these properties. For now, though, it's important that you leave the properties at their defaults. Drag a Light object from the Object Library on the right onto the background sprite. The position of the light isn't important, but the light's other properties are.
You can configure the Color, Shadow, and Ambient color to configure the light and shadow. The Z Position is the node's height relative to its parent node. Set it to 1. The Lighting Mask defines which categories this light belongs to. When a scene is rendered, a light’s categoryBitMask property is compared to each sprite node's lightingBitMask, shadowCastBitMask, and shadowedBitMask properties. If the values match, that sprite interacts with the light. This enables you to define and use multiple lights that interact with one or more objects.
You've probably noticed that the background has not changed after adding the light. That happens because the lighting mask of the light and the background are different. You need to set the background's lighting mask to that of the light, which is 1 in our example.
Update the background in the SKNode Inspector and press enter. The effect of this change is immediate. The light now illuminates the background based on its position. You can modify the light's position to see the interaction between the background and light nodes in real time.
To increase the realism of the background or emphasize one of its features, play with the Smoothness and Contrast properties. Play with the values to see the changes in real time.
Step 2: Populate the Scene
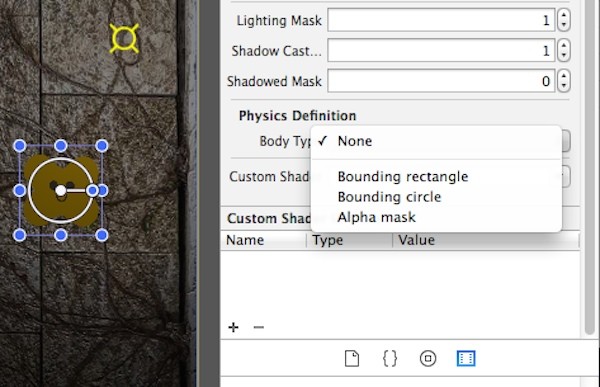
It's now time to add a few objects that interact with the light node. In the Media Library, find the croquette-o.png and croquette-x.png sprites and add them to the scene.
Each sprite needs to be configured individually. Select each sprite and set the Lighting Mask, Shadow Cast Mask, and the Z Position to 1. The lighting mask ensures that the sprite is affected by the light node while the shadow cast mask creates a real time shadow based on the position of the light node. Finally, set the Body Type (Physics Definition) to None. Do this for both sprites.
You should have noticed that, even after setting the properties of lighting and shadow, you cannot see the interaction between the light and the nodes. For that, you need to build and run the project on a physical device or in the Simulator.
Step 3: Manual Lighting
You already know how to add lights using the scene editor. Let's see how to add a light without using the scene editor.
Open the LightingScene.m and inside the didMoveToView: method we create a SKSpriteNode object and a SKLightNode object.
For the SKSpriteNode object, we use the Wicked-Cat.png sprite. The position of the node isn't that important, but the values of zPosition, shadowCastBitMask, and lightingBitMask are. Because SpriteKit parses the data sequentially, you need to set the node's zPosition to 1 for this sprite to be visible, on top of the background sprite. We set shadowCastBitMask and lightingBitMask to 1.
This is what the didMoveToView: method looks like so far:
- (void)didMoveToView:(SKView *)view {
    SKSpriteNode *sprite = [SKSpriteNode spriteNodeWithImageNamed:@"Wicked-Cat.png"];
    [sprite setPosition:CGPointMake(self.frame.size.width/2, self.frame.size.height/2)];
    [sprite setScale:0.6];
    [sprite setZPosition:1];
    [sprite setShadowCastBitMask:1];
    [sprite setLightingBitMask:1];
    [self addChild:sprite];
}
Next, let's add the SKLightNode object. You should take special attention to the categoryBitMask property. If you set it to 1, this light will interact with every sprite. Name it light and set zPosition to 1.
The complete snippet for the SKLightNode should look like this:
SKLightNode* light = [[SKLightNode alloc] init];
[light setName:@"light"];
[light setPosition:CGPointMake(100, 100)];
[light setCategoryBitMask:1];
[light setFalloff:1.5];
[light setZPosition:1];
[light setAmbientColor:[UIColor whiteColor]];
[light setLightColor:[[UIColor alloc] initWithRed:1.0 green:0.0 blue:0.0 alpha:.5]];
[light setShadowColor:[[UIColor alloc] initWithRed:0.9 green:0.25 blue:0.0 alpha:.5]];
[self addChild:light];
Step 4: Change the Light Location
At this point you have a second light. But let's add some user interaction. For that you should add the touchesMoved:withEvent: method and change the light position, taking into consideration the tap location.
-(void)touchesMoved:(NSSet *)touches withEvent:(UIEvent *)event {
    for (UITouch *touch in touches) {
        CGPoint location = [touch locationInNode:self];
        [self childNodeWithName:@"light"].position = CGPointMake(location.x, location.y);
    }
}
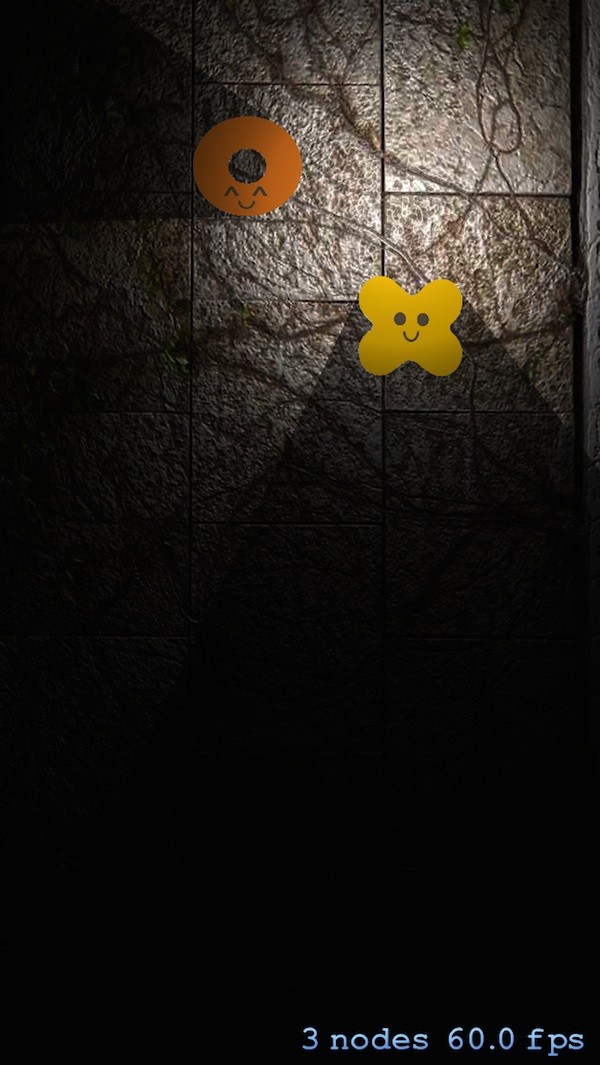
Finally, build and run your application. Tap the Lighting button and you should see something similar to the below screenshot:
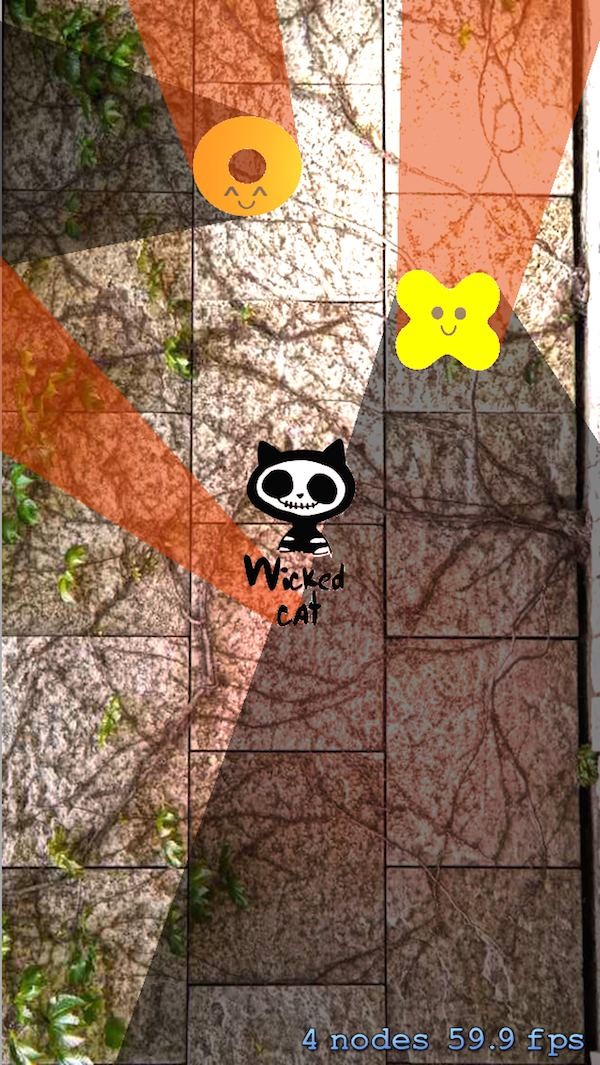
Conclusion
This concludes the first tutorial in our two-part series on the new SpriteKit framework features introduced in iOS 8. In this part, you learned to create custom shaders and lighting effects using both the SpriteKit Scene editor and through code. If you have any questions or comments, as always, feel free to drop a line in the comments.

Comments