No one wants to ship buggy software. Ensuring that you release a mobile application of the highest quality requires much more than a human-driven manual quality assurance process. New devices and operating systems are released to the public each year. This means that there is an ever expanding combination of screen sizes and operating system versions on which you must test your mobile application. Not only would it be extremely time consuming, but attempting to test your iOS application by manual testing neglects an entire piece of the modern software engineering process, automated quality assurance testing.
In today’s world, there are many tools available that can be used to automatically test the software you write. Some of these tools are maintained through an open source model, but there is also a core set provided by Apple. With each new release of the iOS SDK, Apple has continued to show their commitment towards improving the tools available for developers to test the code they write. For the iOS developer who is new to automated testing and interested to get started, Apple’s tools are a good place to start.
1. Apple Provides Helpful Tools
This tutorial is going to provide instructions for using a tool that Apple provides for automated testing, XCTest. XCTest is Apple’s unit testing framework. Unit testing is the type of automated testing that verifies code at the lowest level. You write Objective-C code that calls methods from your "production" code and verify that the code under test actually does what it's intended to do. Are variables set correctly? Is the return value correct?
Tests written with the XCTest framework may be repeatedly executed against your application's code to help you gain confidence that you are creating a bug free product in that new code changes aren't breaking existing functionality.
By default, every new Xcode project is created with a good starting point for writing unit tests. This includes three things:
- a separate target for your tests
- a group for your test classes
- an example test
Let's dig into the structure of an iOS unit test. An individual unit test is represented as a single method within any subclass of XCTestCase where the method returns void, takes no parameters, and the method name begins with test.
- (void) testSomething{}
Luckily, Xcode makes creating test cases easy. With new Xcode projects, an initial test case is created for you in a separate file group whose name is suffixed by the word Tests.
2. Creating Your First iOS Unit Test
I've created a sample project that can be used as a reference for the examples provided in this tutorial. Download the project from GitHub and open it in Xcode.
Step 1: Create the Test Case Class
In the sample project, you can find the group of tests in the folder named JumblifyTests.
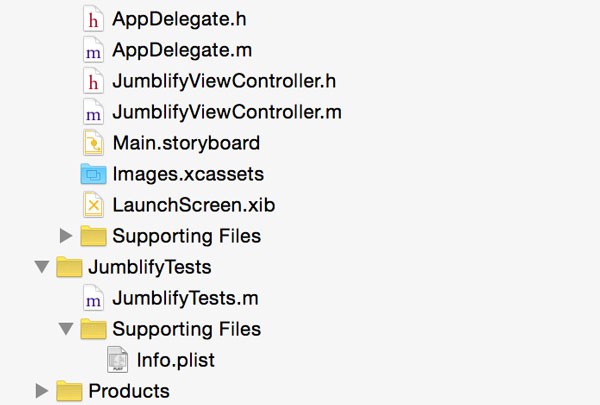
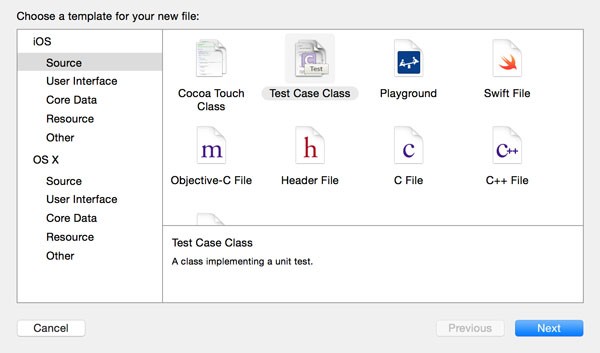
To create your first test case, right click the file group, JumblifyTests, and select New File. Choose Test Case Class from the iOS > Source section, and give the new subclass a name.
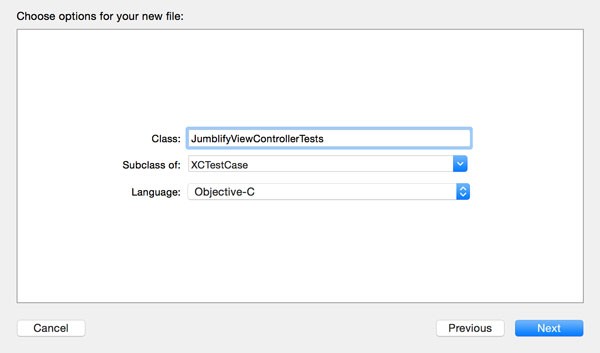
The typical naming convention is to name the test case such that it is the name of the corresponding class under test, suffixed with Tests. Since we'll be testing the JumblifyViewController class, name the XCTestCase subclass JumblifyViewControllerTests.
Step 2: Remove the Boilerplate Code
In the brand new XCTestCase subclass, you’ll see four methods. Two of these are tests themselves. Can you identify which they are? Remember that test method names begin with the word "test".
If you didn't figure it out, the test methods created by default are testExample and testPerformanceExample.
Delete both tests, because we're going to write ours from scratch. The other two methods, setUp and tearDown, are overridden from the superclass, XCTestCase. They are unique in that setUp and tearDown are called before and after each test method is invoked respectively. They are useful places to centralize code that should be executed before or after each test method is called. Tasks like common initialization or cleanup go here.
Step 3: Connect Your Test With Your Class Under Test
Import the header file of the JumblifyViewController class and add a property of type JumblifyViewController to the XCTestCase subclass.
@property (nonatomic) JumblifyViewController *vcToTest;
In the setUp method, initialize the property as shown below.
- (void)setUp
{
    [super setUp];
    self.vcToTest = [[JumblifyViewController alloc] init];
}
Step 4: Write a Test
We're now going to write a test to test the reverseString: method of the JumblifyViewController class.
Create a test method that uses the instantiated vcToTest object to test the reverseString: method. In this test method, we create an NSString object and pass it to the view controller's reverseString: method. It's common convention to give your test a meaningful name to make it clear what the test is testing.
- (void)testReverseString {
    NSString *originalString = @"himynameisandy";
    NSString *reversedString = [self.vcToTest reverseString:originalString];
}
At this point, we haven't done anything useful yet, because we haven't tested the reverseString: method yet. What we need to do is compare the output of the reverseString: method with what we expect the output to be.
The XCTAssertEqualObjects function is part of the XCTest framework. The XCTest framework provides many other methods to make assertions about application state, such as variable equality or boolean expression results. In this case, we have stated that two objects must be equal. If they are, the test passes and if they aren't, the test fails. Take a look at Apple’s documentation for a comprehensive list of assertions provided by the XCTest framework.
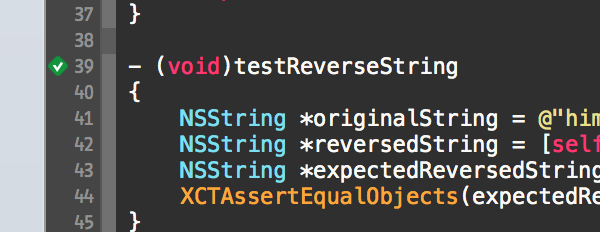
- (void)testReverseString {
    NSString *originalString = @"himynameisandy";
    NSString *reversedString = [self.vcToTest reverseString:originalString];

    NSString *expectedReversedString = @"ydnasiemanymih";
    XCTAssertEqualObjects(expectedReversedString, reversedString, @"The reversed string did not match the expected reverse”);
}
If you try to compile the code at this point, you'll notice a warning when you attempt to call reverseString: from the test case. The reverseString: method is a private method of the JumblifyViewController class. This means that other objects cannot invoke this method since it's not defined in the header file of the JumblifyViewController class.
While writing testable code is a mantra that many developers follow, we don't want to unnecessarily modify our code under test. But how do we call the private reverseString: method of the JumblifyViewController class in our tests? We could add a public definition of the reverseString: method to the header file of the JumblifyViewController class, but that breaks the encapsulation pattern.
Step 5: Adding a Private Category
One solution is to add a private category on the JumblifyViewController class to expose the reverseString: method. We add this category to the XCTestCase subclass, which means it's only available in that class. By adding this category, the test case will compile without warnings or errors.
@interface JumblifyViewController (Test)

- (NSString *)reverseString:(NSString *)stringToReverse;

@end
Step 6: Run the Test
Let's run our tests to ensure that they pass. There are several ways to run unit tests for an iOS application. I'm a keyboard shortcut junkie so my most used technique for running my unit tests for my application is by pressing Command-U. This keyboard shortcut will run all the tests for your application. You can also perform the same action by selecting Test from the Product menu.
As your test suite grows, or if you like implement test driven development, you'll find that running your test suite can become too time consuming. Or it might get in the way of your workflow. An very useful command, buried within Xcode's menu, that I've fallen in love with is Command-Option-Control-U. This shortcut triggers a command that runs the test your cursor is currently in. Once you have your test suite fleshed out and finalized, you should always run the entire test suite. Running an individual test is useful as you're writing a new test test or when you're debugging a failing test.
The command to run one test is complemented by Command-Option-Control-G, which reruns the last test run. This can be the entire test suite or only the most recent test you are working on. It's also useful in case you've navigated away from whatever test you're working on and you're still in the process of debugging it.
Step 7: Reviewing the Results
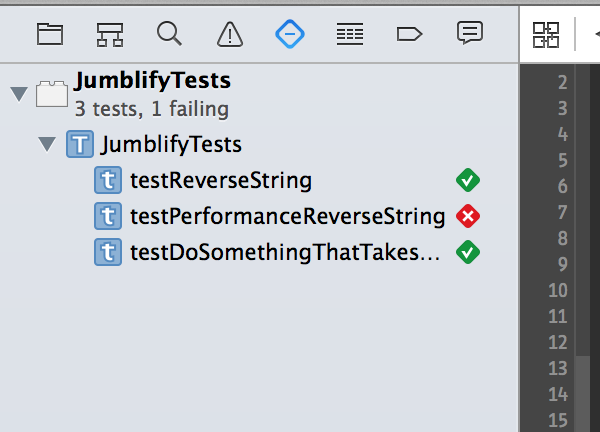
You can see your test results in a couple of places. One of those places is the Test Navigator on the right.
Another option is by looking at the gutter of the Source Editor.
In either of these two places, clicking the green diamond with the white checkmark will rerun that particular test. In the case of a failed test, you'll see a red diamond with a white cross in the center. Clicking it will also rerun that particular test.
3. New in Xcode 6
Xcode 6 introduced two new exciting additions to unit testing on iOS and OS X, testing asynchronous functionality and measuring performance of a specific piece of code.
Asynchronous Testing
Prior to Xcode 6, there was no good way to unit test asynchronous code. If your unit test called a method that contained asynchronous logic, you couldn't verify the asynchronous logic. The test would complete before the asynchronous logic in the method under test was executed.
To test asynchronous code, Apple has introduced an API that allows developers to define an expectation that must be fulfilled for the test to complete successfully. The flow is as follows, define an expectation, wait for the expectation to be fulfilled, and fulfill the expectation when the asynchronous code has finished executing. Take a look at the below example for clarification.
- (void)testDoSomethingThatTakesSomeTime {
    XCTestExpectation *completionExpectation = [self expectationWithDescription:@"Long method"];
    [self.vcToTest doSomethingThatTakesSomeTimesWithCompletionBlock:^(NSString *result) {
        XCTAssertEqualObjects(@"result", result, @"Result was not correct!");
        [completionExpectation fulfill];
    }];
    [self waitForExpectationsWithTimeout:5.0 handler:nil];
}
In this example, we’re testing the doSomethingThatTakesSomeTimesWithCompletionBlock method. We want to hinge success or failure of our test on the value that is returned in the completion block called by the method under test.
To do this, we define an expectation at the start of the test method. At the end of the test method, we wait for the expectation to be fulfilled. As you can see, we can also pass in a timeout parameter.
The actual assertion of the test is made inside the completion block of the method under test in which we also fulfill the expectation we defined earlier. As a result, when the test is run, the test waits until the expectation is fulfilled or it fail if the timeout expires and the expectation isn't fulfilled.
Performance Testing
Another addition to unit testing in Xcode 6 is the ability to measure the performance of a piece of code. This allows developers to gain insight into the specific timing information of the code that's being tested.
With performance testing, you can answer the question "What is the average time of execution for this piece of code?" If there is a section that is especially sensitive to changes in terms of the time it takes to execute, then you can use performance testing to measure the amount of time it takes to execute.
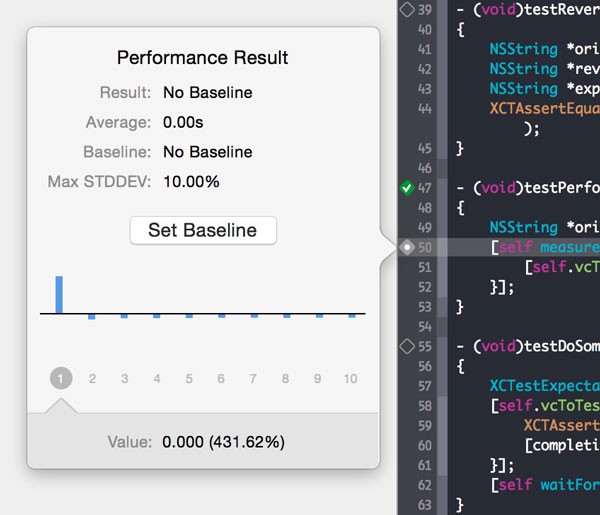
You can also define a baseline execution time. This means that if the code that's being tested significantly deviates from that baseline, the test fails. Xcode will repeatedly execute the code that's being tested and measure its execution time. To measure the performance of a piece of code, use the measureBlock: API as shown below.
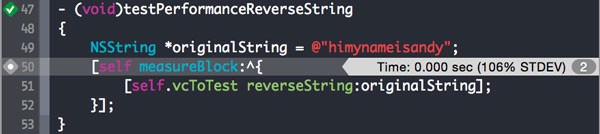
- (void)testPerformanceReverseString {
    NSString *originalString = @"himynameisandy";
    [self measureBlock:^{
        [self.vcToTest reverseString:originalString];
    }];
}
Click the informational message that appears.
Set or edit the baseline time of execution for the performance test.
Conclusion
In this tutorial, you've learned how to use Xcode to create unit tests to verify an iOS application in a programmatic and automated way. Give it a try, either on an existing code base or something brand new. Whether you make a full commitment to unit testing or add a couple tests here and there, you're only adding value to your project through writing more strongly verified software that's less prone to breaking with future changes. Unit testing is only the beginning of automated software testing. There are several additional layers of testing you can add to an iOS application.

Comments