This is the first of a two-part series on Jenkins. Part two will be written by Ian Lollar because he has the best instructor profile image of any Tuts contributor. He also wrote the earlier Setting Up Continuous Integration & Continuous Deployment With Jenkins (Tuts+) which you may want to read as well. Just as a reminder, I do participate in the discussions below. If you have a question or topic suggestion, please post a comment below. You can also tweet me @reifman, email me directly or tweet at Ian.
Jenkins is an extensible, open source continuous integration server. It builds and tests your software continuously and monitors the execution and status of remote jobs, making it easier for team members and users to regularly obtain the latest stable code.
In part one of this tutorial, I'll guide you through installing Jenkins and getting started. In part two, Ian will go more in depth, especially focusing on using the Jenkins Workflow Plugin. More information for this is available at the CloudBees documentation website.
Installing Jenkins
Create Your Droplet
I'm going to walk you through installing Jenkins on an Ubuntu 14.04 instance at Digital Ocean. Once you've registered or signed in to your Digital Ocean account, we'll need to create a new droplet for our Jenkins server.
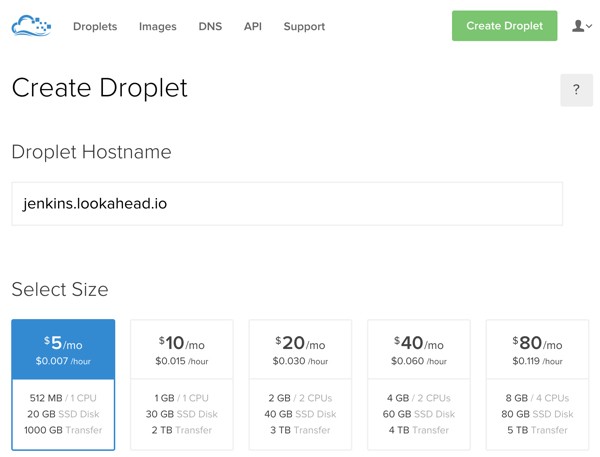
Click the Create Droplet button to get started. I'm using jenkins.lookahead.io as my hostname. We can use the smallest droplet instance of $5/mo. and 512 MB.
You can use whichever region is closest for you:
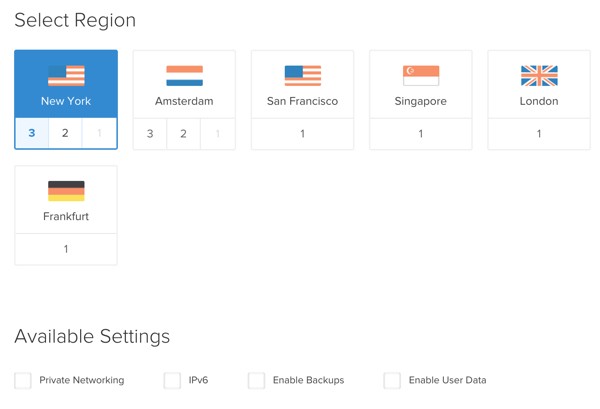
Then, choose the Ubuntu 14.04 image and click Create Droplet:

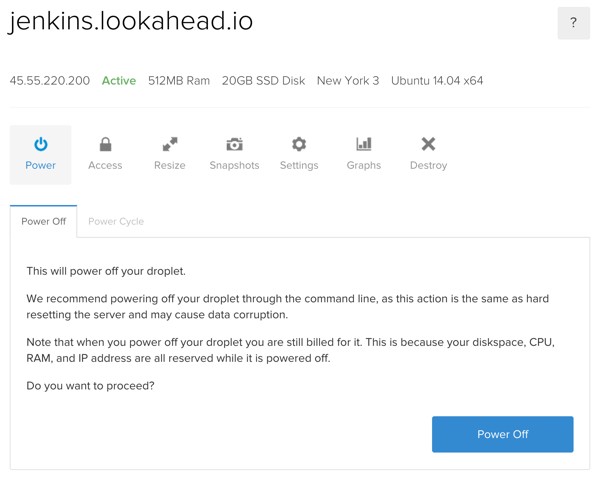
After a minute or so, you'll be redirected to your droplet configuration page with its IP address, e.g. 45.55.220.200:
You'll also receive an email with your login credentials:

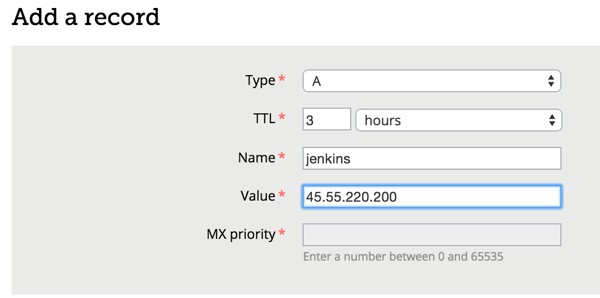
Configure Your DNS Record
Then, go over to your domain registrar and configure a DNS A record for your hostname to point to the given IP address:
Accessing Your Server
To log in to your server, use the password in the Digital Ocean email. You'll need an SSH terminal program:
ssh [email protected]
Then, create an admin user in the sudo group:
adduser admin
usermod -a -G sudo admin
Log out and log back in with the admin user:
ssh [email protected]
Installing Jenkins
To update Ubuntu with Jenkins source lists, type in the following commands:
sudo wget -q -O - http://pkg.jenkins-ci.org/debian/jenkins-ci.org.key | sudo apt-key add -
sudo sh -c 'echo deb http://pkg.jenkins-ci.org/debian binary/ > /etc/apt/sources.list.d/jenkins.list'
sudo apt-get update
To properly install Jenkins, I had success after updating my server and installing git beforehand:
sudo apt-get update
sudo apt-get dist-upgrade
sudo apt-get install git
sudo apt-get install jenkins
I also had to reboot and initially manually start the Jenkins service. Your mileage may vary.
sudo reboot
sudo service jenkins start
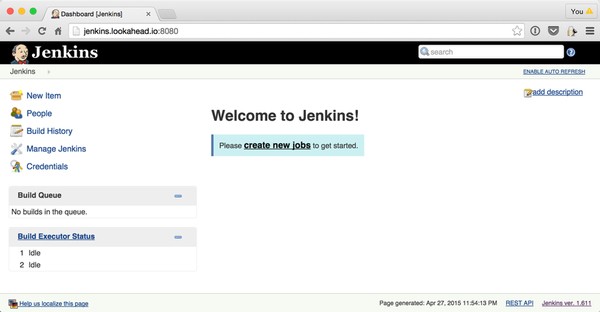
Then, visit your server using port 8080, e.g. http://jenkins.lookahead.io:8080, and you should see the Jenkins startup screen:

Getting Started With Jenkins
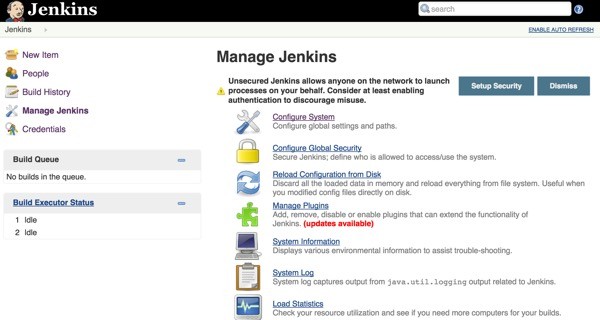
Now, let's walk through the Jenkins user interface. On the left side of the page, you'll notice the navigation menus, e.g. New Item, People, Build History, Manage Jenkins and Credentials. There are also the Build Queue and Build Executor Status panes.
Managing Jenkins Credentials
Initially, Jenkins is completely insecure. Let's configure its Global Security from the Manage Jenkins sidebar menu option:
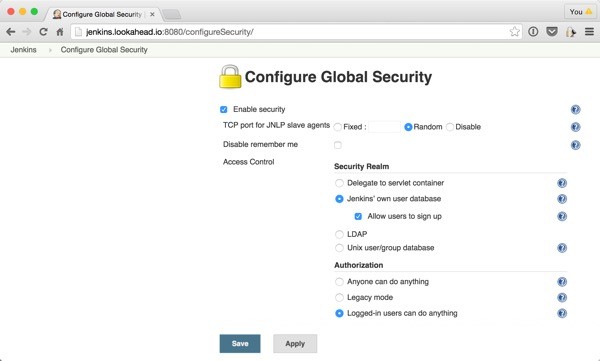
Click Configure Global Security:
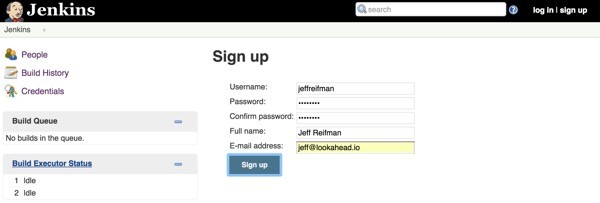
Then, from the home screen, sign up to create a new account and log back in:
Then, return to the Configure Global Security page and turn off the checkbox beside "Allow users to sign up":
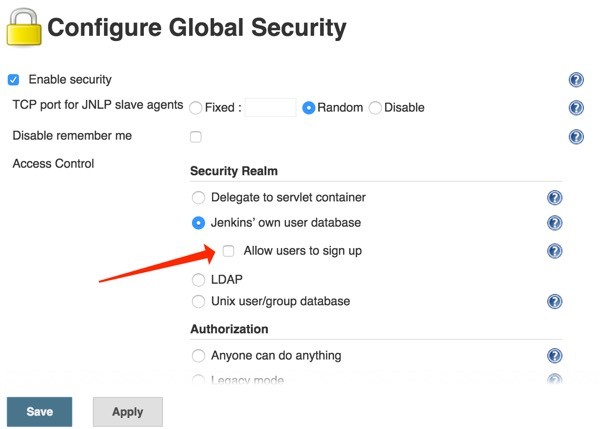
This will prevent unauthorized visitors from creating new accounts.
The People Menu
You can manage the accounts on the system from the People menu in the left sidebar:
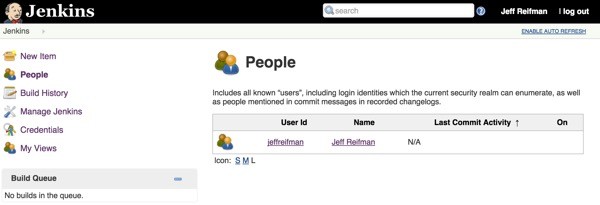
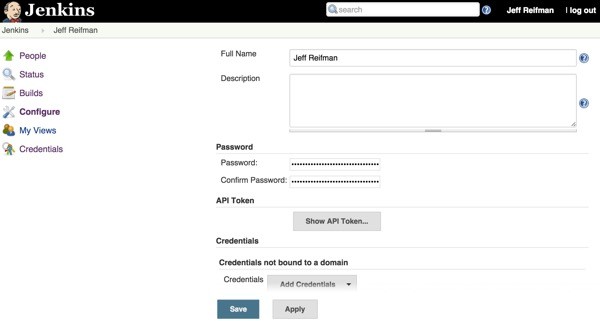
Click on the name of the user. This will load another level of left sidebar menu items specific to the selected person:
Managing Plugins
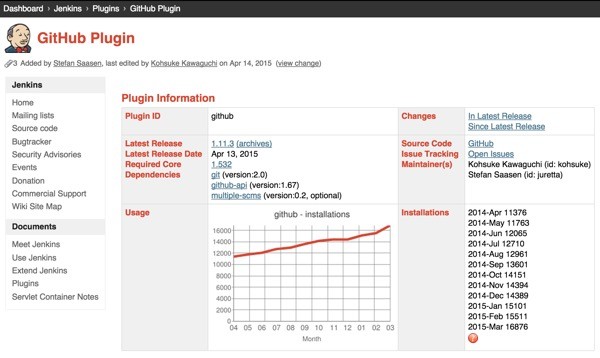
Since we will likely want to integrate GitHub repositories into our build process at some point, here's how you can install the GitHub plugin.
Click the Manage Jenkins link, and then the Manage Plugins link. Switch to the Available tab, and search for the GitHub Plugin.

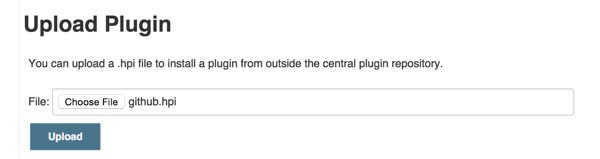
In my installation, I found I had to manually download the github.hpi plugin from the Jenkins code repository and then manually install the GitHub Plugin.
From your Jenkins plugin manager, click the Advanced tab:
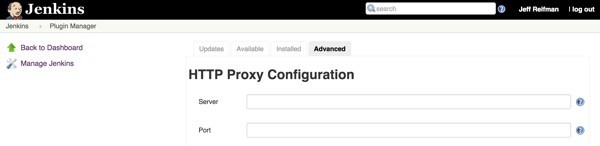
Scroll down to Upload Plugin and choose the github.hpi file:
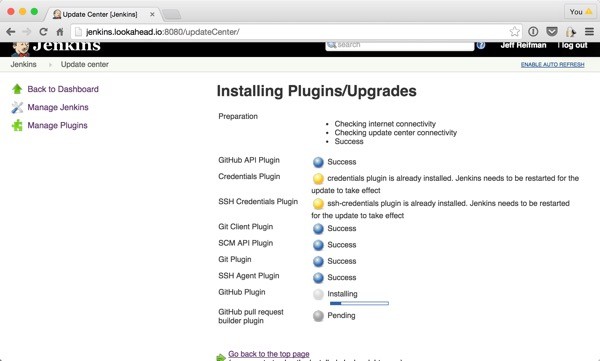
You should see a plugin installation screen like this:
Creating Project Items and Sample Builds
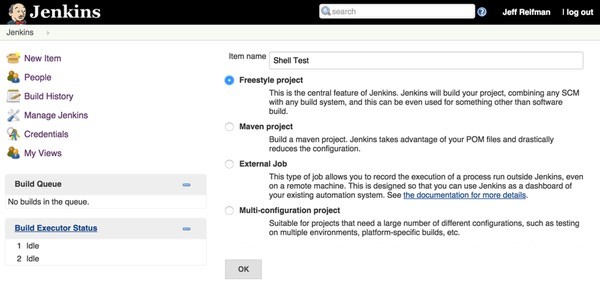
Now, we'll create a sample project which integrates a simple GitHub repository pull and shell command. From the main Jenkins page, click New Item:
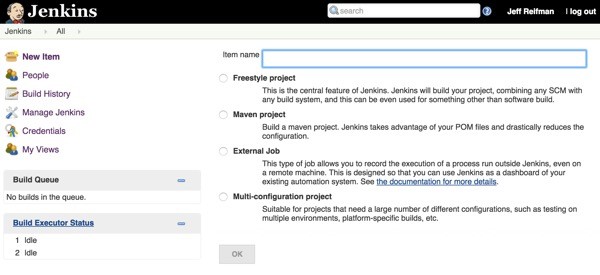
Type in Shell Test and select Freestyle Project:
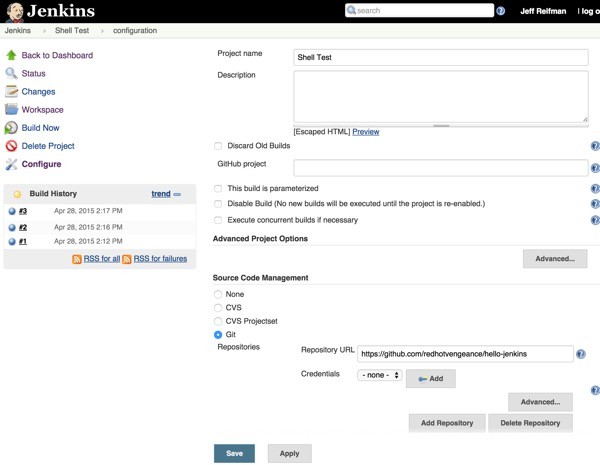
After you click OK, you can configure the project further. For example's sake, I'm using Ian's Hello-Jenkins repository from Setting Up Continuous Integration & Continuous Deployment With Jenkins (Tuts+):
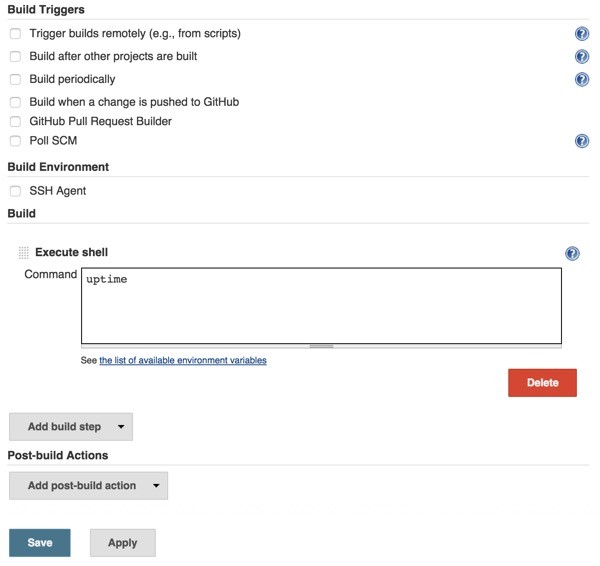
If you scroll down, you can also set build options and configure a sample shell command, e.g. uptime. Alternately, you could use this to run any build script you needed.
Once you save the options, you'll see the Jenkins project page, e.g. Project Shell Test. There's a menu on the left hand side for the project. If you click Build Now, Jenkins will schedule and build your project.

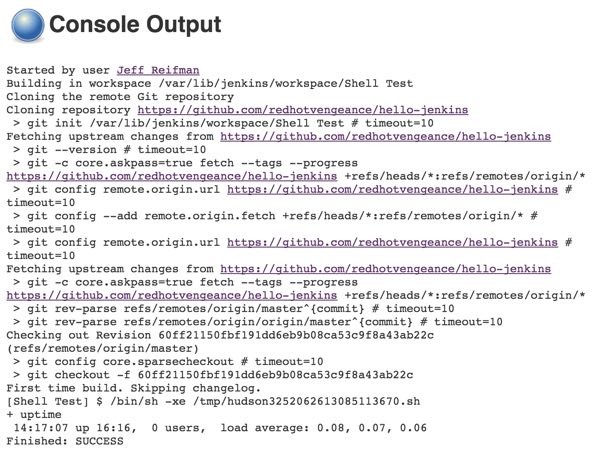
The Build History can be seen in the left hand pane. If you click on one of the build histories, you'll see the Jenkins build results:
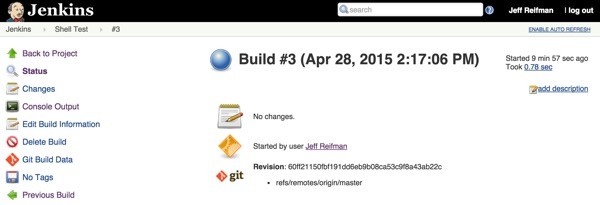
Click Console Output to see the full results. You can see the git pull and the uptime shell command results:
Now you have a basic walkthrough of how Jenkins projects and builds work.
Other Jenkins Resources
If you'd like to follow along a more detailed video tutorial, check out Continuous Integration for PHP projects using Jenkins, Composer, PHPUnit, BitBucket and Digital Ocean:
You can also check out Ian's earlier Jenkins tutorial: Setting Up Continuous Integration & Continuous Deployment With Jenkins (Tuts+). The Jenkins website documentation and wiki is also quite thorough.
What's Next?
Next up, Ian will guide you through using the Jenkins Workflow Plugin. If part two isn't available yet, do check out Ian's earlier tutorial, Setting Up Continuous Integration & Continuous Deployment With Jenkins (Tuts+) and the CloudBees Workflow Plugin documentation website.
Please feel free to post your questions and comments below. You can also tweet me @reifman, email me directly or tweet at Ian. You can also browse our Tuts+ instructor pages for other tutorials by me, Jeff Reifman, and Ian Lollar.

Comments