Introduction
In March 2014, Google officially announced they were branching out into the world of wearables with the unveiling of Android Wear, a new version of the Android operating system designed specifically for wearables. Fast forward a few months to the Google I/O event and Google unveiled two devices running Android Wear, the Samsung Gear Live and LG G Watch.
It's still early days for this new version of the Android operating system, but with more Android Wear devices on the horizon—both Motorola and HTC are launching their own Android smartwatches later this year—this is the perfect time to start getting to grips with this exciting new platform.
Over the course of this two-part series, you'll get an in-depth introduction to all things Android Wear, from the basics of what Android Wear is and how it works, right through to developing your own wearable-ready apps.
In the first part, you'll get all the background information and best practices you need, ready to start developing for the wearable platform in the second part.
1. What is Android Wear?
The Android Wear operating system uses Bluetooth to connect to handheld device(s) running Android 4.3 or higher. Once this connection is made, the wearable channels information and updates from the paired smartphone and/or tablet, and conveniently displays them on the user's wrist. These updates include things like Google Now cards, Gmail, Google Calendar, and phone notifications, such as incoming calls and text messages.
But, Android Wear is more than just a convenient way to receive smartphone and tablet notifications. Android Wear can also execute tasks on the paired smartphone or tablet. For example, you can use your Android Wear device to play, pause, and skip music tracks on your handheld.
Another big part of the Android Wear experience are vocal commands. Vocal commands allow you to retrieve information as well as execute tasks on the wearable and on the paired handheld device(s). When the user wants to issue a vocal command, all they need to say is "Okay, Google", followed by their command.
Tasks that Android Wear users can already complete using voice alone, include:
- Sending texts, instant messages, and emails ("send Jessica Thornsby a text message," and then dictating your message).
- Getting answers to those important questions in life, such as “will it rain this afternoon?” and “Where’s the nearest pub?”
- Getting directions (“Give me directions to Tamper Coffee on West Street.”) The directions appear via Google Maps on the paired handheld device and as cards on the wearable. The Android Wear device also vibrates when it's time for you to make a turn.
- Setting yourself reminders to trigger either at a certain time or when Android Wear detects you're at a specific location (“remind me to clean the rabbits out when I get home.”)
- Taking notes using Google Keep ("take a note, we need more milk.")
- Launching an app on the paired handheld ("Open Facebook.")
Although this connection means your wearable app can utilize lots of information and functionality from the paired handheld device, the downside is that you'll usually need to develop two versions of your app, one that runs on the wearable and one that runs on the handheld.
2. Understanding Android Wear's User Interface
The Android Wear operating system is very different from the operating system you’re used to seeing on tablets and smartphones. This difference is most prominent in terms of user interface.
Google has developed an entirely new user interface for Android Wear. For now, think of this new user interface in terms of its two major components, the Context Stream and the Cue Card.
Context Stream
Rather than quitting and launching apps as you would on a smartphone or tablet, the majority of wearable apps work around a card-based system.
The heart of the Android Wear user interface is a vertical stream of cards that appear automatically based on factors such as location, time, and the user's activity and interests. If you're familiar with Google Now, the Context Stream will feel instantly familiar as it resembles an automatically-ranked stream of Google Now cards.
Unlike the Google Now cards you're used to seeing on your smartphone or tablet, Android Wear only displays a single card at a time. The user scrolls between the currently-active cards by swiping vertically.
Although it's possible to develop full-screen apps for wearable devices, Google are encouraging developers to integrate their wearable apps with the Context Stream as much as possible.
Your goal should be to create an app that generates cards and then inserts these cards into the Context Stream at the point they become most useful. The user can then glance at the stream and immediately see your app's timely and relevant update.
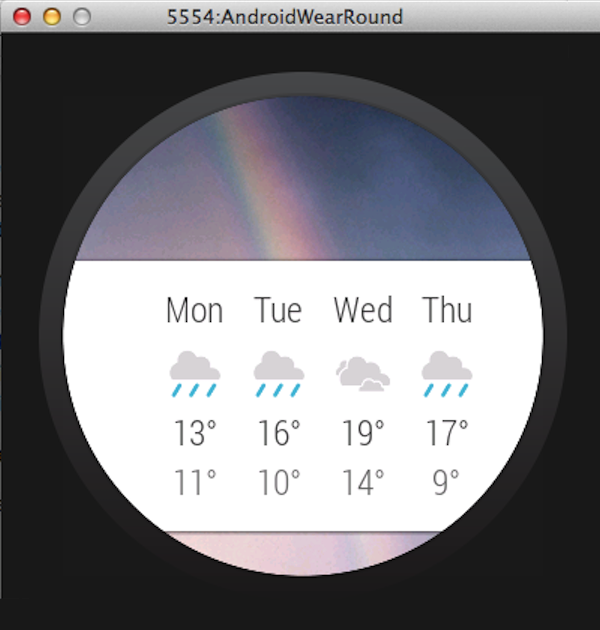
You also have the option to add extra pages of information to your notification card. The user accesses these pages by swiping right on the notification card.
The screenshots below show a weather notification card that displays today's forecast and an additional page that displays the forecast for subsequent days.
 The
The The above screenshot shows the main notification card.
 The
The The above screenshot shows an additional page.
If the user continues to swipe through the extra pages, they may encounter another common user interface element, an action button. As the name suggests, action buttons allow the user to perform an action, which may occur on the wearable or on the paired handheld device£.
Cue Card
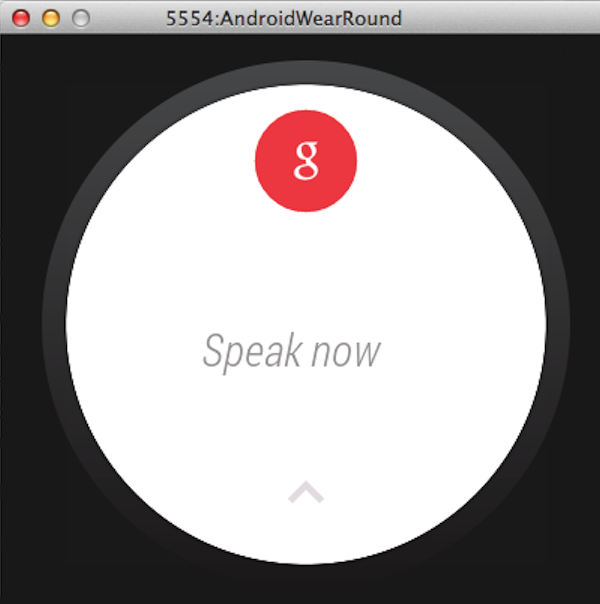
Sometimes, the user won't get the information they need from the notification card(s) alone or they'll want to perform a specific task. In these situations, the user can tell Android Wear what they want by issuing a vocal command.
When the user gives the "Okay, Google" wake-up command, what they're actually doing is launching a special "Cue Card" that receives and acts on their vocal commands.
This may sound straightforward, but the Cue Card opens up some interesting possibilities for the developer.
When the Cue Card recognizes and acts upon a vocal command, what's actually happened is that the Cue Card has successfully matched the vocal command to a specific Intent. The key to getting your app to respond to vocal commands is to hook into these Intents.
3. Android Wear Libraries and Classes
The Android Wear APIs are delivered via Google Play services and the Android Support Library. This is a broad topic that's worth exploring in-depth, but there's a couple of libraries and classes that are worth getting acquainted with straight away.
Android Support Library & NotificationCompat
The easiest way to start developing for wearables is to create a handheld app that can send notifications to a paired wearable device.
Extending your notifications in this way requires several classes, which you can find in the Android v4 Support Library:
-
NotificationCompat.WearableExtender: This class allows you to add wearable-specific extensions to your notifications, which is essential for providing users with the best possible Android Wear experience. -
NotificationCompat.Builder: This builder class ensures your notifications display properly, both on handheld and wearable devices. -
NotificationManagerCompat: This class ensures your notifications properly support wearable features. When it's time to deliver your notifications, make sure you useNotificationManagerCompatinstead ofNotificationManager. If you do useNotificationManager, it's possible someNotificationCompat.WearableExtenderfeatures won't function properly. -
NotificationCompat.Action.WearableExtender: This class extends notification actions to wearables. Each action must have a title, an icon that represents the action, and an Intent that's sent whenever the user invokes the action.
To add the Android v4 Support Library to your development environment, open the Android SDK Manager, and then download and install either the Android Support Library package (if you’re an Eclipse user) or Android Support Repository (if you're on Android Studio).

Wearable User Interface Support Library
This unofficial library helps you design a wearable-friendly user interface for your app by including user interface widgets that illustrate best practices.
One particularly important component of this support library, is the BoxInsetLayout layout manager, which lets you use the same layout on both rectangular and round screens.
If you're using Android Studio, then this library is automatically included when you use the Project Wizard to create a wearable app.
4. Best Practices
Before you fire up your development environment and put what you've just learnt into practice, it's important you know what makes a great Android Wear app, so you can create the best possible experience for your users.
In the second part of this two-part series, we'll look at the best practices you should keep in mind when you're developing Android Wear apps.
Create a Glanceable App
The key to developing a great Android Wear app is to keep questioning how you would use a traditional watch. Do you stare at your watch's face for any significant length of time? Or do you just glance at it and expect to get all the information you need?
The user will expect to interact with their smartwatch—and by extension your app—in exactly the same way as their normal watch. Therefore, a big part of designing a successful wearable app is to make it as glanceable as possible. To design a glanceable app and notification cards, keep the following guidelines in mind.
Display One Piece of Information at a Time
Your notification cards should only ever display a single piece of information. If you need to communicate more information, use additional pages rather than trying to squeeze more info onto a single card.
Keep Text to a Minimum
Your notification card should only contain words and phrases, not complete sentences. A trick for keeping text to a minimum is to communicate each piece of information through an icon and value pairing. For example, a glanceable alternative to the sentence "There's a 50% chance of rain today," is a cloud-and-raindrop icon accompanied by a "50%" label.
Increase Font Size
Make your text easier to read at a glance, and at a distance, by increasing the font size. When you use a large font, you'll also be less tempted to pack more information onto a single card.
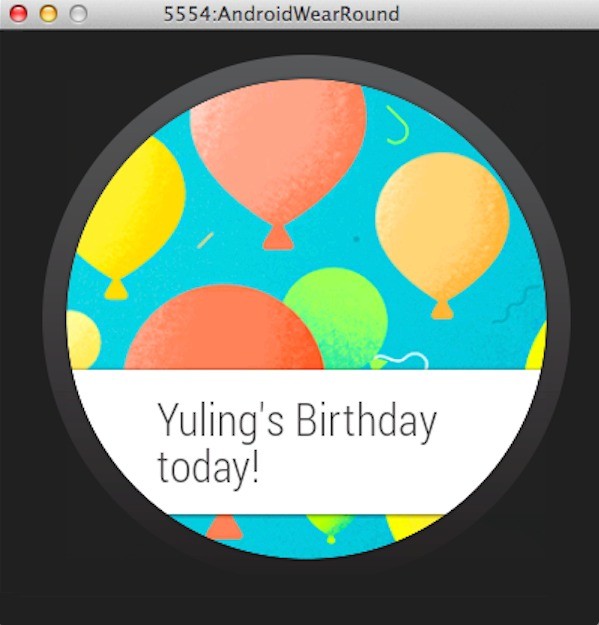
Make Use of Background Images
As the old saying goes, a picture is worth a thousands words. You can instantly communicate crucial information about a notification card by including a background image.
A particularly effective use of background images is to provide a selection of images that correspond to the different notifications your app can generate. For example, if you're designing an app that notifies the user about traffic jams along their most frequently-used routes, it makes sense to supply three different background images, an open road, a few cars, and a massive traffic jam. Then, whenever your app generates a card, it can choose the most appropriate background image to accompany that card. Even if the user is too busy to examine your notification card in detail, they can still get some useful information from the background image alone.
Keep Interactions Simple
Again, consider how you use a normal watch. When was the last time you sat down and gave your watch a few minutes of your undivided attention?
Watches are designed to be glanced at on the go, in-between performing other activities. Smartwatches, and by extension wearable apps, are no different. Users expect their wearable app to provide the information they need, without them having to navigate various menus and tap different options.
With this in mind, your app should require user input only when it's absolutely necessary. On the rare occasions where you do need some input from the user, you should focus on quick and easy interactions such as taps, swipes, and voice commands, as anything more complicated is difficult for the user to achieve on a wearable's smaller screen.
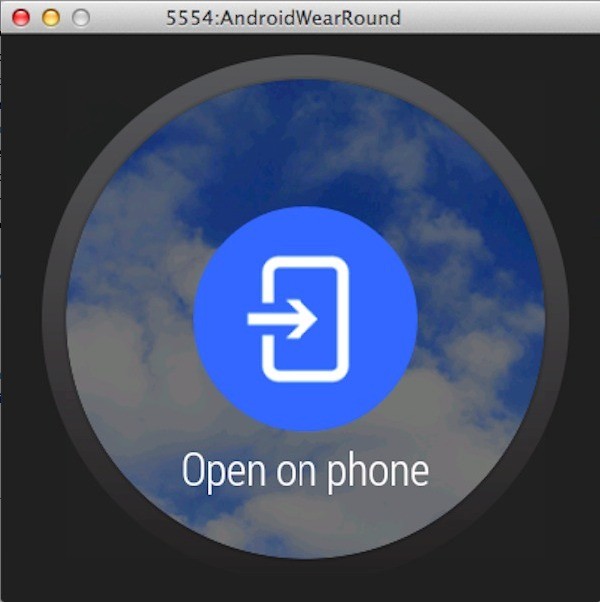
If your app really does require a more complicated interaction, don't force the user to complete this interaction on the wearable. Instead, transfer the user to the paired handheld device, where they can complete the interaction on a larger screen, before returning to their wearable.
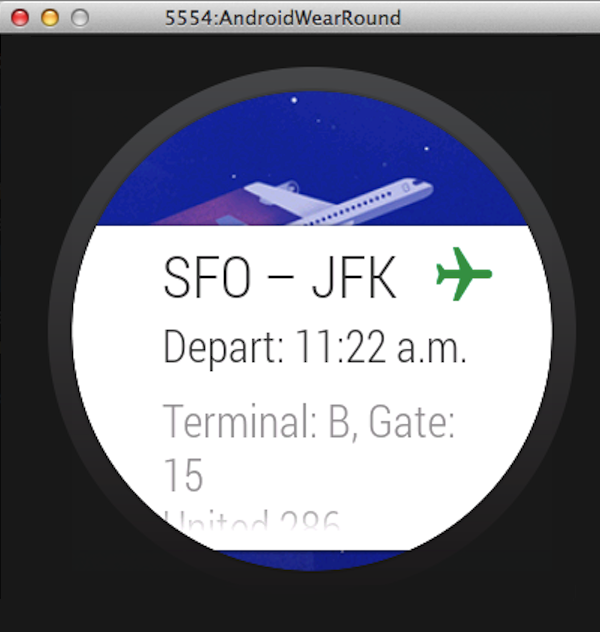
In the screenshot below, tapping the action button will launch the relevant app on the user's paired smartphone, where they can complete the interaction in question.
Keep Active Notifications to a Minimum
Wearables, as the name suggests, are worn against the skin. This means that active notifications—notifications that cause the device to vibrate—are difficult to ignore and almost impossible to miss.
This has some obvious benefits. For example, when you pair a wearable to your smartphone, you no longer have to worry about missing an important call because your phone is in the bottom of your bag. However, because active notifications are almost impossible to ignore, a wearable app that's constantly triggering active notifications is going to become very irritating, very quickly.
As a general rule, your wearable app should only trigger active notifications when the notification in question involves a contact and is occurring now, for example, the paired smartphone is receiving a text message. When this isn't the case, your app should instead generate a card and insert it into the Context Stream, ready for the next time the user glances at their wearable.
At the very least, make sure your wearable app is using less active notifications than its smartphone or tablet equivalent.
Conclusion
In the first part of this two-part series, you got an in-depth introduction to the Android Wear operating system and what it has to offer both users and developers. You've also learned a number of best practices for developing great wearable apps.
In the second part, I'll show you how setup your development environment and start developing for the Android Wear platform.

Comments