You've probably heard of Google's Webmaster Tools and figured you should be using them, but just haven't had the time to set them up. If only there were an easy way to manage your Google services all in one place, right?
Well, Google has just released a brand new plugin which still in beta testing as of this writing that will help you do just that.
It's called Google Publisher Plugin and, to start out, is only offering management for AdSense and Webmaster Tools, but indicates that more services will be integrated after it passes beta testing. Here is your chance to get in on the ground floor using this great plugin produced directly by Google.
In the past, verifying your site would mean uploading files through FTP or adding code to your header or footer files. With this new plugin, you to verify your site with Google Webmaster Tools with just one click.
For today's tutorial, we will focus on Webmaster Tools, and my next tutorial will go over AdSense setup and integration in full detail.
With that said, let's get started.
Before You Begin
If you haven't already, it's a good idea to setup a Google account. If you have a Gmail address, you're already there - you'll just need to integrate that account with your Webmaster Tools.
If the website is a business site and your Gmail account is a personal account, you may want to consider setting up an account just for the business. The basic Google account is free and it will help you keep all your Google services together in one place with one login. You can begin here.
Installation
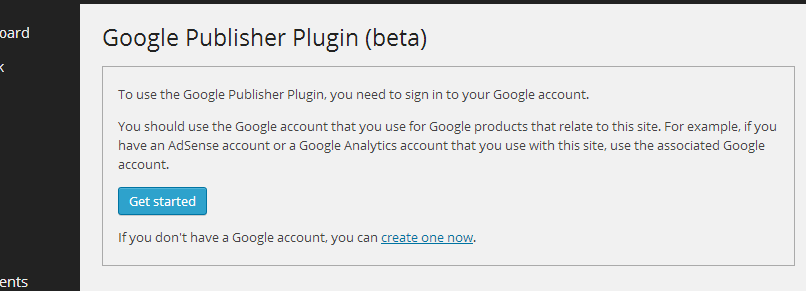
The Google Publisher Plugin is available from the repository, so simply install it like you would any other plugin. Once you install it and go to the plugin's settings, you will see a screen like this:

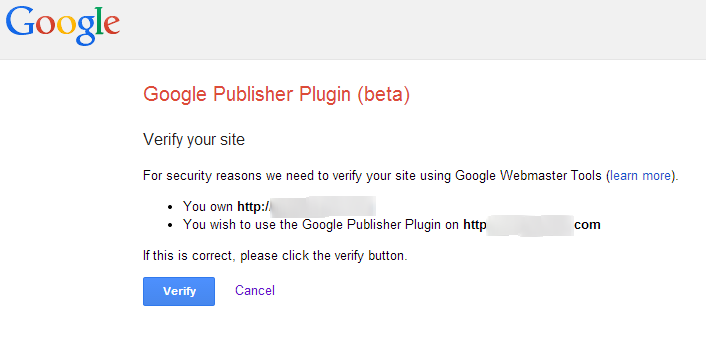
Click on the "Get Started" button and you will be redirected to verify your site.

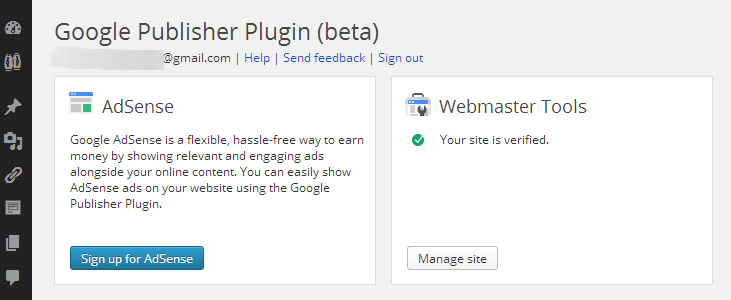
Click on the blue "Verify" button, and you will be directed back to your website back end screen to configure the plugin.

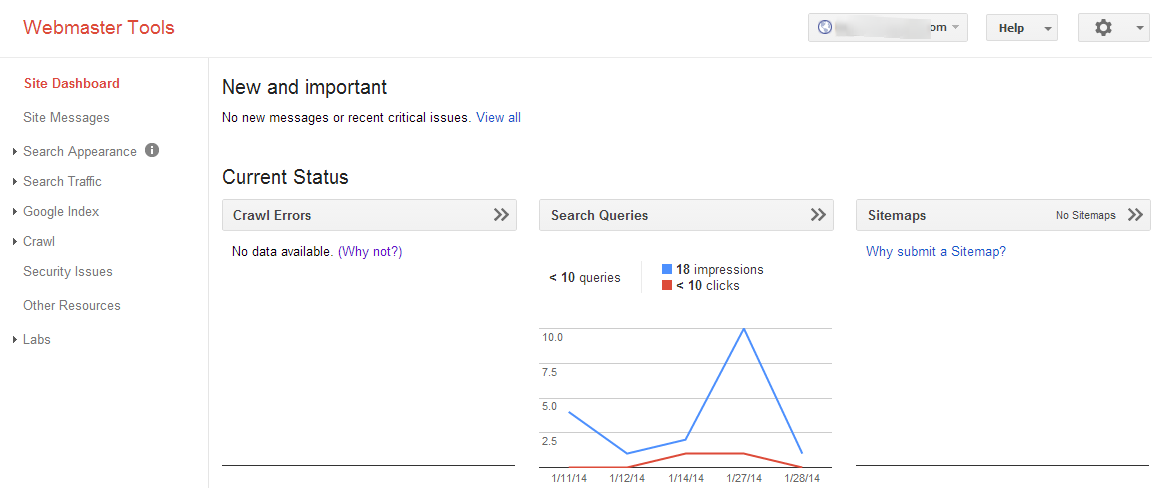
In the Webmaster Tools box, click on "Manage Site" and you will be redirected to the Webmaster Tools page.

You'll probably notice that there's not to see especially if your site is new. It takes a little while for Google to start tracking your site and give you some useful information. Google will need to begin crawling your site before it can identify Crawl Errors.
But right away you will get an idea of some important things you need to do, like submit a Sitemap. Sitemaps are very easy to set up with plugins like Google XML Sitemaps, and there's no reason not to have one.
You will notice that all kinds of information is available here including information on Structured Data, Data Highlighter, HTML Improvements, and Sitelinks. I find the Search Traffic information some of the most interesting and useful including
- Search Queries are what are people searching for that sends them to your site.
- Links to Your Site are incoming links from other sites. In other words, find out what other sites are bringing in traffic to your site.
- Internal Links are important for viewers to be able to find more information that is related and helps Google learn more about what is important on your site.
- Manual Actions allow you to find out if Google thinks your site is using spammy techniques and has actually taken manual actions to demote your site in the search results or remove your site all together. You will also get information here about what actions you should take to fix this problem.
After your Webmaster Tools are verified, the plugin really just offers a quick link to your Webmaster Tools account. You will not actually be able to view your tools in your WordPress backend.


Comments